Un guide d’installation de Jenkins étape par étape.
Dans cet article, nous allons apprendre à installer Jenkins sur les systèmes d’exploitation suivants.
- Windows
- CentOS
- Ubuntu
Pour tous les systèmes d’exploitation ci-dessus, les étapes d’installation de Jenkins varient légèrement, mais les étapes de configuration sont les mêmes.
Jenkins est un outil d’automatisation open-source permettant aux développeurs de gérer des projets et des applications. Il est utilisé pour construire et déployer des logiciels et des applications. Il s’agit d’une application d’automatisation puissante qui permet une intégration constante et une livraison continue des projets, quelle que soit la plateforme sur laquelle vous travaillez.
Jenkins étant une application Java, elle fonctionne de manière autonome sur n’importe quelle machine sur laquelle est installé un environnement d’exécution Java (JRE).
Si vous souhaitez apprendre Jenkins, consultez ce cours en ligne sur Jenkins proposé par Udemy pour devenir un héros à partir de zéro.
Prérequis
JDK8 est obligatoire pour tous les systèmes d’exploitation. Nous devons donc d’abord installer JDK8 ou une version plus récente. Vous pouvez le télécharger et l’installer à partir de la page de téléchargement Oracle Java.
Installation de Jenkins sur Windows
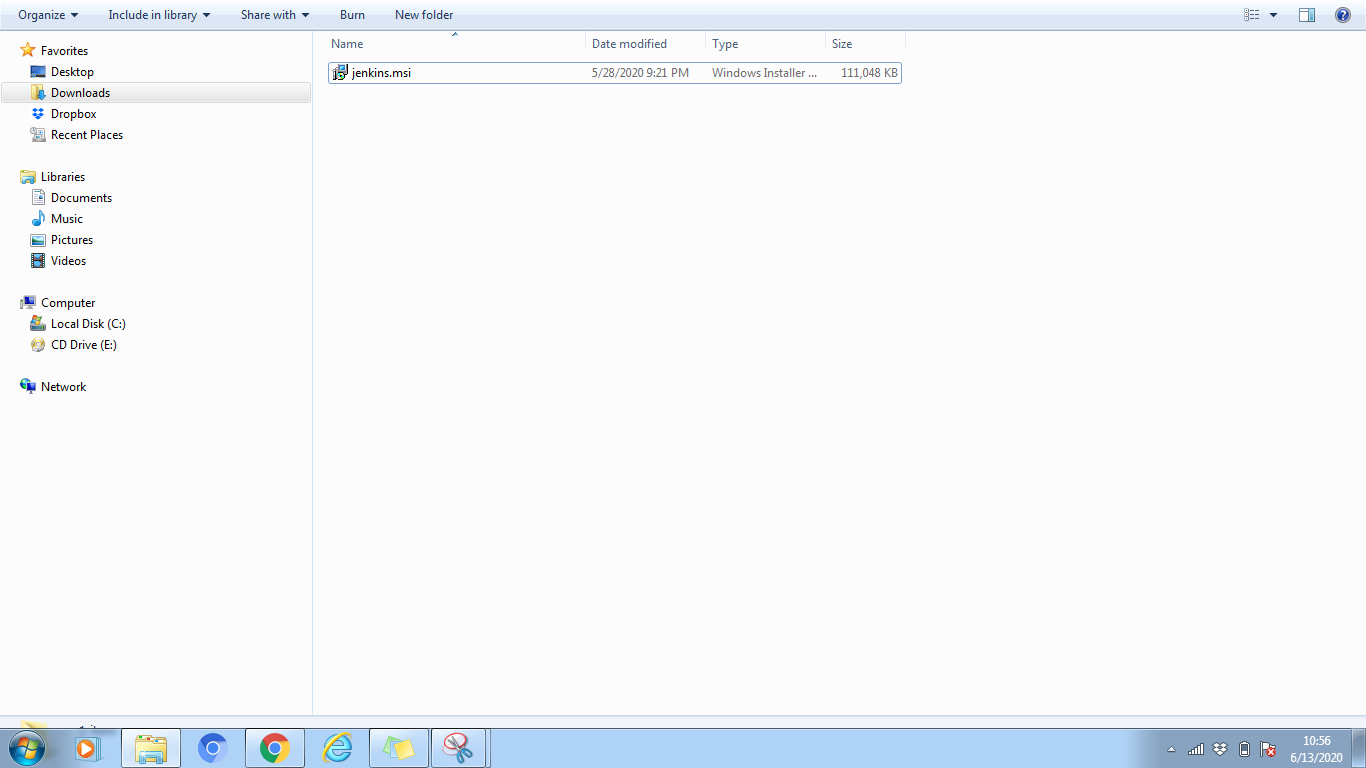
Une fois le JDK installé et opérationnel, nous sommes prêts à télécharger et à installer Jenkins. Téléchargez le dernier paquet MSI de Jenkins pour Windows.
- Double-cliquez sur
jenkins.msipour commencer l’installation.
- Cliquez sur Next et installez
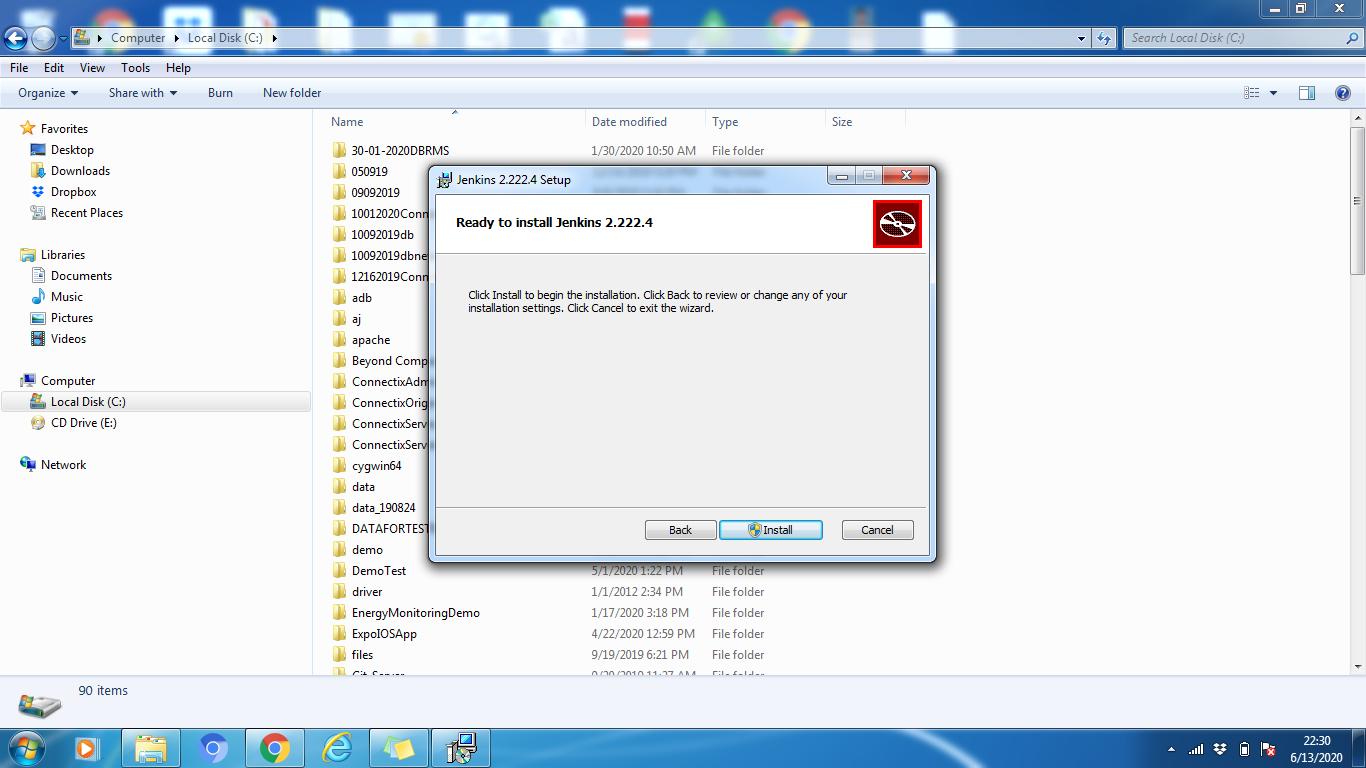
- Cliquez sur le bouton Change si vous souhaitez l’installer dans un autre répertoire. Dans cet exemple, nous conserverons l’option par défaut, cliquez sur Next

- Une fois le processus d’installation terminé, cliquez sur le bouton Finish pour terminer l’installation.
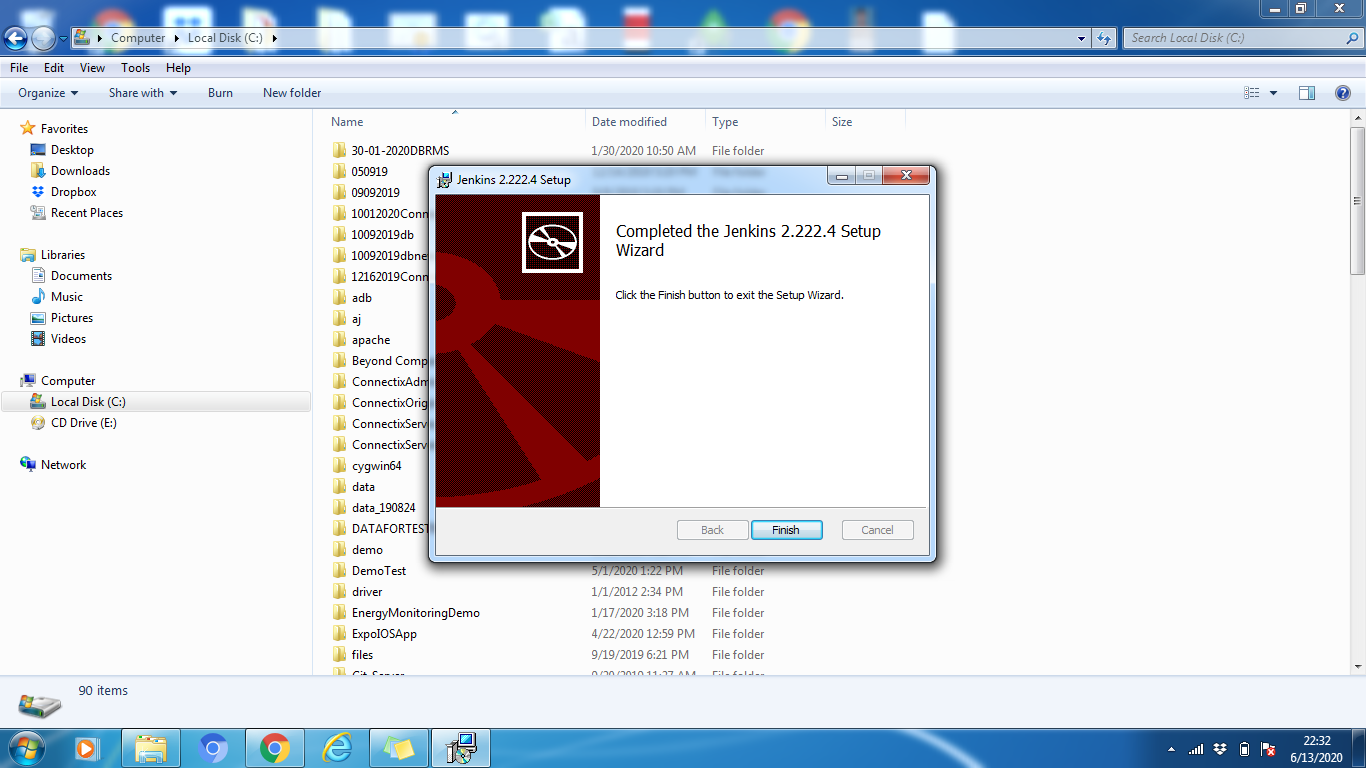
Comme vous pouvez le constater, l’installation de Jenkins sous Windows est très simple. Tout comme n’importe quel autre logiciel standard.
Installation de Jenkins sur Ubuntu
Comme indiqué précédemment, assurez-vous que JDK8 est installé et fonctionne sur la machine Ubuntu. Si ce n’est pas le cas, exécutez la commande suivante pour l’installer.
sudo apt install default-jdk-headless
geekflare@ubuntu:~$ sudo apt install default-jdk-headless
Lecture des listes de paquets... Terminé
Construction de l'arbre des dépendances
Lecture des informations d'état... Terminé
Les NOUVEAUX paquets suivants seront installés :
  default-jdk-headless
0 mis à jour, 1 nouvellement installé, 0 à supprimer et 102 non mis à jour.
Besoin de récupérer 1132 B d'archives.
Après cette opération, 6144 B d'espace disque supplémentaire seront utilisés.
Get:1 http://archive.ubuntu.com/ubuntu bionic-updates/main amd64 default-jdk-headless amd64 2:1.11-68ubuntu1~18.04.1 [1132 B]
Récupéré 1132 B en 2s (676 B/s)
Sélection du paquet default-jdk-headless précédemment non sélectionné.
(Lecture de la base de données ... 30061 fichiers et répertoires actuellement installés)
Préparation du déballage de .../default-jdk-headless_2:1.11-68ubuntu1~18.04.1_amd64.deb ...
Décompression de default-jdk-headless (2:1.11-68ubuntu1~18.04.1) ...
Mise en place de default-jdk-headless (2:1.11-68ubuntu1~18.04.1) ...
geekflare@ubuntu:~$
Pour vérifier que Java a été installé avec succès, exécutez la commande ci-dessous :
java -version
geekflare@ubuntu:~$ java -version
openjdk version "11.0.7" 2020-04-14
Environnement d'exécution OpenJDK (build 11.0.7 10-post-Ubuntu-2ubuntu218.04)
OpenJDK 64-Bit Server VM (build 11.0.7 10-post-Ubuntu-2ubuntu218.04, mixed mode, sharing)
geekflare@ubuntu:~$
Une fois l’installation terminée, nous sommes prêts à installer Jenkins.
Etapes de l’installation :
Etape 1 : Tout d’abord, ouvrez le terminal de commande (Ctrl Alt T)
Etape 2 : Pour installer Jenkins,ajoutez la clé du dépôt au système
<span style="font-weight: 400;">wget -q -O - http://pkg.jenkins-ci.org/debian/jenkins-ci.org.key | sudo apt-key add -</span>
geekflare@ubuntu:~$ wget -q -O - http://pkg.jenkins-ci.org/debian/jenkins-ci.org.key | sudo apt-key add -
OK
geekflare@ubuntu:~$
Étape 3 : Une fois la clé ajoutée, nous devons ajouter l’adresse du dépôt de paquets Debian à la machine.
<span style="font-weight: 400;">sudo sh -c 'echo deb http://pkg.jenkins-ci.org/debian-stable binary/ > /etc/apt/sources.list.d/jenkins.list'</span>
Étape 4 : Mettez maintenantà jour les paquets Ubuntu
<span style="font-weight: 400;">sudo apt update</span>
geekflare@ubuntu:~$ sudo apt update
Hit:1 http://archive.ubuntu.com/ubuntu bionic InRelease
Get:2 http://archive.ubuntu.com/ubuntu bionic-updates InRelease [88.7 kB]
Hit:3 http://pkg.jenkins-ci.org/debian-stable binary/ InRelease
Get:4 http://pkg.jenkins-ci.org/debian-stable binary/ Release [2044 B]
Get:5 http://pkg.jenkins-ci.org/debian-stable binaire/ Release.gpg [195 B]
Get:6 http://archive.ubuntu.com/ubuntu bionic-backports InRelease [74.6 kB]
Get:7 http://archive.ubuntu.com/ubuntu bionic/universe amd64 Packages [8570 kB]
Get:8 http://pkg.jenkins-ci.org/debian-stable binary/ Packages [17.6 kB]
Get:9 http://security.ubuntu.com/ubuntu bionic-security InRelease [88.7 kB]
Get:10 http://security.ubuntu.com/ubuntu bionic-security/main amd64 Packages [748 kB]
Get:11 http://security.ubuntu.com/ubuntu bionic-security/main Translation-en [237 kB]
Get:12 http://security.ubuntu.com/ubuntu bionic-security/restricted amd64 Packages [50.8 kB]
Get:13 http://security.ubuntu.com/ubuntu bionic-security/restricted Translation-en [12.3 kB]
Get:14 http://security.ubuntu.com/ubuntu bionic-security/universe amd64 Packages [673 kB]
Get:15 http://security.ubuntu.com/ubuntu bionic-security/universe Translation-fr [223 kB]
Get:16 http://security.ubuntu.com/ubuntu bionic-security/multiverse amd64 Packages [7808 B]
Get:17 http://security.ubuntu.com/ubuntu bionic-security/multiverse Translation-fr [2856 B]
Get:18 http://archive.ubuntu.com/ubuntu bionic/universe Translation-fr [4941 kB]
Get:19 http://archive.ubuntu.com/ubuntu bionic/multiverse amd64 Packages [151 kB]
Get:20 http://archive.ubuntu.com/ubuntu bionic/multiverse Translation-fr [108 kB]
Get:21 http://archive.ubuntu.com/ubuntu bionic-updates/main amd64 Packages [969 kB]
Get:22 http://archive.ubuntu.com/ubuntu bionic-updates/main Translation-fr [329 kB]
Get:23 http://archive.ubuntu.com/ubuntu bionic-updates/restricted amd64 Packages [60.5 kB]
Get:24 http://archive.ubuntu.com/ubuntu bionic-updates/restricted Translation-fr [14.7 kB]
Get:25 http://archive.ubuntu.com/ubuntu bionic-updates/universe amd64 Packages [1085 kB]
Get:26 http://archive.ubuntu.com/ubuntu bionic-updates/universe Translation-fr [337 kB]
Get:27 http://archive.ubuntu.com/ubuntu bionic-updates/multiverse amd64 Packages [15.9 kB]
Get:28 http://archive.ubuntu.com/ubuntu bionic-updates/multiverse Translation-fr [6420 B]
Get:29 http://archive.ubuntu.com/ubuntu bionic-backports/main amd64 Packages [7516 B]
Get:30 http://archive.ubuntu.com/ubuntu bionic-backports/main Translation-fr [4764 B]
Get:31 http://archive.ubuntu.com/ubuntu bionic-backports/universe amd64 Packages [7484 B]
Get:32 http://archive.ubuntu.com/ubuntu bionic-backports/universe Translation-fr [4436 B]
Récupéré 18.8 Mo en 58s (327 kB/s)
Lecture des listes de paquets... Terminé
Construction de l'arbre des dépendances
Lecture des informations d'état... Fait
102 paquets peuvent être mis à niveau. Lancez 'apt list --upgradable' pour les voir.
geekflare@ubuntu:~$
Étape 5 : Enfin, pour installer Jenkins, exécutez la commande suivante
<span style="font-weight: 400;">sudo apt install jenkins</span>
geekflare@ubuntu:~$ sudo apt install jenkins
Lecture des listes de paquets... Terminé
Construction de l'arbre des dépendances
Lecture des informations d'état... Terminé
Les paquets supplémentaires suivants seront installés :
  daemon
Les NOUVEAUX paquets suivants seront installés :
  daemon jenkins
0 mis à jour, 2 nouvellement installés, 0 à supprimer et 102 non mis à jour.
Besoin de récupérer 65,7 Mo d'archives.
Après cette opération, 66,8 Mo d'espace disque supplémentaire seront utilisés.
Voulez-vous continuer ? [O/n] O
Get:1 http://archive.ubuntu.com/ubuntu bionic/universe amd64 daemon amd64 0.6.4-1build1 [99.5 kB]
Récupérer:2 http://pkg.jenkins-ci.org/debian-stable binary/ jenkins 2.235.1 [65.6 MB]
Récupéré 65.7 MB en 3min 34s (307 kB/s)
Sélection d'un démon de paquets précédemment non sélectionné.
(Lecture de la base de données ... 29242 fichiers et répertoires actuellement installés)
Préparation du déballage de .../daemon_0.6.4-1build1_amd64.deb ...
Déballage de daemon (0.6.4-1build1) ...
Sélection du paquet jenkins précédemment non sélectionné.
Préparation du déballage de .../jenkins_2.235.1_all.deb ...
Décompression de jenkins (2.235.1) ...
Installation de daemon (0.6.4-1build1) ...
Installation de jenkins (2.235.1) ...
invoke-rc.d : impossible de déterminer le niveau d'exécution actuel
Traitement des déclencheurs pour systemd (237-3ubuntu10.39) ...
Traitement des déclencheurs pour man-db (2.8.3-2ubuntu0.1) ...
Traitement des déclencheurs pour ureadahead (0.100.0-21) ...
geekflare@ubuntu:~$
Jenkins a été installé avec succès. Nous pouvons maintenant démarrer le serveur Jenkins.
Etape 6 : Démarrer Jenkins avec la commande systemctl
<span style="font-weight: 400;">sudo systemctl start jenkins</span>
systemctl n’affiche pas de résultat, nous pouvons donc vérifier le statut avec la commande ci-dessous. Grâce à cette commande, nous pouvons vérifier si Jenkins est actif ou non.
<span style="font-weight: 400;">sudo systemctl status jenkins</span>
geekflare@ubuntu:~$ sudo systemctl status jenkins
● jenkins.service - LSB : Démarrer Jenkins au moment du démarrage
   Loaded : chargé (/etc/init.d/jenkins ; généré)
   Active : active (exited) since Sat 2020-04-04 10:10:19 UTC ; 2 months 16 days ago
     Docs : man:systemd-sysv-generator(8)
    Tâches : 0 (limite : 4915)
   Groupe CG : /system.slice/jenkins.service

Apr 04 10:10:18 ip-172-31-17-25 systemd[1] : Starting LSB : Démarrer Jenkins au démarrage...
Apr 04 10:10:18 ip-172-31-17-25 jenkins[1984] : Correct java version found
Apr 04 10:10:18 ip-172-31-17-25 jenkins[1984] :  * Démarrage du serveur d'automatisation Jenkins jenkins
Apr 04 10:10:18 ip-172-31-17-25 su[2037] : Successful su for root by root
Apr 04 10:10:18 ip-172-31-17-25 su[2037] : ? ?? root:root
Apr 04 10:10:18 ip-172-31-17-25 su[2037] : pam_unix(su:session) : session ouverte pour l'utilisateur root par (uid=0)
Apr 04 10:10:18 ip-172-31-17-25 jenkins[1984] : mesg : ttyname failed : Le système d'exploitation de l'entreprise n'est pas en mesure d'assurer la continuité de l'exploitation
Apr 04 10:10:18 ip-172-31-17-25 su[2037] : pam_unix(su:session) : session closed for user root
Apr 04 10:10:19 ip-172-31-17-25 jenkins[1984] : ...done.
Apr 04 10:10:19 ip-172-31-17-25 systemd[1] : Démarré LSB : Démarrer Jenkins au démarrage.
geekflare@ubuntu:~$
Etape 6 : Configurer le port (Optionnel)
Par défaut, Jenkins fonctionne sur le port 8080, et nous devons rendre ce port accessible de n’importe où (s’il n’est pas accessible).
Ouvrons le port :
<span style="font-weight: 400;">sudo ufw allow 8080</span>
Nous pouvons vérifier l’état du port avec la commande suivante :
<span style="font-weight: 400;">sudo ufw status</span>
geekflare@ubuntu:~$ sudo ufw status
Statut : actif
To Action From
-- ------ ----
8080 ALLOW Anywhere
8080 (v6) Autorisé partout (v6)
geekflare@ubuntu:~$
Si le statut du pare-feu est inactif, exécutez la commande suivante, sinon elle n’est pas nécessaire
<span style="font-weight: 400;">sudo ufw allow OpenSSH</span>
suivi de
<span style="font-weight: 400;">sudo ufw enable</span>
Installation de Jenkins sur CentOS
Tout d’abord, assurez-vous que JDK8 est installé et fonctionne sur la machine. S’il n’est pas installé, exécutez la commande suivante pour installer le paquet OpenJDK 8.
sudo yum install java-1.8.0-openjdk-devel[geekflare@localhost ~]$ sudo yum install java-1.8.0-openjdk-devel
CentOS-8 - AppStream 1.0 kB/s | 4.3 kB 00:04
CentOS-8 - AppStream 397 kB/s | 5.8 MB 00:14
CentOS-8 - Base 3.5 kB/s | 3.9 kB 00:01
CentOS-8 - Extras 547 B/s | 1.5 kB 00:02
Jenkins-stable 6.5 kB/s | 2.9 kB 00:00
Dépendances résolues.
================================================================================
Paquet Arch Version Dépôt Taille
================================================================================
Installation :
java-1.8.0-openjdk-devel x86_64 1:1.8.0.252.b09-3.el8_2 AppStream 9.8 M
Résumé des transactions
================================================================================
Installer 1 paquet
Taille totale du téléchargement : 9.8 M
Taille installée : 41 M
Est-ce que c'est correct [y/N] : y
Téléchargement des paquets :
java-1.8.0-openjdk-devel-1.8.0.252.b09-3.el8_2. 531 kB/s | 9.8 MB 00:18
--------------------------------------------------------------------------------
Total 507 kB/s | 9.8 MB 00:19
Vérification de la transaction
La vérification de la transaction a réussi.
Exécution du test de transaction
Le test de transaction a réussi.
Exécution de la transaction
Préparation : 1/1
Installation : java-1.8.0-openjdk-devel-1:1.8.0.252.b09-3.el8_2.x86 1/1
Exécution du scriptlet : java-1.8.0-openjdk-devel-1:1.8.0.252.b09-3.el8_2.x86 1/1
Vérification : java-1.8.0-openjdk-devel-1:1.8.0.252.b09-3.el8_2.x86 1/1
Produits installés mis à jour.
Installé :
java-1.8.0-openjdk-devel-1:1.8.0.252.b09-3.el8_2.x86_64
Terminé !
[geekflare@localhost ~]$Pour vérifier que Java a été installé avec succès, exécutez la commande suivante
java -version[geekflare@localhost ~]$ java -version
openjdk version "1.8.0_252"
Environnement d'exécution OpenJDK (build 1.8.0_252-b09)
OpenJDK 64-Bit Server VM (build 25.252-b09, mixed mode)
[geekflare@localhost ~]$Une fois l’installation terminée, nous pouvons procéder à l’installation de Jenkins.
Etapes de l’installation
Etape 1: Ouvrez d’abord le terminal de commande
Etape2: Pour installer Jenkins, nous devons d’abordtélécharger et ajouter la clé GPG de Jenkins :
sudo wget -O /etc/yum.repos.d/jenkins.repo http://pkg.jenkins-ci.org/redhat-stable/jenkins.repo[geekflare@localhost ~]$ sudo wget -O /etc/yum.repos.d/jenkins.repo http://pkg.jenkins-ci.org/redhat-stable/jenkins.repo
--2020-06-21 04:29:52-- http://pkg.jenkins-ci.org/redhat-stable/jenkins.repo
Résolution de pkg.jenkins-ci.org (pkg.jenkins-ci.org)... 52.202.51.185, 64:ff9b::34ca:33b9
Connexion à pkg.jenkins-ci.org (pkg.jenkins-ci.org)|52.202.51.185|:80... connecté.
Requête HTTP envoyée, réponse attendue... 200 OK
Longueur : 85
Sauvegarde dans : '/etc/yum.repos.d/jenkins.repo'
/etc/yum.repos.d/je 100%[==================>] 85 --.-KB/s en 0s
2020-06-21 04:29:54 (2.61 MB/s) - '/etc/yum.repos.d/jenkins.repo' sauvegardé [85/85]
[geekflare@localhost ~]$Etape 3: Après avoir téléchargé et ajouté la clé GPS de Jenkins, importezensuite la clé GPG de Jenkins:
sudo rpm --import https://jenkins-ci.org/redhat/jenkins-ci.org.keyÉtape 4: Mettez à jour les paquets CentOS
sudo yum update[geekflare@localhost ~]$ sudo yum update
Dernière vérification de l'expiration des métadonnées : 0:17:09 ago on Sun 21 Jun 2020 04:21:20 AM PDT.
Les dépendances sont résolues.
Rien à faire.
Terminé !
[geekflare@localhost ~]$Etape 5: Après avoir mis à jour les paquets centos, nous sommes prêts à installer Jenkins :
sudo yum install jenkins[geekflare@localhost ~]$ sudo yum install jenkins
Dernière vérification de l'expiration des métadonnées : 0:19:26 ago on Sun 21 Jun 2020 04:21:20 AM PDT.
Dépendances résolues.
===============================================================================
Architecture du paquet Version Taille du dépôt
===============================================================================
Installation :
jenkins noarch 2.235.1-1.1 jenkins 63 M
Résumé des transactions
===============================================================================
Installer 1 paquet
Taille totale du téléchargement : 63 M
Taille installée : 63 M
Est-ce que c'est correct [y/N] : y
Téléchargement des paquets :
jenkins-2.235.1-1.1.noarch.rpm 172 kB/s | 63 MB 06:16
-------------------------------------------------------------------------------
Total 172 kB/s | 63 MB 06:16
Vérification de la transaction
La vérification de la transaction a réussi.
Exécution du test de transaction
Le test de transaction a réussi.
Exécution de la transaction
Préparation : 1/1
Exécution du scriptlet : jenkins-2.235.1-1.1.noarch 1/1
Installation : jenkins-2.235.1-1.1.noarch 1/1
Exécution du scriptlet : jenkins-2.235.1-1.1.noarch 1/1
Vérification : jenkins-2.235.1-1.1.noarch 1/1
Produits installés mis à jour.
Installé :
jenkins-2.235.1-1.1.noarch
Terminé !
[geekflare@localhost ~]$Etape 6: Démarrer Jenkins via systemctl
sudo systemctl start jenkinsPuisque systemctl n’affiche pas la sortie, vous pouvez vérifier le statut avec la commande ci-dessous. Grâce à cette commande, vous pouvez vérifier si Jenkins est actif ou non.
sudo systemctl status jenkins[geekflare@localhost ~]$ sudo systemctl status jenkins
[sudo] mot de passe pour geekflare :
● jenkins.service - LSB : serveur d'automatisation Jenkins
Loaded : chargé (/etc/rc.d/init.d/jenkins ; généré)
Active : actif (en cours d'exécution)
Docs : man:systemd-sysv-generator(8)
Jun 20 11:15:22 localhost.localdomain systemd[1] : Démarrage du LSB : Jenkins Automa>
Jun 20 11:15:23 localhost.localdomain runuser[1456] : pam_unix(runuser:session)>
Jun 20 11:15:33 localhost.localdomain jenkins[1433] : Démarrage de Jenkins [ OK ]
Jun 20 11:15:33 localhost.localdomain systemd[1] : Démarré LSB : Jenkins Automat>
Jun 21 04:23:04 localhost.localdomain systemd[1] : Arrêt de LSB : Jenkins Automa>
[geekflare@localhost ~]$Etape 7: Configurer le port (Optionnel)
Par défaut, Jenkins fonctionne sur le port 8080, et nous devons rendre ce port accessible de n’importe où (seulement s’il n’est pas accessible). Ouvrons le port,
sudo firewall-cmd --permanent --zone=public --add-port=8080/tcp[geekflare@localhost ~]$ sudo firewall-cmd --permanent --zone=public --add-port=8080/tcp
succès
[geekflare@localhost ~]$Après avoir configuré le port, rechargez le pare-feu avec la commande
sudo firewall-cmd --reload[geekflare@localhost ~]$ sudo firewall-cmd --reload
succès
[geekflare@localhost ~]$Configuration de Jenkins
Une fois Jenkins installé, il fonctionnera sur le port 8080. Configurons-le en naviguant vers http://localhost:8080 sur notre navigateur préféré.
Etape-1: Visitez http://localhost:8080
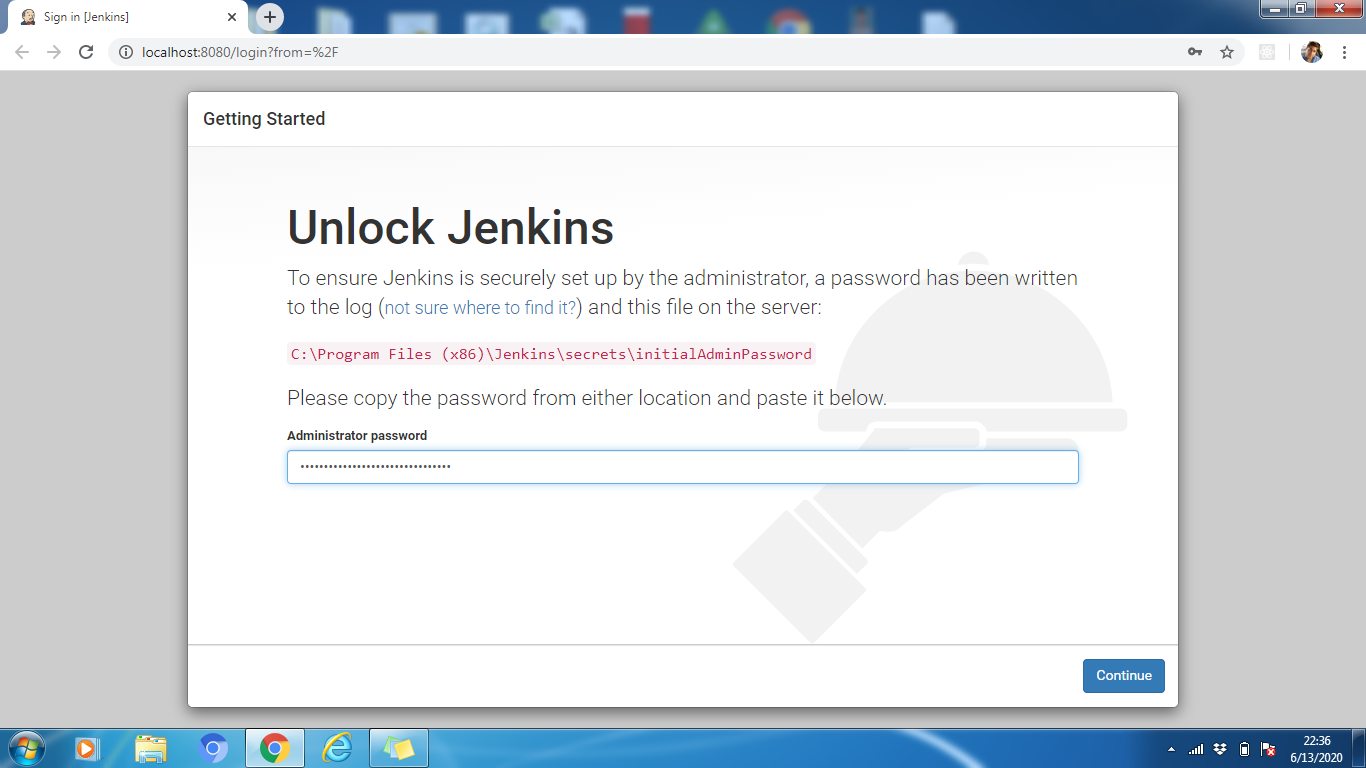
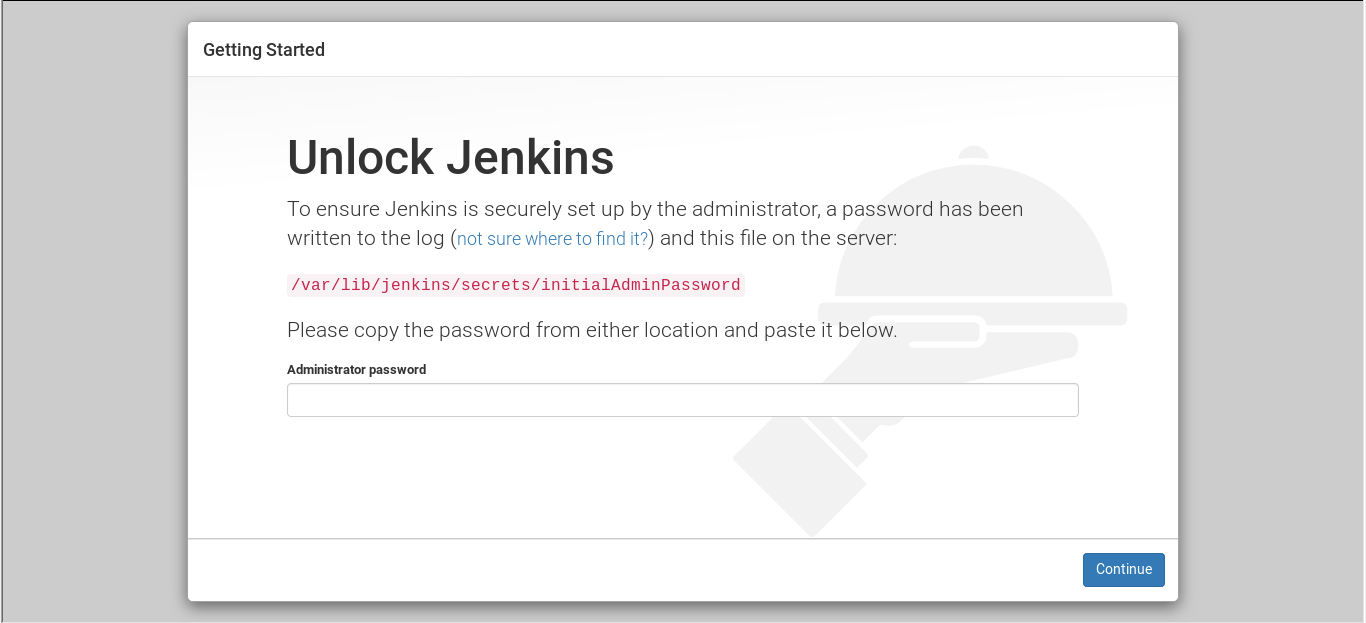
Etape-2: Pour déverrouiller Jenkins, copiez le mot de passe de l’administrateur à partir du fichier situé à l’adresse suivante
- Pour Windows
C:\NProgram Files (x86)\NJenkins\Nsecrets\Nmotdepasseadministrateurinitial
- Pour CentOS et Ubuntu
/var/lib/jenkins/secrets/initialAdminPassword
Collez-le dans le champ du mot de passe de l’administrateur .Cliquez ensuite sur le boutonContinuer.
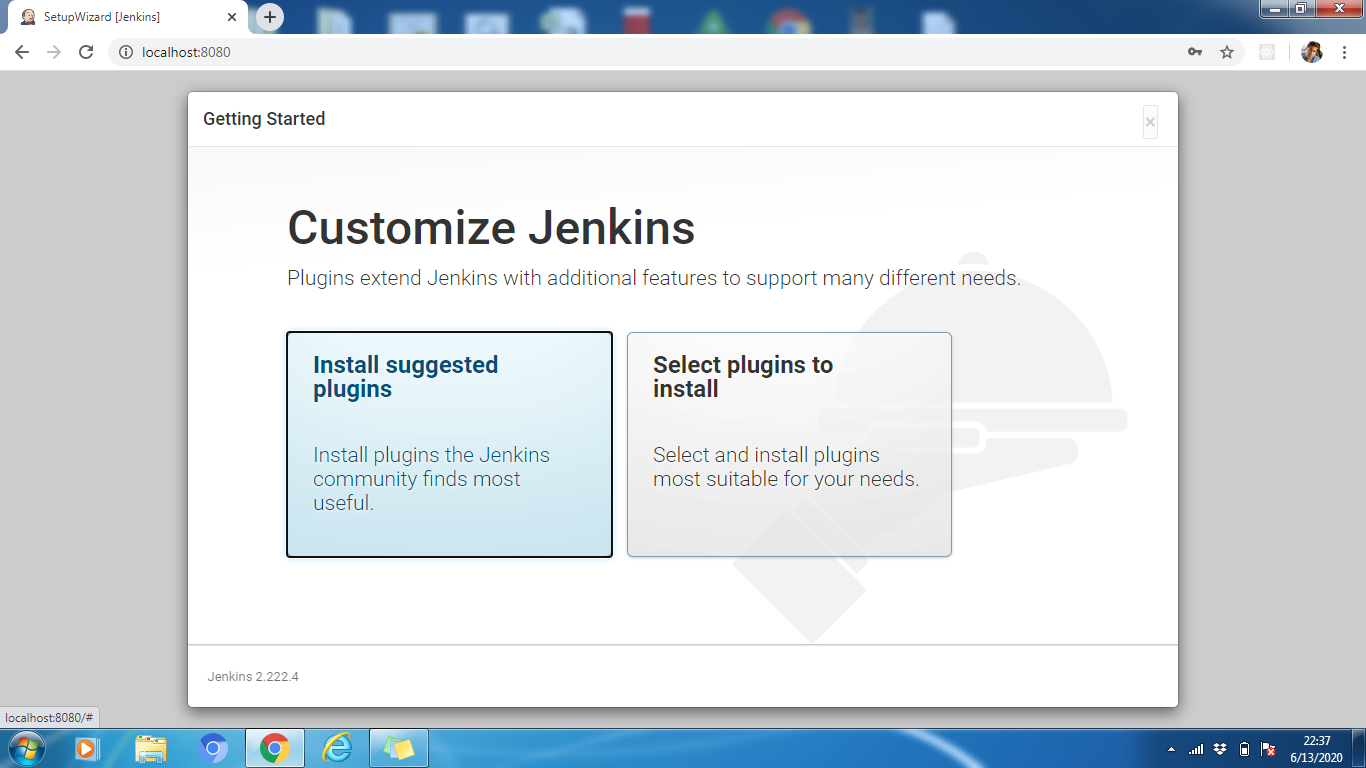
Etape-3: Vous pouvez installer les plugins suggérés ou vous pouvez sélectionner les plugins en fonction de votre cas d’utilisation. Ici, nous allons installer les plugins suggérés.
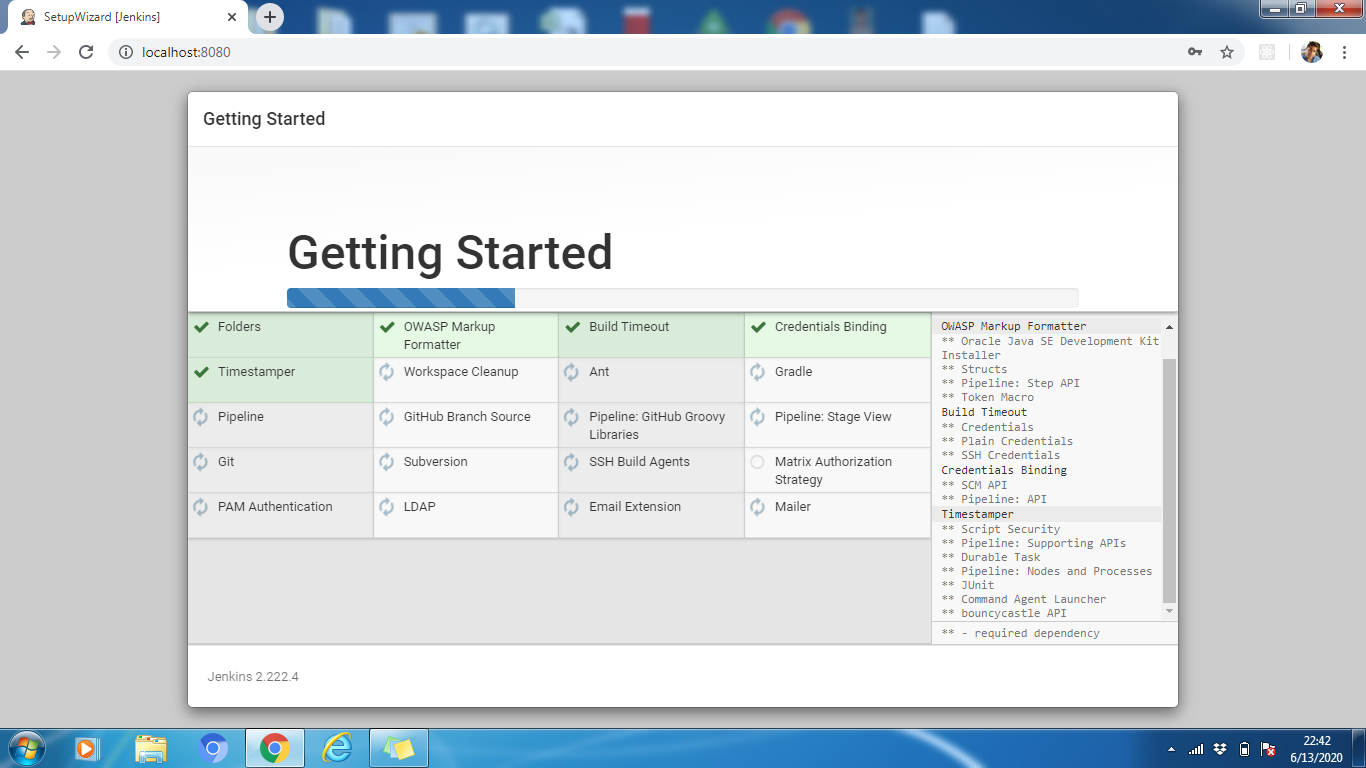
Étape-4: Veuillez patienter jusqu’à ce que tous les plugins soient installés. Lorsque l’installation est terminée, cliquez sur Continuer.
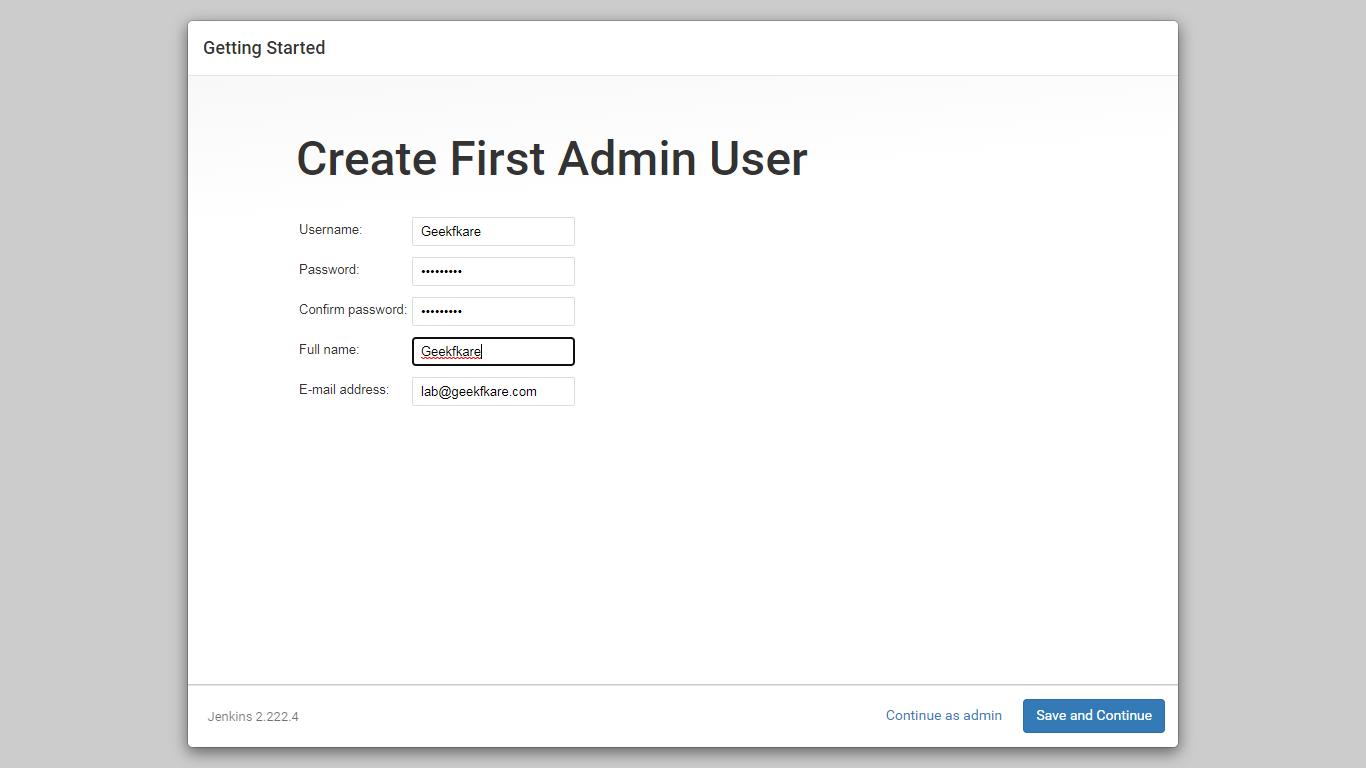
Étape-5: Créez un profil d’administrateur pour Jenkins. Entrez les détails requis et cliquez sur Save and Continue.
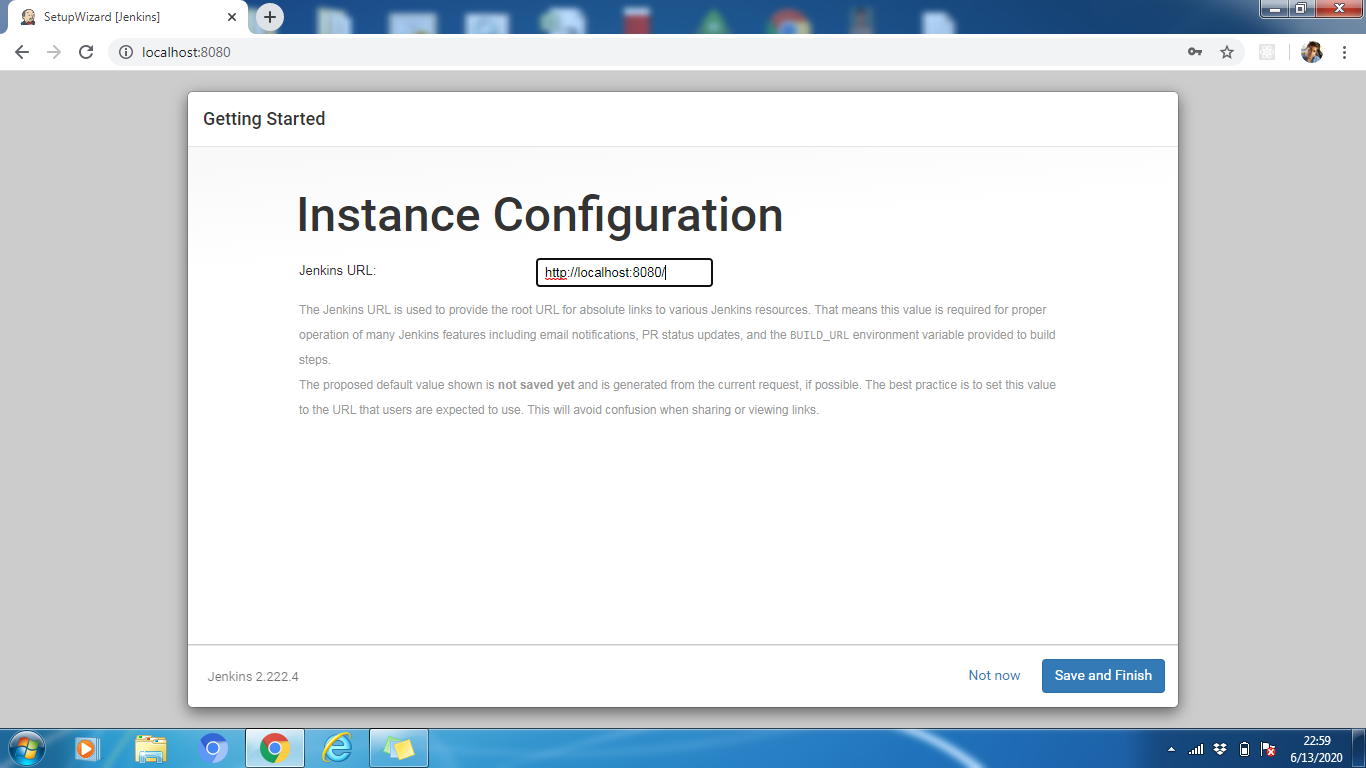
Etape-6: Nous pouvons changer l’URL de Jenkins si nécessaire, gardons la par défaut http://localhost:8080. Cliquez sur Save and Finish pour terminer le processus de configuration. Cliquez maintenant sur Start Using Jenkins
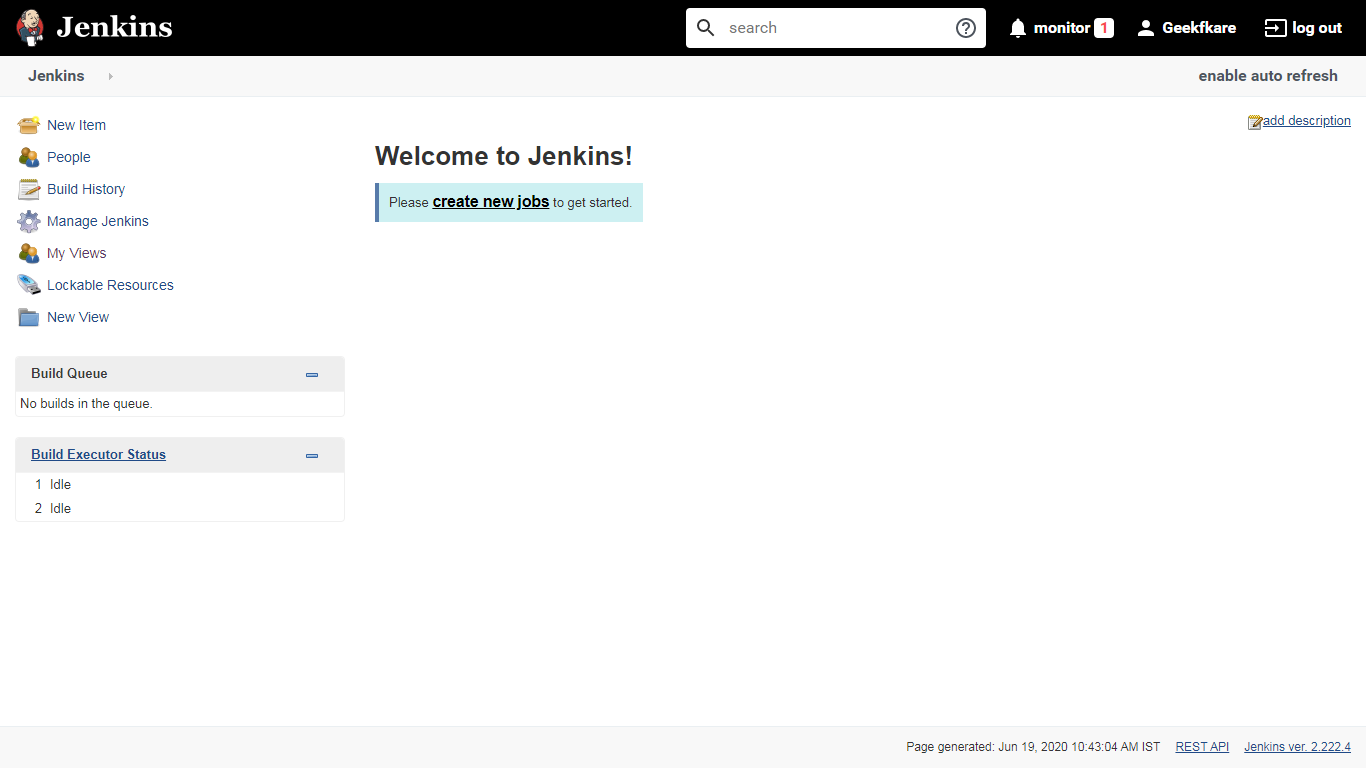
Enfin, le processus de configuration est terminé, et la page ci-dessus est la page par défaut, Welcome to Jenkins !
L’étape de configuration de Jenkins est similaire pour tous les systèmes d’exploitation, à l’exception de l’étape 2 où nous devons récupérer et saisir le mot de passe de l’administrateur. Ce mot de passe peut être récupéré dans le fichier, stocké dans le chemin indiqué sur l’interface utilisateur de Jenkins.
Conclusion
Voici donc les étapes de l’installation de Jenkins sur votre système d’exploitation favori. Ensuite, apprenez à créer vos premiers pipelines Jenkins.
L’installation de Jenkins est facile et si vous l’installez pour une équipe distante, vous pouvez soit obtenir une VM Cloud et l’installer vous-même, soit opter pour une plateforme d’hébergement Jenkins.