HTML, JavaScript, and CSS are among the pillars of front-end development. Angular is one of the most used JavaScript frameworks for building client-side applications. On the other hand, Bootstrap is among the most popular User Interface (UI) frameworks.
Frameworks are a collection of a pre-built set of code, tools, and libraries that offer a predefined way to build applications. Bootstrap and Angular are both frameworks.
This article will define each framework and discuss the benefits of combining the two technologies and how to combine them to create visually appealing and powerful apps.
What is Bootstrap?

Bootstrap is a free front-end toolkit for creating mobile-first applications. This HTML, CSS, and JavaScript framework has a big collection of reusable pieces of code that developers can use on various parts of their projects.
This framework has design templates for various features such as buttons, modals, picture carousels, tables, navigations, and so much more. Bootstrap has extensive documentation to make it easy to use.
What is AngularJS?

AngularJS is a JavaScript framework that extends the syntax of HTML beyond a regular markup language. This framework introduces features such as data binding that allow developers to avoid the complex process of creating responsive web pages when using HTML.
AngularJS employs the model-view-controller (MVC) framework, where there is a clear separation between the application’s logic and the user interface. Developers can use AngularJS to create single-page web applications, social networking applications, eCommerce platforms, content management systems, and more.
Benefits of using Bootstrap in Angular
- Prebuilt UI components: You don’t have to create navigation bars, buttons, carousels, and cards from scratch, as Bootstrap has pre-build pieces of code that you can use. Thus, developers can focus more on functionality while Bootstrap takes care of the basic structure and styling.
- Customizable: The pre-built components provide boilerplate code. However, you can customize the code while on your application. For instance, if you take a card from Bootstrap, you can change various elements, such as images and text to suit your needs.
- Responsive: Modern web users browse on various devices, from smartphones and tablets to computers. You don’t have to create an application for each screen size, as Bootstrap provides responsive web applications.
- Brings consistent styling: A good web application should have a consistent feel and look across different pages. The use of Bootstrap elements and components can help you achieve this goal.
- Strong community: This framework is packed with many resources and strong documentation and is backed by many developers.
Prerequisites
#1. Node.js
This is a JavaScript run-time environment that you will use to run JavaScript code outside the browser. You can check the current version of your Node.js by running this command;
node -v
You can install it from the official website if it is not installed.
#2. Node Package Manager (NPM)
NPM will manage all the associated packages you need for your Angular app. NPM is installed by default when you install Node.js. You can check the current version using this command;
npm -v
#3. Angular CLI
It is a command line tool we will use to create the basic structure of an Angular app. You can install Angular CLI using this command;
npm install -g @angular/cli
#4. An Integrated Development Environment (IDE)
This is where you will be writing your code. You can use any IDE that supports JavaScript, such as Visual Studio Code or Webstorm.
How to add Bootstrap to Angular
We now have all the tools needed to create our Angular app. There are two major approaches to adding Bootstrap to Angular; 1. Installing Bootstrap using NPM. 2. Using CDN links
Approach 1: Using NPM
We can install the entire Bootstrap library to our project using NPM. Follow these steps;
Step 1: Use Angular CLI to set up the basic app structure
A typical Angular app has many files. We will name our app angular-bootstrap-mockup (you can give your app any name that pleases you). Use this command to set up your app;
ng new angular-bootstrap-mockup
You will be taken through these questions;
- Would you like to add Angular routing? (y/N) enter y
- Which stylesheet format would you like to use? Select CSS
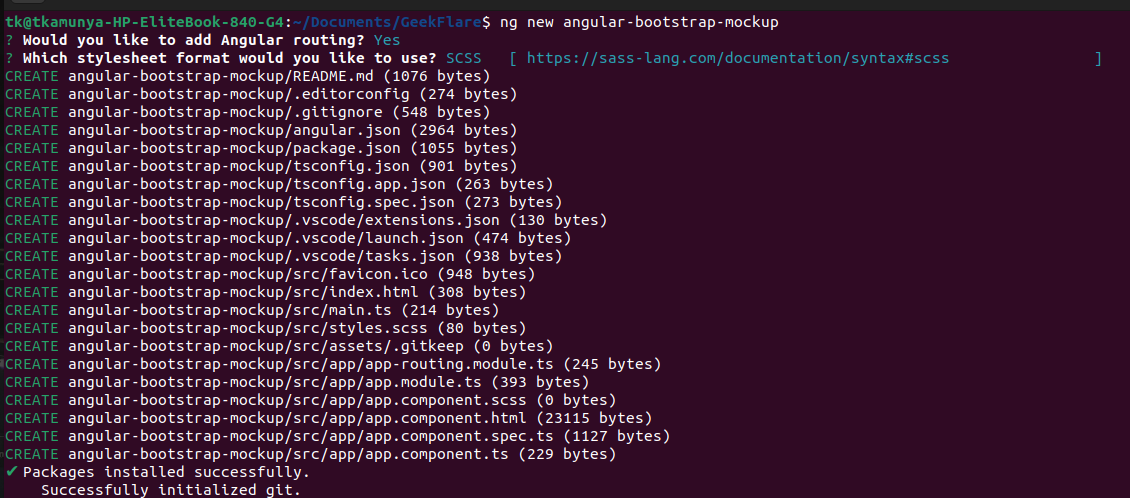
Once the setup is over, you will have something similar to this on your terminal.

Navigate into the created project and move to step 2. You can use this command;
cd angular-bootstrap-mockup
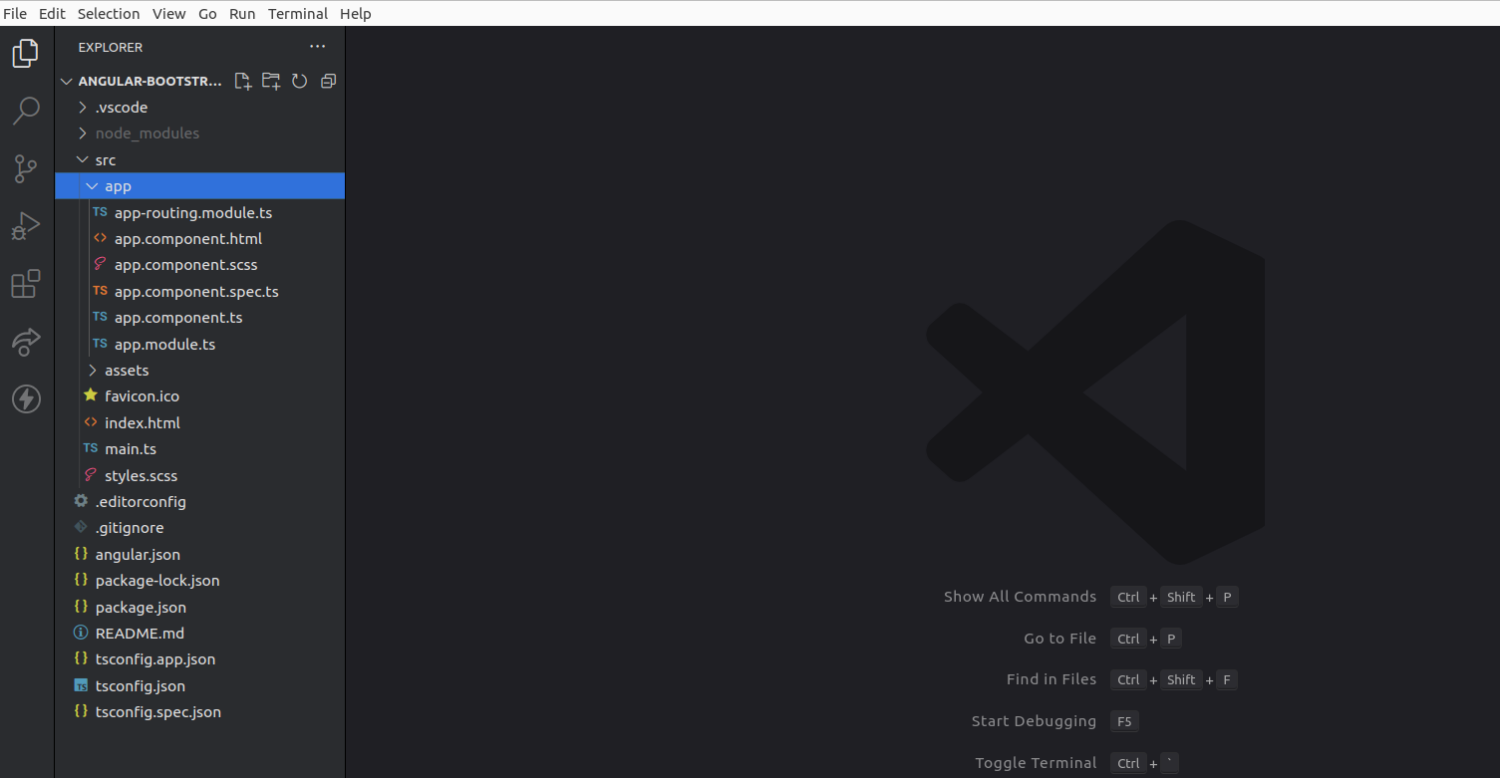
Open the project in your code editor. The project structure will be as follows;

Step 2: install bootstrap and bootstrap icons.
Run this command to install both;
npm install bootstrap bootstrap-icons
Step 3: Include Bootstrap on angular.json file
Locate the angular.json file on the root folder of your app and change these lines;
"styles": [

  "node_modules/bootstrap/scss/bootstrap.scss",

  "node_modules/bootstrap-icons/font/bootstrap-icons.css",

  "src/styles.scss"

],

"scripts": [

  "node_modules/bootstrap/dist/js/bootstrap.bundle.min.js"

]
Step 4: install ng-bootstrap
Ng-bootstrap is a collection of Angular UI components built on top of the Bootstrap framework. The different components in this library are designed to work with AngularJS.
Use this command to install it;
npm install @ng-bootstrap/ng-bootstrap
Step 5: Modify app.module.ts to include NgbModule.
Change the contents of the app.module.ts file with this;
import { NgModule } from '@angular/core';

import { BrowserModule } from '@angular/platform-browser';

import { NgbModule } from '@ng-bootstrap/ng-bootstrap';

import { AppRoutingModule } from './app-routing.module';

import { AppComponent } from './app.component';

@NgModule({

  declarations: [

    AppComponent,

  ],

  imports: [

    BrowserModule,

    NgbModule,

    AppRoutingModule,

  ],

  providers: [

  ],

  bootstrap: [

    AppComponent,

  ],

})

export class AppModule {

}
Step 5: Modify app.component.ts
import { Component } from '@angular/core';

import { NgbModal } from '@ng-bootstrap/ng-bootstrap';

@Component({

  selector: 'app-root',

  templateUrl: './app.component.html',

  styleUrls: ['./app.component.scss'],

})

export class AppComponent {

  constructor(private modalService: NgbModal) {

  }

  public open(modal: any): void {

    this.modalService.open(modal);

  }

}
Step 6: Add Bootstrap elements to the app.component.html file
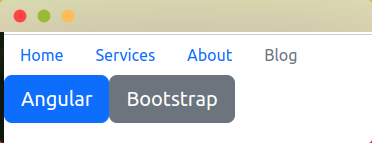
There are tons of components to select from on the Bootstrap website. We will create a simple navbar and add two buttons.
Change the contents of app.component.html as follows;
<ul class="nav">

  <li class="nav-item">

    <a class="nav-link active" aria-current="page" href="#">Home</a>

  </li>

  <li class="nav-item">

    <a class="nav-link" href="#">Services</a>

  </li>

  <li class="nav-item">

    <a class="nav-link" href="#">About</a>

  </li>

  <li class="nav-item">

    <a class="nav-link disabled">Blog</a>

  </li>

</ul>

<button type="button" class="btn btn-primary btn-lg">Angular</button>

<button type="button" class="btn btn-secondary btn-lg">Bootstrap</button>
Step 7: Run your app
Use this command;
ng serve
When Angular development runs, you can open http://localhost:4200/ on your browser.

Approach 2: Add Bootstrap to Angular using CDN links
This approach lets you link directly to Content Delivery Network (CDN) that stores Bootstrap files.
We can create several buttons using this approach on a new project. Follow these steps;
Step 1: Create a new Angular project
We will name our app angular-bootstrap-cdn. (You can pick any name).
Run this command;
ng new angular-bootstrap-cdn
Once the installation is over, change directory and open your project in a code editor. You can use this command to enter the project directory;
cd angular-bootstrap-cdn
Step 2: Include the CDN link on the index.html file
Locate the src/index.html file and CDN link in the head section.
<head>

…….

  href="https://maxcdn.bootstrapcdn.com/bootstrap/4.0.0/css/bootstrap.min.css">

………

</head>
Step 3: Add Bootstrap code to the app.component.html file
Locate the src/app/app.component.html file.
You can add this code to the file;
<button type="button" class="btn btn-primary">Primary</button>

<button type="button" class="btn btn-secondary">Secondary</button>

<button type="button" class="btn btn-success">Success</button>

<button type="button" class="btn btn-danger">Danger</button>

<button type="button" class="btn btn-warning">Warning</button>

<button type="button" class="btn btn-info">Info</button>

<button type="button" class="btn btn-light">Light</button>

<button type="button" class="btn btn-dark">Dark</button>

<button type="button" class="btn btn-link">Link</button>
Step 4: Run your app
ng serve

Frequently Asked Questions
Yes. Bootstrap and Angular Material are UI libraries created to serve the same purpose. However, you should not use both libraries when dealing with the same component, as they are likely to crash. For instance, if you want to create a login page, pick either based on the available components.
The current version of Bootstrap, as of this writing, is v5.3.0-alpha2. On the other hand, the current version of Angular is Angular 15. Anything from Bootstrap 4 is compatible with various Angular versions. However, always check the documentation on both Bootstrap and Angular official websites when combining the two technologies
There is no limitation on the nature of applications you can build using Bootstrap and Angular. You can use the two to build single-page applications, eCommerce websites, social platforms, dashboards, and admin panels. You can also use Angular with the Ionic framework to create mobile applications.
Angular is a JavaScript framework. However, Angular is written in TypeScript, a superset of JavaScript. TypeScript introduces new functionalities that are unavailable in JavaScript. You can thus use Angular with both TypeScript and Angular apps.
Conclusion
You can now comfortably use two of the most popular front-end frameworks, Angular and Bootstrap, to create various applications.
The choice of approach will depend on the use case and type of app you want to create.
Even though the CDN approach looks easy, it also has various downsides. The major challenge is the security of your app, as hackers can use CDNs to push malicious scripts to your website.
Installing Bootstrap using NPM gives you control over the code you include in your application. However, this approach can be time-consuming as you have to download all the dependencies.
Check out how to add Bootstrap to a React app.

