Here’s a quick Canva vs. Movavi for video and image editing capabilities. Stay tuned.
Do I need to tell you how important videos are? Probably not! You are already diving into them day in and day out and wondering which one to pick among
Let me start it this way: they are vastly different tools.
While Canva has some video-editing features, it works primarily on images. Still, you can tweak the video overlay elements, add some effects, do animations, and a few more little things which indicate Canva isn’t serious about the videos yet.
Coming over to Movavi, it flaunts “video” as the first point on its resume.
So, there isn’t a Canva vs. Movavi debate for video editing because the latter is in a different league. Similarly, Canva is at a whole new level when it comes to images.
Still, we’ll try to do the unthinkable and compare them for video and images. In the end, you will have the clarity to choose the best one for your use case.
Let’s dive in.
Movavi vs. Canva: For Video
To make it interesting, I will take one royalty-free sample video (taken from Pexels.com) and try to get creative with both of these tools. Indirectly, the results will depict the possibilities.
Movavi Video Editing
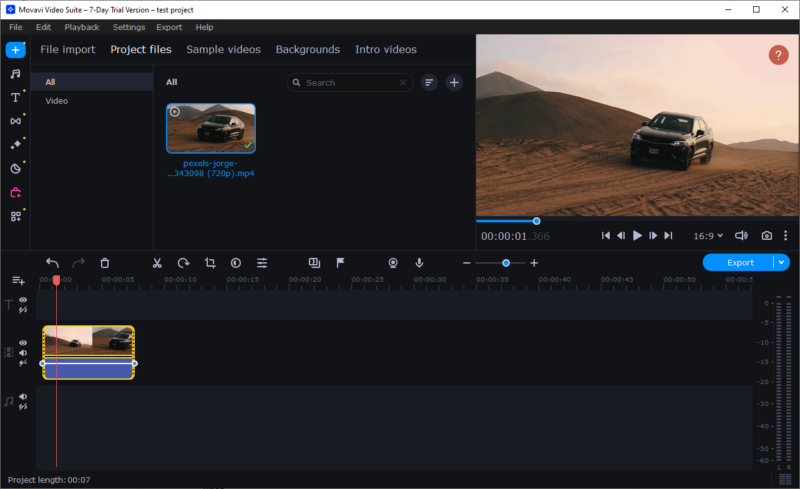
Right from the interface, one gets the vibes of serious video editing. And that’s true. It packs features like color adjustments, overlays, motion tracking, slow motion, chroma key, screen detection, LUTs, and more, which are typical of such video-heavy tools.
Consequently, there is a lot you can do with video via Movavi.
First, you have its stock audio library with a decent collection of music clips and sounds.
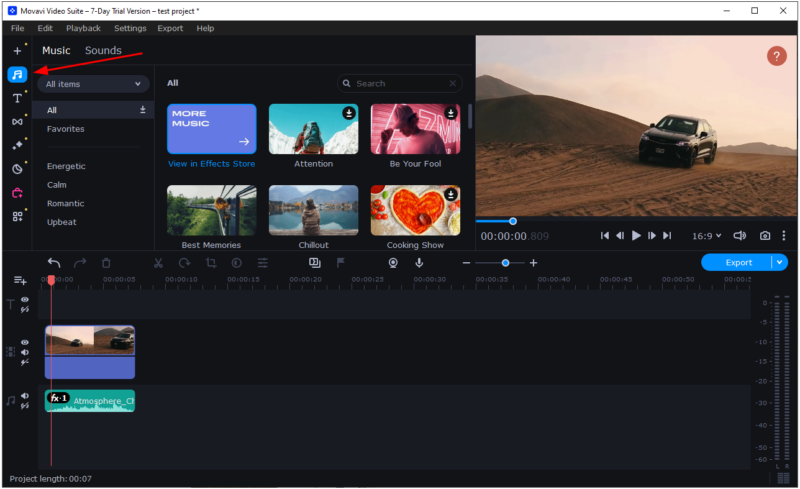
Alternatively, the interface lets you record or upload custom audio and video. Besides, Movavi has its own Effects Store, where you can explore many media assets with a single subscription.
I tried to add some titles, and there are many presets available at no extra cost.
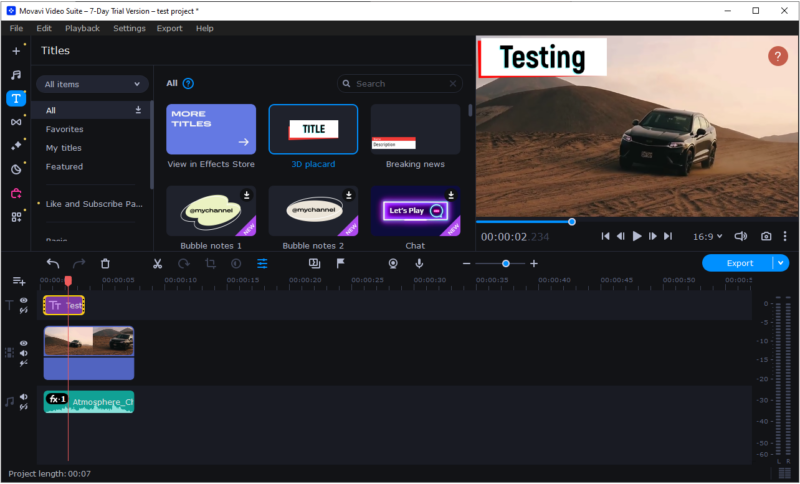
This is for overlaying text elements with default animation styles. In addition, these are handy for opening and end credits.
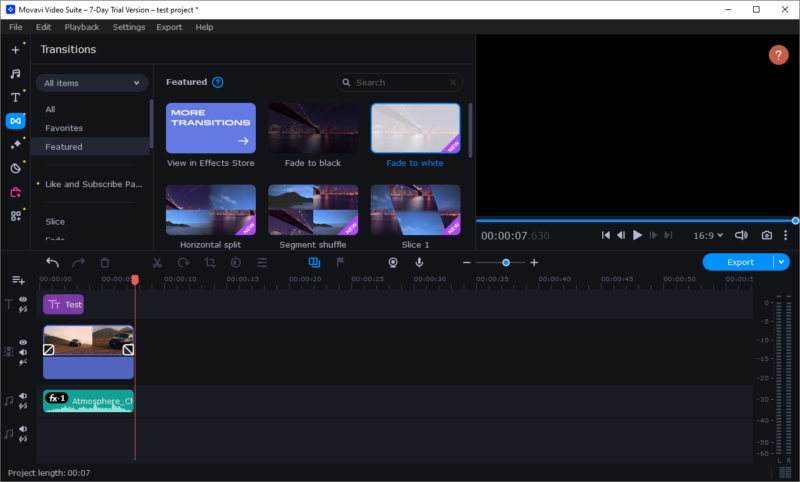
Movavi Video Editor also features standard transition effects to put at the start or end or between video clips. Again, these cover basic transitions, and for more uniqueness, Movavi tempts you with its effect store subscription.
Next comes its filters, overlays, and LUTs. One can pick among these and also apply multiple effects.
You can see I have used a Pop art filter:
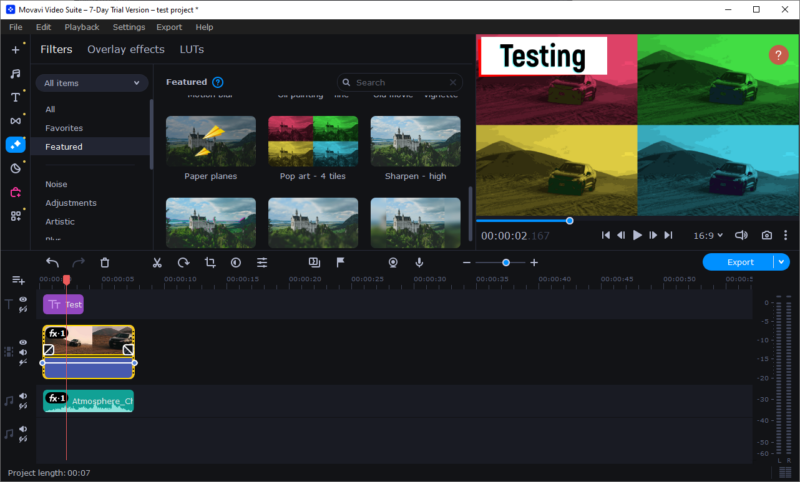
There are way more options, however. Especially the overlay effects can add flavor to the clips, and LUTs allow you to theme the overall output.
Next, you have stickers, callouts, and frames. Stickers and callouts are for highlighting certain video elements or to give specific messages at any time during the clip. For instance, the subscribe button, which pop-ups in many YouTube videos, will come under this category.

While this may seem similar to the Titles we have seen earlier, you can’t edit the stickers and callouts.
These were some things I could do to the sample video clip, but this is far from the limit. The simplest way to explore everything you can do with any element is by right click on the timeline area.

This shows the available effects you can apply to a subject element. Especially the Tools section indicates an exhaustive list of possible modifications and enhancements.
Overall, there are a ton more things I can do and write about. However, in that case, we will drift apart from the scope of this article which is to compare Movavi and Canva.
So, I’ll stop here and start with Canva.
Canva Video Editing
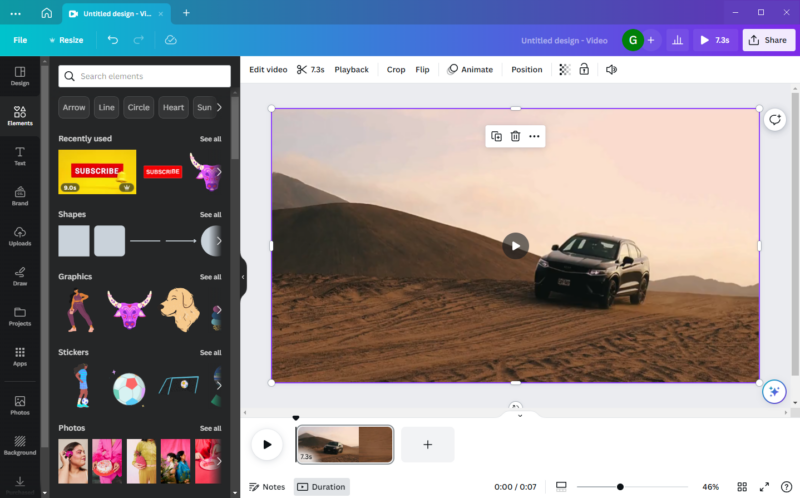
Though Canva has a powerful web application, I have downloaded its Windows version. And right from the first looks, I can tell this tool isn’t meant for video editing. Basically, everyone who has used a video editor can spot this. Particularly, there are no “visible” timelines, the signature of such tools, which indicates its video limitations upfront.
Regardless, I have started with the Edit video at the top.
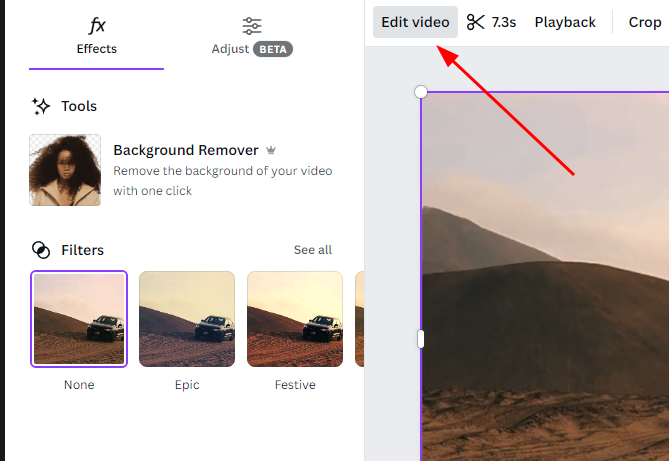
It features a background remover and filters (much like LUTs) under the Effects category. Besides that, Adjust (BETA) allows you to color, light, and texture correct the output.
Moreover, the video editing features cut, speed change, crop, flip, etc.
Next, we have Animate to apply preset animations at the start, end, or both. One can control the speed of the animation and its direction.
Finally, the last tab at the top, Position, is where you can put multiple videos on top of each other or side by side with a custom background.
What helps the Canva case is the stock asset library which you can use for overlay elements. And though one can not see the timelines right away, there is a feature that works almost similarly.
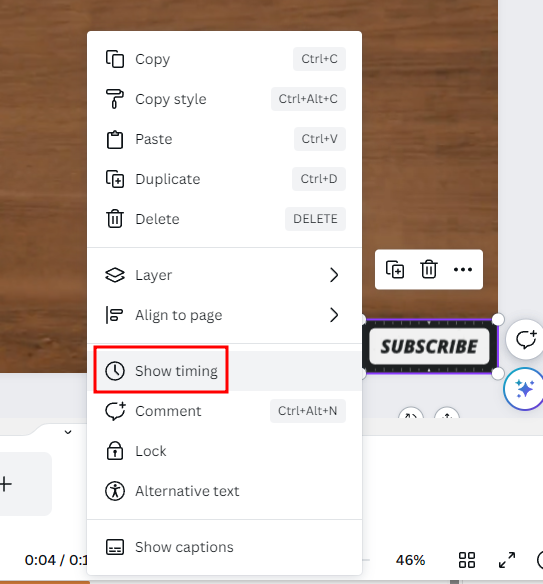
You can right-click over the subject element and click Show timing. This will reveal the position of that object relative to the primary video element.
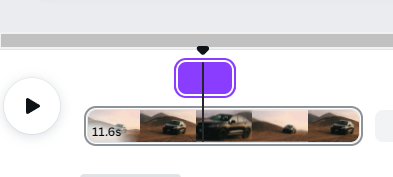
Now you can adjust the position and the duration by just dragging it. This will be handy for social media people to point out objects, put pop-up buttons like Subscribe or Follow, or give end credits, etc.
And while it does not feel as workable as the video editing timelines, it does the job to an extent. Importantly, the timing will indicate the selected element, and there won’t be multiple such bars for different objects.
However, that’s not true for the audio. You can have as many audio tracks, each with its own timeline space where you can apply effects like fades in & out, beat sync (to time video elements to the music), volume, etc.
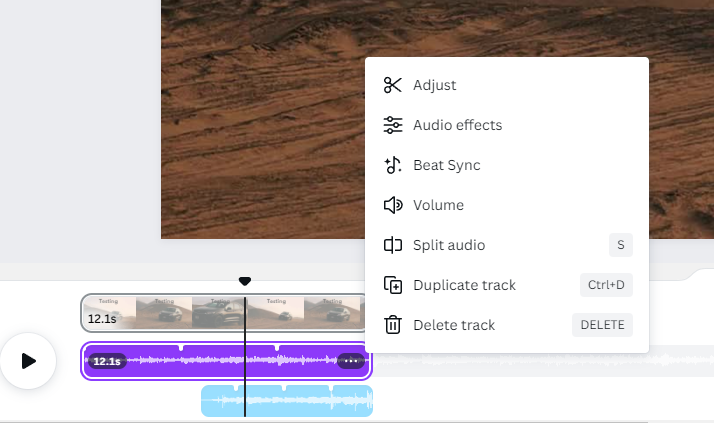
In addition, Canva also lets you upload custom audio-video tracks.
So that sums up Canva video editing capabilities from my side.
Verdict
Movavi and Canva are aiming for different use cases. Movavi is best for someone breaking into serious video editing with decent audio features as well.
And Canva doesn’t seem to be that bothered about video and audio at present. It’s focused on images, the battleground we are moving on to next.
Canva vs. Movavi: For Images
Canva is a renowned force in image editing, and this might be tough for Movavi. Let’s start with Canva this time.
Canva Image Editing
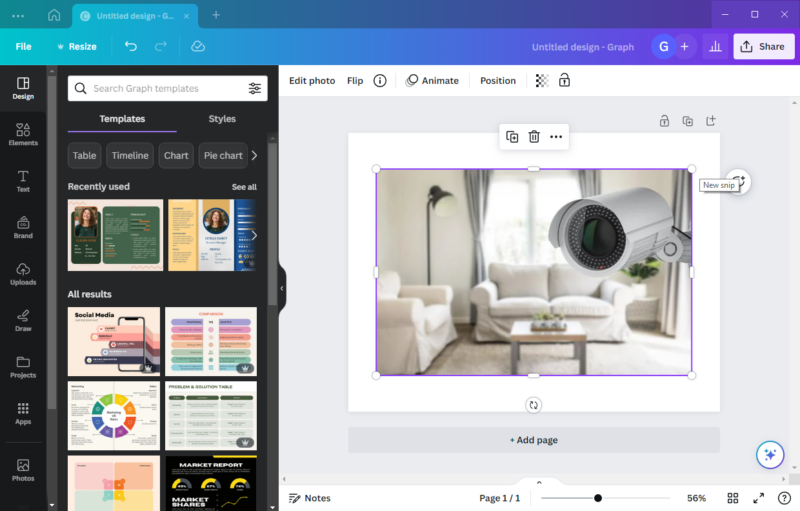
I feel if you’re subscribed to Canva Premium, there is nowhere else you’ll need to search for media elements and templates. Its ever-expanding stock library rarely disappoints you. Plus, the interface is really intuitive, and everything just works.
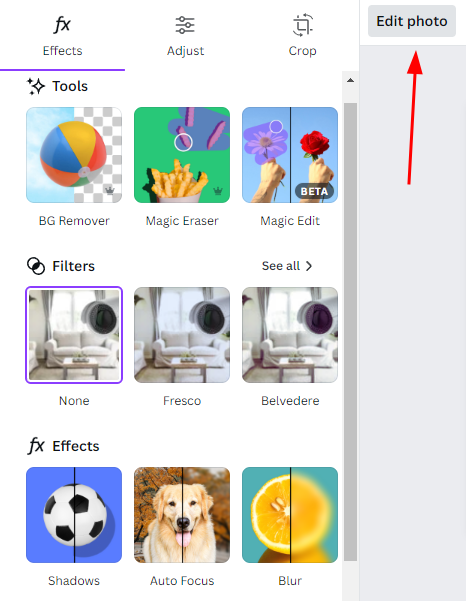
Coming to the editing part, you have a background remover, AI-powered Magic Eraser, and Magic Edit. A small restriction is you can only use Magic Eraser or Magic Edit at a time.
Check this where I tried to remove the table using its eraser and the next one with the camera replaced by a hair dryer.


You might see some rough edges in AI work, but that’s the (sad) reality with such tools at present. These AI technologies will take some time to mature; until then, the results can be subpar.
Moving on, Canva has theme filters, shadows, autofocus, and blur. Specifically, auto-focus worked great to put certain segments in focus while blurring everything else. Similarly, shadows let you adjust their size, length, angle, etc.
Likewise, image editing includes color, temperature, and texture corrections to the background, foreground, or both.
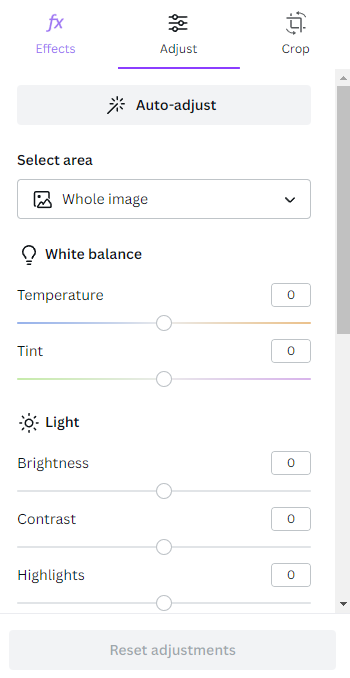
Finally, the Canva image editing prowess concludes with animations and the positioning of multiple images in layers.
Movavi Image Editing
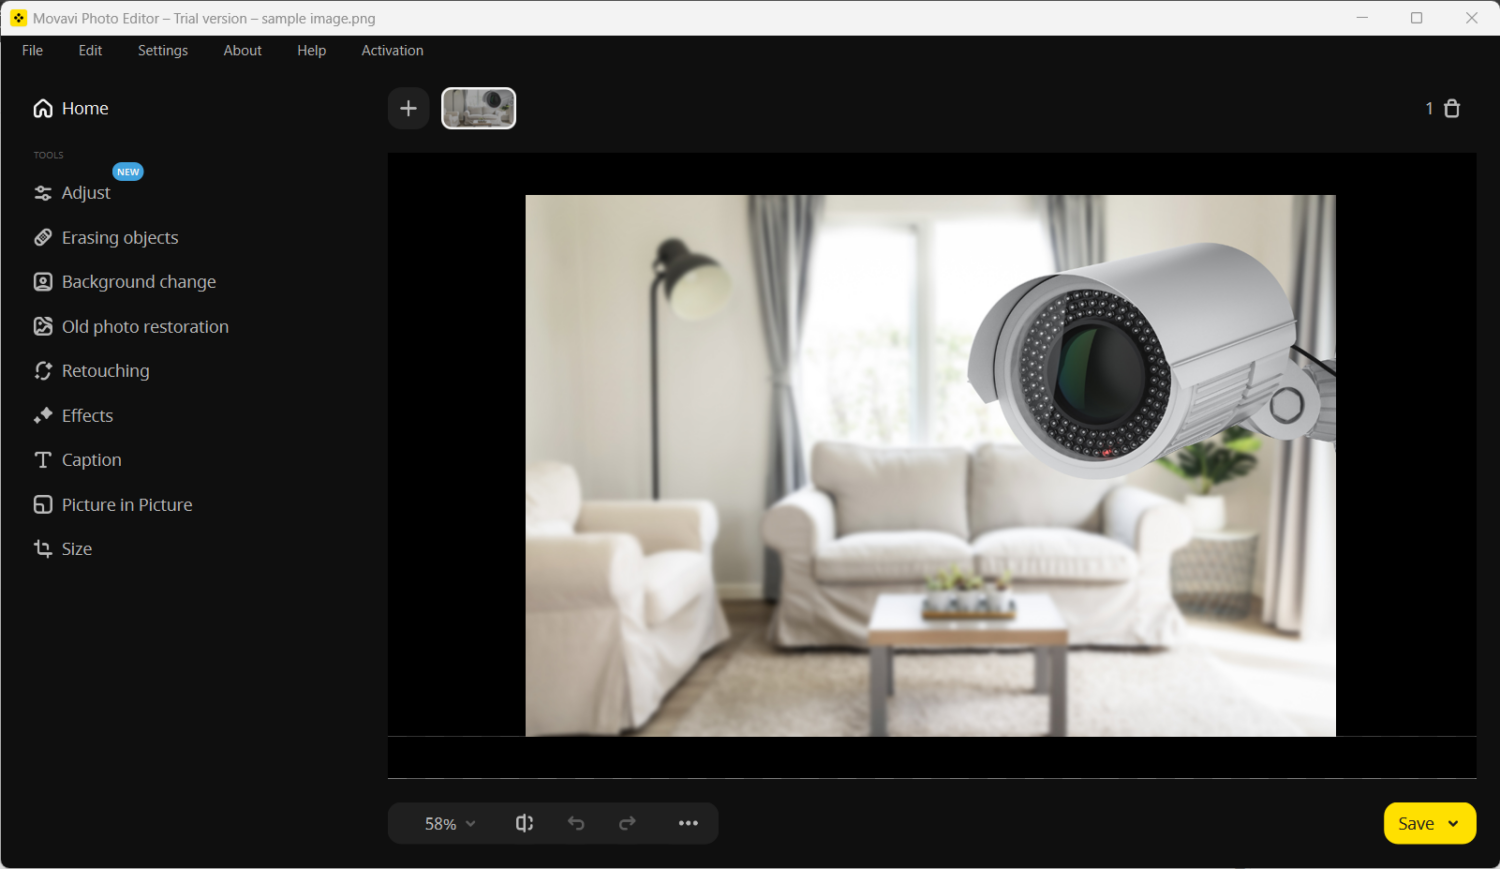
I would easily give Movavi Photo Editor a plus one for its super straightforward interface. There is absolutely no chance someone will lose sight of any feature.
Everything is nicely stacked on its left pane.
Starting off its first tool, Adjust, it gives you auto color corrections presets, with an option to do it all manually.
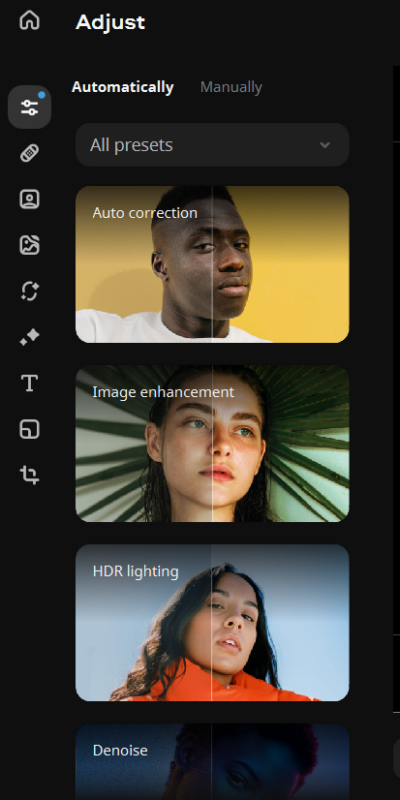
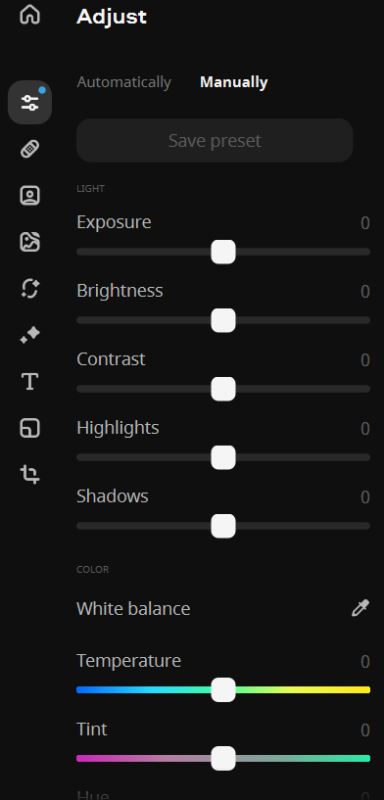
I tried some of the auto-corrections, and it worked great.
Next, I tried its Erasing Objects. It has both auto and manual modes.
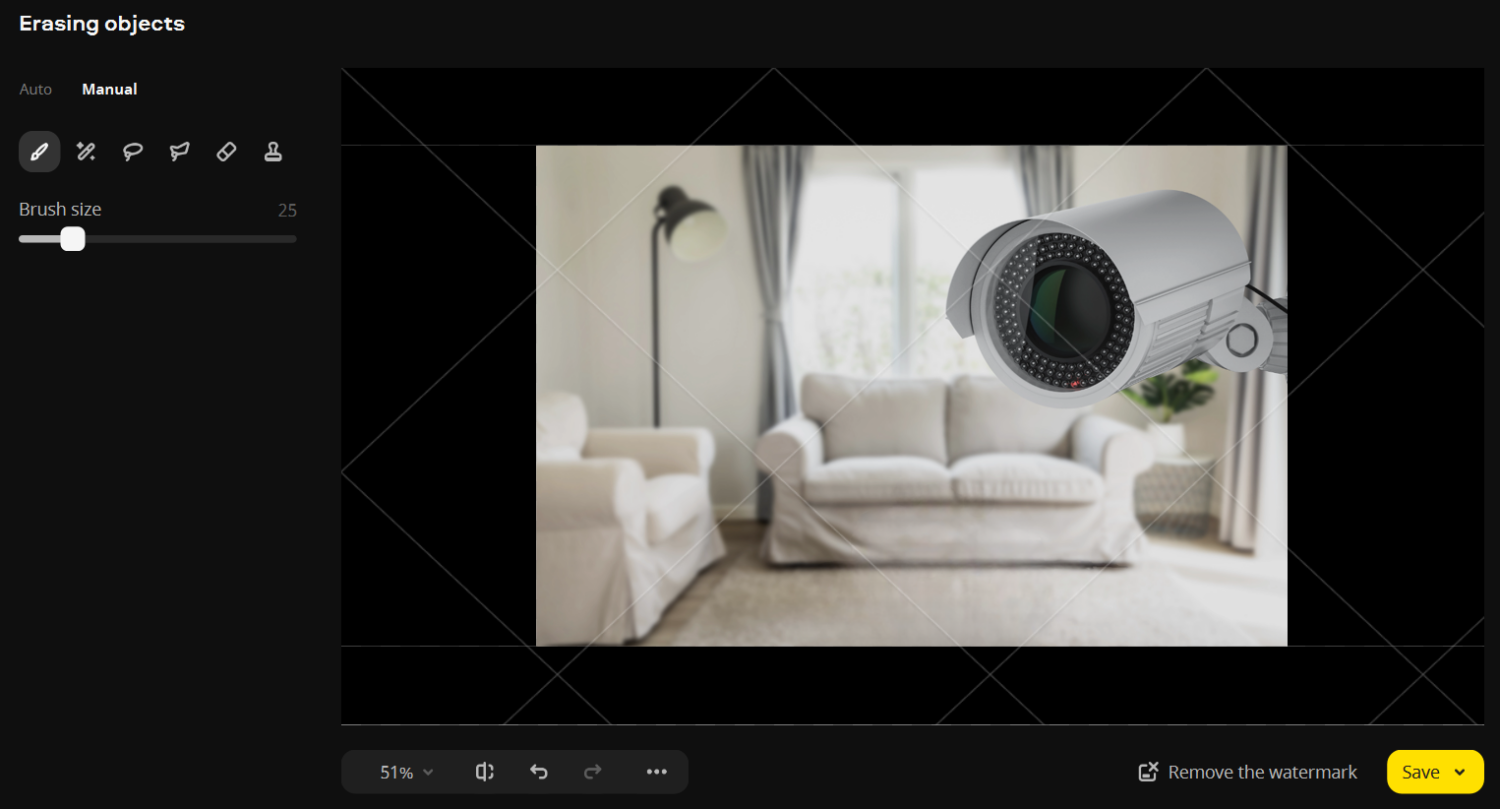
I have to admit here this was miles better than what Canva Magic Eraser did on the same object. I have tried both AI and manual brushing to the center table, and the final render is pretty convincing.
Besides, its manual eraser has many options to accurately trace any object for satisfactory removal. So far, the scale tilts towards Movavi as its AI performs better and is coupled with manual editing.
Next on the list is a background remover like Canva. Again, there are two modes, AI and manual, for fine-tuning the output.
Old photo restoration is another feature that isn’t there with Canva yet. It’s an AI-powered feature to remove defects and colorize old photos.
I have downloaded one from Unsplash and gave it a go.


This felt good, but I expected more. So, I tried another one.


This one cleared any remaining doubts, and I can safely attest that it isn’t another AI gimmick, and Movavi photo editor can render studio-level outputs.
Its Retouching has again AI and manual modes. This time its AI could not make major changes, especially what I expected in skin smoothing, wrinkle removals, etc. However, the manual modes worked well on a few things, including eye enlargement and face slimming.


Next are its Filters to theme any image and Caption to add text and stickers.
A few more tools include crop, rotate, resize, etc. This completes my brief encounter with Movavi Photo Editor.
Verdict
Like it was with video editing, Canva, and Movavi are going in entirely different directions.
Canva’s strength is a rich stock media library, lightweight photo editing, and animations that serve day-to-day marketers. On the other hand, Movavi has a bunch of AI tools to help in professional photo editing.
Final Thoughts
There is no clear winner because they aren’t competing. They both are good at what they do and have takers in their respective domains. For someone trying to choose among them, it’s just a matter of sorting out the requirements.
For in-depth photo and video editing, you have Movavi with premium video and photo editors. And you get week-long fully-featured trials to see them inside out.
Canva suits surface-level jobs and is a boon for online publications, e-commerce stores, social media professionals, etc. Besides, it has a powerful forever free version which you can try to get more insights.
That will be all from my side. Goodbye!

