Is your DS4Windows not working on Windows 11? Ensure your PC meets all the system requirements and that your Bluetooth drivers are up-to-date.
DS4Windows is a virtual emulator that allows you to connect Xbox 360 and PlayStation controllers to your PC with a user-friendly interface and a simple UI.
Playing video games on a PC with Xbox controllers is enormous fun. But when you can’t connect your DualShock4 or PS5 controller to Windows, it turns out to be a real bummer. You may see the unpleasant No Controllers Connected (Max 4) or DS4 not detecting controller error message on your screen.
Many gamers have complained about DS4Windows connection issues or received compatibility errors. It’s a bit annoying, but it can be solved.
So, how should you troubleshoot this problem? Is something missing, or are there any hardware issues? Here, we prepare you a quick walk-through to fix the DS4Windows not working on Windows 11. Let’s jump straight into it.
Method #1: Check System Requirements
Thanks to its X86- 64 based platform, Windows 11 supports DS4Windows. However, to ensure that the program operates efficiently, you should check its essential requirements before installing it. Your PC needs the following requirements to run DS4Windows properly:
- Microsoft .NET 5.0 Runtime or above.
- Visual C++ 2015-2019 Redistributable.
- Virtual Gamepad Emulation Framework (ViGEmBusv.1.17.333.0 ) driver or higher.
- Compatible controllers (DualShock 4, Ps5 supported Xbox controllers).
- Micro USB cable or a compatible Bluetooth connection (Windows built-in or an adaptor).
- Disabling PlayStation Configuration Support option in Steam.
Method #2: Update your Bluetooth drivers
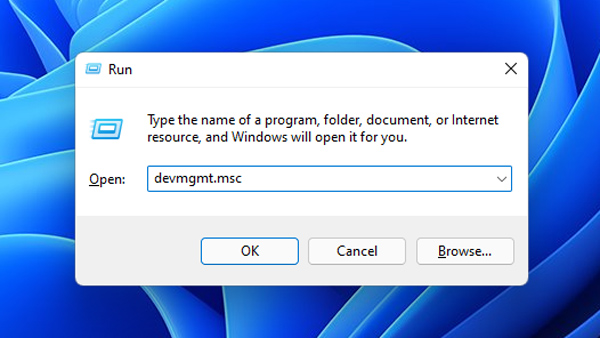
Your outdated Bluetooth drivers are one of the reasons your DS4WINDOWS isn’t working. To do this, first, make sure that your Bluetooth adapter is switched on. To update your Bluetooth drivers, you can use some of these driver updaters software or press Window + R hotkeys to launch the Run app and then follow the steps below:
Step 1: Type devmgmt.msc in the Run box to access your Device Manager.
Step 2: Next, look for the Bluetooth category.
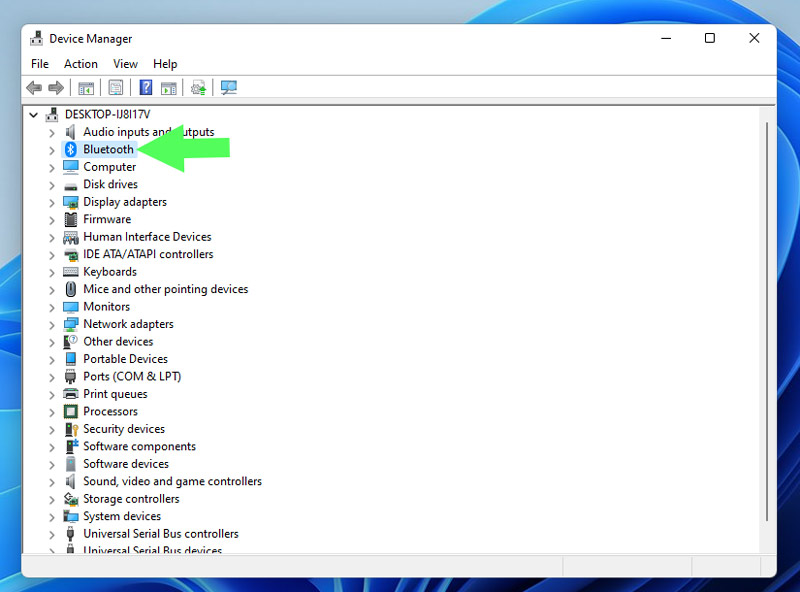
Step 3: Select Update driver from the context menu when you right-click on the Bluetooth device you want to update.
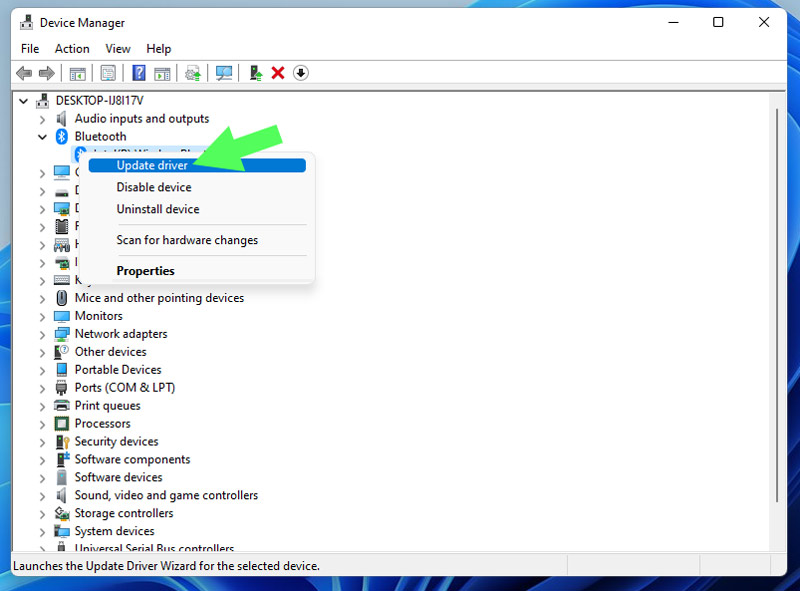
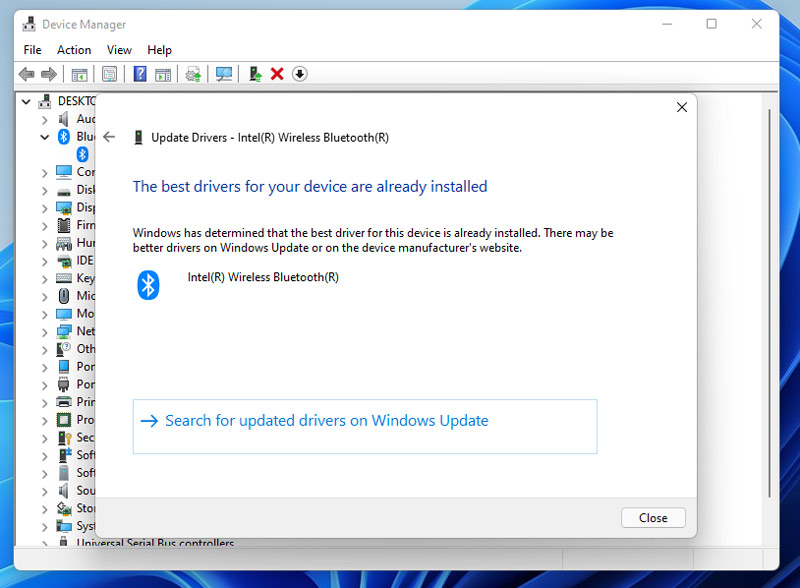
Step 4: Now, opt for Search automatically for drivers. However, if you already have your drivers on your Windows, choose to Browse my computer for drivers.

Step 5: After updating the driver, run DS4Windows app to see if it’s fixed.
Method #3: Update your DS4Windows
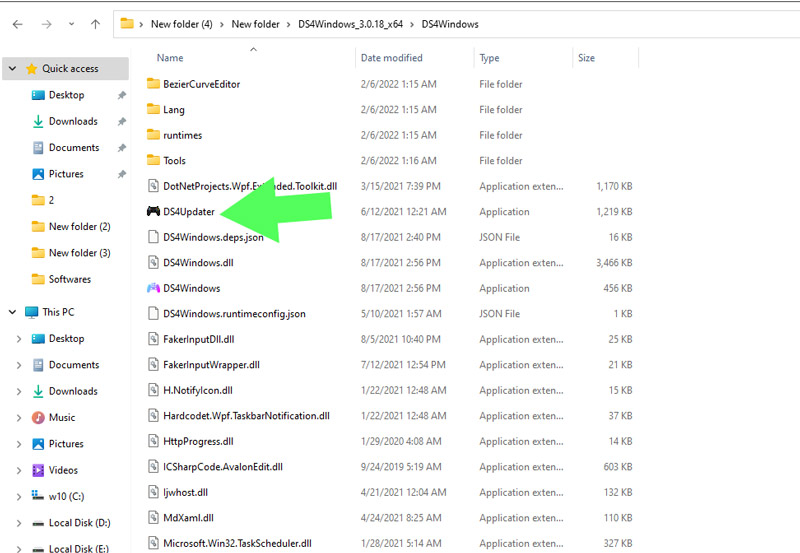
To update DS4Windows, use the DS4Updater app included in the DS4Windows directory.
Step 1: To find the DS4Updater app, first browse to the location where you unzipped and installed DS4Windows.
Step 2: Following that, double-click on the DS4Updater to launch it.
Step 3: Once it opens up, the update will begin.
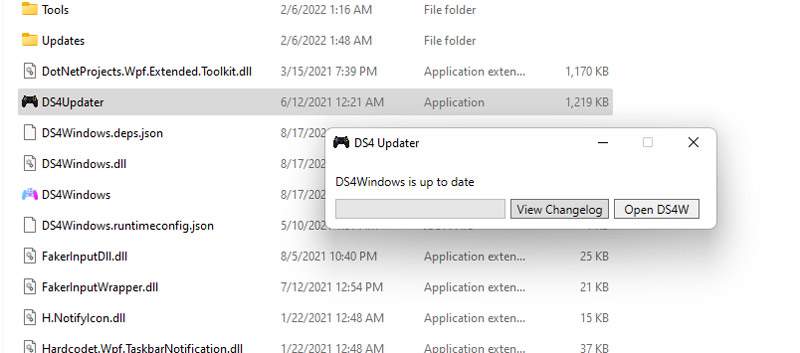
After finishing the update process, restart your computer and see if the DS4Windows are working correctly. If not, proceed to the next step.
Method #4: Reinstall DS4WINDOWS
If you were unable to update your DS4Windows or were unsuccessful with that method for whatever reason, we recommend reinstalling the DS4Windows app. To Reinstall your DS4windows first, you need to remove them.
Uninstalling DS4Windows
While deleting DS4Windows is not challenging, it is not as straightforward as removing other applications.
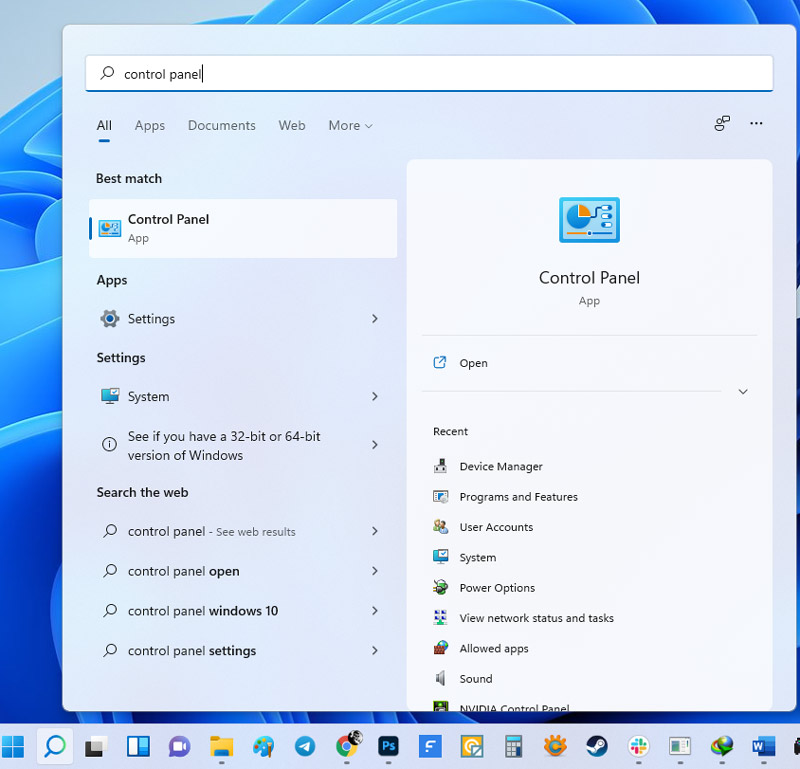
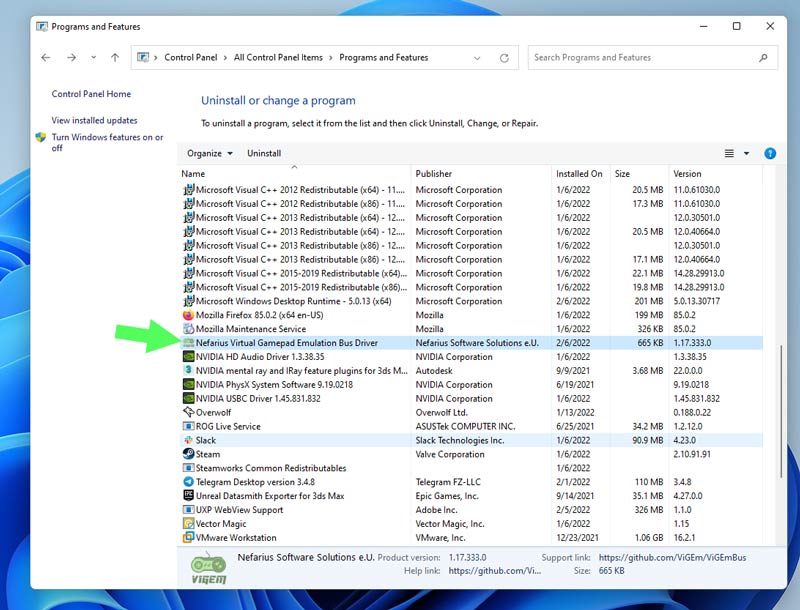
Step 1: To get started, first, you need to uninstall a driver. Open the Start menu, type Control Panel, and press Enter to access the Control Panel.
Step 2: Then click on Programs and Features.
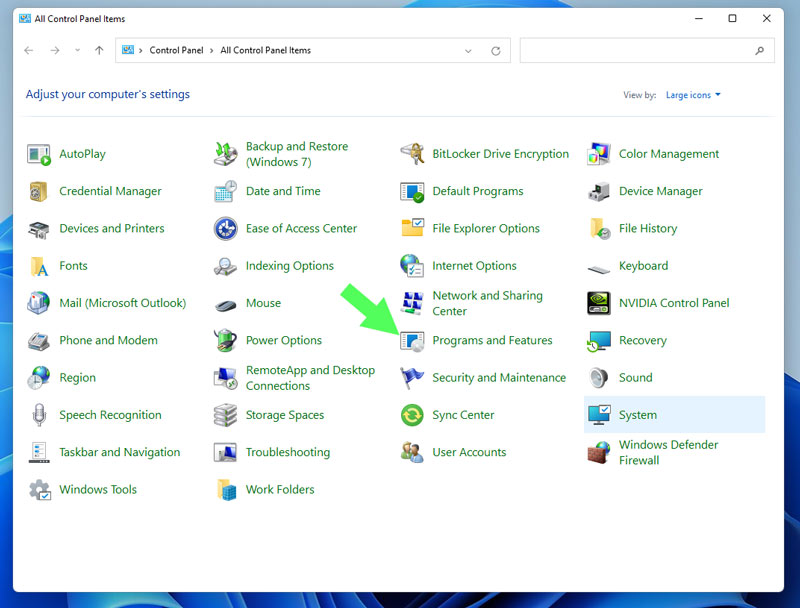
Step 3: In the Programs and Features window, look for Nefarius Virtual Gamepad Emulation Bus Driver.
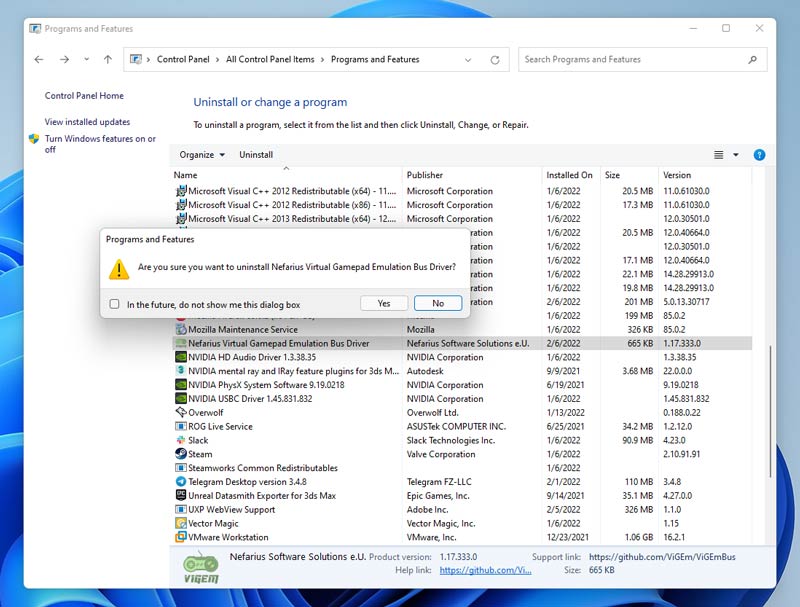
Step 4: After that, double-click on it and then select Yes to begin the uninstalling process.
Step 5: The next step is to remove all DS4Windows files from your computer. To do so, navigate to the directory into which the file was unzipped and installed.
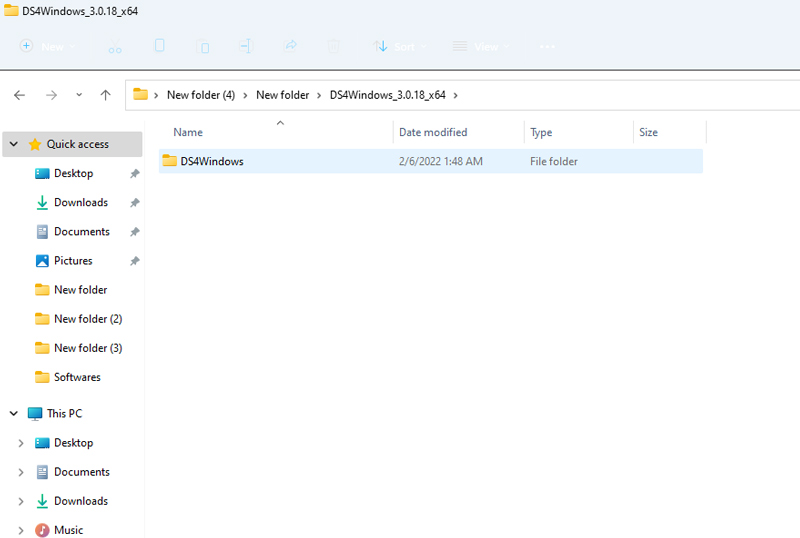
Step 6: After you’ve selected the DS4Windows folder, you can either delete it by choosing the trash icon after right-clicking on it or by pressing the delete key on your keyboard.
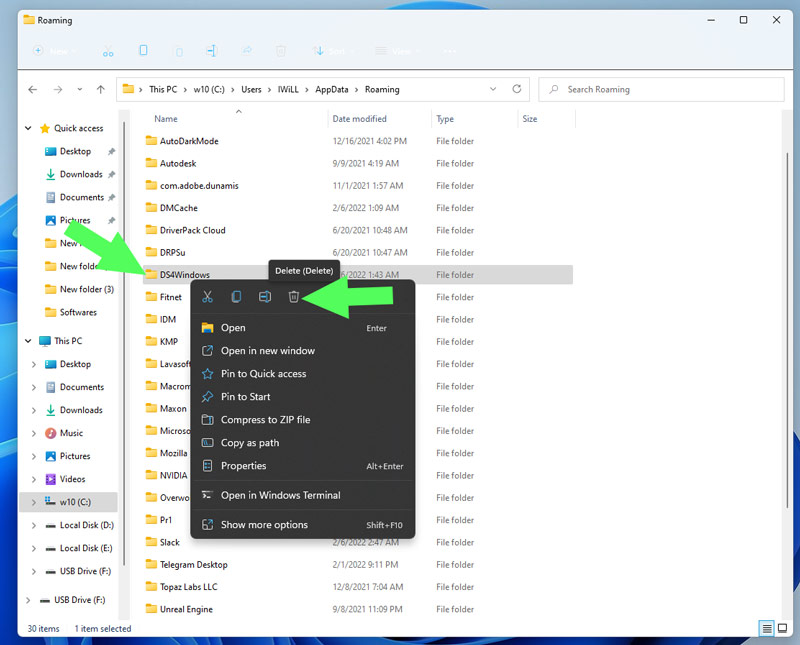
Step 7: Next, type %Appdata% into File Explorer and hit Enter.

Step 8: Afterwards, you’ll be taken to the Roaming directory. To complete the uninstall of DS4Windows, locate and delete the DS4Windows folder.
Reinstalling DS4Windows
Step 1: First, download the DS4Windows file from Github.
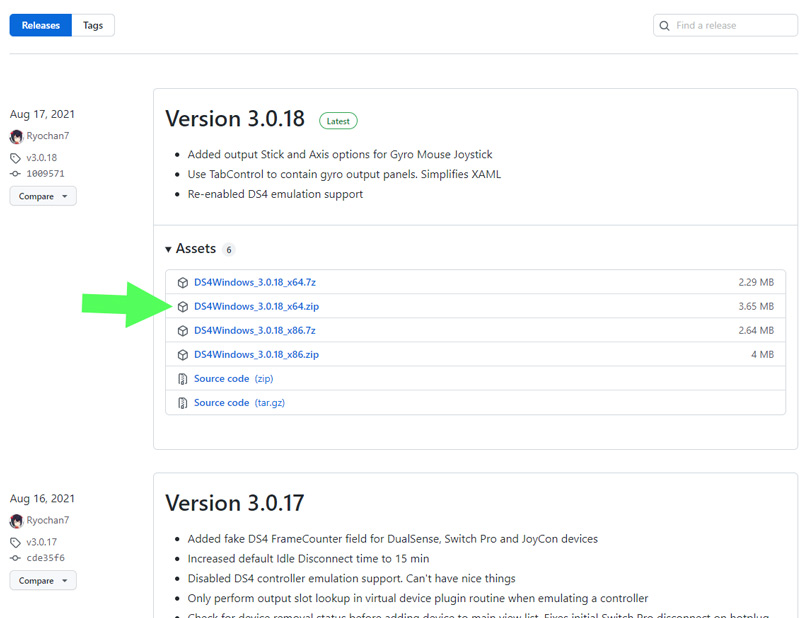
Step 2: Following that, extract the downloaded Zip file.
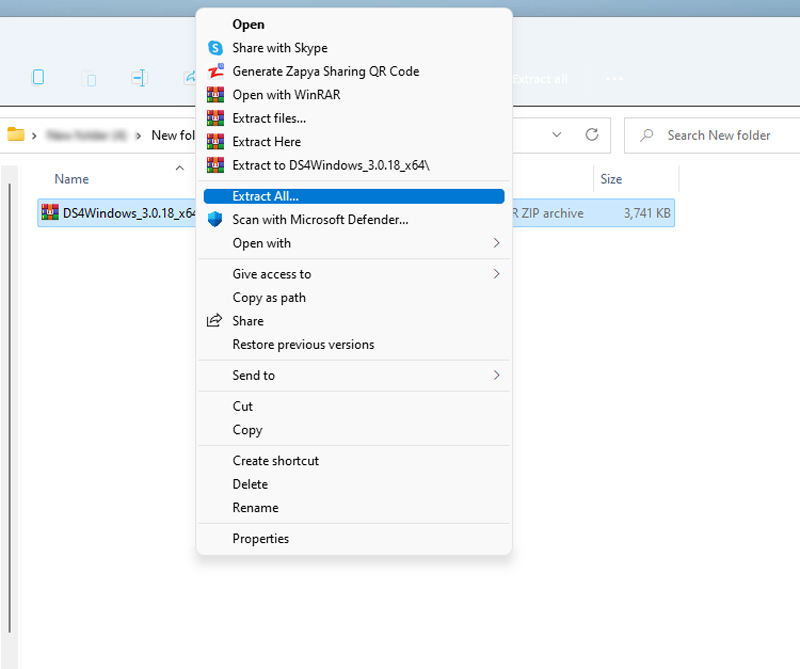
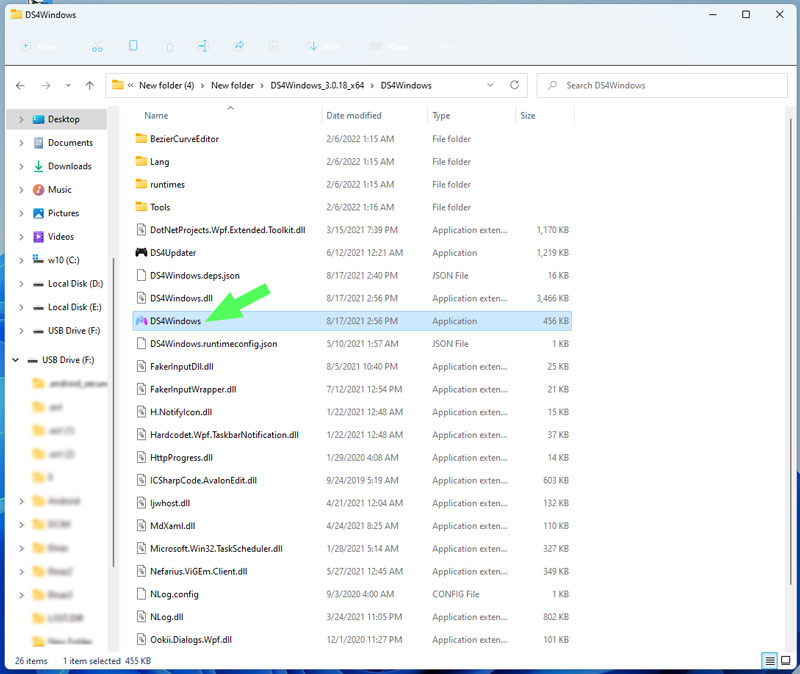
Step 3: Open the extracted file and double-click on the DS4Windows.exe.
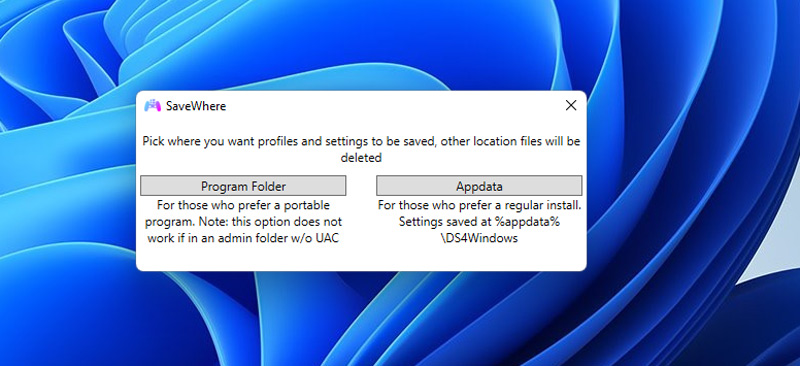
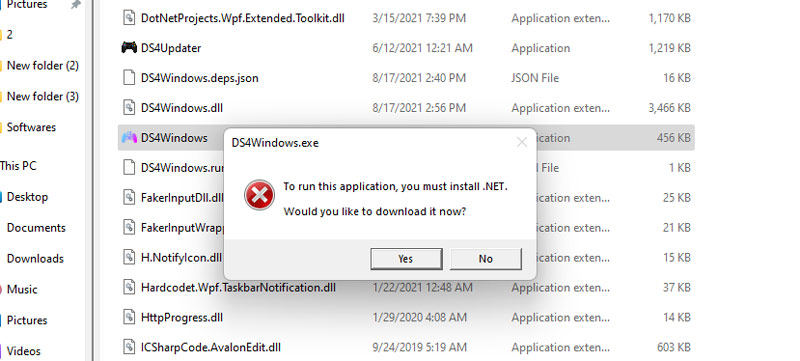
Step 4: Next, a dialog box pops up and asks you to select where to save profiles and settings. So, opt for Appdata.
Note: You may encounter a .NET Runtime error message. As discussed early in this article, .NET 5.0 Runtime is a prerequisite for this program. So, if you see the error, download .NET 5.0 Runtime.
Step 5: In this stage, follow the instructions given in the Welcome to DS4Windows steps to finish the installation.

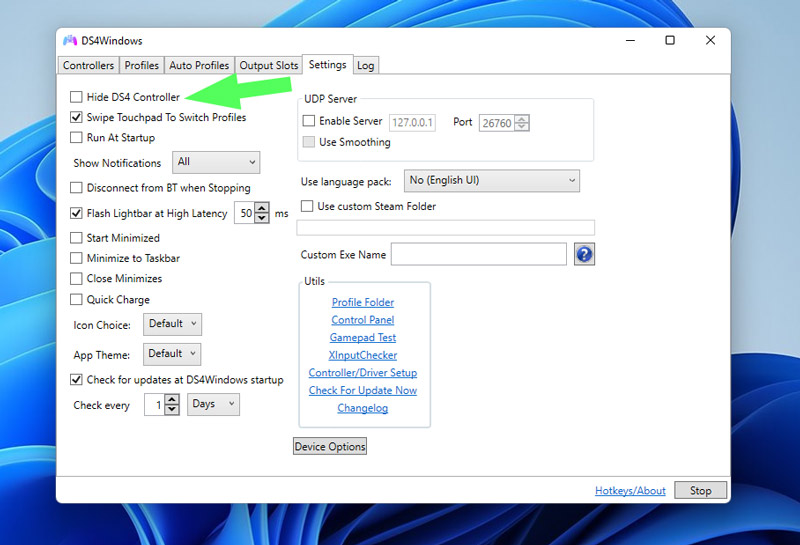
Step 6: Afterwards, you may look at the Settings tab and select the Hide DS4 controller button for double input connection issues.
It’s now time to see if DS4Windows is functioning correctly. If you’re still having problems with the app, continue to the next step.
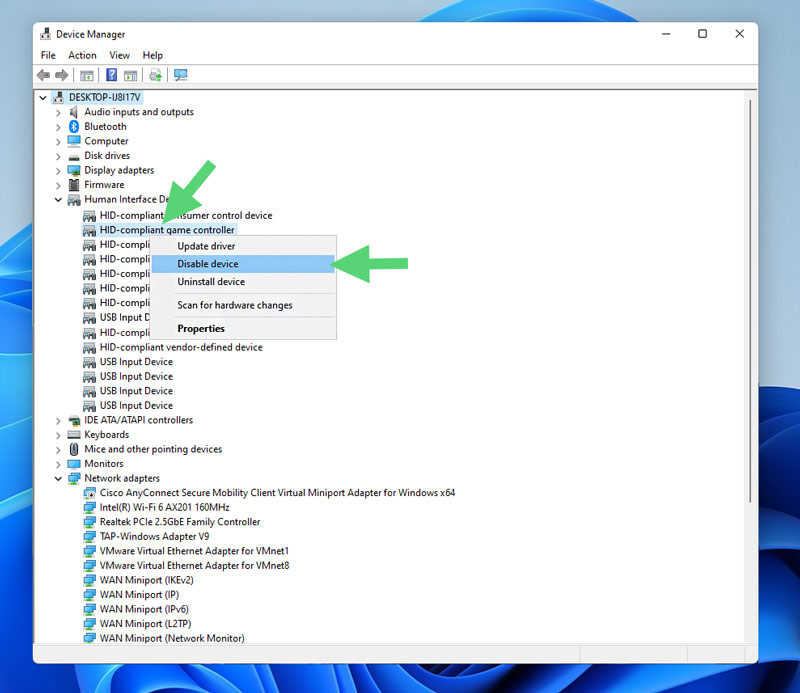
Method #5: Re-enable controller in device manager
If you still have problems detecting the controller, we suggest that you head over to the next solution, i.e., re-enabling the DS4 controller. To begin, do these steps:
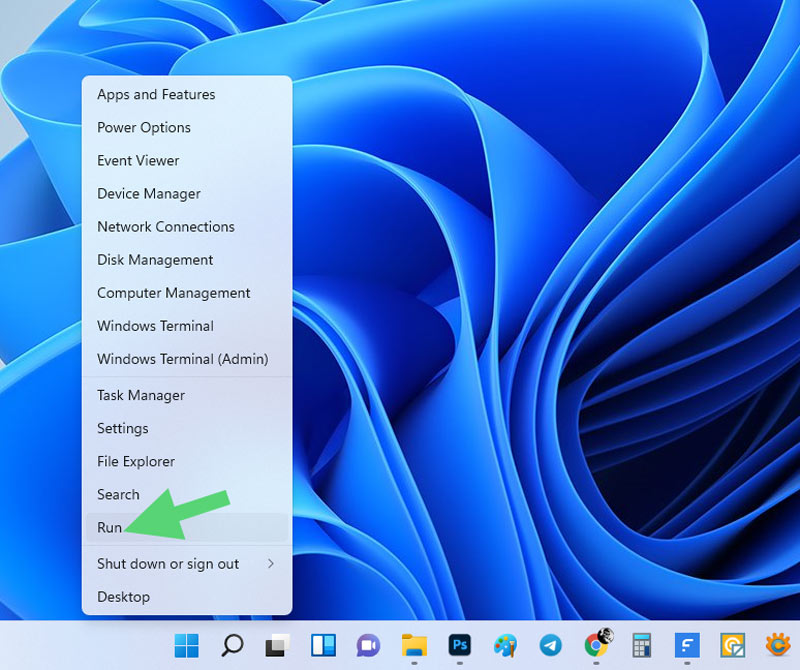
Step 1: To launch the Run prompt, right-click on the Start menu and select Run, or press the Windows + R keys simultaneously.
Step 2: Now, type devmgmt.msc in the box and hit Enter.
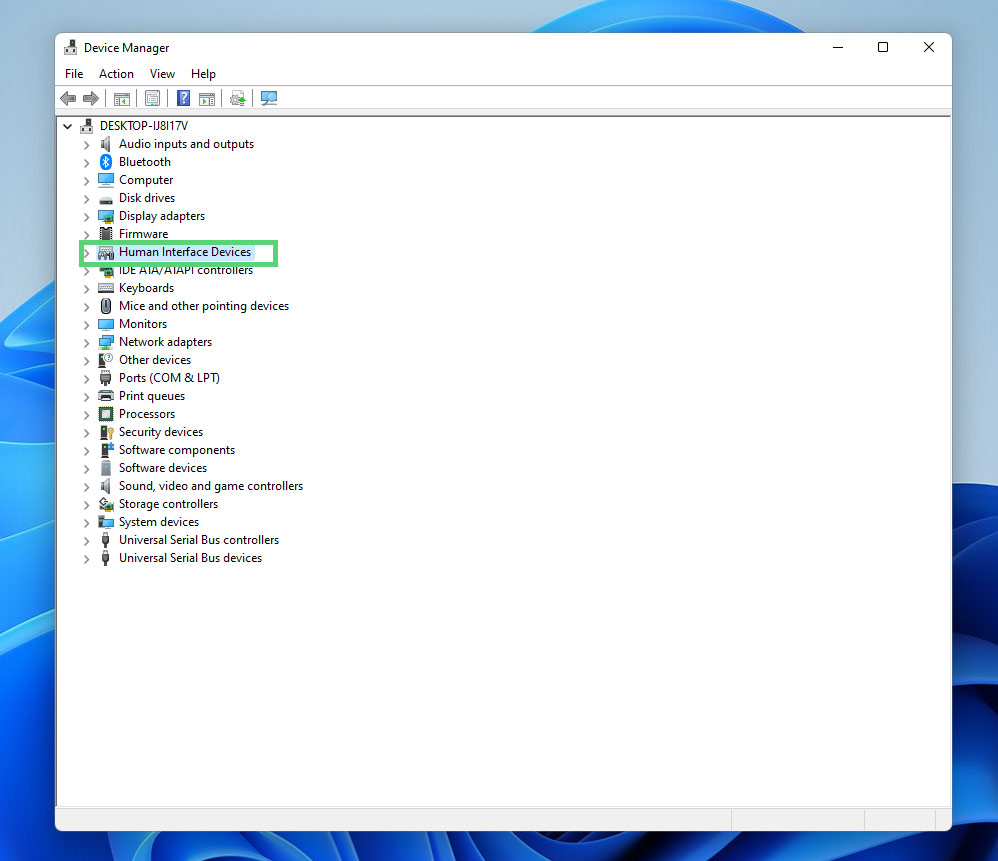
Step 3: Double-click on Human Interface Devices to see the drivers.
Step 4: Following that, right-click on the HID-compliant game controller and select Disable device.
Step 5: After a few seconds, right-click on the HID-compliant gaming controller again but select Enable device this time.
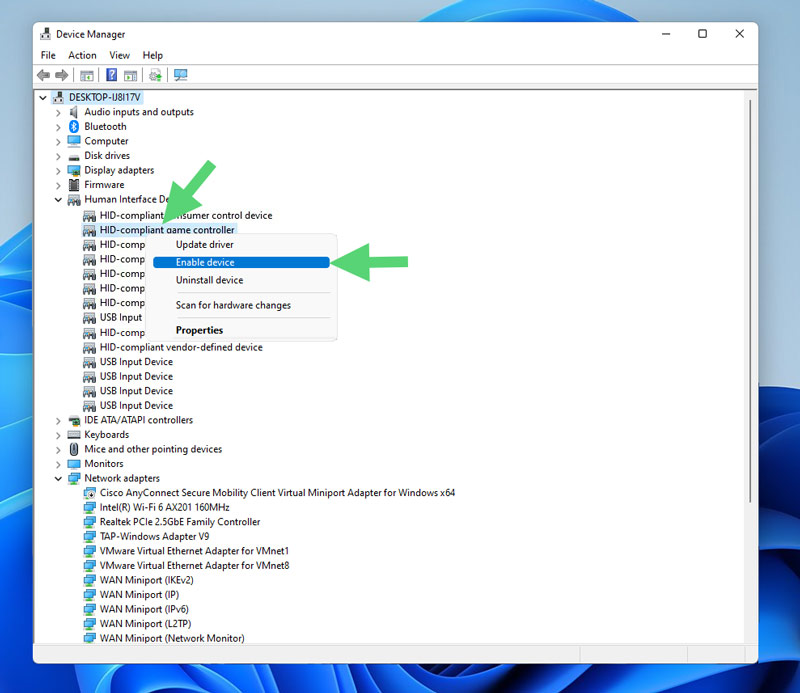
Step 6: Now, you can reset your computer to see if you are still getting DS4Windows, not working errors.
If this method doesn’t work, move on to the next solution.
Method #6: Restore Windows to the Previous State With RSTRUI.exe
Although this solution is not suggested, it is considered a last resort. You should be aware of losing personal data or some installed programs after Restoration. Anyway, to restore your Windows with the Rstrui.exe file, follow the below steps:
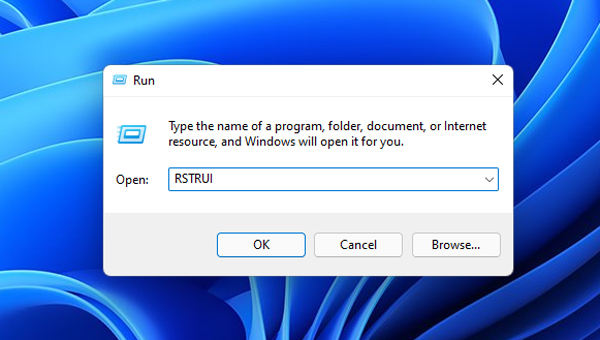
Step 1: Open your Run box by pressing Windows+R keys on your keyboard or right-click on the Start menu and select Run.
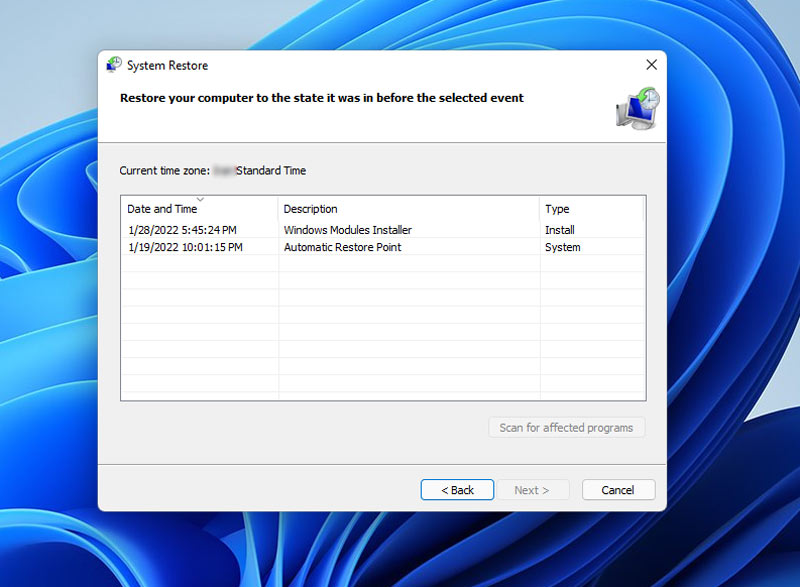
Step 2: Now, Type RSTRUI and click OK to launch System Restore.
Step 3: Following that, click Next.
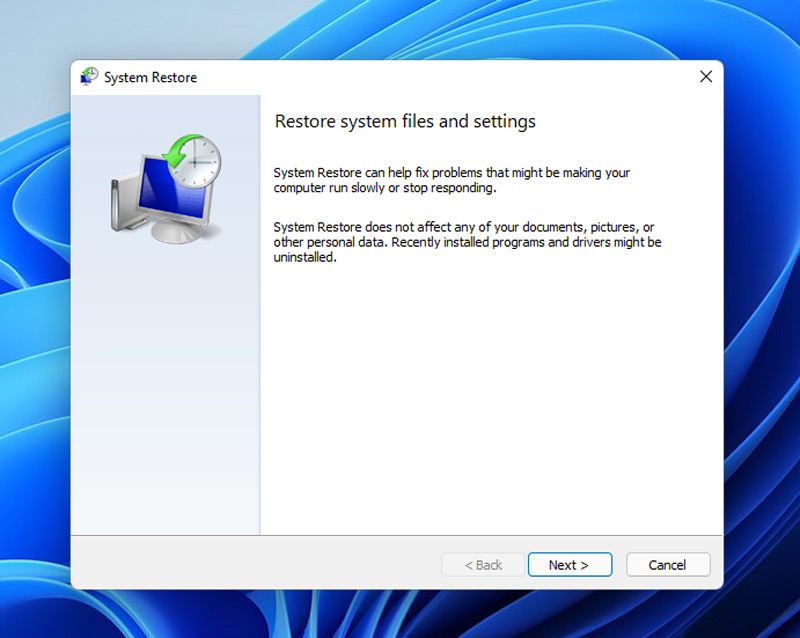
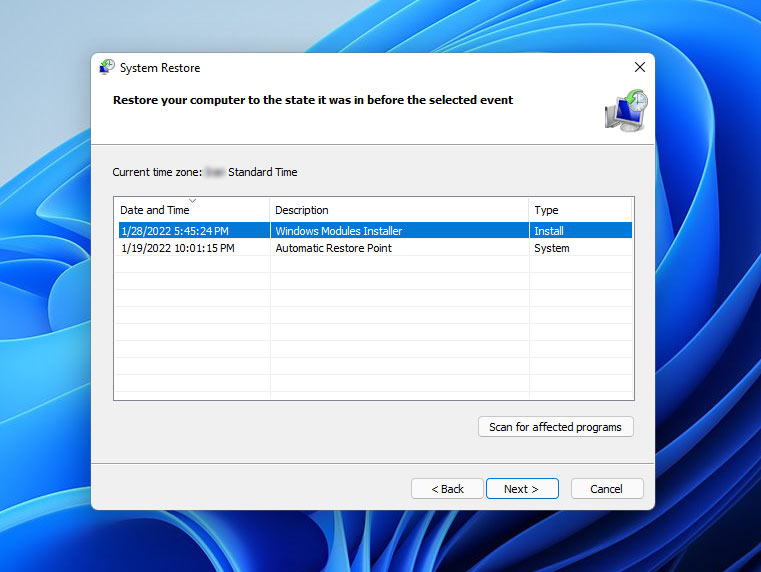
Step 4: You have two options at this stage. You can either select a date before installing DS4Windows or a date when it was working.
Note: When you restore your computer to its previous state, it will impact other apps as well. As a result, make a backup of your important data. You may also use the Scan for Affected Programs button to learn more about the changes.

Step 5: After selecting the desired time and date, click Next.
Step 6: Select Finish to begin restoring your computer to the specified time and date.
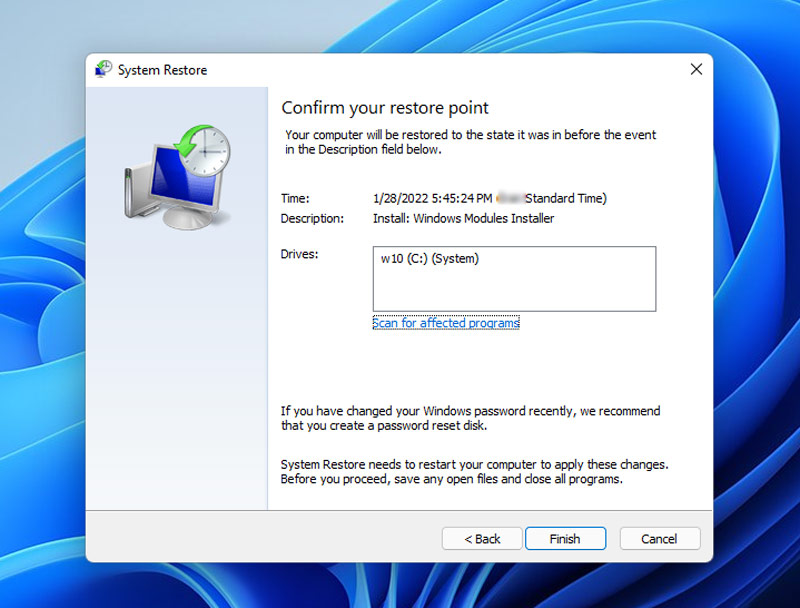
Step 7: Once the process is finished, your computer will restart to apply the changes. Afterwards, if DS4Windows is available on your computer, check to see if it is working. However, if you selected a date when you did not have the app on your PC, you can install it now.
Step 8: Next, restart your computer and see if the error has been resolved.
Final Words
DS4Windows is an emulator application that connects Xbox 360 and PlayStation controllers to Windows 11. However, there are times when you encounter an annoying DS4Windows not working error message on Windows 11.
As detailed in this article, there are several methods for resolving the DS4Windows not working issue.
However, the first three methods—checking the system requirements, updating the Bluetooth driver, and updating the DS4Windows application—have been shown to resolve the problem for most users.