Google Colab makes data science, deep learning, neural networks, and machine learning accessible to individual researchers who cannot afford costly computational infrastructure.
Machine learning and data science are the two new technologies in which all new-generation computer scientists want to excel.
But, practicing on projects becomes a constraint since you need high-end PCs for such workloads. The answer to this issue is Google Colaboratory or Colab, in short.
What Is Google Colab?
Google Colab is a Jupyter Notebook-like product from Google Research. A Python program developer can use this notebook to write and execute Python program codes just using a web browser.
In a nutshell, Google Colab is a cloud-hosted version of Jupyter Notebook. To use Colab, you do not need to install and runtime or upgrade your computer hardware to meet Python’s CPU/GPU intensive workload requirements.
Colab gives you free access to computing infrastructure like storage, memory, processing capacity, graphics processing units (GPUs), and tensor processing units (TPUs).
Google has specially programmed this cloud-based Python coding tool, keeping in mind the needs of machine learning programmers, big data analysts, data scientists, AI researchers, and Python learners.
The best part is one code notebook for all the components needed to present a complete machine learning or data science project to program supervisors or sponsors. For example, your Colab notebook can contain executable codes, live Python codes, rich text, HTML, LaTeX, images, data visualizations, charts, graphs, tables, and more.
How Does Google Colab Work?

Google Colab is simply an online representation of Jupyter Notebook. While Jupyter Notebook requires installation on a computer and can only use local machine resources, Colab is a full-fledged cloud app for Python coding.
You can write Python codes using Colab on your Google Chrome or Mozilla Firefox web browsers. You can also execute those codes on the browser without needing any runtime environment or command line interface.
Furthermore, you can give your Python project notebook a professional look by adding mathematical equations, graphs, tables, images, and other graphics. Additionally, you can code data visualizations in Python, and Colab will render the code in a visual asset.
Moreover, Colab lets you reutilize Jupyter Notebook files from GitHub. Apart from that, you can also import compatible machine learning and data science projects from other sources. Colab efficiently processes the imported assets to display clean and error-free Python codes.
9 Google Colab Features
1. GPUs and TPUs
Free Colab users get chargeless access to GPU and TPU runtimes for up to 12 hours. Its GPU runtime comes with an Intel Xeon CPU @2.20 GHz, 13 GB RAM, a Tesla K80 accelerator, and 12 GB GDDR5 VRAM.
The TPU runtime consists of an Intel Xeon CPU @2.30 GHz, 13 GB RAM, and a cloud TPU with 180 teraflops of computational power.
With Colab Pro or Pro+, you can commission more CPUs, TPUs, and GPUs for more than 12 hours.
2. Notebook Sharing
You can create shareable links for Colab files that are saved on your Google Drive. Share the link with the collaborator and fellow programmers who want to work with you.
3. Special Library Installation
Colab lets you install non-Colaboratory libraries (AWS S3, GCP, SQL, MySQL, etc.) that are unavailable in the Code snippets. All you need to do is add a one-liner code with the following code prefixes:
!pip install (example: !pip install matplotlib-venn)!apt-get install (example: !apt-get -qq install -y libfluidsynth1)4. Pre-installed Libraries
Google Colab offers multiple pre-installed libraries so that you can import the required library from Code snippets. Such libraries include NumPy, Pandas, Matplotlib, PyTorch, TensorFlow, Keras, and more ML libraries.
5. Collaborative Coding
Co-coding is indispensable for group projects. It helps your team to complete milestones earlier than the expected time frame. If your team needs real-time collaboration on ML and data science projects, Google Collaborative is just the tool.
Simply send an editable link with the collaborators or invite collaborators for group coding. The entire Python notebook updates automatically as the team codes, and you get the feeling of working on shared Google Sheets or Docs.
6. Cloud Storage
Google Colab uses your Google Drive storage quota for file-saving purposes. Hence, you can resume work from any computer on which you can access your Google Drive account.
Cloud storage also functions as a backup of your data from any disasters.
7. GitHub Integration
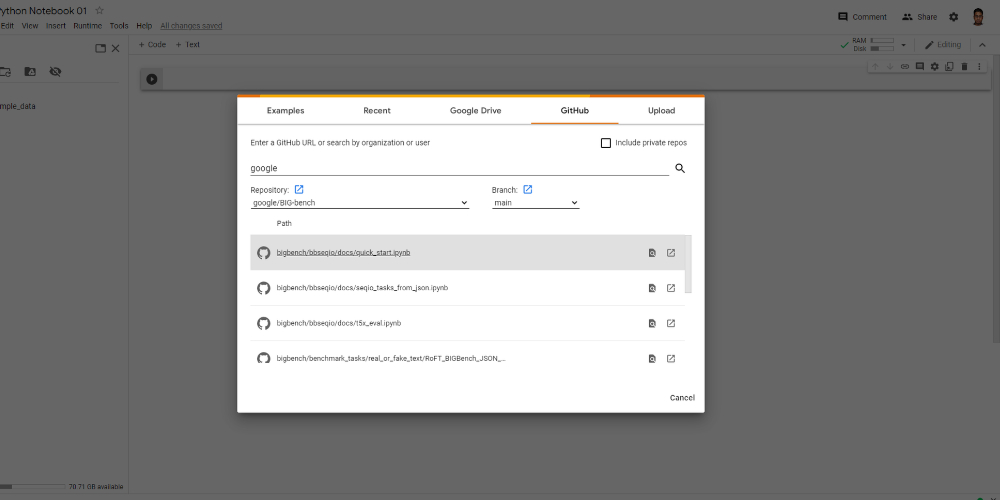
You can link your GitHub account with Google Colab to push and pull code files. For import, you can press Ctrl+O and click on the GitHub tab to get code files. On the contrary, simply click on Save a copy to GitHub from the File menu to send files to GitHub.
8. Multiple Data Sources
Google Colaboratory supports various data sources for your ML and AI training projects. For example, you can import data from a local machine, mount Google Drive to a Colab instance, fetch remote data, and clone the GitHub repo into Colab.
9. Automatic Version Control
Like Google Sheets and Docs, Google Colab also has an exhaustive history tracker. The module tracks all the changes made since the file creation. You can access the logs from the File menu and click the Revision History option.
Why Should You Choose Google Colab?
- Google Colaboratory is a cloud-based tool. You can start coding fantastic ML and data science models using your favorite browser like Chrome.
- Colab is free of charge with limited resources. However, you should not expect that you can store your artificial intelligence or machine learning models indefinitely on Colab’s free infrastructure.
- Free access to GPUs and TPUs for extensive data science and machine learning models.
- It comes with pre-installed and popular data science libraries.
- You can easily share the code notebook with collaborators for real-time coding.
- Since Google hosts the notebook on Google Cloud, you do not need to worry about code document version control and storage.
- You can train AI using images.
- You can train models on audio and text.
- You can run TensorFlow programs on Colab.
How to Use Google Colab
You can use Google Colaboratory if you meet the following minimum requirements:
- A Google account to experience all the convenience of Colab.
- A computer that can run the latest Google Chrome (recommended) or Mozilla Firefox browser
- Accept Google data usage terms and conditions.
You can access Google Colaboratory from its official website. Colab is free; however, limited resource allocations are not always guaranteed. If you need more speed and processing capabilities with guaranteed resources, you can get Colab Pro or Pro+.

For some data science and machine learning models suited for Colab, you can check out Google Seedbank.
Google Colab vs. Jupyter Notebook
| Code Doc Features | Google Colaboratory | Jupyter Notebook |
|---|---|---|
| Instant code file viewing | Yes | No |
| Code doc sharing | Yes | No |
| Installed libraries | Yes | No |
| Cloud hosting | Yes | No |
| Syncing files | Yes | No |
Executing Common Tasks on Google Colab
#1. Create a Notebook

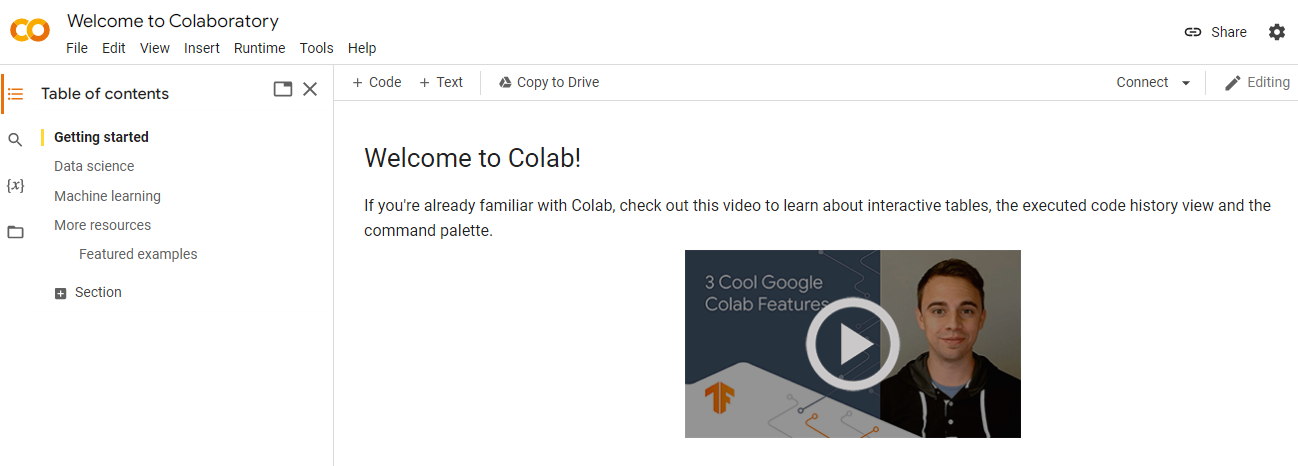
- Go to the Google Colab portal and see, “Welcome to Colab!”
- On the top menu, click on File.
- From the File context menu, choose New notebook.
- Your new Python notebook is ready. You may rename the notebook file.
#2. Upload and Download Files
You can upload local Python codes to Colab by following these steps:

- On the top menu, click File.
- A context menu will open with many options.
- Find Upload notebook and click on it.
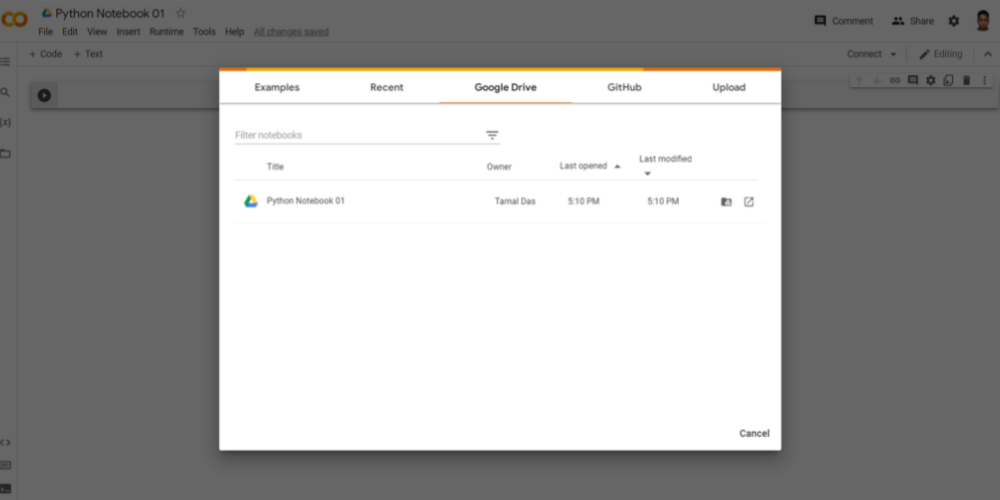
- You will now see an overlaid console with options like Examples, Google Drive, GitHub, and Upload.
- Click on any tab and select the code content you want to upload.
Downloading your in-progress or finished project is also super easy. Here are the steps:

- Click on the File menu located on the top menu bar.
- Hover the cursor over Download.
- A context menu will open with two download file format options: .ipynb and .py.
- You can choose a preferred format and download the file.
#3. Access GitHub
Accessing GitHub is just a breeze in Colab. Here is what you can do:

- Click File on the top menu bar.
- Select Upload Notebook from the context menu.
- A console with a GitHub tab will open.
- Alternatively, you can press Ctrl+O to access the same console.
- GitHub search options are GitHub URL, user name, and organization’s name.
#4. Access Local Files
- Press Ctrl+O on your new Colab notebook.
- Select the Upload tab on the console that appears.
- Click Choose File to locate the local file you want to open on Colab.
#5. Access Google Drive

- Click File on the upper menu.
- You can select Open Notebook or Upload Notebook.
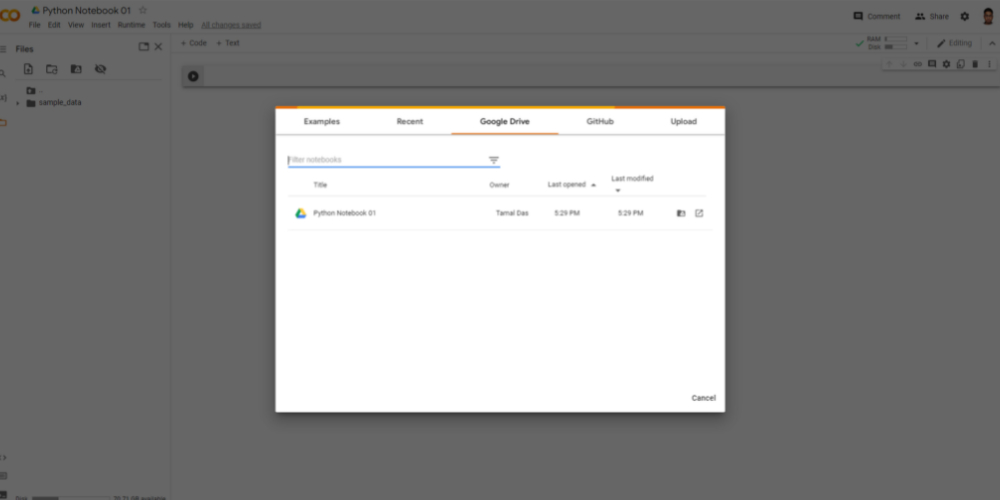
- A console will appear with a tab for Google Drive.
- Click on that to access files from Google Drive.
If you would like to mount Google Drive to your Colab instance, follow these steps:

- Click on File located on the left navigation pane.
- Select the Mount Drive command.
- On the notification that appears, select Connect to Google Drive.
- Google will ask you to choose an account for authorization.
#6. Save to and Import From Google Sheets
You can save your notebook data effortlessly to a Google Sheets file for further processing. To do so, try these steps:

- Click the Code Snippets button at the bottom left corner.
- A navigation pane will open on the right side.
- Type Sheets in the filter, and you will find Saving data and Importing data code snippets.
- Double-click on the title to include the code in the notebook.
#7. Access AWS S3
You can access files and coding assets from cloud storage platforms like AWS S3 and Azure Blob by using cloud storage buckets.

To do this, you must install ByteHub, which has the functionalities for loading and saving data onto cloud storage. You may run the following code:
!pip install -q bytehub[aws] Access Kaggle Datasets

- Go to the Kaggle account and click on Expire API Token from the API section to remove old tokens.
- Create New API Token to get the kaggle.json on the local computer.
- Now use the following code to install Kaggle:
!pip install -q kaggle- Now, upload the Kaggle.json file to the Python code base, following a standard coding practice.
Conclusion
I hope by now you have an idea about what Google Colab is, how to access and reasons to use it. The best way to learn is by practicing it.

