Changing margins in Google Docs can improve the readability and formatting of your document.
Whether you’re adjusting them for printing, better spacing, or specific formatting guidelines, this quick guide will walk you through different methods to change margins in Google Docs.
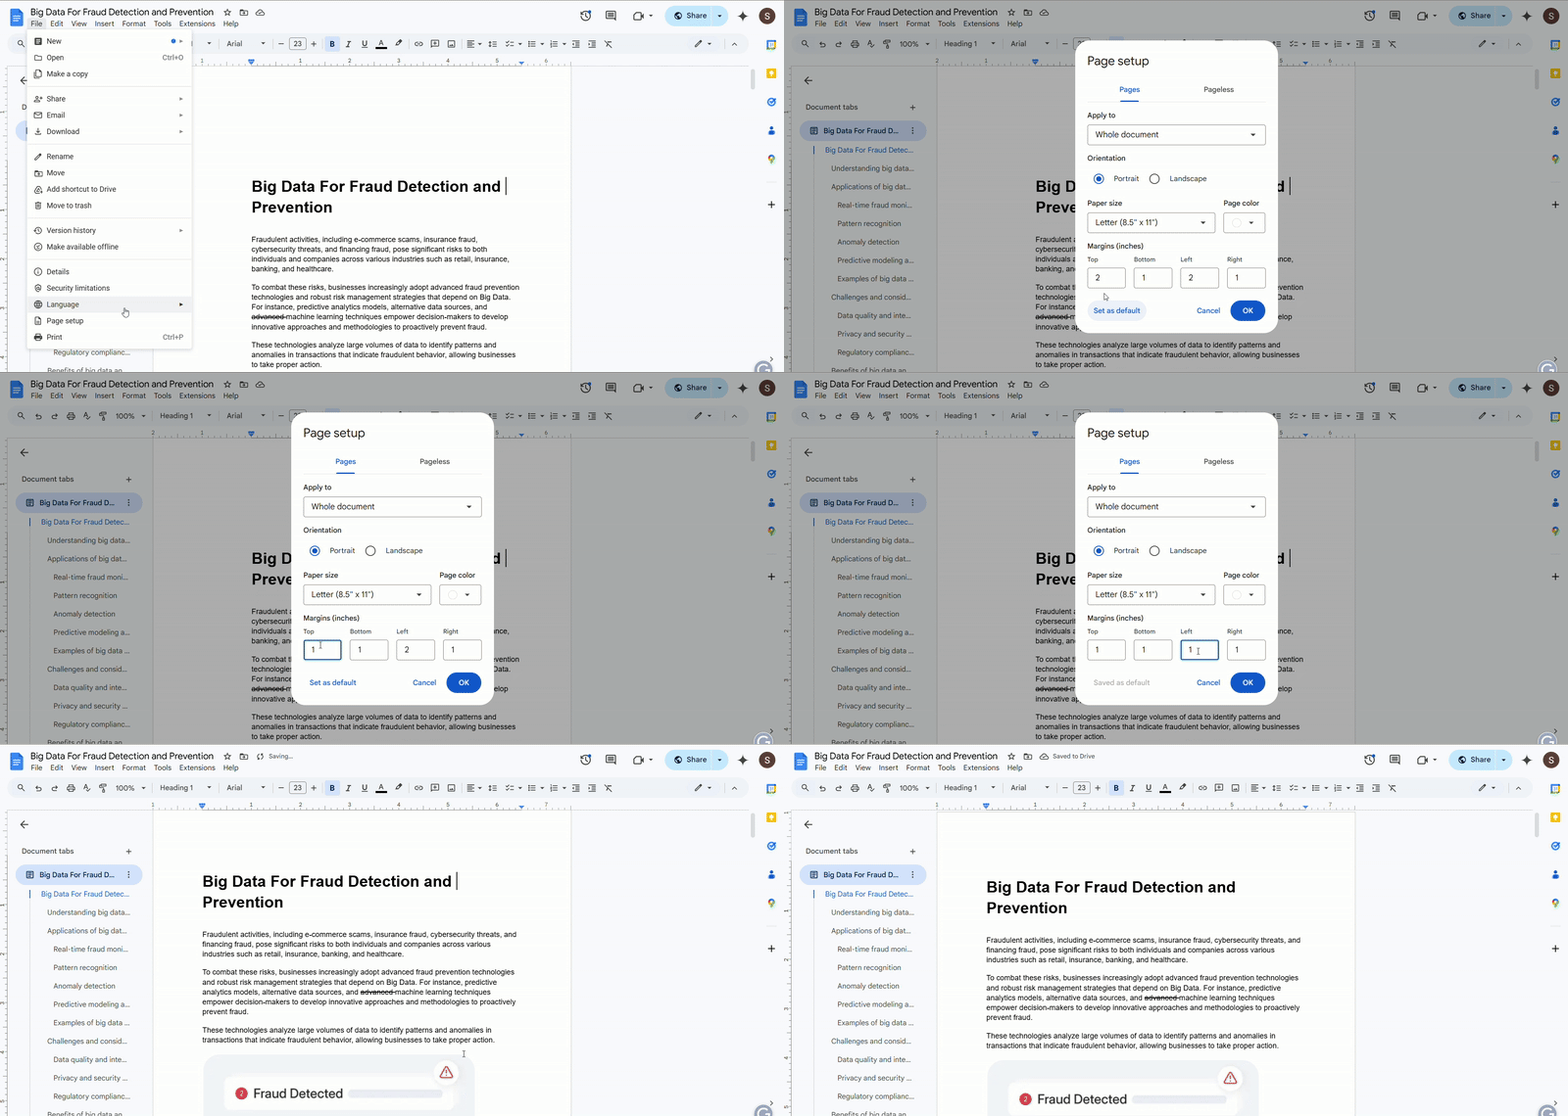
Easy Way to Change Margins in Google Docs Using Page Setup
For easy margin control, the Page Setup method is the most straightforward approach.
Steps to Change Margins via Page Setup:
- Open your document in Google Docs.
- Click File > Page Setup.
- In the Page Setup window, locate the margin fields (Top, Bottom, Left, Right).
- Enter your desired margin values in inches.
- Click OK to apply the changes.
- (Optional) Click Set as Default if you want to use the same margins for future documents.
Other Ways to Change Margins in Google Docs
1. Change Margins Using the Ruler (Quick Method)
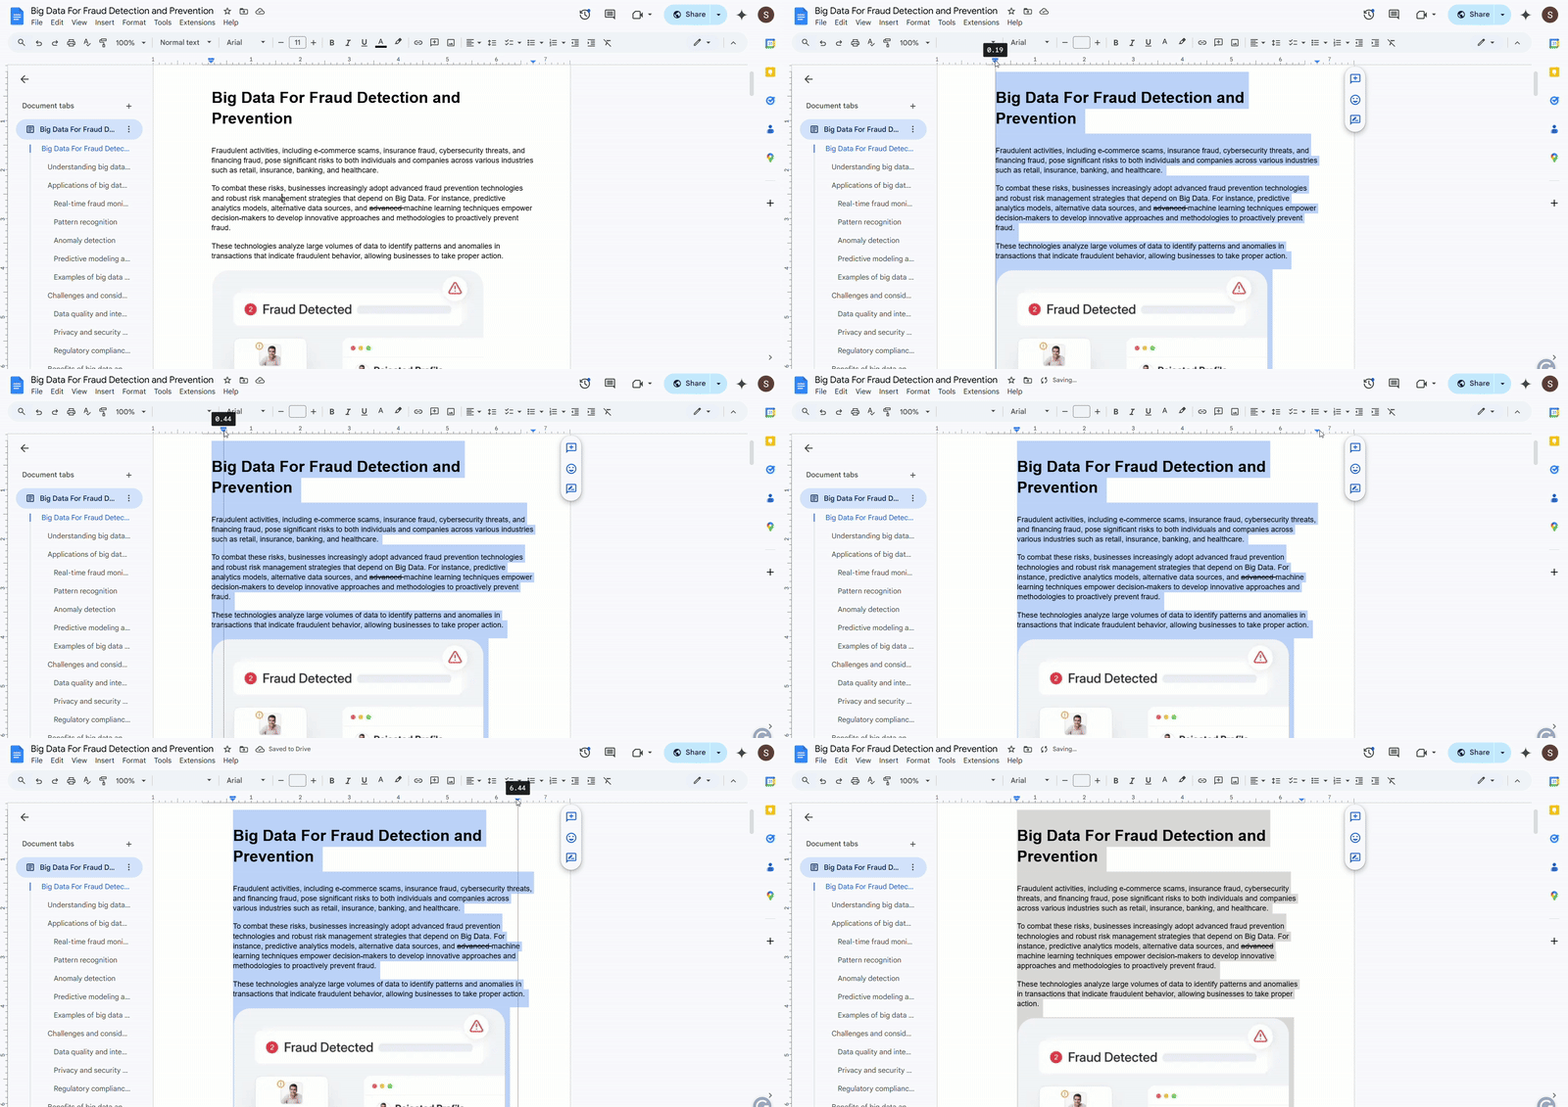
For a more interactive approach, you can adjust margins using the ruler at the top of the document.
Steps to Adjust Margins Using the Ruler:
- Ensure the ruler is visible by clicking View > Show Ruler.
- Locate the gray and blue markers on the ruler.
- Click and drag the left or right margin markers to adjust margins.
- Release the mouse to apply the changes.
This method allows for quick adjustments without needing to open the Page Setup window.
2. Adjust Margins for Specific Paragraphs Using Indentation
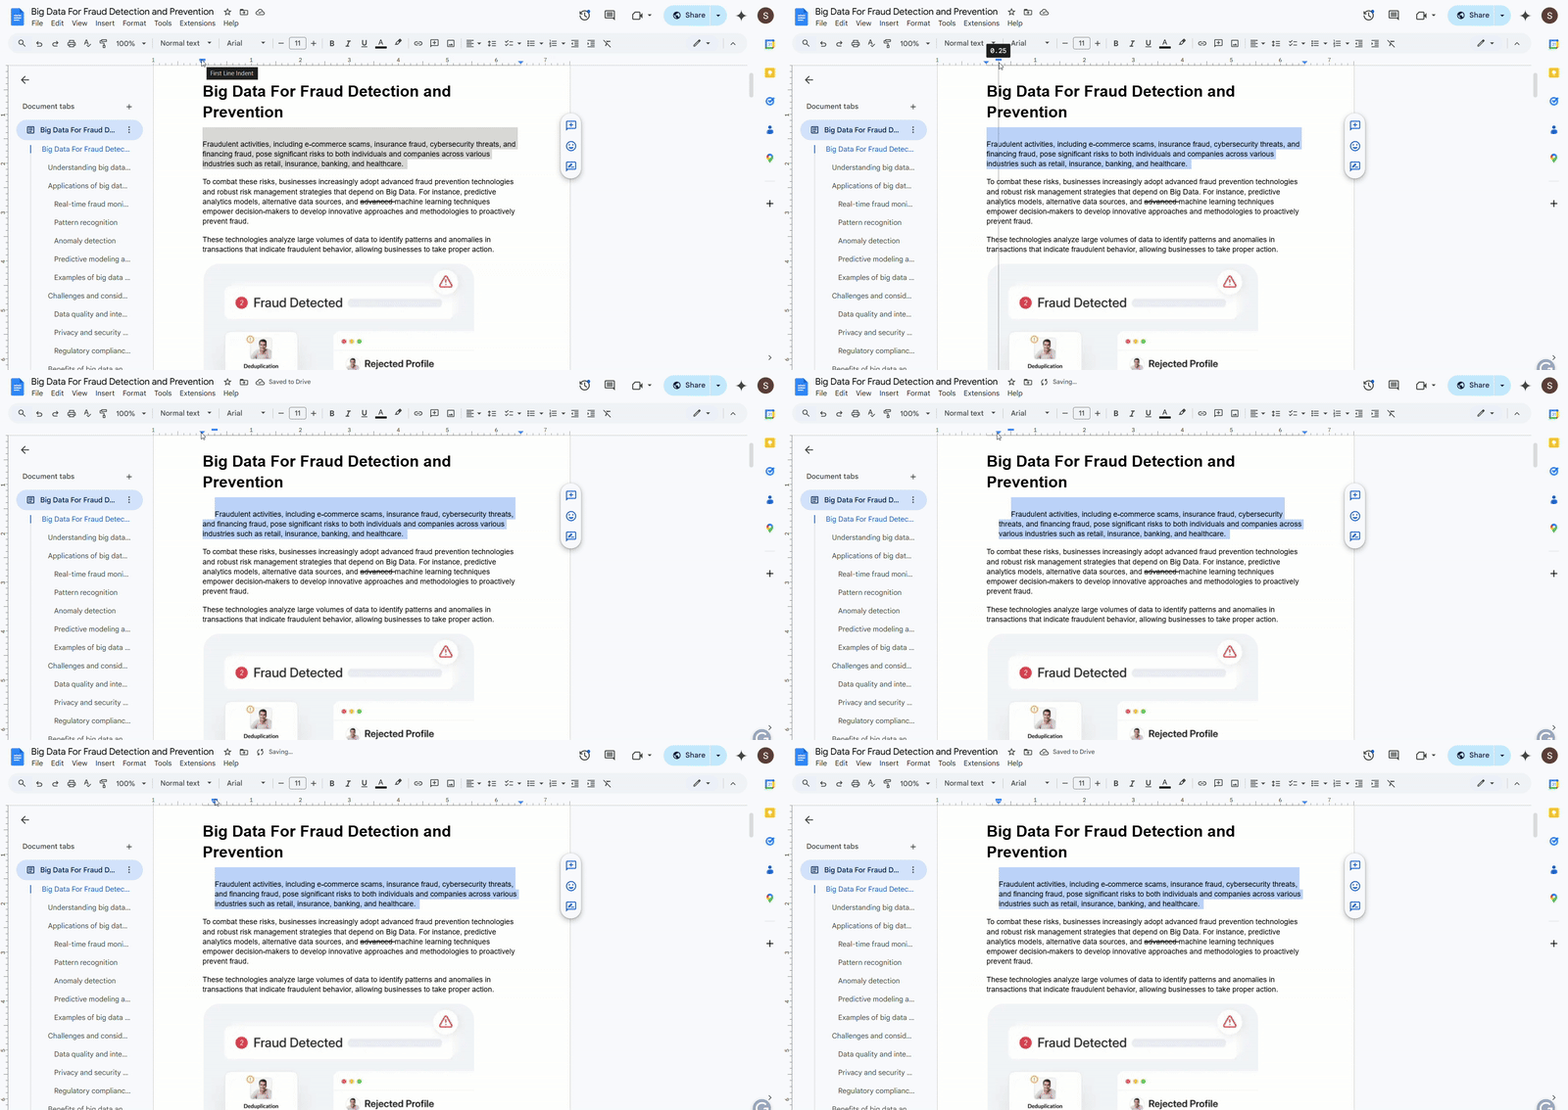
If you need to change the margins for specific paragraphs rather than the entire document, adjusting indentation is the best method.
Steps to Adjust Paragraph Indentation:
- Highlight the paragraph you want to modify.
- Ensure the ruler is visible (View > Show Ruler).
- Use the blue triangular markers to set left and right indentation.
- Adjust the first-line indent marker (top triangle) if needed.
This method is useful for block quotes, citations, and formatting specific sections differently from the rest of the document.
3. Use Google Docs Add-ons for Advanced Margin Control
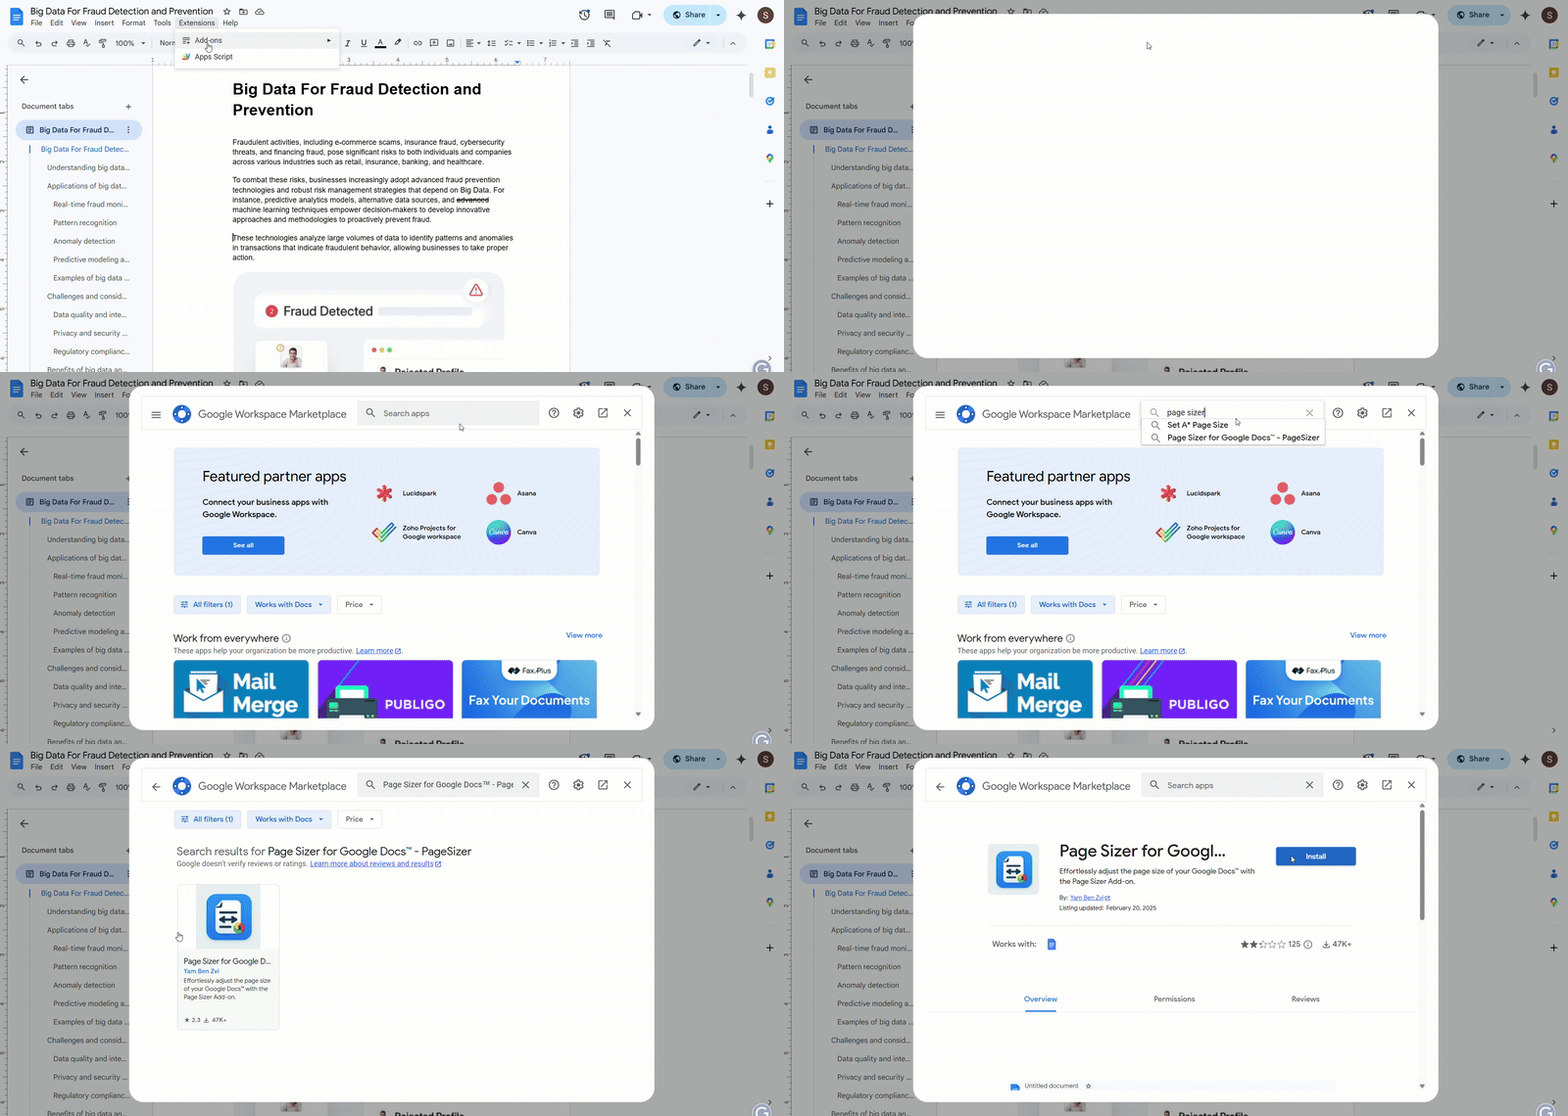
For specialized formatting, add-ons can provide additional margin customization features.
Steps to Install & Use Add-ons:
- Go to Extensions > Add-ons > Get Add-ons.
- Search for formatting tools like Page Sizer.
- Click Install and allow necessary permissions.
- Open the add-on and set your custom margins.
This method is ideal for legal documents, publishing, or other advanced formatting needs.
4. Create Custom Templates with Predefined Margins
If you frequently use the same margin settings, creating a template can save time.
Steps to Create a Template:
- Adjust your margins using Page Setup.
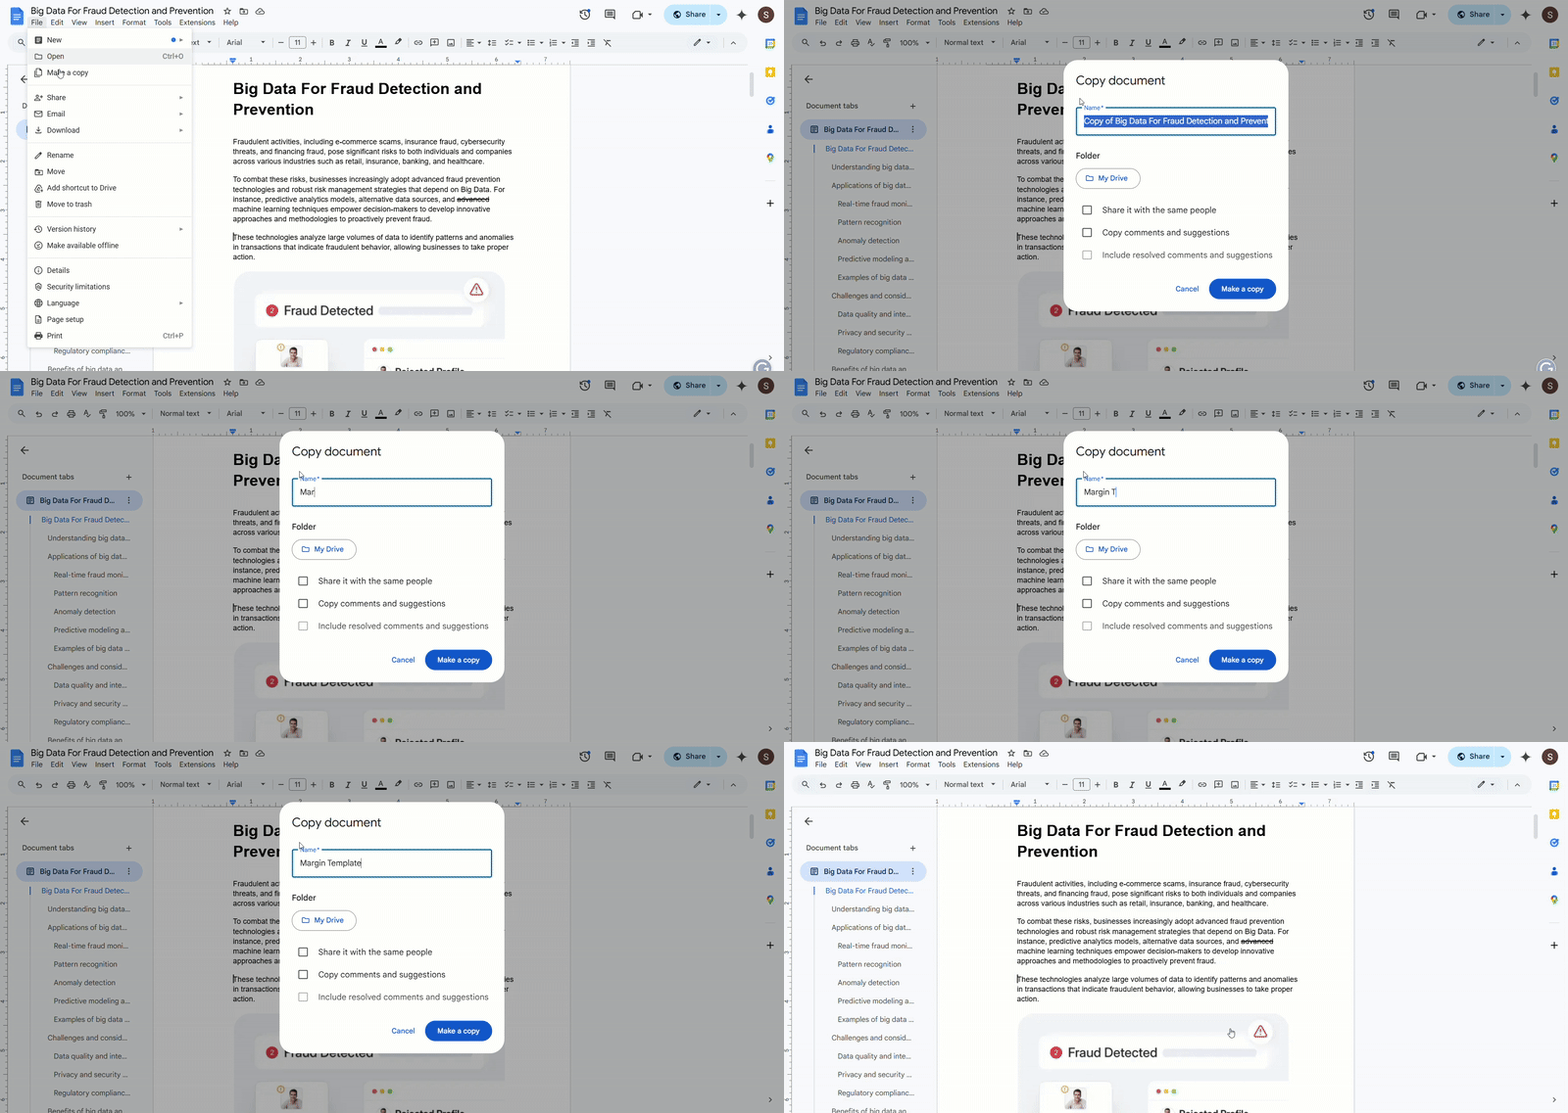
- Click File > Make a Copy and rename the document as a template.
- Store it in Google Drive for easy access.
This method is useful for team collaboration or branding consistency.
5. Use Tables to Create Section-Specific Margins
If you need different margins for specific sections, using tables can be a useful workaround.
Steps to Use Tables for Custom Margins:
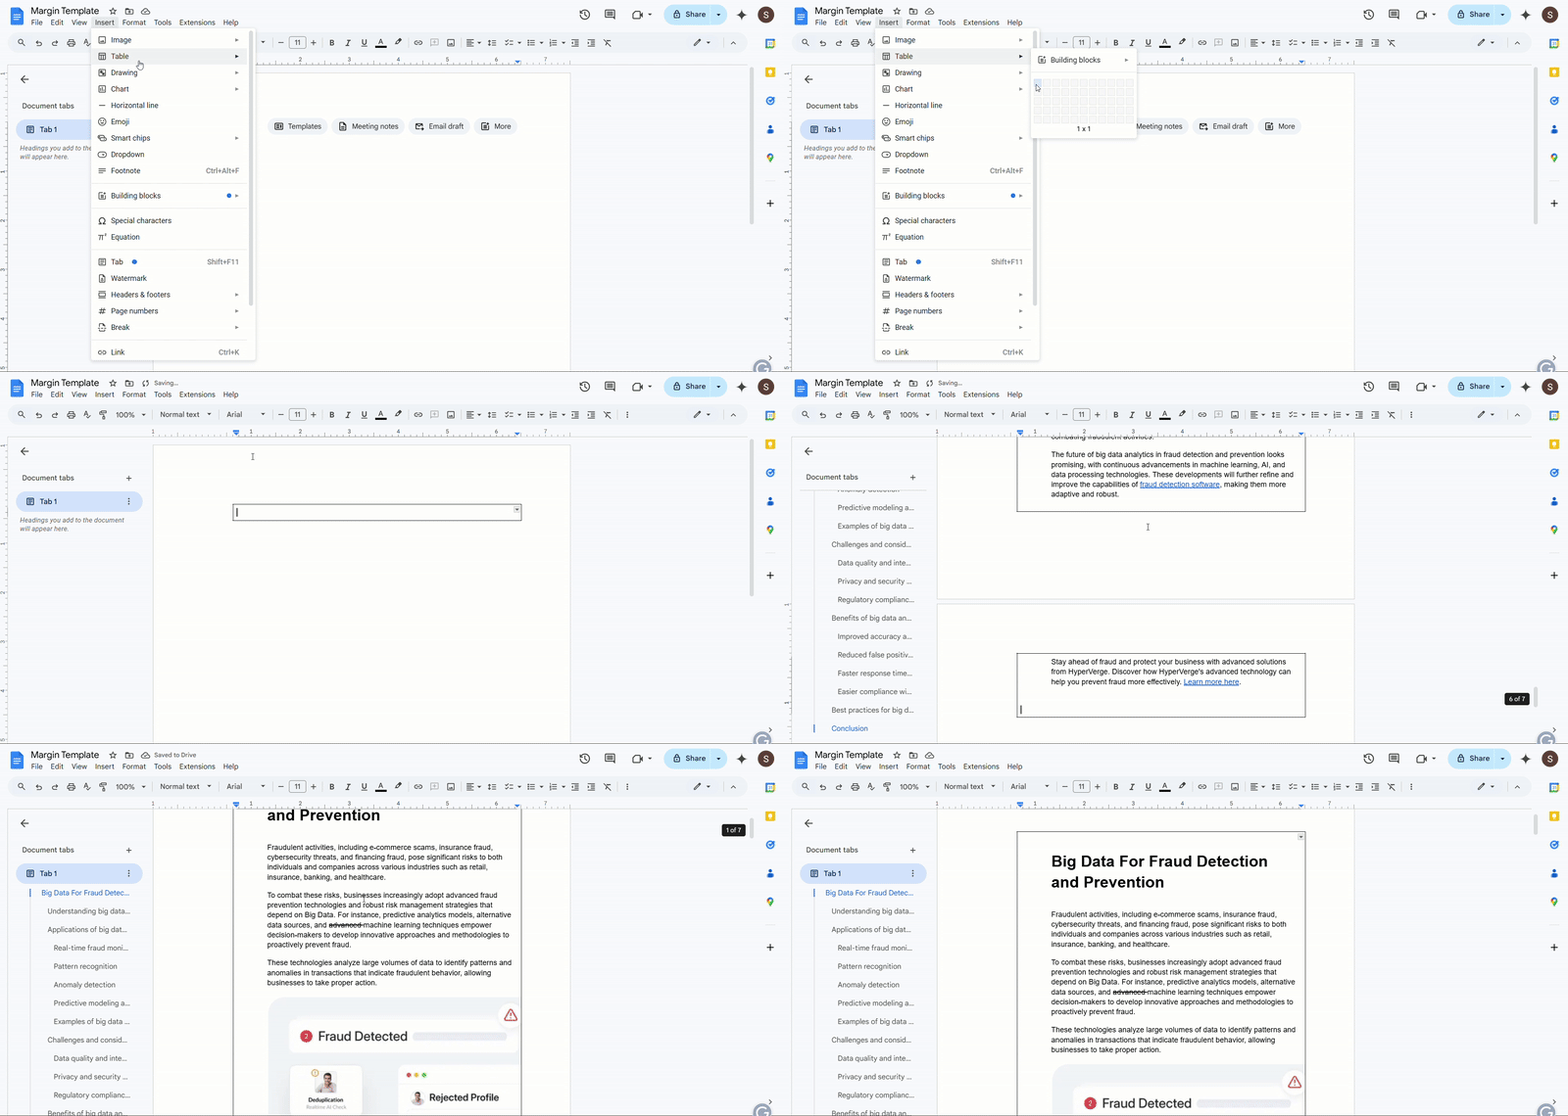
- Insert a single-cell table (Insert > Table > Select 1×1).
- Resize the table to match the desired section size.
- Remove the border (Right-click > Table Properties > Set border color to white).
- Enter content inside the table and adjust spacing manually.
This method is often used for resumes, reports, or creative formatting needs.
Explore more on Google Docs
-
 EditorRashmi Sharma is an editor at Geekflare. She is passionate about researching business resources and has an interest in data analysis.


