On 6th June 2022, Apple launched the much-awaited macOS 13 Ventura, replacing the macOS 12 Monterey. The new OS certainly created a buzz among Mac users. It enhanced the overall experience of the Macbook to a new level with its feature-rich ambiance.
However, some old-school Macs, the decade-old models with outdated hardware, struggle to get an official upgrade offer to macOS Ventura. And we all know Apple does it often to its Mac users.
A team of developers caught hold of this and created software that can help users experience the new macOS in their age-old systems.
The software is coined as OpenCore Legacy Patcher (OCLP).
What is OpenCore Legacy Patcher
OpenCore Legacy Patcher (OCLP) is a python-based project that allows old macs to achieve a near-native experience of macOS Ventura and other recent OS without official support from Apple.
The software runs on the same OpenCore bootloader used to run macOS on non-Apple hardware, also known as a Hackintosh.
The OpenCore bootloader helps install macOS Ventura on an old, unsupported Mac, ignoring the hardware incompetence and seaming the OS incompatibility. Amazing, isn’t it?
Furthermore, to stay put to its core purpose, OCLP is accustomed to frequent updates for features, fixes, and compatibility. So how did something like OCLP come into play?
The idea dates back to when Apple discontinued a specific Mac model with the latest version of macOS; that version usually still ran on other Macs that shared the same CPU as the discontinued Mac.
However, the hardware differences between “supported” and “discontinued” Macs could be so small that for running a new macOS version on unsupported mac models, you only need to trick the bootloader into thinking it was running on a slightly newer Mac.
And the developers behind OCLP gave this idea a green flag. In the next section, we’ll see how the idea was made possible.
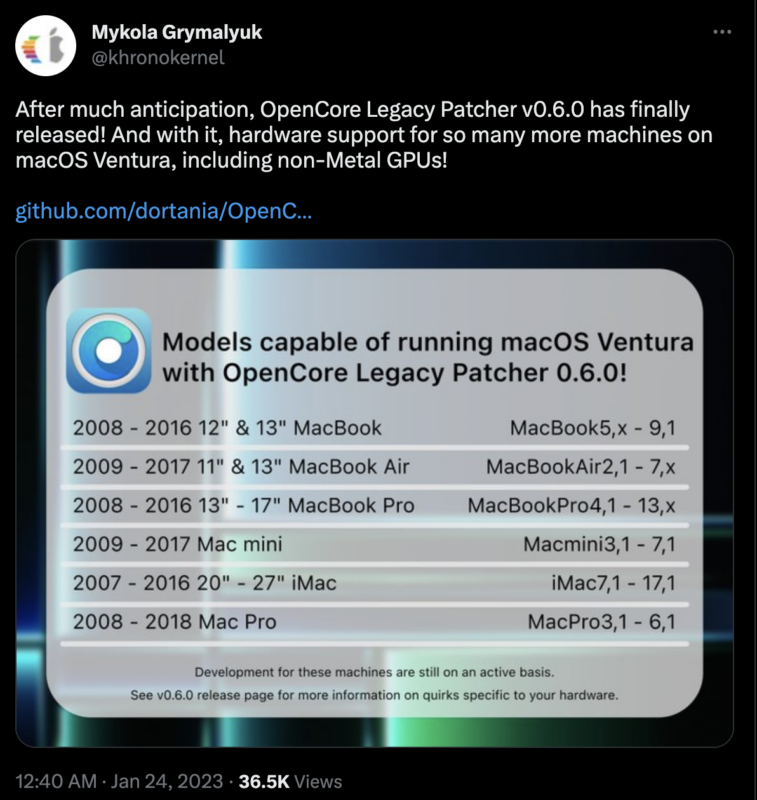
As of now, OpenCore is limited to running macOS Ventura on these selected Mac models:
- 2008 – 2016 MacBook
- 2009 – 2017 MacBook Air
- 2008 – 2016 MacBook Pro
- 2009 – 2017 Mac mini
- 2007 – 2017 iMac
- 2008 – 2013 Mac Pro
If you didn’t find your device on the list above, check the full list on GitHub.
How Does OCLP Work?
OpenCore is a free replacement for Apple UEFI and iBoot (Apple’s bootloader) software.
The Unified Extension Firm Interface (UEFI) is a low-key software that acts as a bridge between the hardware’s firmware and the operating system’s software.
So with both these core replacements combined, OpenCore efficiently replicates the behaviors MacOS expects from its UEFI and iBoot.
Thereby tricking the Mac into running an upgraded macOS on an unsupported system.
The process is so seamlessly efficient that it can run on legacy Mac products and computers from other manufacturers.
But how does OCLP actually work? Here’s a brief overview of its working:
- First, the tool detects the user’s hardware configuration and generates a configuration file for the OpenCore bootloader, customized to work with the specific hardware.
- Then, it downloads and installs the necessary kexts (kernel extensions) and drivers that are required for the system to boot and function properly.
- The tool patches certain system files, such as the macOS kernel, to enable compatibility with the hardware and the OpenCore bootloader.
- Finally, the tool installs the OpenCore bootloader, which allows the user to boot into macOS and manage the boot process for the system.
Mac Ventura Changes by Apple
Apple made some significant changes for macOS Ventura, which gave a tough time for OCLP developers, like:
- macOS Ventura doesn’t officially support any Intel CPUs older than the 7th generation
- Removed drivers, including GPU drivers, AMD GPUs, Intel Ethernet controllers, and more
- Removed USB support and non-force touch trackpads
But these were the tip of the iceberg. Apple jumped a few steps ahead to remove support for older x86 processors that don’t support the AVX2 instruction set.
The AVX2 instruction set instructs the OS to boot on certain CPUs or Macbooks officially supported by Apple.
Simply put, Apple restricted the OS from booting on CPUs without those instructions.
So, typically, Apple did it all to ensure that macOS Ventura specifically runs on MacBook (2017 and later), MacBook Air (2018 and later), and MacBook Pro (2017 and later).
But the hurdles were well accepted by the developers of OCLP.
A tweet by Mykola Grymalyuk, product lead at OCLP, cleared the air around using macOS Ventura on old macs.
Key Features of OCLP
#1. Hardware Compatibility
OpenCore Legacy Patcher provides hardware compatibility for unsupported Mac devices. This tool is designed to support a wide range of the latest and discontinued Mac devices.
Besides, you can enjoy native Over the Air (OTA) system updates. Over the Air (OTA) update is the ability to quickly deliver a new version of the software that bypasses the App Store and Play Store review process.
So that without requiring any official permissions, OCLP can offer users with time-sensitive updates.
#2. Bootloader
OpenCore uses a bootloader to enable the booting of macOS Ventura on unsupported hardware.
The bootloader provides a means to load the operating system on the computer’s hardware, regardless of whether Apple officially supports the hardware. You can unlock features such as Sidecar and AirPlay to Mac, even on native Macs.
#3. Configuration
Using OCLP, you can customize the macOS installation.
The configuration interface enables users to specify the hardware they are using, the boot options they want to use, and the drivers they need to install.
Users can also select which macOS version they wish to install; the present OCLP version supports macOS Big Sur, Monterey, and Ventura.
#4. Automated Patching
OpenCore Legacy Patcher provides an automated patching process that enables users to quickly and efficiently patch their macOS installation. The patching process is designed to be fast and reliable, ensuring that the macOS installation is fully functional on the user’s hardware.
#5. Community Support
OpenCore Patcher Paradise Discord Server is a community server for OpenCore users with a respectful userbase who support and assist other users.
The community provides resources and documentation to help troubleshoot any issues you might encounter with the tool. It also ensures that users have access to the information and resources they need to use OpenCore Legacy Patcher successfully.
#6. Security
OpenCore comes with a secured and protected environment. It has built-in System Integrity Protection, im4m Secure Boot and Vaulting, and FileVault 2. Furthermore, you can also quickly recover OS, enable Safe Mode, and enjoy single-user Mode booting on non-native OS.
Install macOS Ventura Using OCLP
To get started, visit OpenCore Legacy Patcher > Supported models, to see if your mac would support the software.
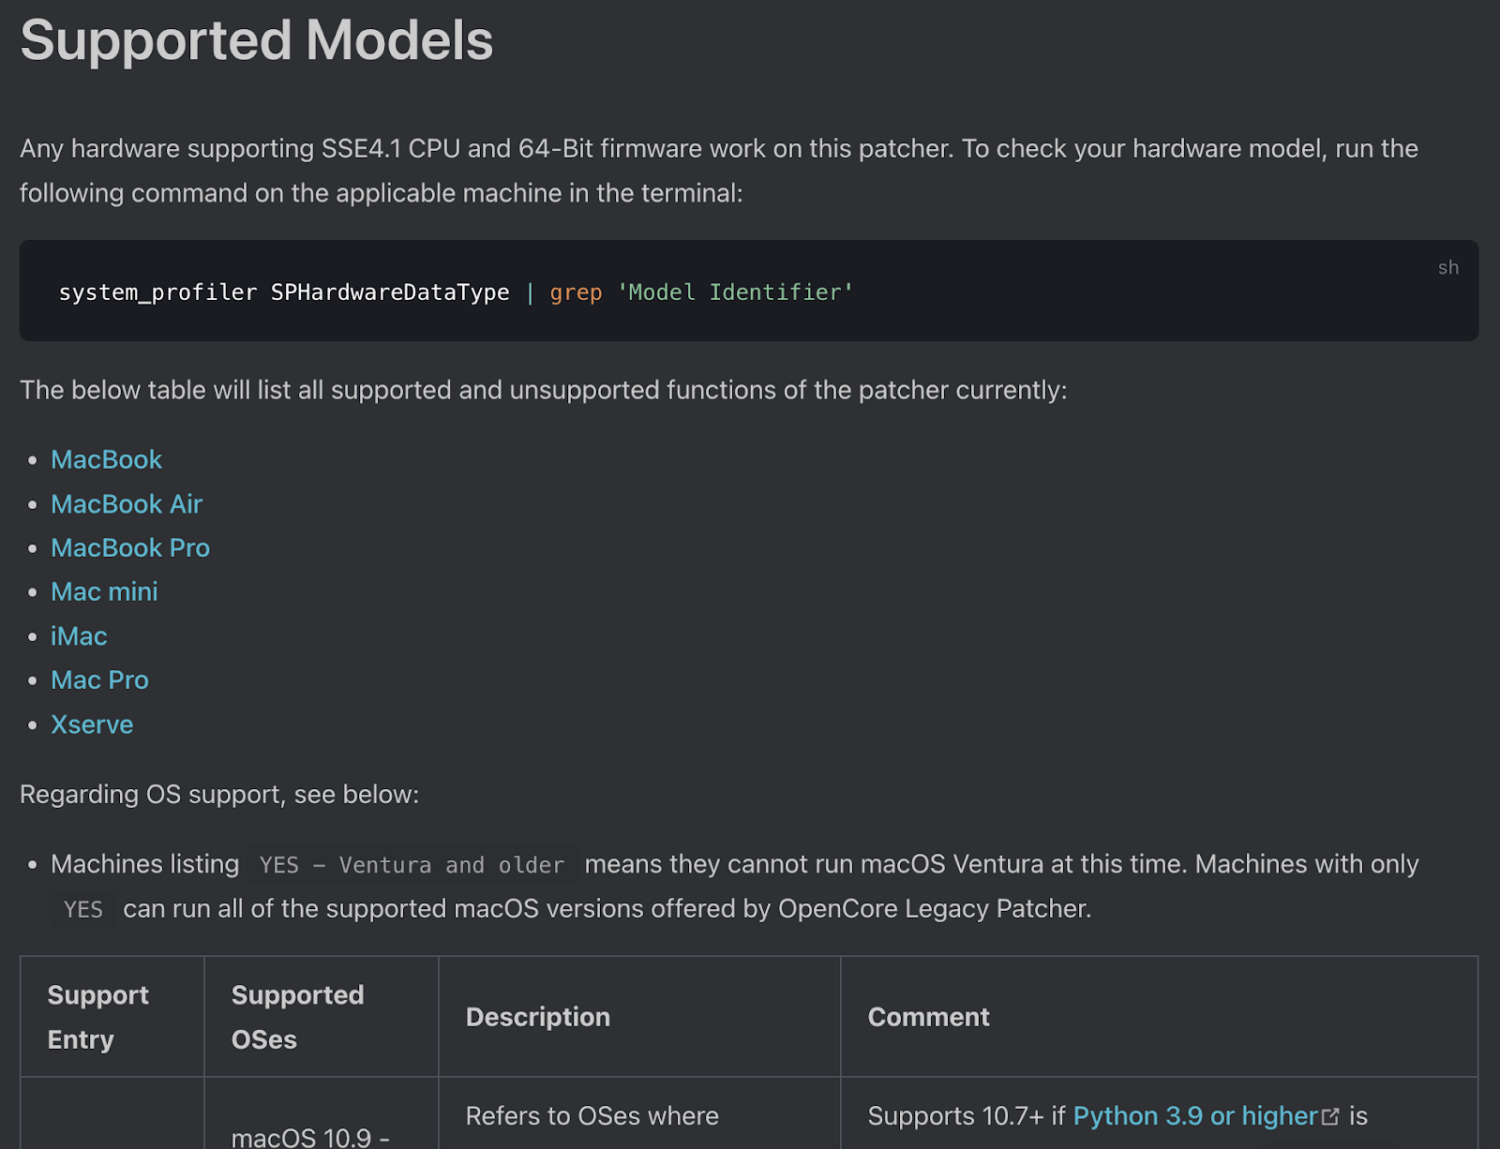
Once you’ve your Mac listed on OCLP provided list of supported models, here’s how to install macOS Ventura using OpenCore.
Step 1. Format External USB Drive
Go to Finder > Applications > Utilities > Disk Utility App
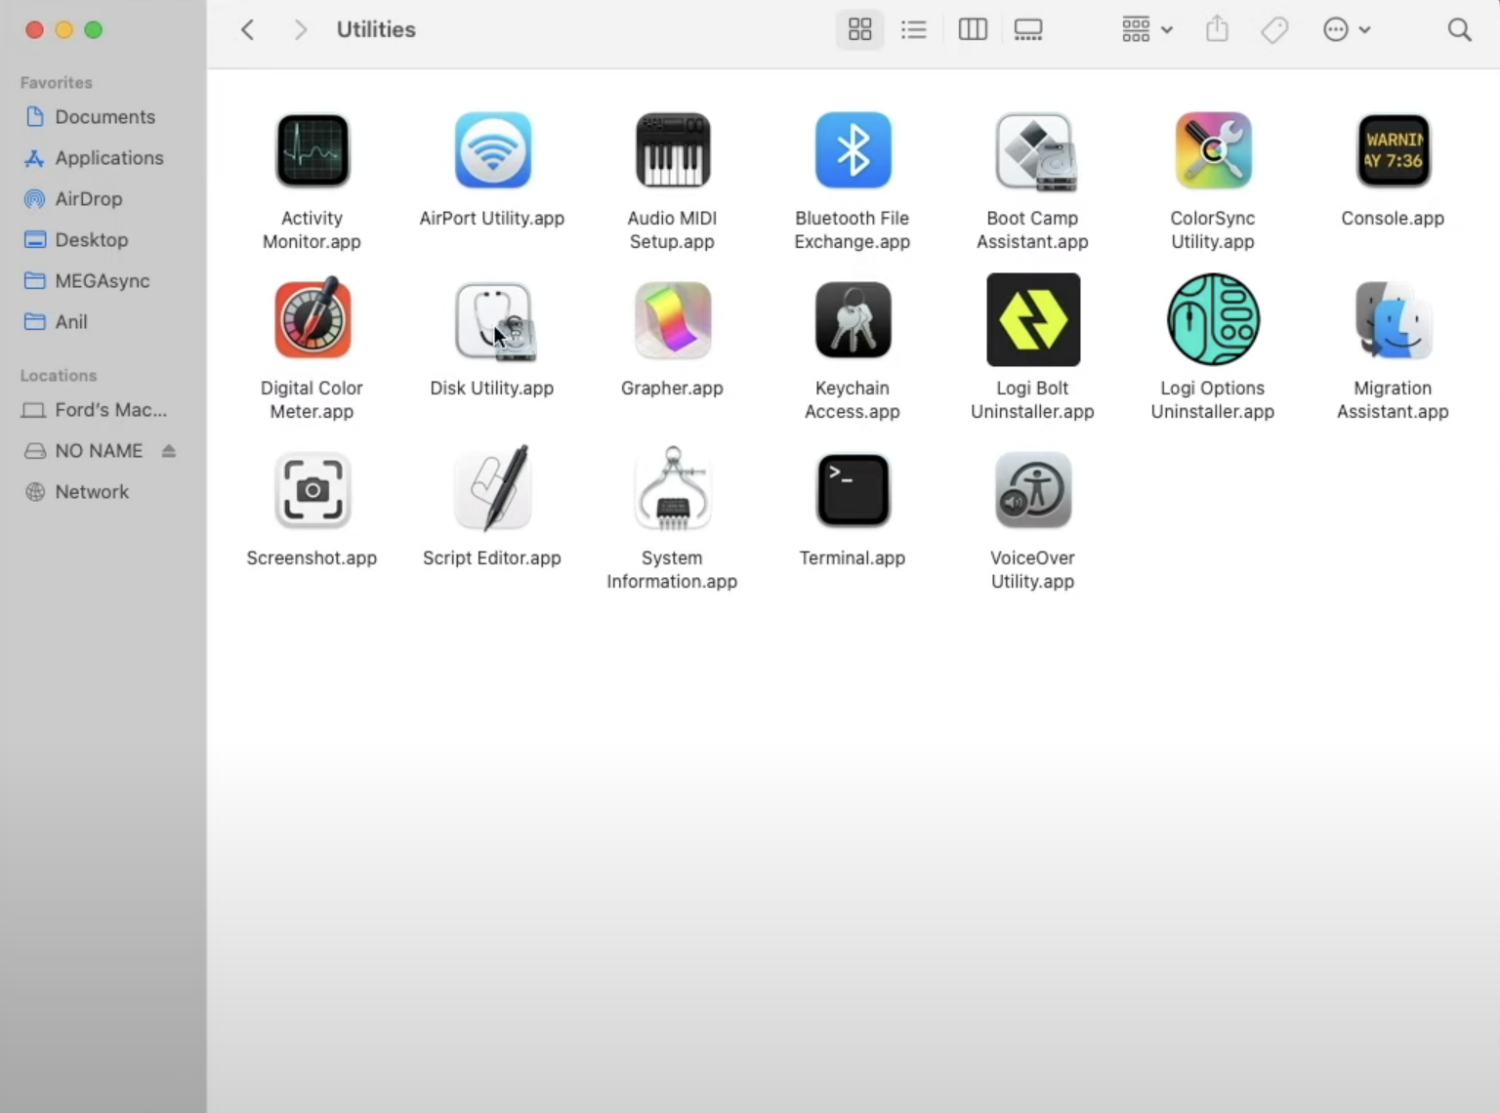
Now choose the external drive you want to erase from the side bar, and click Erase on the top menu bar.
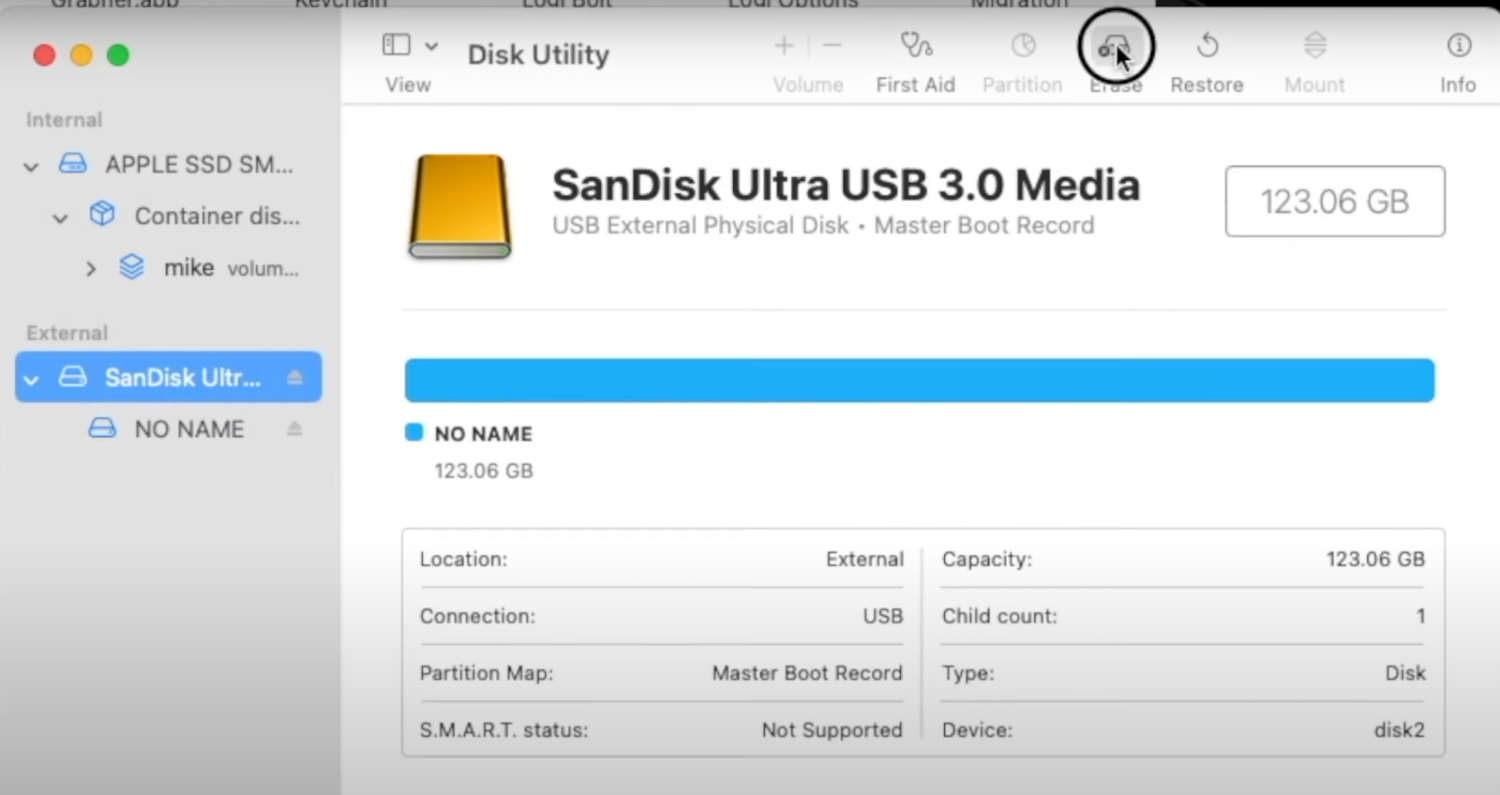
For example, here, we have selected SanDisk Ultra USB 3.0 Media as our external disk.
As you click on erase, a dialogue box appears with the following options.
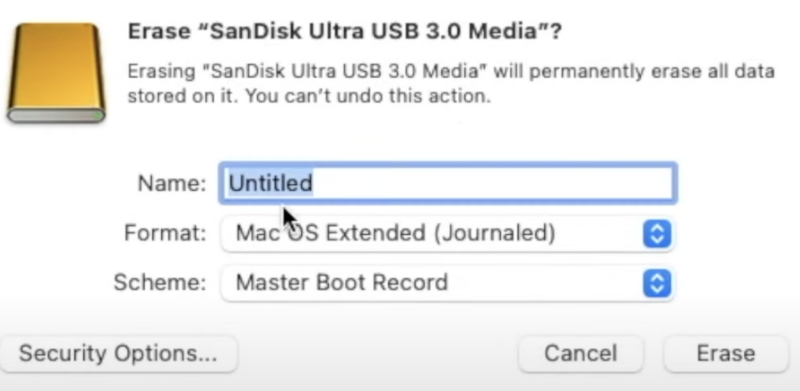
Next, change the disk’s name to ‘OCLP_Installer’’ or something you can easily recognize later on. And, the Scheme to ‘GUID Partition Mac.’
Click on Erase to get the USB drive ready to set-up using OpenCore Legacy Patcher.
Step 2. Download and Install OCLP
Visit Github’s OpenCore Legacy Patcher releases page and download the OCLP zip file. Make sure to download the latest version of OCLP available on the page.
Note: The page doesn’t have a big-bold download button. So you need to scroll down a bit, click on the Asset dropdown, and select OpenCore-Ptcher-GUI.app.zip to download it on your Mac.

Once the zip file icon is visible on your desktop , extract the file to have the OpenCore application installed on your Mac.
Step 3. Download MacOS Ventura
When you click on the OpenCore app, you will see a menu having several options.
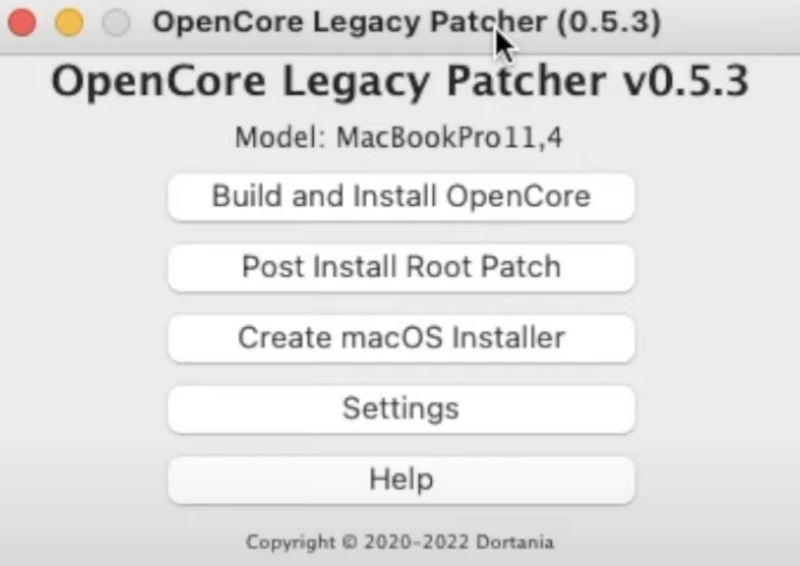
The first thing we will do is to download macOS Ventura. To do so, select Create macOS Installer from the menu.
As you select, another box appears with a set of options:
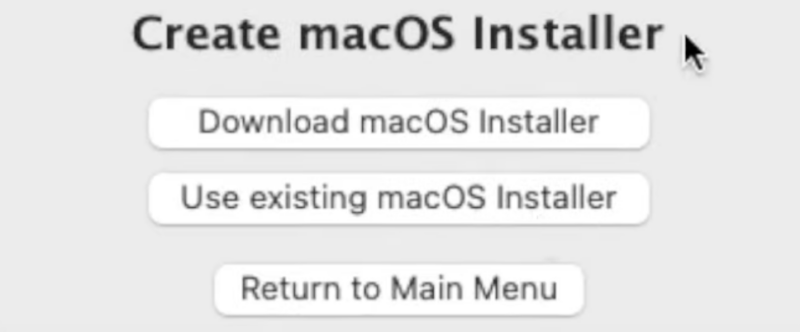
Click on Download macOS Installer, and the download will start automatically. A while after, you will be prompted with a list of installers currently available from apple.
To download macOS Ventura, select macOS 13.1 (22C65 – 12.2 GB).
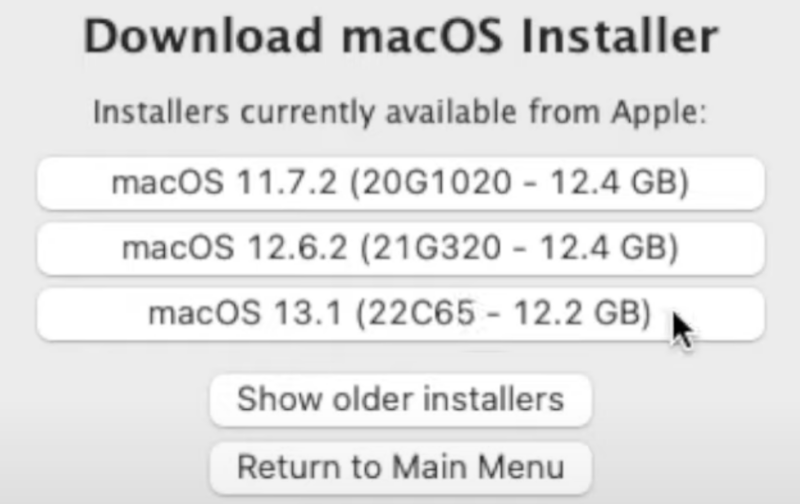
Now brew yourself a cup of coffee and let your Mac install the macOS Ventura file. There might be some flash prompts wanting you to enter an admin password at times. So do keep an eye for them.
Step 4. Create a Bootable Mac Ventura USB Drive
Once the OS is installed, it’s visible in the Application folder. Quite right here:
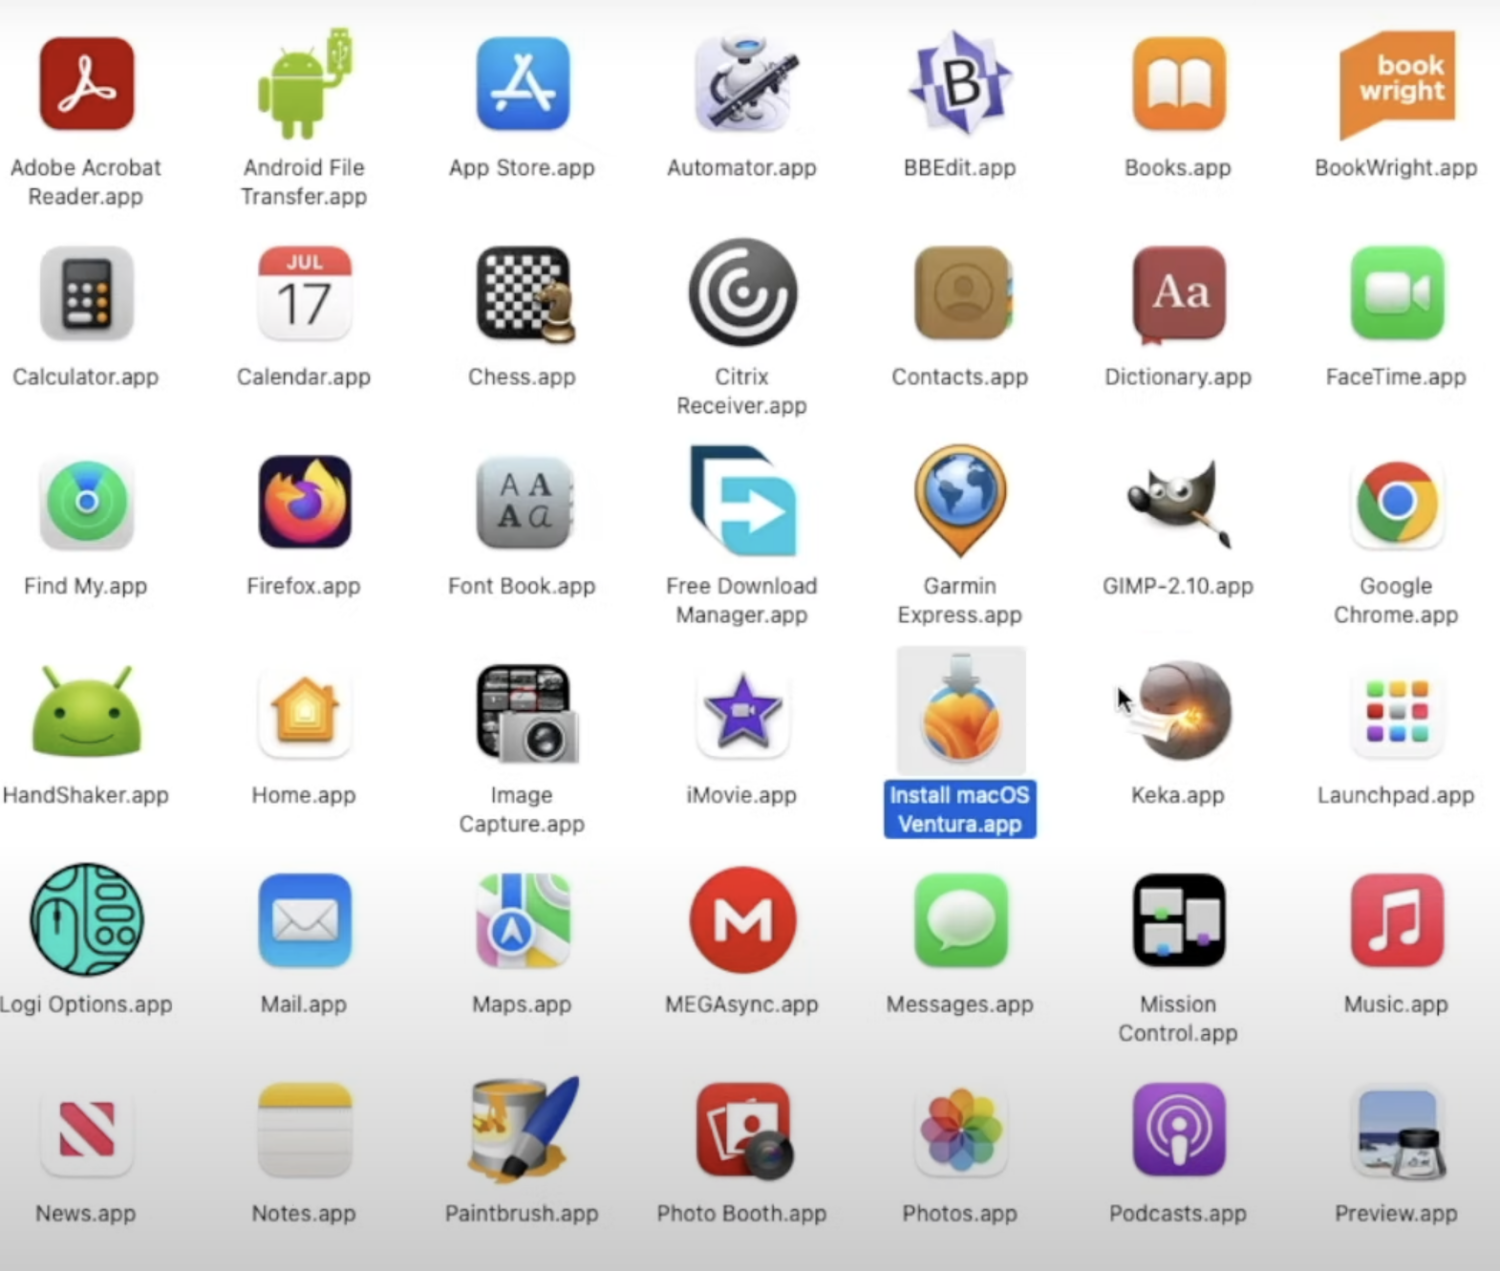
Now here’s the main thing. If you click on the icon to install macOS Ventura directly, your mac won’t allow it. Since you’re using an unsupported model.
Instead, go back to OpenCore Legacy Patcher and click on Flash Installer.
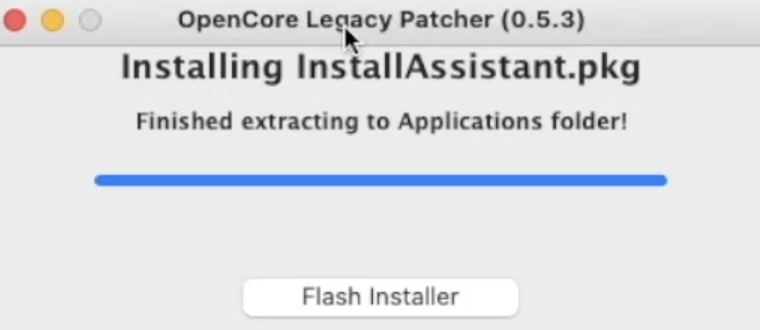
OCLP, by default, will provide you with all the macOS versions available on your system. Like we had the macOS Ventura installer on our system, and OCLP automatically detected it for us.
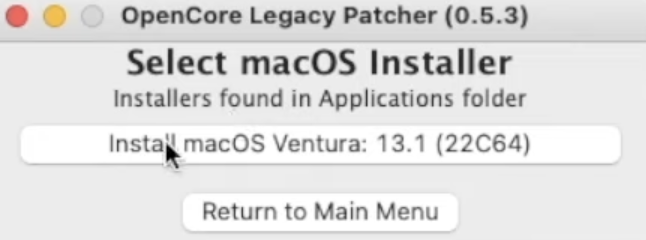
Click on Install and then provide all the necessary permissions as asked for by OCLP.
Next, select the external drive in which you want to install the macOS. Ensure the drive is 14GB+ and removable.
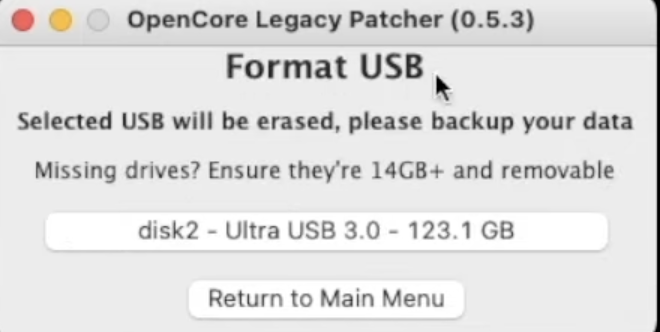
Once you have selected the drive, the system starts the process of creating an installer. Again, it might take a while so be patient.
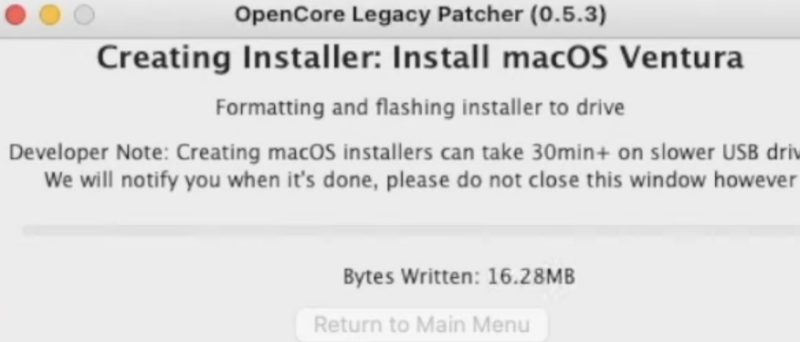
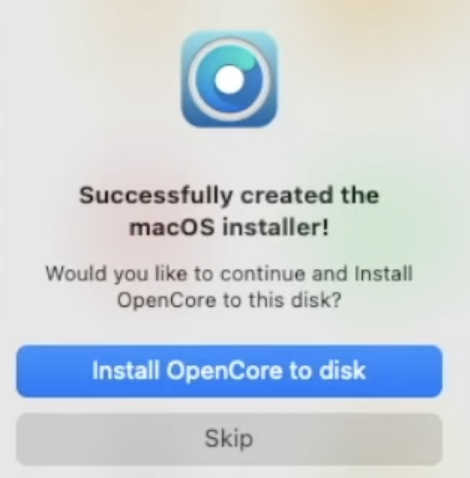
While the installer is being created, you’ll see a pop-up asking to install OpenCore to the same USB drive. Why this?
That’s because until you have OpenCore on the same USB drive as macOS Ventura it’s not going to boot up.
Hence, you must install it by clicking on Install OpenCore to disk.
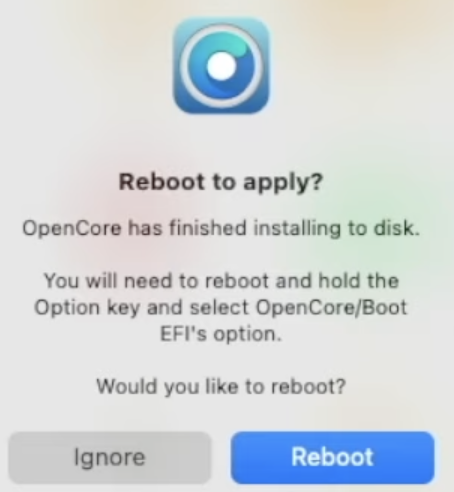
Now it’s time to reboot your Mac and experience macOS Ventura on your system. Click on Reboot and wait for the system to shutdown.
Step 5. Upgrade to Mac OS Ventura
Hold on to the option key when you restart the system until you hear the chime sound on your mac. Soon enough, you’ll see three options on the screen:
- Internal disk
- macOS Ventura Installer
- EFI Boot
Use the arrow keys to move to EFI Boot and press Enter.
On the next screen, select Install macOS Ventura and press Enter.
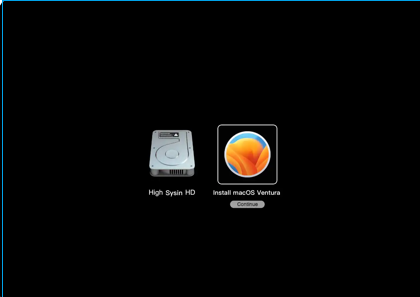
And that’s it! You have successfully installed macOS Ventura on your unsupported Mac using OpenCore.
Wrapping Up
OpenCore Legacy Patcher is certainly getting a breakthrough in providing its users with the utmost Mac experience.
However, some things may not work as you expected since the project is an unauthorized modification by Apple.
Besides, the OCLP team still has other challenges on their minds. The foremost of them is to create automation of these hacks so that even a non-tech person would easily use and set up the software.
You may also explore how to reinstall macOS.

