Windows 11, as an operating system, has great appeal in terms of aesthetics, features, and usability. However, one has to meet Microsoft’s strict system requirements to download Windows 11.
If you have an old or underperforming PC, you might not be one of the lucky ones to enjoy Windows 11. However, worry not! Windows 11 lite version can be your savior. It’s the most lightweight version of Windows with no strict hardware requirements and can be installed on any computer.
As the Windows 11 lite version isn’t an official version released by Microsoft, you can’t go and get it from the official Microsoft website. Although you still need the original product key as a user to activate Windows, you’ll need to download the Windows 11 lite version (Tiny11) ISO file on your PC.
What Is Windows 11 Lite Version?
Windows Tiny11, or Windows 11 lite version, is a fine-tuned custom version of Windows 11. It has been designed to operate on less powerful computers, only requiring 8 GB of storage (as opposed to Windows 11’s 20 GB). Plus, it barely requires RAM (only 2 GB or so).
You can skip downloading or reserving space for all the extra bloatware. Windows Tiny11 was created by NTDev, by cutting out other rudimentary apps like Paint or Microsoft Edge. You’ll still have access to core Windows apps like Calculator or Notepad.
In the stripped-down version of Windows 11, you’ll not be boggled down by security requirements such as a secure boot or TPM (trusted platform module) for hardware.
Disclaimer: It is worth mentioning that Windows Tiny11 can only be built on Windows Pro, and not other versions. Moreover, to build Windows Tiny11 on your computer, you need to have the original Windows key as a user.
Why Should You Install Windows Tiny11?
Windows Tiny11, or Windows 11 lite version, won’t update automatically or won’t have access to official support. Despite all that, Windows Tiny11 is a pretty good deal, and here’s why you should install it:
- Reduced bloatware makes it a very lightweight operating system
- Windows Tiny11 gives you the benefits of Windows 11, even if your PC is old
- That being said, Windows Tiny11 doesn’t have strict hardware requirements
- Windows Tiny11 will run on 2 GB RAM and 8 GB of storage
- Windows Tiny11 will have core apps like Notepad but will ditch redundant ones like Microsoft Edge
- Windows Tiny11 also doesn’t force security requirements like trusted platform modules for hardware on your PC
- Most of all, you get to enjoy the standard features of Windows 11 on underperforming or old PCs
Windows 11 vs. Windows 11 Lite
If you want to take a comprehensive look at all the ways in which the Windows 11 lite version differs from Windows 11’s official version, take a look at the pointers we’ve covered below:
| Windows 11 | Windows 11 Lite | |
|---|---|---|
| Version | Windows 11 is the official version, released by Microsoft | Windows 11 lite is the experimental version, released by NTDev |
| Speed | Not as fast or lightweight as Tiny11 | Faster and lightweight, comparatively |
| Support | Windows 11 will also have access to official support | Windows Tiny11 will have no official support |
| Updates | Windows 11 will get automatic updates | You’ve to manually update Windows Tiny11 everytime |
| Storage | Windows 11 requires 20 GB of storage for installation | Windows Tiny11 requires total 8 GB for easy installation (6.34 GB for the OS and remaining for apps) |
| RAM | Windows 11 can require 4 – 8 GB of RAM to run | Windows Tiny11 can require 200 MB – 2 GB of RAM to run |
| Security | Windows 11 comes with security boot or related hardware requirements | Windows Tiny11 ditches trusted platform modules and similar security requirements for hardware |
| Apps | Windows 11 will come with apps like Paint, Edge, Notepad, Calculator | Windows Tiny11 comes with core apps like Notepad and Calculator, but doesn’t force useless yet heavy apps like Edge |
| Machine Build | Windows 11 works for newer builds, not perfect for old or under-powered setups | Windows Tiny11 has been created for smaller or older builds |
It is worth mentioning once more that Windows Tiny11, if not installed properly, can break your system or expose you to security risks.
So, proceed with caution and only when you’re sure of what you’re doing. Also, if you miss the Windows 11 apps, here are better app alternatives you can install and run for a better experience!
How to Install Windows Tiny11
Repeat the following methods to prepare your computer before creating a customized Windows 11 ISO file with Tiny11 Builder.
#1. Download the Windows Tiny11 ISO file and Tiny11 Builder
- You can download Windows 11 22621.1265 or 22621.525 from UUPDump
- You can also download the Windows ISO file version 22H2 (22621.525) from the Microsoft official website
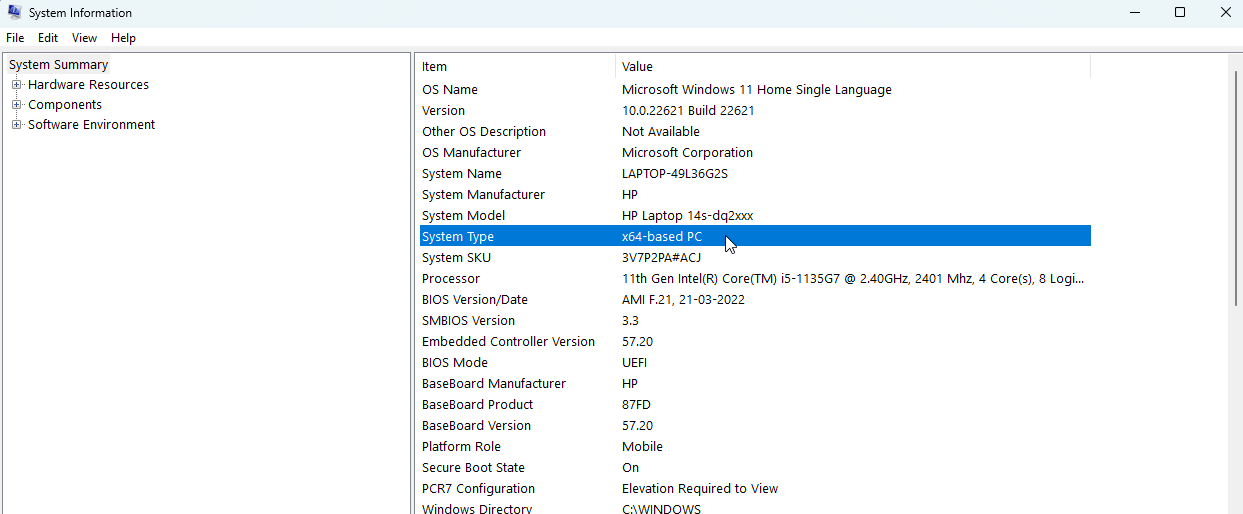
- Go to Search > System Information > System Type to determine whether your PC needs the x64 or arm64 version
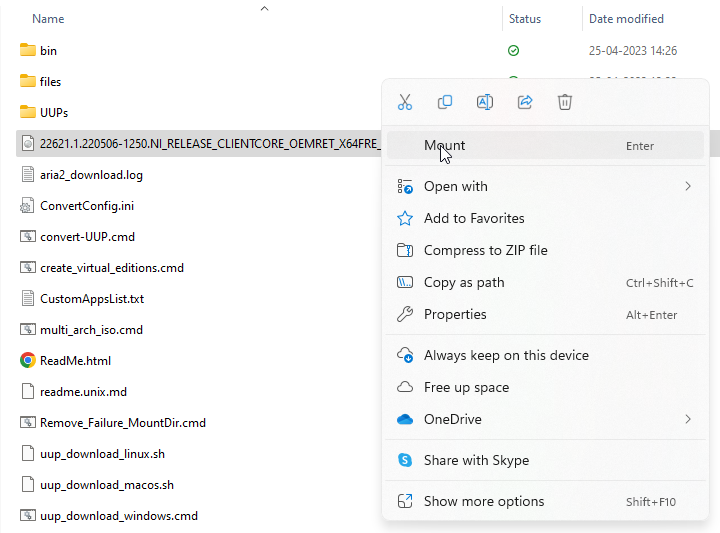
- Right-click on the downloaded ISO file and select Mount
- Next, go to the Tiny11 Builder GitHub page
- Download the Tiny11 Builder tool by clicking on Code towards the right of your screen and selecting Download ZIP
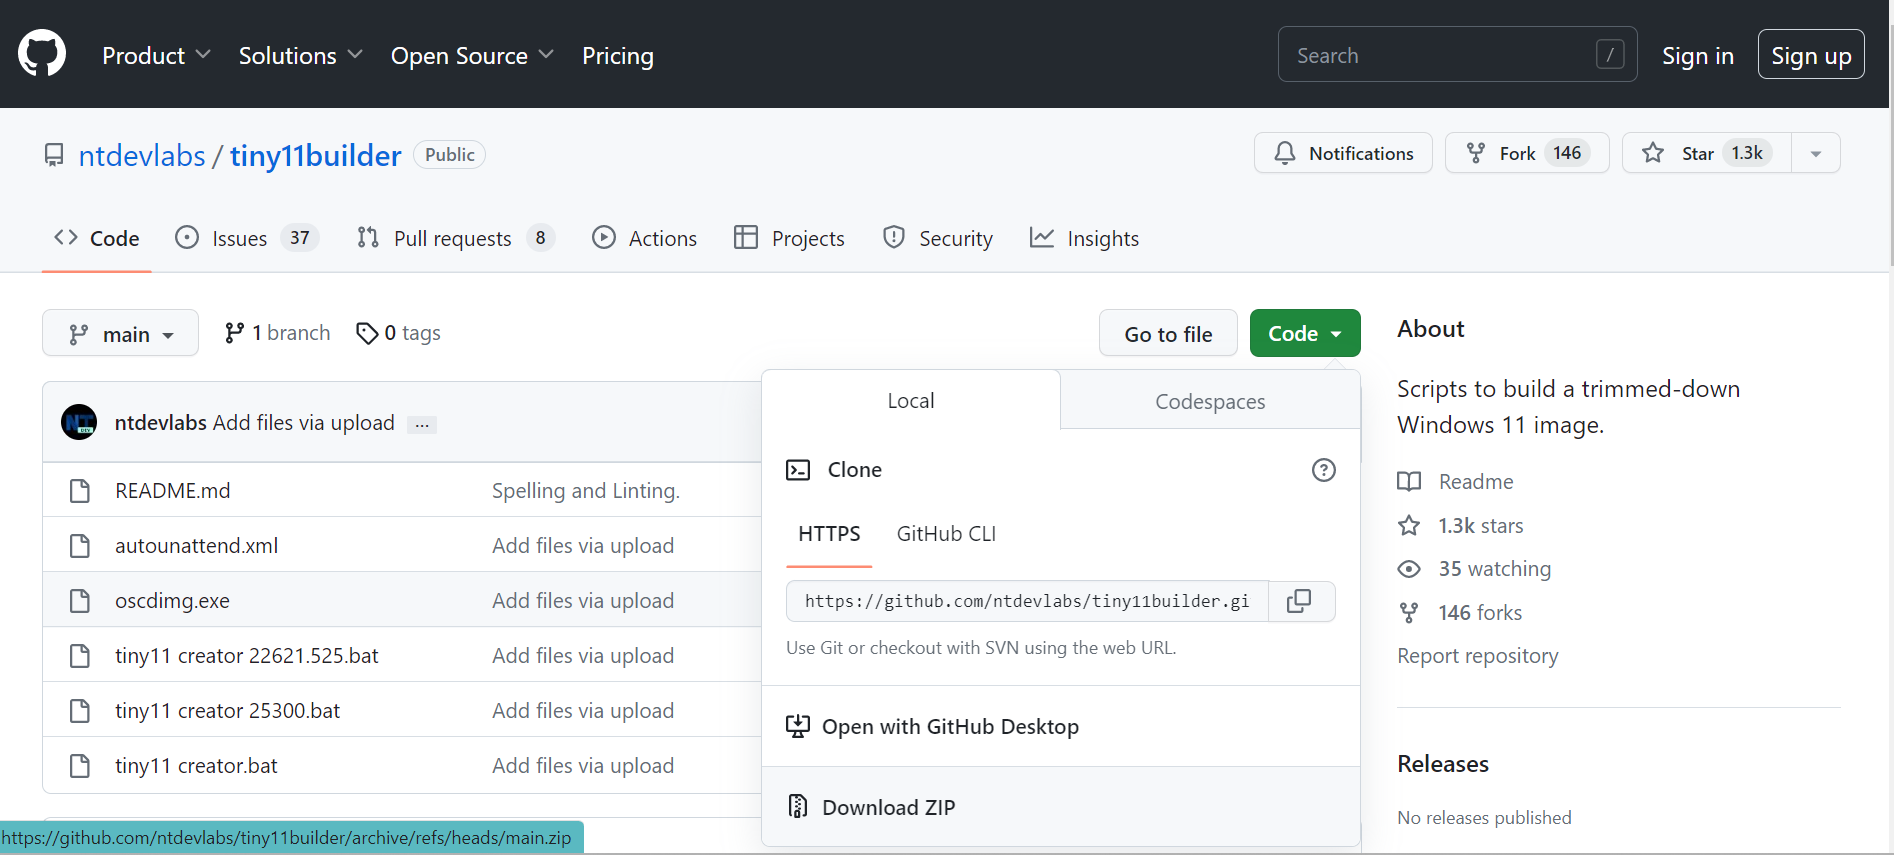
- Right-click the downloaded ZIP and click on Extract All to a convenient location in your disk drive
- If you’ve downloaded the 22621.525 version, you need to run the tiny11 creator 22621.525.bat as an administrator by right-clicking on it, and if you’re working with the 22621.1265, you should use the tiny11creator.bat script
- If you’re being prevented by Microsoft Defender SmartScreen, click on More Info and select Run Anyway
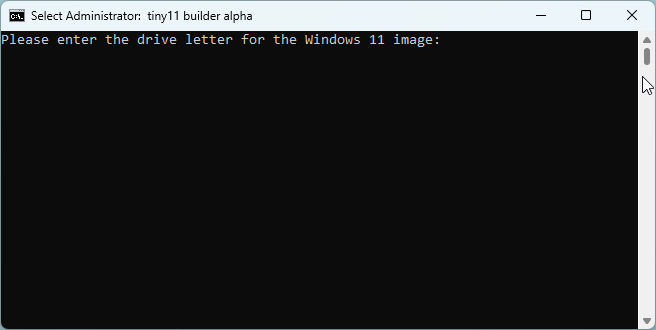
- You’ll be required to enter the drive letter where you’ve mounted the image in the Administrator terminal that opens up and press Enter
- You’ll be asked to provide the image index. This is important if you have multiple images in your drive letter; you’ll be asked to choose the one you want to work with. If you have no additional images, your index number should be 1.
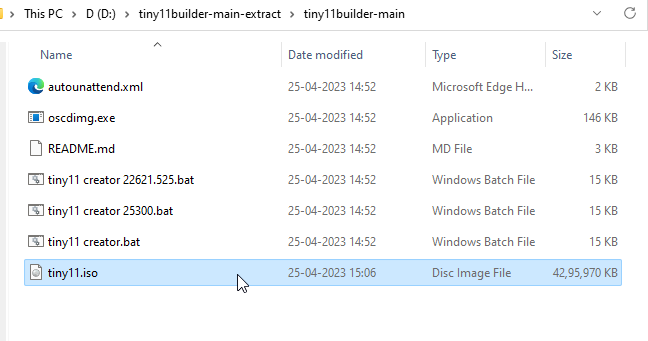
- Once the operation’s completed successfully, your tiny11.iso file will be ready. It can be accessed in the folder from where you ran the .bat file.
#2. Steps to Create a Partition to Install Windows Tiny11
- Go to Control Panel > System & Security > Administrative Tools
- Proceed to Computer Management and select Storage from your left.
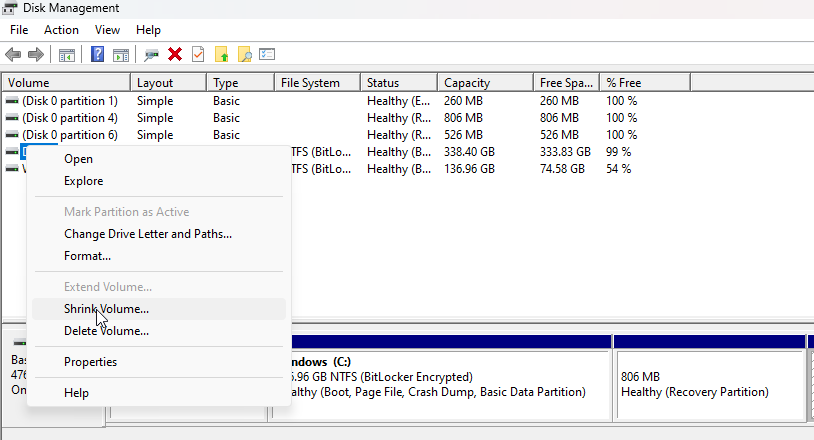
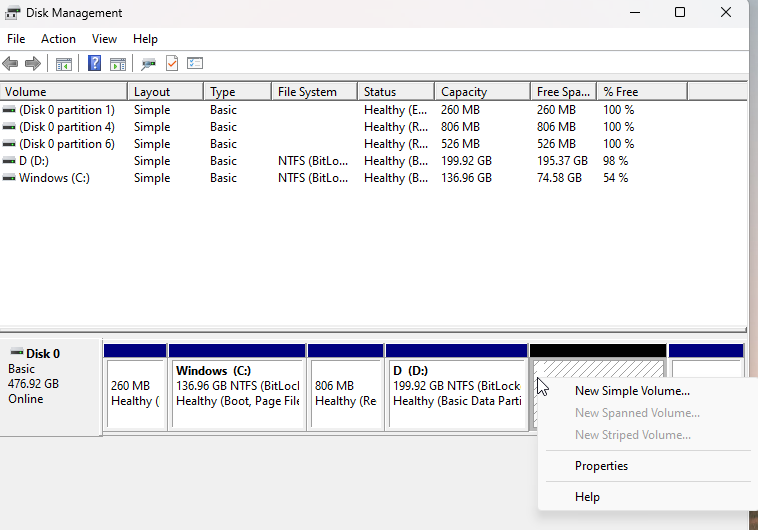
- Click on Disk Management and right-click on the unallocated space to create a partition.
- If you don’t have unallocated space, you can right-click on an existing partition and click Shrink Volume.
- Once you’re able to create or find unallocated space, you can right-click and select “New Simple Volume”
- You can follow a set-up wizard and give it a name, and assign a letter to your new drive
- You can name it Windows Tiny11 for convenience’s sake.
- Click on Finish, and the new partition will be created for your Windows Tiny11.
#3. How to Burn the Windows 11 Lite ISO File Onto a Pen Drive
Once you’ve created space for Windows 11 Lite on your PC, you’ll need to burn the ISO file onto a pen drive to facilitate the installation process. You need to download Rufus for this purpose. Once you have Rufus, plug in your pen drive and follow the steps below:

- To begin, open Rufus and select your pen drive by clicking on the drop-down menu that’s next to the Device.
- Below, you’ll be required to choose the ISO image in the boot selection.
- Browse through the original folder where you’ve stored your ISO image, select the file, and click Open.
- You don’t need to change any other options; just click on Start.
- Rufus will ask your permission to format your pen drive. Click OK
- The process can take up to 10 –15 minutes.
- Once you see the message Ready, you can click on Close and remove your pen drive.
#4. How to Install Windows 11 Lite
To install Windows 11 Lite, plug in your pen drive and follow the steps below:
- Press your power button to start your PC, but keep hitting the BIOS hotkey (F2, F8, F10, or F12, depending on your device) to open your BIOS on your PC.
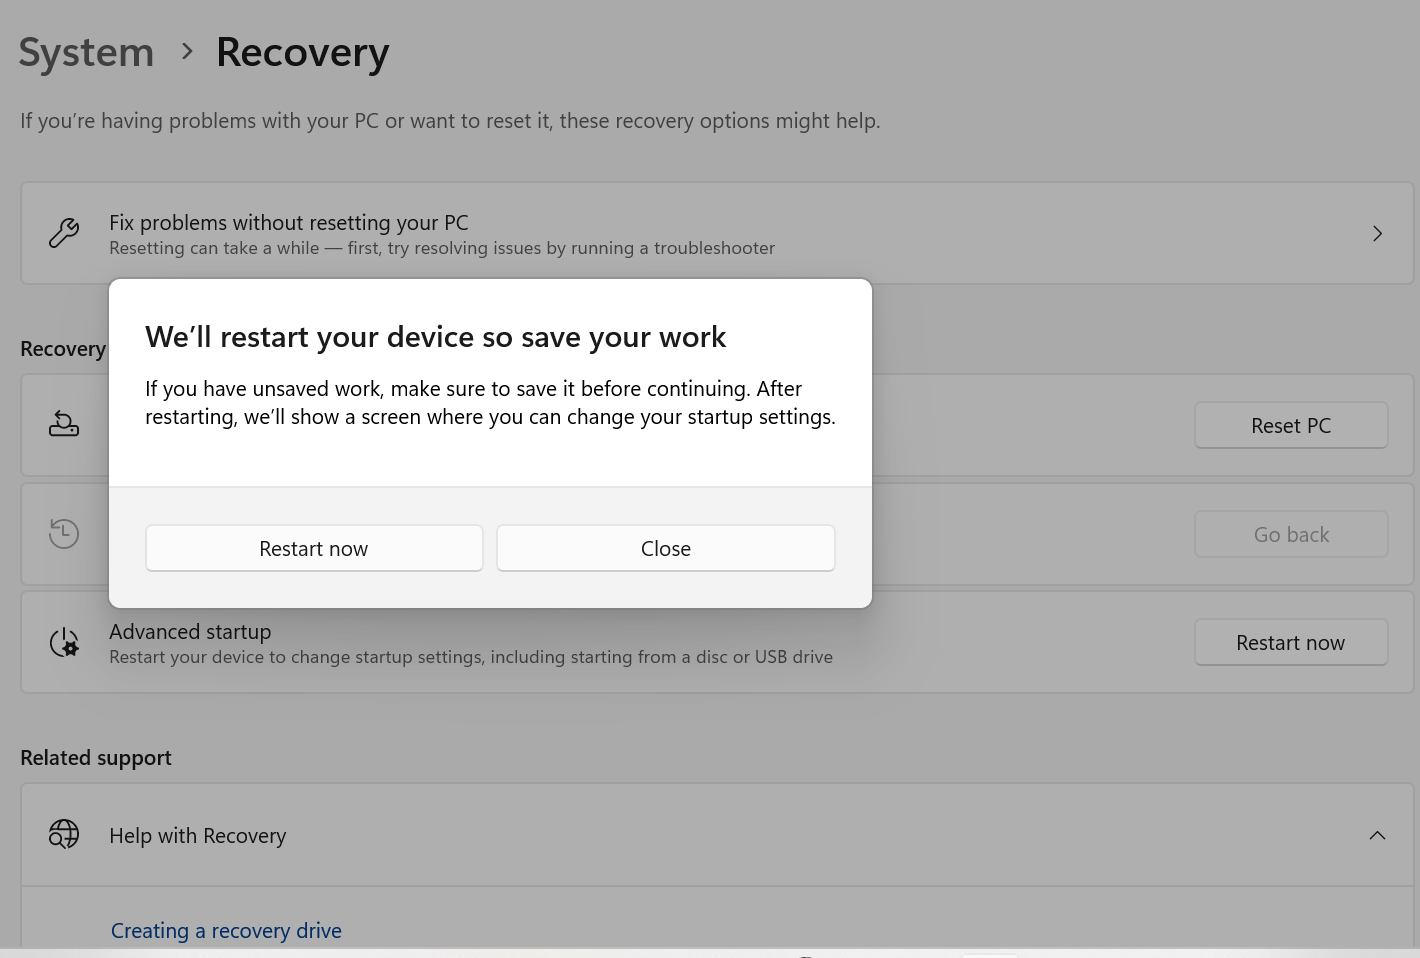
- You can also enter BIOS settings by searching for Change Advanced Startup options on your Search Bar.
- Click on Restart now and remember all the activity you’ll be required to do in the BIOS window henceforth should be carried out using your keyboard only.
- Once the BIOS window has opened, find your Boot Order menu and select your pen drive as the USB drive you want to boot from.
- The Windows setup will open, and you can follow the steps of a normal setup.
- You’ll come to a screen where you’re required to select a partition; select the one you’ve created earlier in the process and named Windows Tiny11.
- Depending on the state your PC is in, this process might take a while to complete.
- That’s it! Windows 11 Lite is now installed on your device and is good to go.
If you want to compress Windows 11 Lite further and put your security risks to a minimum, take a look at the next section. This step is optional, but we do recommend you try it for security reasons.
How to Debloat Your Windows Tiny11 to Make It Safer and Lighter
Debloating can not only help you make your Windows 11 lite safer but also get rid of unnecessary apps that might eat away at essential storage space.
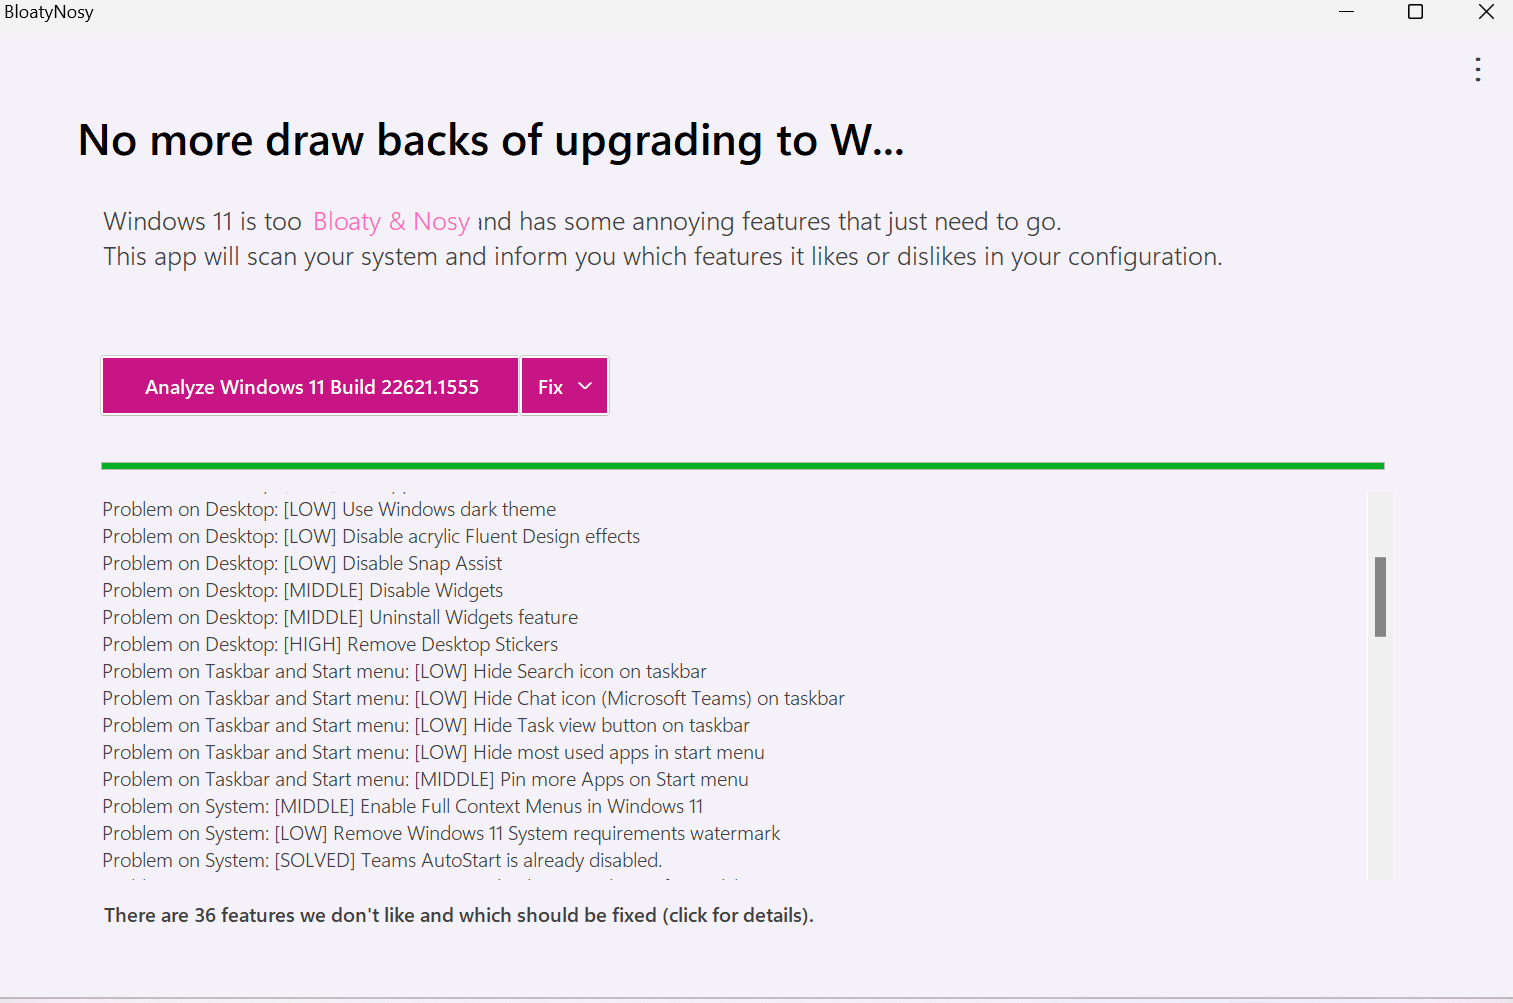
If you’re also looking to remove tracking services that might be running in the background, debloating is a sure-shot way to get them. Here are the steps to debloat using a tool called BloatyNosy (formerly Debloos):
- Go to GitHub’s website and jump to BloatyNosy under Github’s releases.
- Scroll down to assets, and download BloatyNosyApp.zip to save the file to your device.
- Open the downloaded file, and click on Extract all.
- Once you’ve clicked the Extract button, you can open the BloatyNosy folder.
- Go on to launch the file by double-clicking the BloatNosy.exe file.
- Click on More Info, and if you find a Run anyway button, press the Analyze Windows and Fix options.
- Click on Analyze to see what the issues are with your PC, and then click on the drop-down and choose to Apply Fixes. And you’re done!
You’re also free to debloat your Windows 11 lite version using other ways, like running tried and tested debloated scripts.
That’s all! Enjoy your Windows Tiny PC with the fastest speed and lightest build out there.
Things You Need for Windows Tiny11
To begin your Windows Tiny11 installation process, you’ll need to keep a few things handy:
- Download the free utility software, Rufus, to create a bootable USB drive
- As you’ll be dealing with ISO images, you’ll need a pen drive to complete the installation
- You’ll also need to create a dedicated partition to store the files (process mentioned above); we recommend you keep two CPU cores reserved for this purpose
While plenty of redundant apps like Clipchamp, Office Hub, Maps, Media Player, and others have been removed altogether, Microsoft Teams and Cortana are still a part of the Windows 11 lite version.
Although Xbox has been deleted, the Xbox Identity Provider is still available. So, the app can be reinstalled easily for gaming enthusiasts. Now, don’t be alarmed if you see the Edge icon and taskbar pin on the screen. That’s just a ghost version: Microsoft Edge has been removed.
As for languages, only the US version (en-us x64) is supported by the Windows 11 lite version. You can fix this manually by replacing the instance of en-us with the language needed (such as en-gb or en-jm). Replace the x64 instance with arm64 if your processor is different.
Bottomline
When it comes to installing Windows 11 lite, you can say that the process is a little tricky. If you have completed installations using ISO files, you’ll find this installation process to be a cakewalk!
Now, once you have downloaded and installed Windows 11 lite following the steps mentioned above, you can be sure to save a ton of space. This is a perfect solution for PCs that are underpowered, have smaller builds, and don’t have a lot of storage space or RAM to support the Windows 11 official version.
You’ll get no official support or automatic updates for Windows Tiny11, but if your PC doesn’t support Windows due to the nature of hardware or security restrictions, you should give this a shot.

