Working on Photoshop and tired of using the same fonts? Have a font you’d like to add to Photoshop for a project at hand? Thankfully for you, it’s incredibly easy to add fonts to Photoshop with our step-by-step guide for font integration.
Though Adobe Photoshop comes with a lot of great fonts, it’s only natural to want to spice things up and add your own custom fonts of choice. Moreover, Adobe Photoshop commands a nearly 50% market presence with its one-click transformations and revolutionary tools. Hence, as a designer, you’re sure to be using it a lot. So, why not add your favorite fonts to Photoshop in 4 simple steps and make your life easier?
However, before we jump straight to the steps, let’s start with a refresher on how to use fonts and their different file types.
Importance of Fonts in Design
Can people read what you’re writing? Can you grasp their attention via the font you’re using? Does it match the message undertone of your graphics? These are questions that are often asked about fonts. Fonts aren’t just aesthetic. They are useful. They can help build a mode, convey a tone: playful, witty, professional, or they can help build interest.
Let’s take a quick look at some font facts:
- Create an overall aesthetic and a brand voice
- Fonts elicit emotions and feelings
- Using too many fonts can be confusing or illegible
- Using clashing fonts can defeat the purpose and break the consistency
- Using very similar fonts can fail to grab attention
- Using all caps can be unnecessary and inappropriate
- Treat fonts as artistic elements and give them breathing space
- Create a visual hierarchy so that they see what’s the most important first
Font File Types You Should Know About
Font file types are many, and not knowing the difference can be a big roadblock to designers. To start off, we must begin with the difference between a font and a font family or typeface. A font’s an individual font, whereas a font family or typeface is a group/collection of similar fonts.
#1. TrueType Font (TTF)
Developed by Apple in the 1980s, TrueType Font (TTF) have .ttf extension and can be recognized by that. This font type is great for use on Windows and Mac as its support is incredible. It also supports smooth scaling. While you’ll find bold and italic styles, ligatures and other complex features aren’t available.
However, every TTF font comes with digital and printer data in a single file. That means you get all the data for print and digital products at the same place. Photoshop is compatible with TTF fonts.
#2. OpenType Font (OTF)
Developed by Microsoft taken over by Adobe, OpenType (OTF) fonts are cross-platform. In fact, unlike TTF fonts, they can hold thousands of glyphs in a single file.
The font is super attractive to designers as it can hold unlimited variations of style and supports Photoshop. Extensive typography and unlimited size resizing make it a catch!
#3. Embedded Open Type (EOT)
Developed by Microsoft, Embedded Open Type (EOT) attempts to solve copyright problems that might arise with TTF and OTF fonts when they’re used for web publishing. The font files are smaller as well.
Copyright protection and additional encryption make EOT promising if it wasn’t for low compatibility. It only works with Internet Explorer, which is no longer the medium for search!
#4. Web Open Font Format (WOFF)
Developed in 2009, Web Open Font Format (WOFF) has faster loading types than OTF and TTF and better compatibility across all platforms. Of course, WOFF is compatible with Photoshop.
However, you can’t download WOFF fonts on your PC. You can use your own website or a host like Google Fonts to load WOFF types of fonts.
Now with the release of WOFF2, designers can also expect compression algorithms, more metadata, and more efficient data storage.
#5. Scalable Vector Graphics Font (SVG)
Originally used for the web, SVG isn’t actually a font type. It’s a vector-based graphics format or a mathematical expression, which allows you to form 2D images.
For this reason, you can use SVG fonts in different colors and transparencies. Plus, some can be animated. SVG fonts are very popular with designers. Photoshop supports open-type SVG fonts.
Though numerous font types exist, Adobe Photoshop only supports fonts that are TTF or OTF.
How to Add Fonts to Photoshop
The process of adding fonts to Photoshop on Windows and Mac is the same. It’s just that you’ll be using different applications to download and install the font to your device. Follow the steps below:
#1. Find Your Font
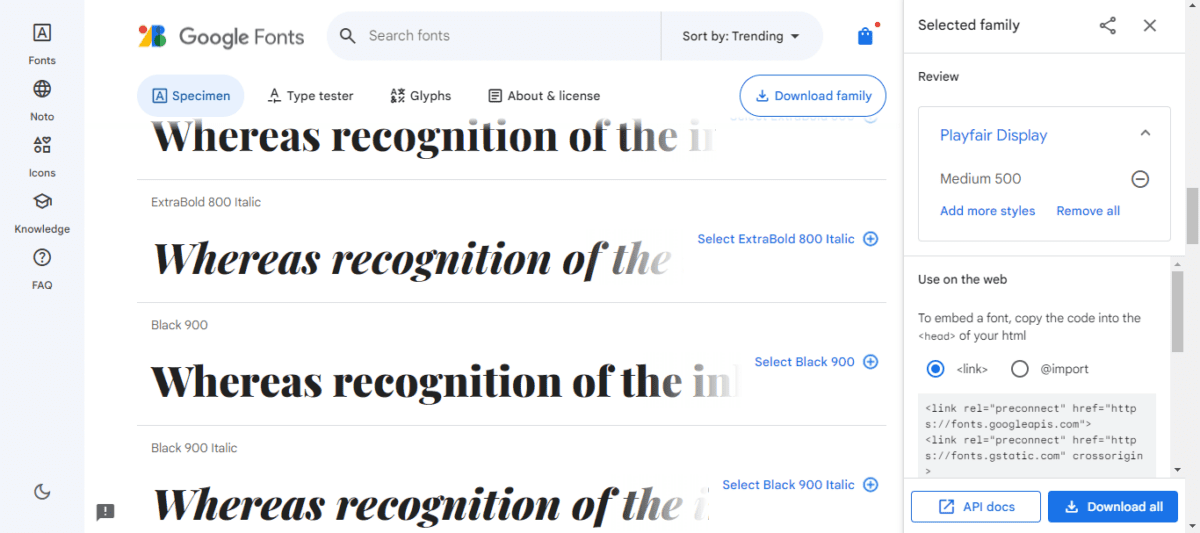
If you don’t have the font you want to add to Photoshop, begin your search! A simple Google search can help you find your desired font. There are numerous online libraries that have free and attractive fonts that can be used in a range of projects, from printing to web publishing.
You can also download fonts from other sources like Microsoft Store or Google Fonts. While finding fonts is easy and straightforward on the web, you should look for reputable sites. Not choosing reputable sites can put your security at risk and jeopardize your design projects.
#2. Download Your Font
Once you click on Download, your font of choice or font family will start downloading. When done, it’ll be saved as a .zip file.
#3. Locate and Install the Font
Once you have downloaded the font to your device, it’s time to install the font. Go to downloads and find the compressed file. If you can’t find it there, you can click on the Downloads in your browser and choose: Show file location to see where it has been saved.
For Mac
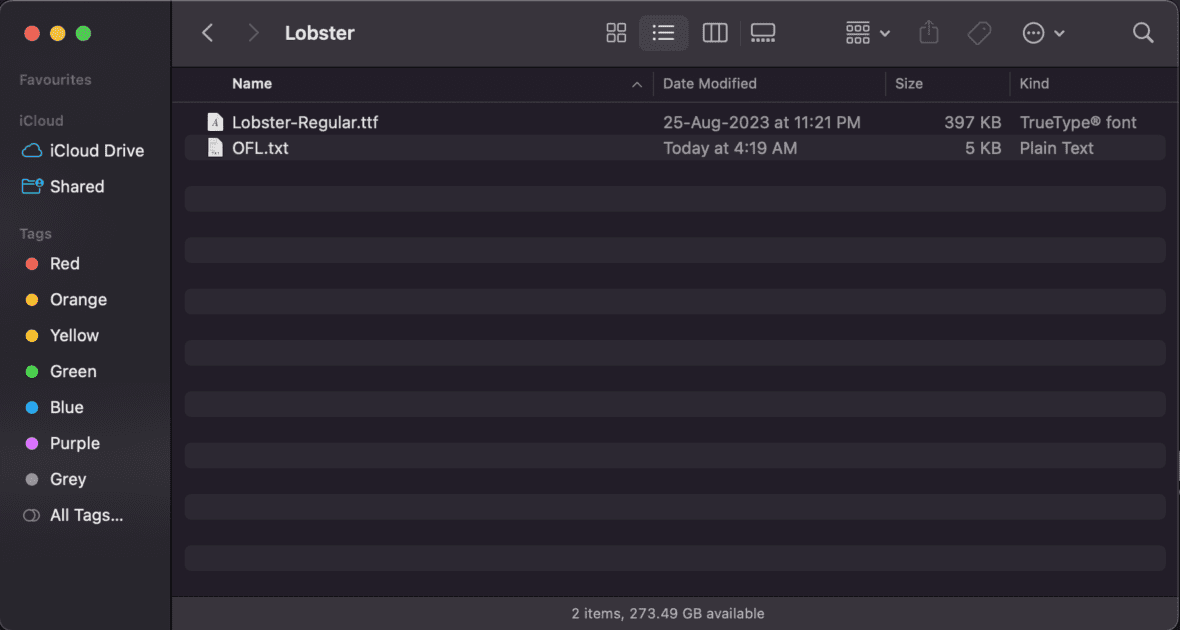
- You can right-click on the .zip file to unzip it
- You’ll find an OTF or TTF file inside
- Double-click the one you want to install
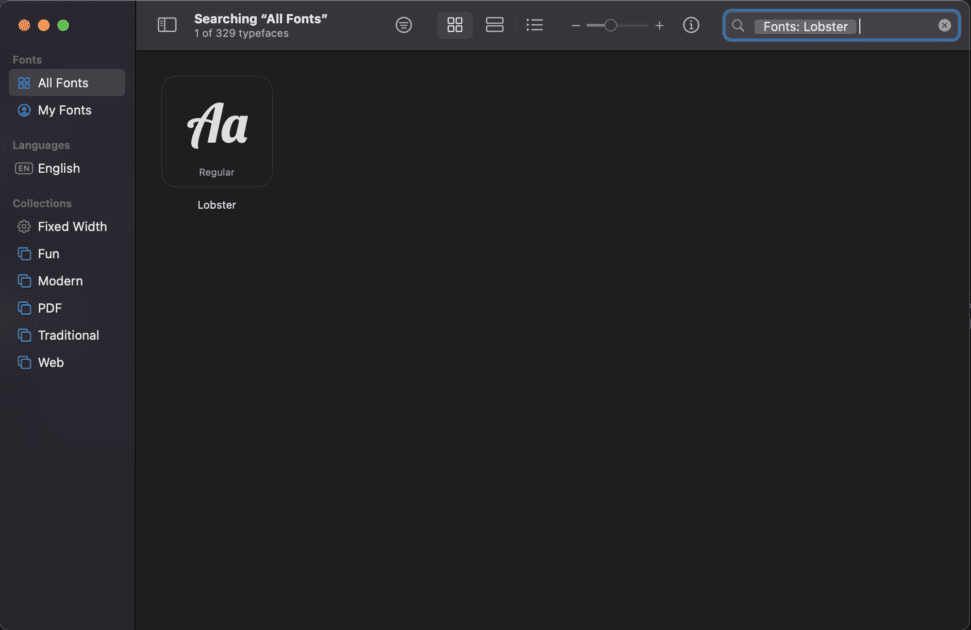
- Once downloaded and installed, a screen will open up that’ll show you all the available fonts you have downloaded on the Mac as My Fonts
- You can search for your fonts by name, if you have multiple fonts downloaded
For Windows
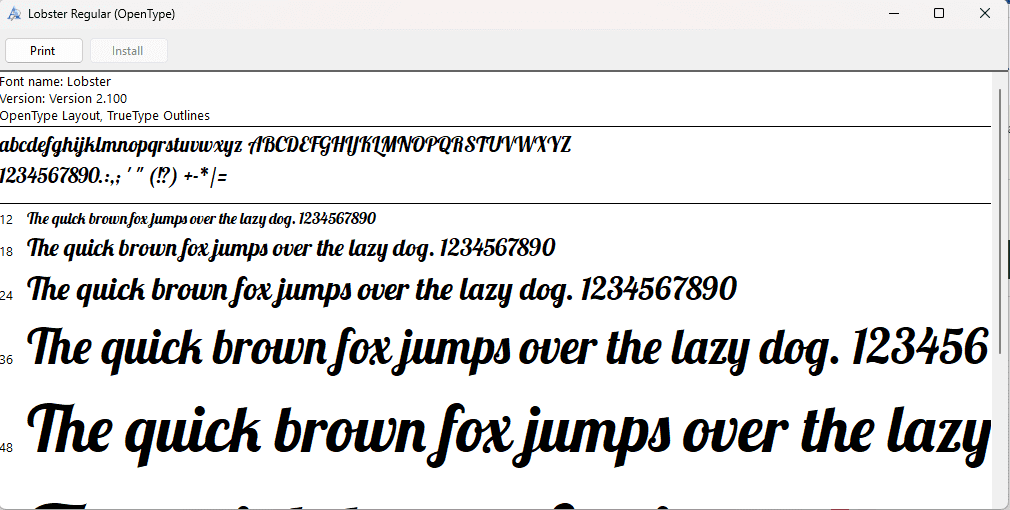
- You can double-click the file, and you’ll find a TTF or an OTF file
- Click on the file, and you’ll find two options: Print or Install.
- Press Install and you’ll see that option’s blurred out, which means it has been downloaded already
When you install the font by right-clicking it, you make it available across all applications on your PC.
#4. Select the Font in Photoshop
As your font is available on your PC, you’ll be able to select it in Photoshop. Now, where should you go looking for it?
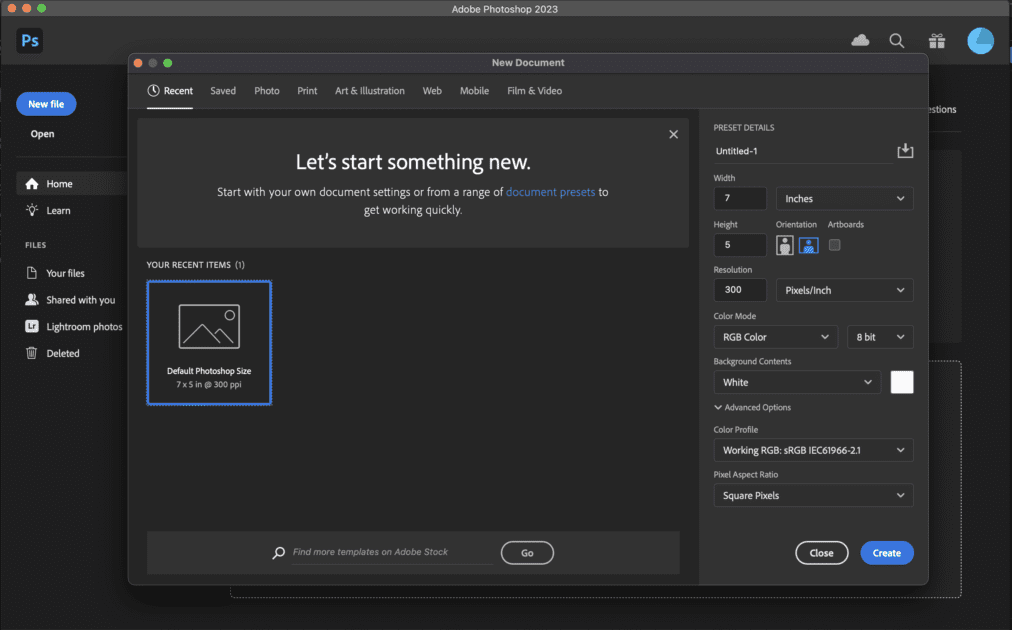
- Open the Adobe Photoshop application
- Click on the left menubar and look for the capital T; T stands for the horizontal type tool
- If you right-click on it, you can also choose Vertical Type Tool, Vertical Type Mask Tool, and Horizontal Type Mask Tool
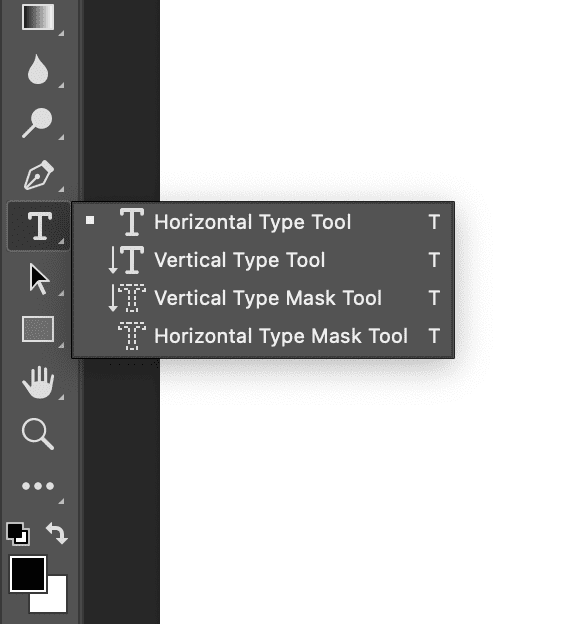
- For this purpose, you can either select the Horizontal Type Tool or Vertical Type tool depending on whether you want to write left to right or top to bottom
- Click on the area where you would like to add the text
- A pop-up bar will appear on your screen
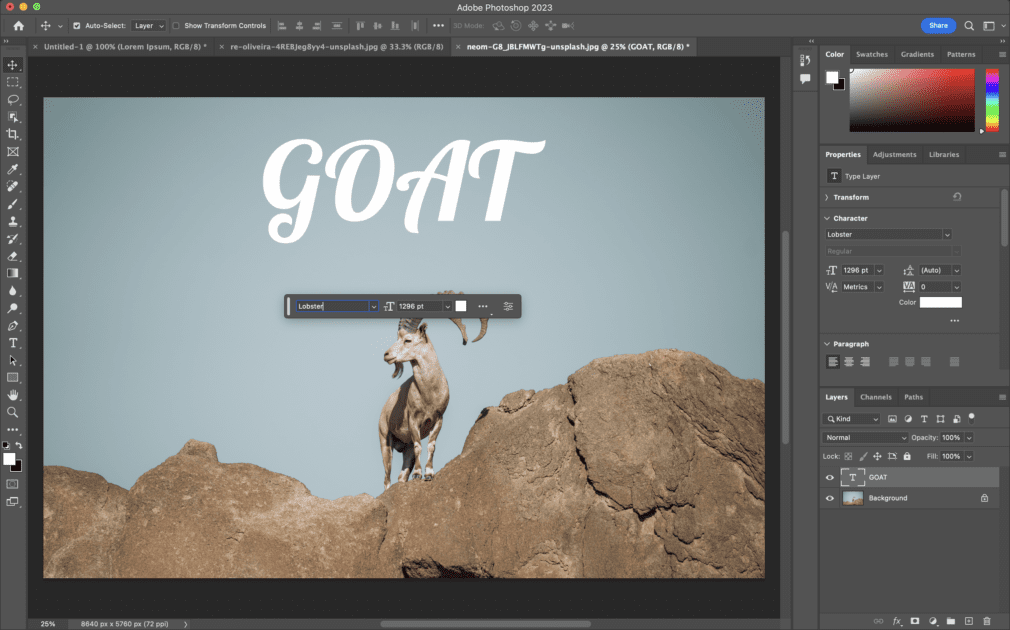
- Search for the font name you have downloaded and select it
- You can also choose the size and font color once you’ve selected it
- Start typing, and you’ll see your text appearing in the font you’ve downloaded and installed
How to Add Adobe Fonts to Photoshop
If you’re having trouble accessing or adding Adobe fonts to Photoshop, follow the steps below and never miss out on 20,000+ Adobe fonts that can be great for personal and commercial use:
#1. Downloading Adobe Fonts
Even if you have Adobe fonts activated, you can download additional Adobe fonts from the Adobe Library. To do this, you need the Creative Cloud app installed on your Windows or Mac device.
#2. Go to Adobe Font Library
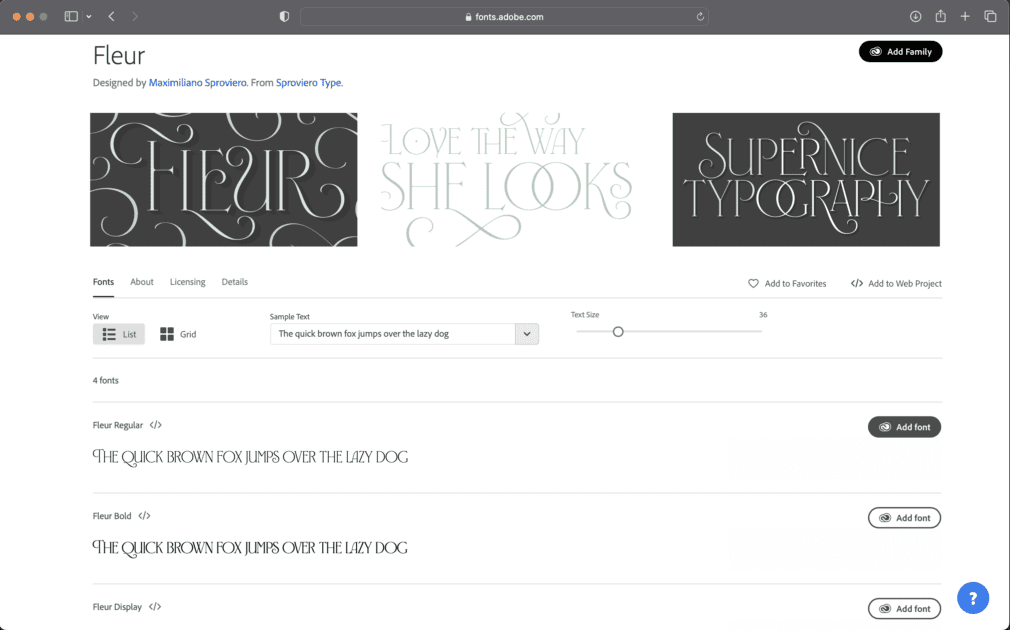
Next, go to your browser and make your way to the Adobe Font Library
You can look for fonts that match your writing style. Search for fonts via text size, languages and writing systems, tags, classification, and other properties. You can also tick the box and see more fonts that are available with Creative Cloud.
You can also manage these fonts by opening them with Creative Cloud or using them in Web Projects. Downloading them is fairly easy. Just click on Add Family.
You can also heart-react to each font you like and have a list of Favorites, which can then be accessed under Manage Fonts on the right.
#3. Activate Font
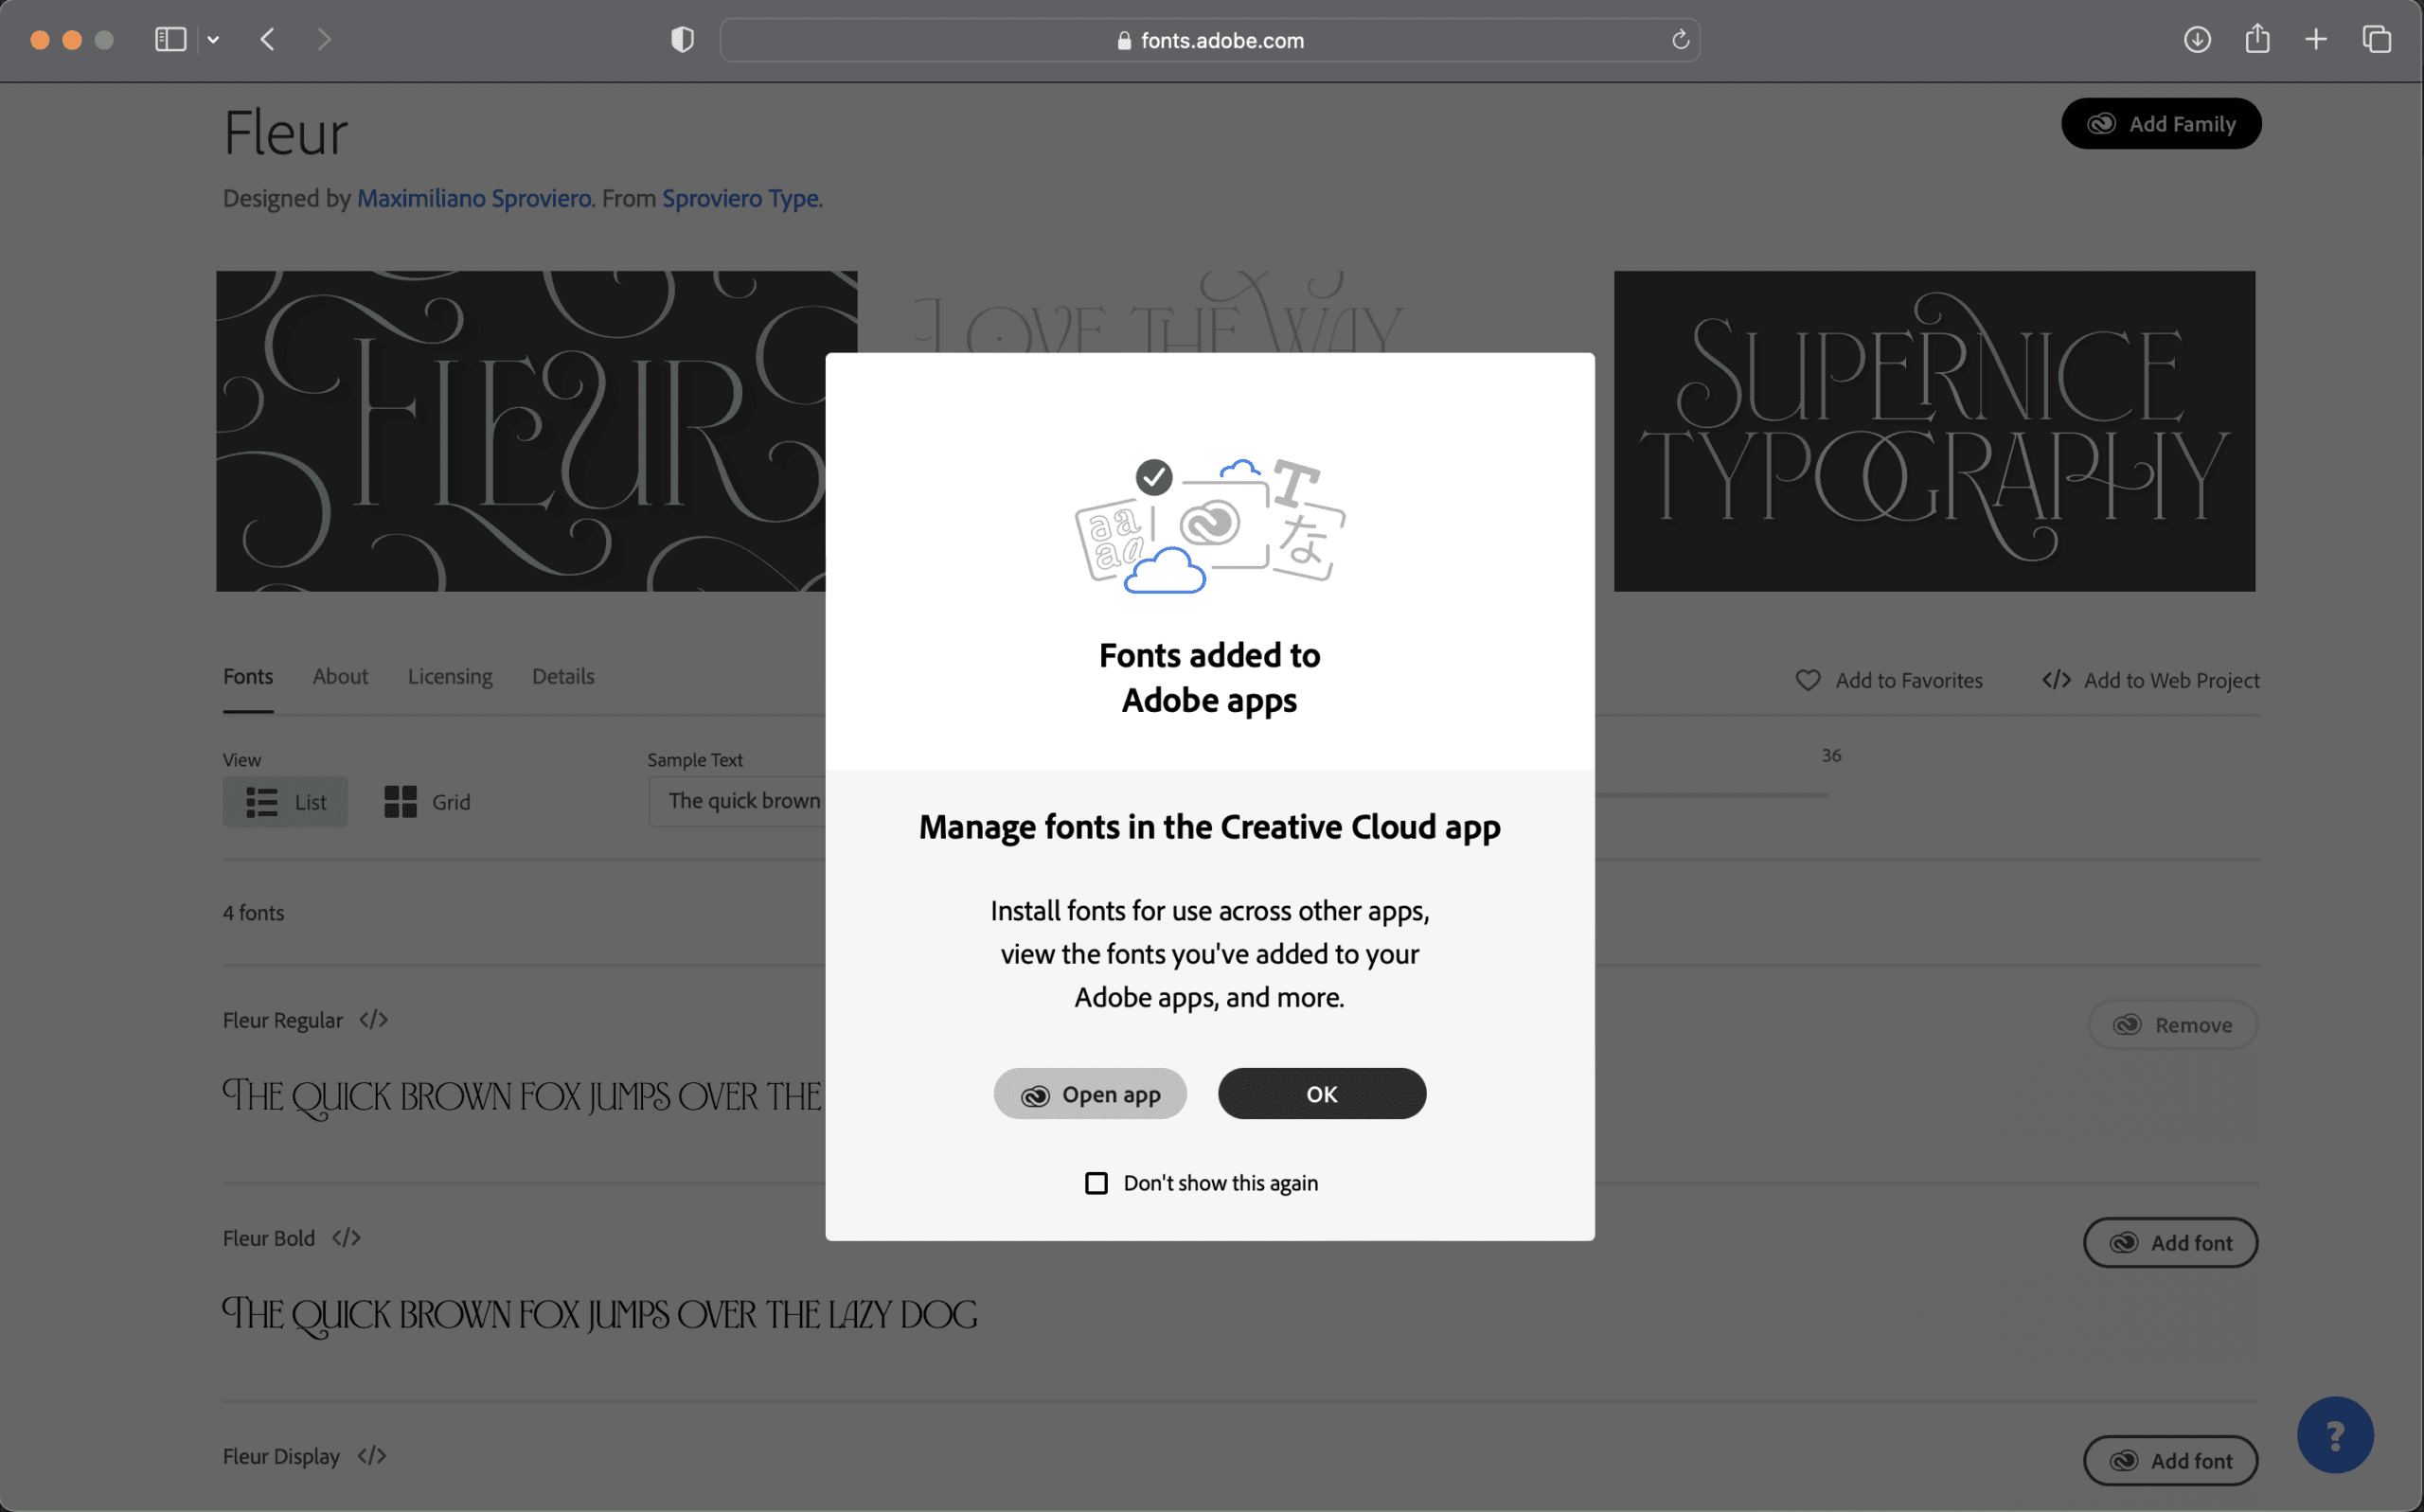
You can click on a font to see how it looks and licensing details. Mostly, licensing details will tell you if it’s fit for personal or commercial use, in what types of projects can this font be used, and how you can purchase additional licenses.
You can also activate font families together if you have Creative Cloud by clicking on Add Family. If you would rather not add the entire family, click Add Font.
The activated fonts get downloaded automatically and can be used across Adobe applications. You can remove the font later as well. They can be easily managed within Creative Cloud.
Things to Consider for Using Fonts in Adobe Photoshop
While downloading a font from the vast abyss of the internet might be straightforward, using it in an array of projects you’re not permitted to can get you in trouble. Steer clear of trouble by taking into consideration these essential pointers:
#1. Check License
About to download a font? Read the license. See if it’s fit for commercial use. To use fonts legally as a designer, you’ll need fonts that are permitted to be used commercially.
Moreover, certain fonts are available only for current projects like PDFs or web publishing. If you want to use them in other print projects, you might have to buy additional licenses. Hence, look out for these and steer clear of legal troubles.
#2. Look for a ReadMe File
In the absence of clear licensing details, you might want to look for a ‘readme file’. Certain font download websites let you download fonts. But only as a demo. Don’t mistake them for permissions.
Always check their ‘readme’ file to know about permissions. If you’re unable to find details, it’s best to skip a font rather than use a pirated font and get stuck in copyright issues.
#3. Rely on Reputable Sources Only
It’s easy to get carried away when you see a good font. You might want to download it straight away, even if the website’s not too well-known or mainstream. Don’t.
Other than legal and copyright issues, downloading a font from a spammy website can be corrupt. Most free fonts come with a Trojan virus. It can get downloaded as a legitimate or useful app and then try to gain access to your personal or confidential info. It can harm your system and put you in jeopardy.
#4. Contact the Creator for Copyright Issues
If you really like a font and there are no available details on licensing, permissions, or copyright, you can try one last resort. You can try reaching out to the creator.
Some font websites mention the author’s name or hyperlink to their website. You can leave them an email and try your best. Going another step ahead involves searching for the author on Reddit, Facebook Group, or Quora.
If you don’t find the author, you have a big chance of someone from the design community helping you with the author’s details or permissions.
#5. Check Terms of Use Even for Adobe Fonts
You can go to Adobe’s Font licensing to see permissions, as they have very extensive terms of use for Adobe fonts.
For example, you can’t use Adobe fonts in any mobile application you’re building. You’re permitted to use them for PDFs or for video content that has been edited using Adobe After Effects or Premiere Pro.
It’s important to remember that if you discontinue your Creative Cloud subscription, the font will disappear. It’ll show as a missing font, and you’ll need to subscribe to Creative Cloud to replace and reactivate the font.
You may also read Adobe Creative Cloud – Is It Worth It?
Be Careful Using Downloaded Fonts
While it’s incredible to add novel items like rare fonts to your design projects, you have to be meticulous in their use. Check for licensing, and be thorough with the Terms of Use, even if you’re using a free site or Adobe Fonts that are usually permitted for commercial projects.
Some fonts are permitted for some projects only and require separate print and digital licenses. You can also find the author and ask for a commercial use permit in case it’s not readily available. In the absence of any help, reach out to the designer’s community and have someone help you with the crucial decision.
Be extremely wary of downloading free fonts from small or illegitimate sites, as they can corrupt your PC and lead to sensitive data loss.
Next, you may also explore some best Photoshop plugins to take your design skills to the next level.


