Did you just see the “An error occurred while preparing the installation/ update” error while installing or updating macOS? Don’t worry yet. Instead, try out these simple fixes.
Installing macOS or updating a Mac device is quite convenient compared to Windows devices. You can just hit the Update macOS button in the Software Update utility of Mac, and you are good to go. If you ever need to install a fresh copy of macOS, you can do it directly from the Mac App Store.
However, sometimes, your Mac can not accept an update or prepare for the new installation process. If you ever get stuck in such an issue, get started with the following troubleshooting ideas.
Reasons Behind macOS Installation or Update Errors
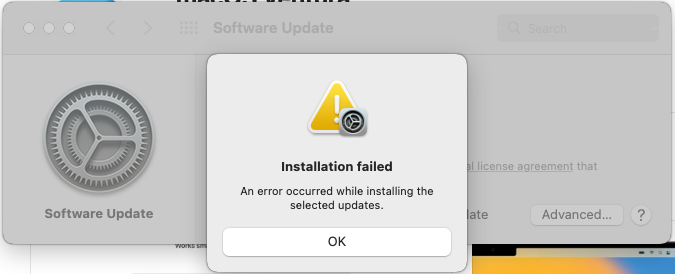
Most Macs shouldn’t show such an error ever. Only a few could encounter the error while updating or installing macOS due to the following reasons:
- The device lacks sufficient disk space to download, expand, and install the new macOS update or fresh installation.
- The internet connectivity is not adequate either for updates or fresh installation of macOS.
- The MacBook or iMac might not be compatible with the macOS you are trying to install.
- A failing Macintosh HD (NVMe/ SSD/ HDD) or RAM could also stall the macOS update or installation process.
- In the case of fresh macOS installation, a faulty installation media like a USB stick or external HDD can also cause this error.
- The source ISO of a bootable macOS USB could be corrupted or incomplete.
The error could happen in the following stages of installing or updating Mac:
- Downloading updates or installer
- Preparing the disk and media for installation
- Installing macOS
- Verification of the macOS
Often, the error itself suggests the best possible solution, like restarting the device or emptying some disk space. If you do get such directions, try that first. If the issue does not go away or you did not get any advice from Mac in the first place, try the following fixes. For your convenience, I organized the easiest fixes first.
Check the Device Compatibility
It is quite tempting to update to or install the latest macOS as soon as Apple releases one. However, there is no guarantee that all the latest macOS releases will support your existing Mac. Hence, check the below list and see if your Mac is compatible with the latest release of macOS, which is Ventura:
- Mac Pro (2019)
- Mac Studio (2022)
- Mac Mini (2018)
- iMac (21.5-inch, 2017)
- MacBook Air (Retina, 13-inch, 2018)
- MacBook Pro (13-inch, 2017)
For more compatible devices, visit Apple’s device compatibility portal. Suppose the device is compatible. Then, check for the following first:
Stable Internet
The macOS update process will always require stable internet. But, you may easily say what has internet to do with a bootable-disk based macOS installation process.
Even in this scenario, the macOS installer must go online to fetch device firmware data, device hardware information, etc. Hence, ensure your Mac is connected to a stable internet with 2 Mbps or better connectivity strength.
Free Up Disk Space
If the update or installation fails due to disk space shortage, here is what you should do:
- Click the Apple logo on the Mac toolbar and select About This Mac.
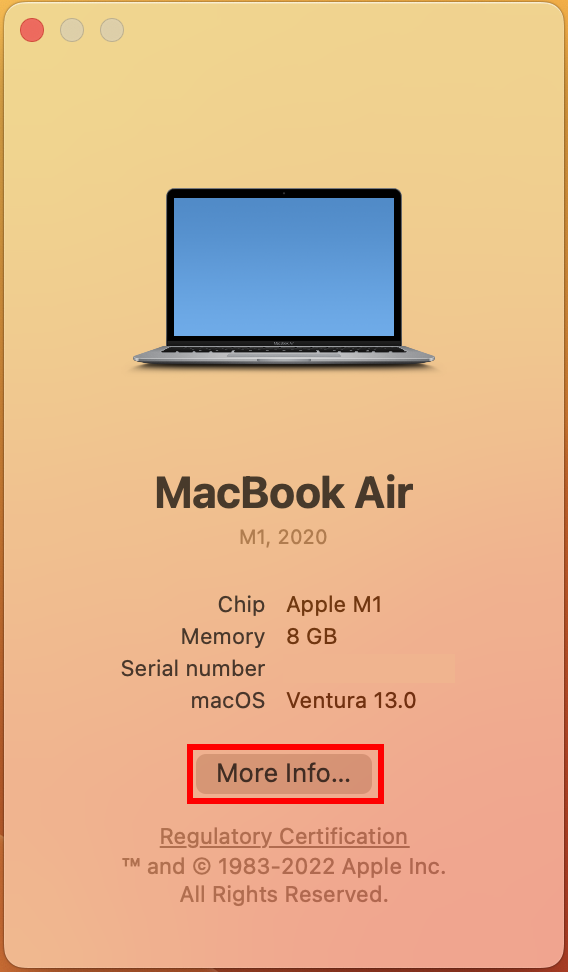
- A splash screen will pop up. There, click More Info.
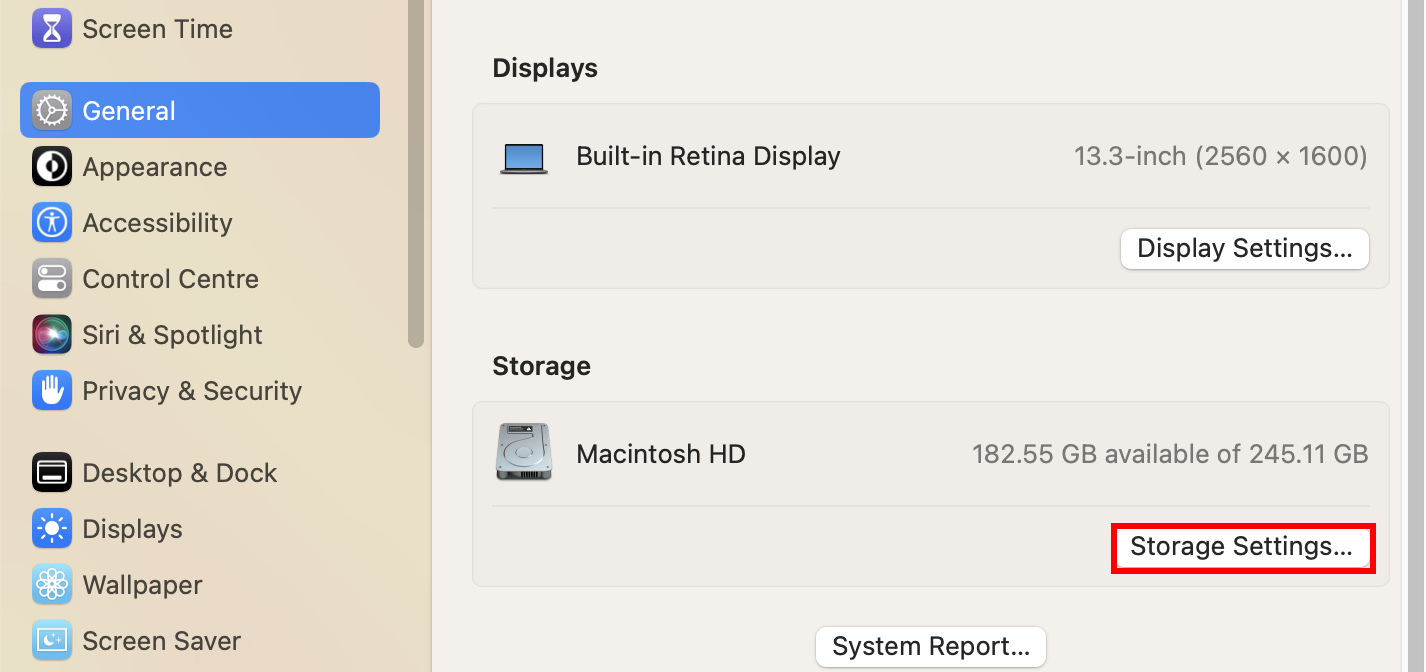
- Scroll down to the Storage section and click on Storage Settings near Macintosh HD.
- You should now see options like Applications, Documents, Photos, etc.
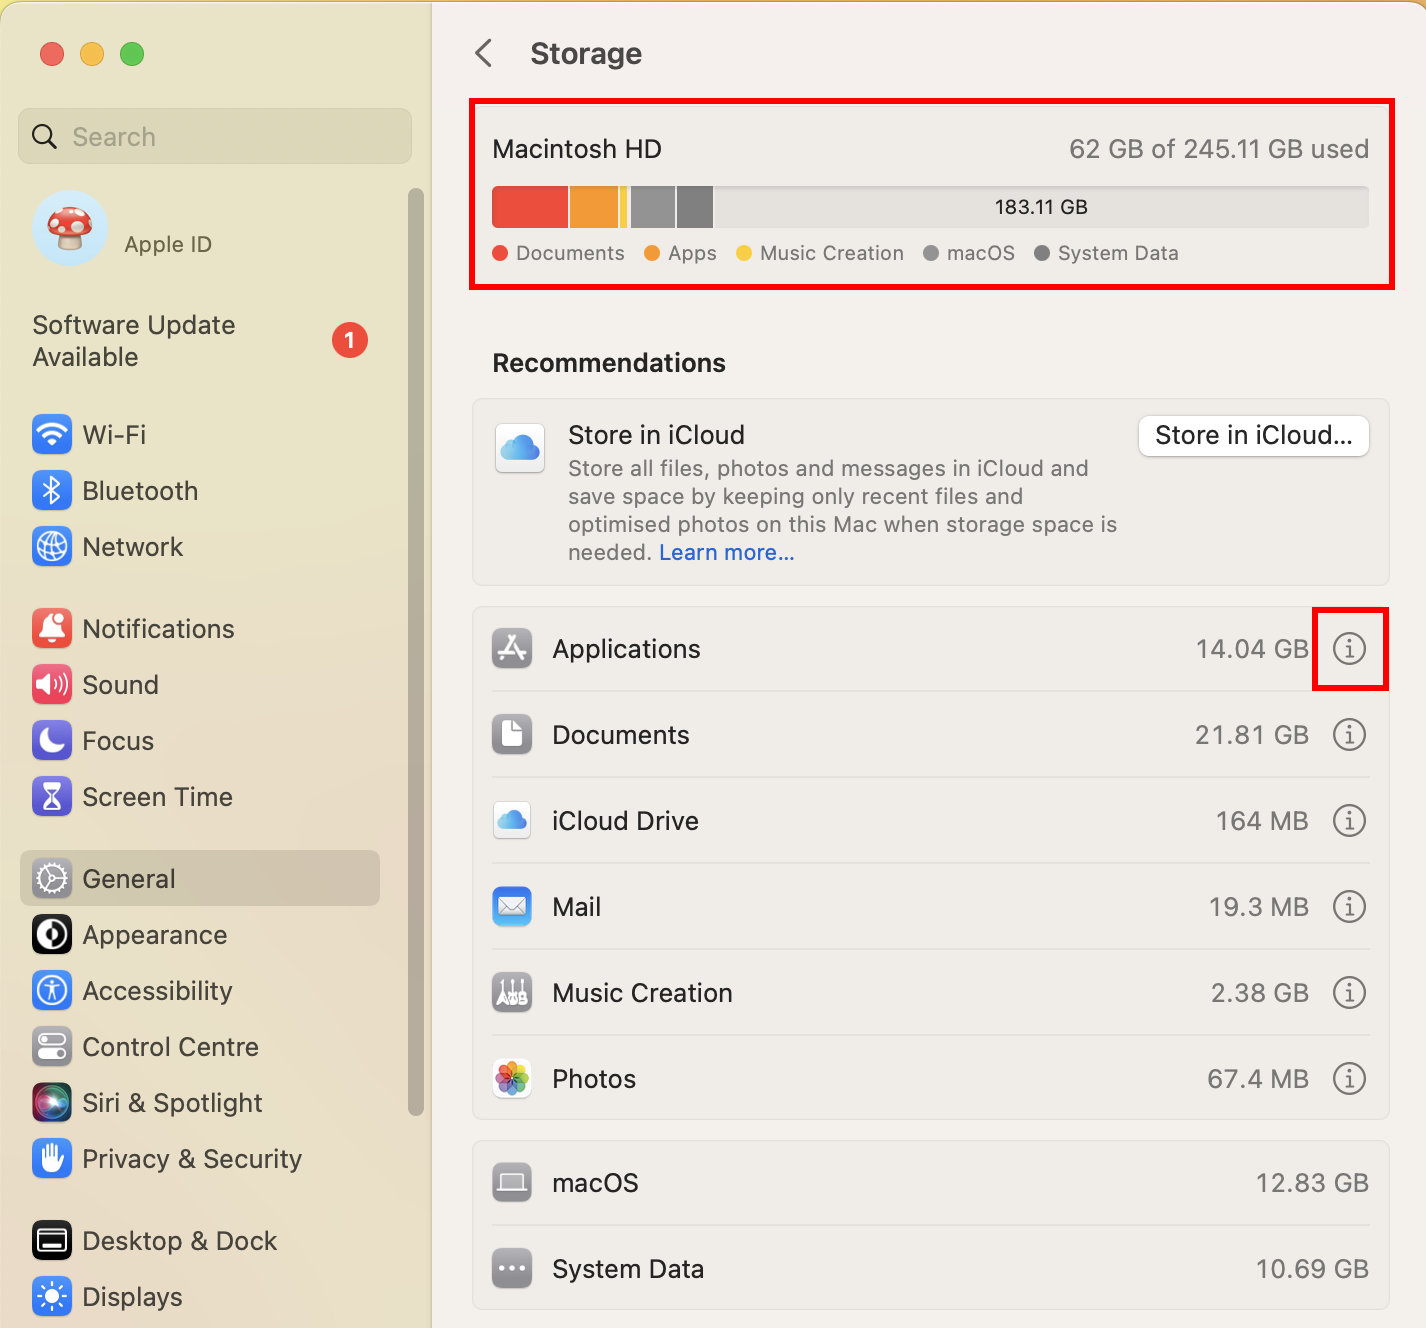
- Click the (i) buttons to find further options to delete unnecessary files.
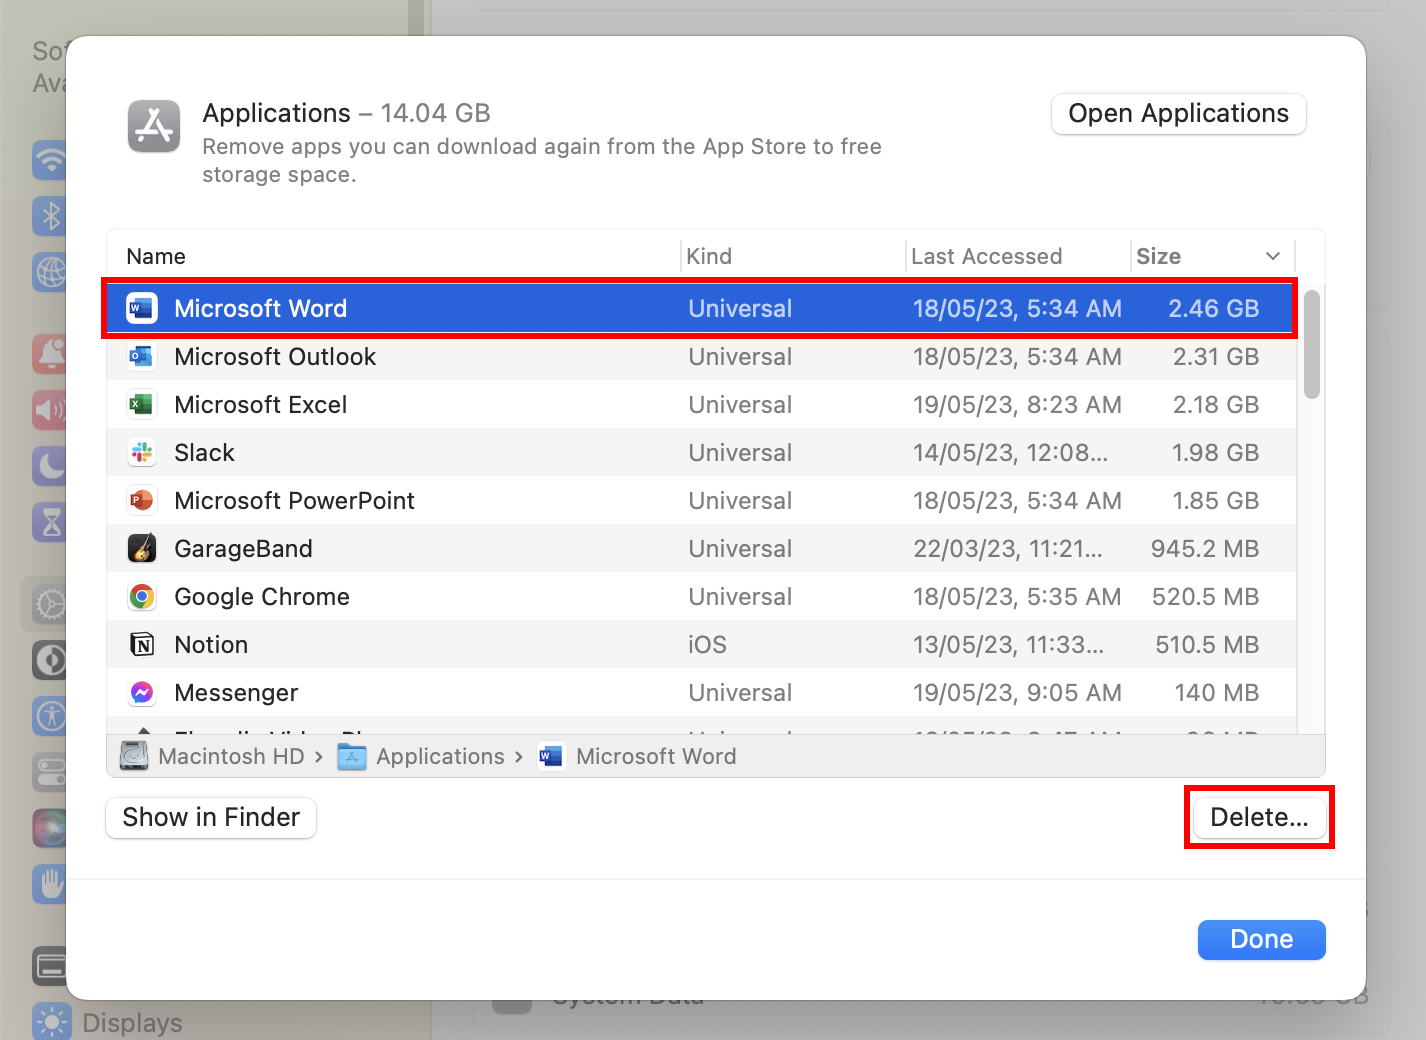
After freeing up enough disk space, retry the macOS update or installation.
Try Combo Updates
If you are facing frequent issues with macOS updation or fresh installation, you must try a compatible macOS Combo Update. A Combo Update is a larger macOS package than the Delta Update. A Combo Update can update your Mac from a couple of years old macOS setup to macOS Catalina.
So, if you are now on macOS Mojave, High Sierra, etc., and want to update, get the macOS Catalina Combo Update from Apple Support Downloads portal.
Restart the Mac
One of the easiest tricks to fix most computer trouble is restarting the system. This is also applicable to Mac. So, reboot your MacBook or iMac by following these steps:
- Click the Apple menu on the Mac toolbar.
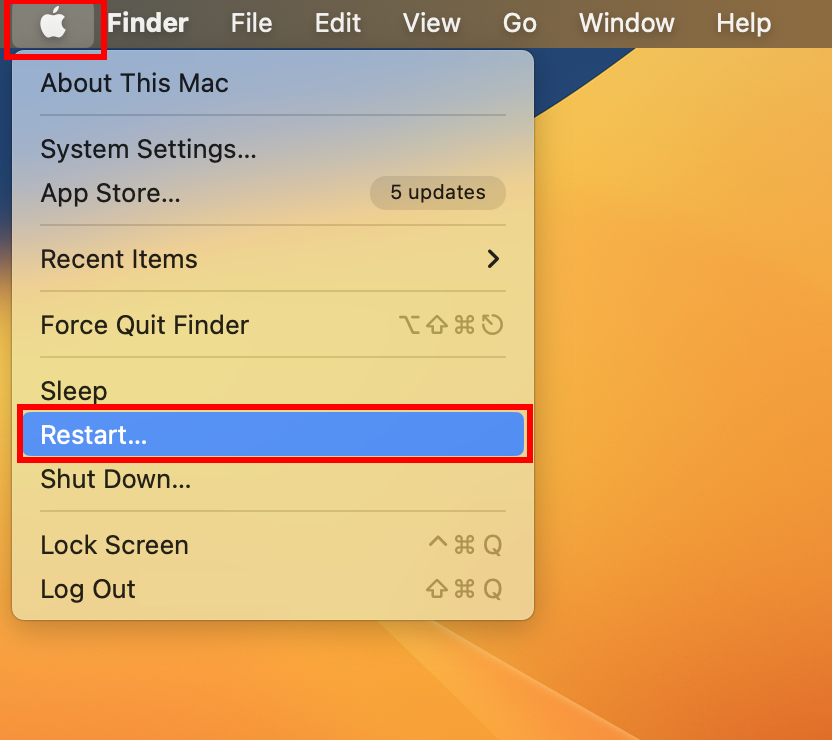
- On the context menu that opens, select Restart.
- A notification will pop up. There, Click Restart again.
- Your MacBook or iMac will restart
After the reboot, try to update macOS from System Settings > General > Software Update or re-install macOS from App Store.
Reset the Mac NVRAM
NVRAM, also known as PRAM (Parameter RAM), is a small memory chip on the Mac to store and quickly retrieve specific system settings. These settings include various hardware systems such as sound volume, display resolution, startup-disk selection, and time zone.
If you encounter issues where one or more settings aren’t functioning as expected, like the “Error occurred while preparing the installation/ update,” performing a reset of the NVRAM can be helpful.
If you are still using one of those Intel-processor-based Macs, you can follow these instructions to restart the NVRAM:
- Power down your Mac.
- Power on your Mac, and quickly press and hold the Option, Command, P, and R keys.
- After approximately 20 seconds, you can release the keys. During this time, your Mac may appear to restart; you may hear the startup sound multiple times or see the Apple logo multiple times.
- Now, try to update or install macOS.
Resolve Date and Time Issues
When your device communicates with Apple servers, manual date and time create a conflict. To resolve this, follow these steps:
- From the Apple menu on the Mac toolbar, go to System Settings.
- On System Settings, choose the General option on the left side navigation panel.
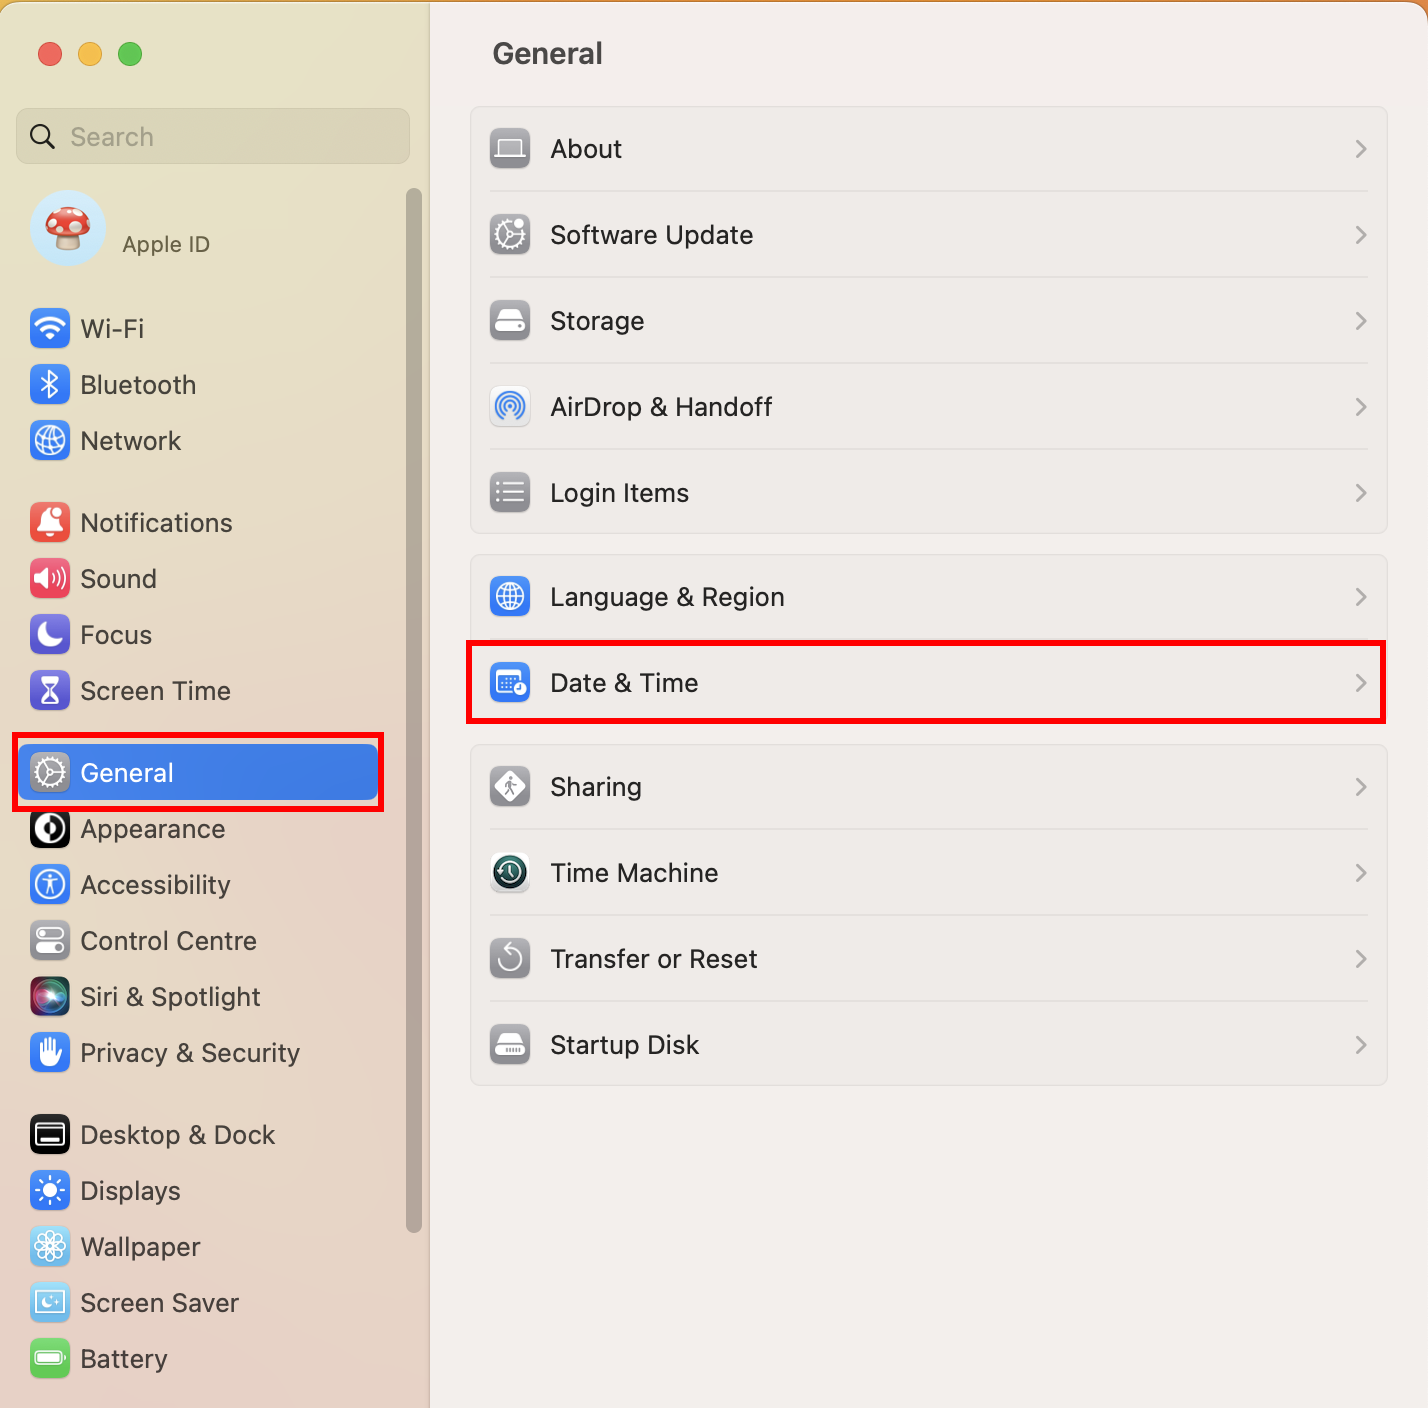
- On the right side, you should now see the Date & Time option. Click on that.
- Now, toggle on the Set time and date automatically switch.
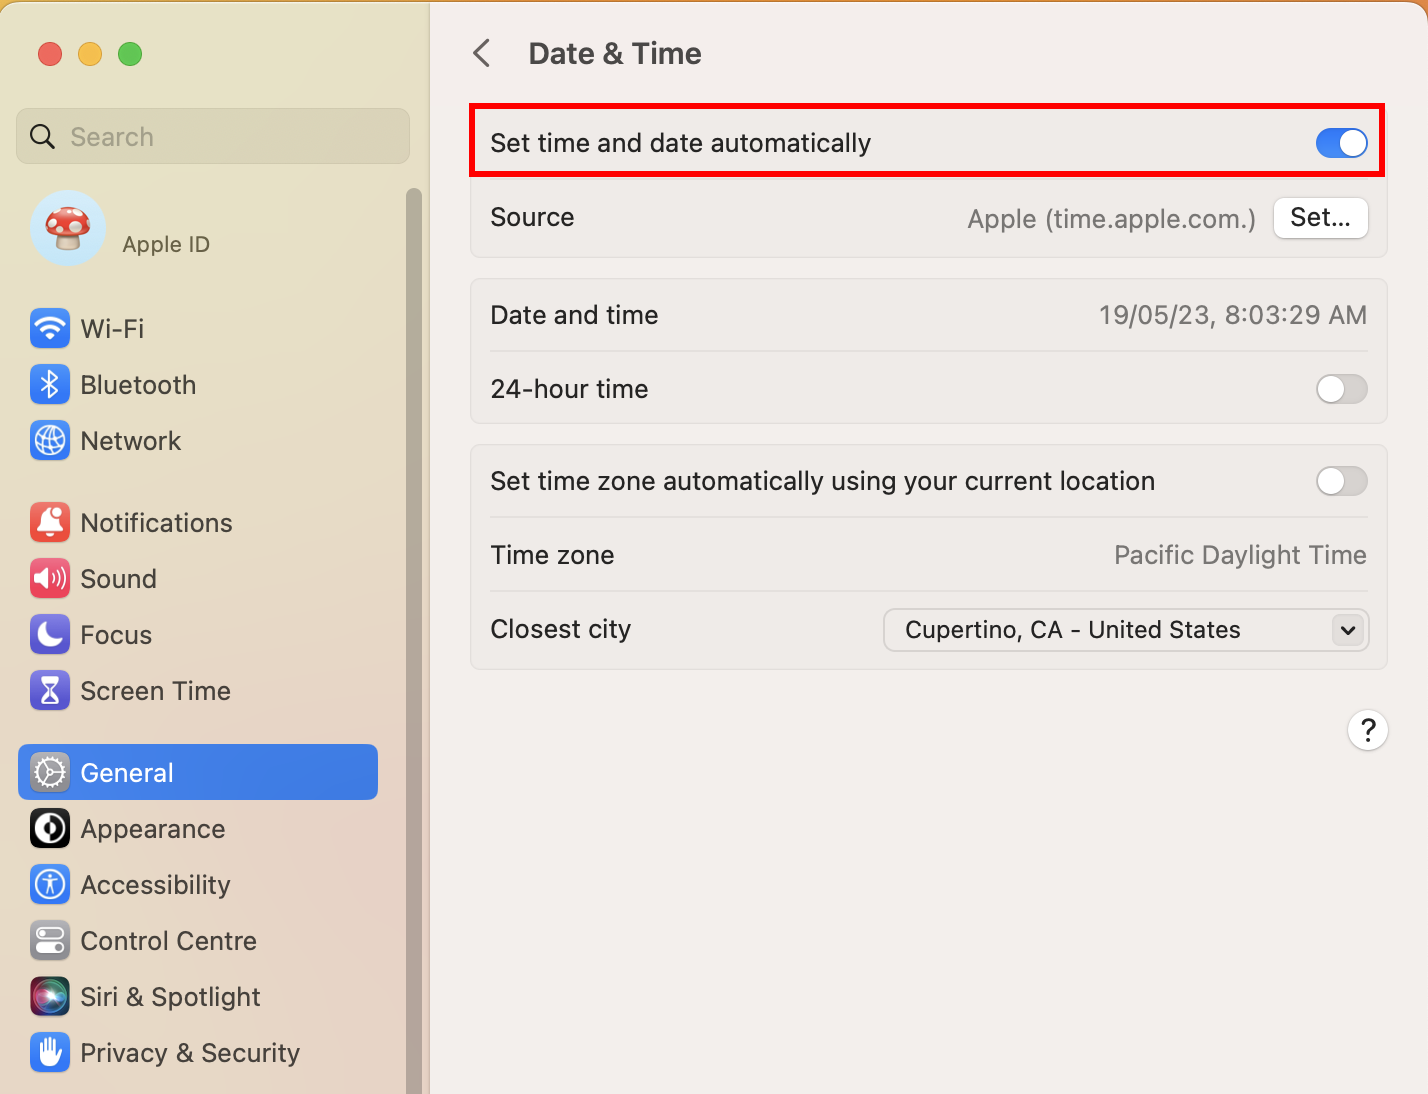
- Closely look at the values and ensure that the auto-synced date and time are correct.
Now, you can go ahead with updating or installing macOS on your MacBook or iMac, and this time it should work.
Install macOS in Safe Mode
If you are unable to complete macOS installation from the Mac App Store in normal mode, you can try Safe Mode. Follow the steps below to reset the Mac into Safe Mode:
Safe Mode for Apple Silicon Mac
- Go to the Apple menu and click Shut Down to turn off the Mac.
- After 10 seconds of shutdown, hit the power on button.
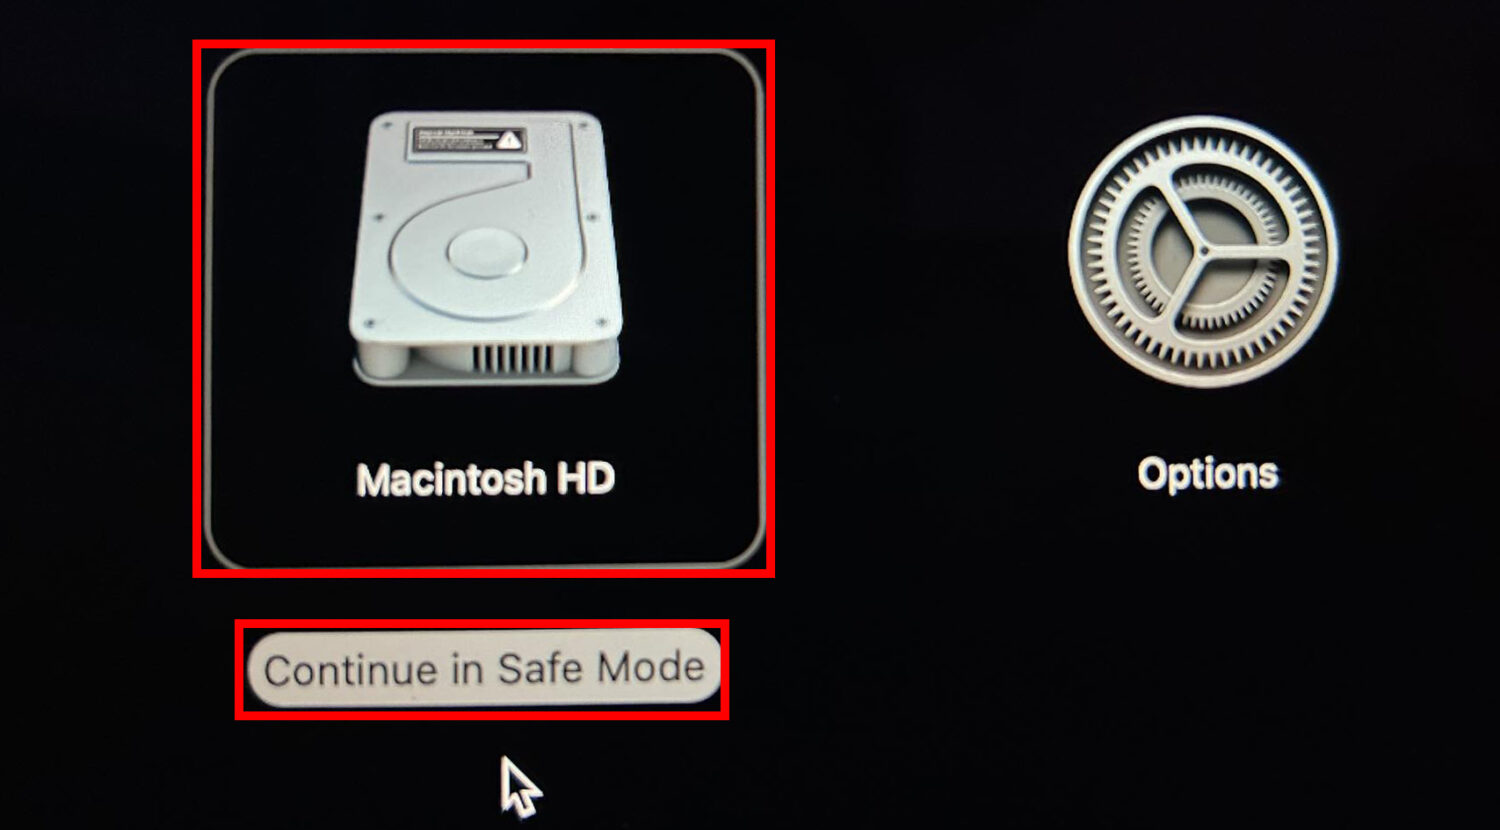
- Keep pressing the button until the startup options pop-up appears.
- From the startup options window, choose your desired startup disk, and then press and hold the Shift key.
- While you’re holding the Shift key, click Continue in safe mode.
- Proceed to log in to your Mac. It’s possible that you may be prompted to log in again during this process.
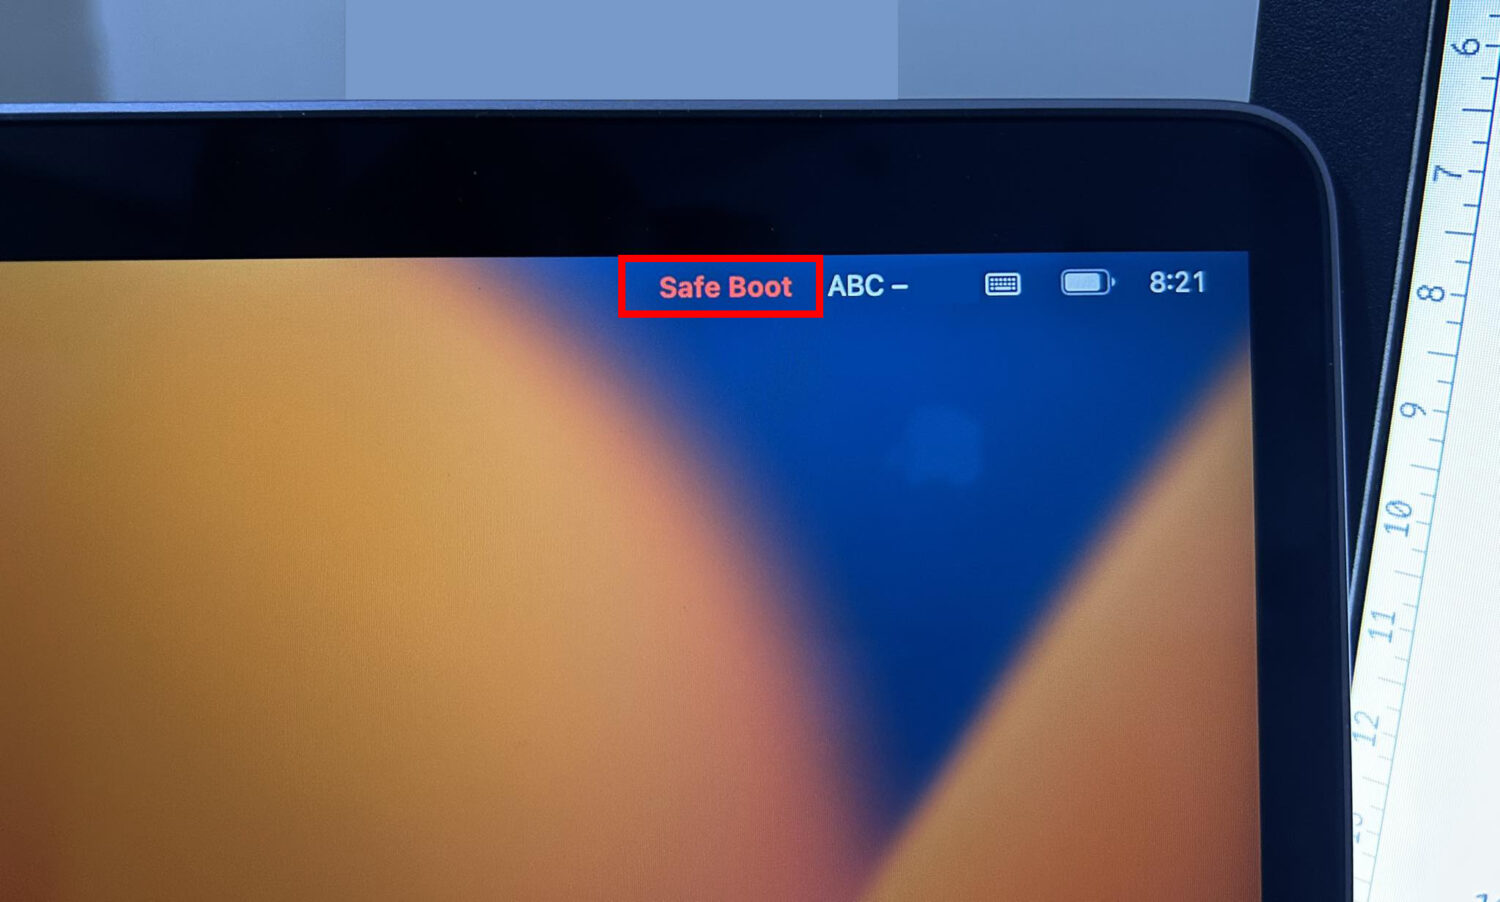
- Once on the login screen, you should see Safe Boot near the keyboard configuration information in the top right corner of the screen.
Safe Mode for Intel Mac
- Reboot or power on the Mac.
- Immediately, press and hold the Shift key and let the startup process continue.
- Release the Shift key when you reach the login window.
- Continue to log in to your Mac using a password.
- The macOS may ask you to log in again when you activate the Safe Mode.
- You should see the label “Safe Boot” displayed in the upper-right corner of the window, either on the first or second log-in attempt.
To get rid of the Safe Mode on Mac, just reboot the device again.
Try the macOS Recovery
When facing trouble installing the latest macOS on your MacBook or iMac, it is worth trying the same from the macOS Recovery screen. The macOS Recovery can install the latest macOS, the most updated version of the previously installed macOS, and the macOS that came with the device.
Now, the process to enter the Recovery mode on Apple Silicon Mac and Intel Mac is slightly different. However, for any of these Macs, ensure you satisfy the following conditions:
- You have plugged in the charging adapter to a power outlet, and the Mac is charging.
- You have to power down the device.
- Finally, if using the wireless keyboard, connect the keyboard using a USB cable or use a wired keyboard.
Recovery Mode for Apple Silicon Mac
- Press and hold the Power on button on the keyboard (MacBook) or on the back panel (iMac) until you see the Macintosh HD and Options screen (Startup options).
- Click the cogwheel icon or the Options button, and the Continue button will appear. Click Continue.
- Apple logo with a progress bar shows up.
- The device will soon enter the macOS Recovery screen.
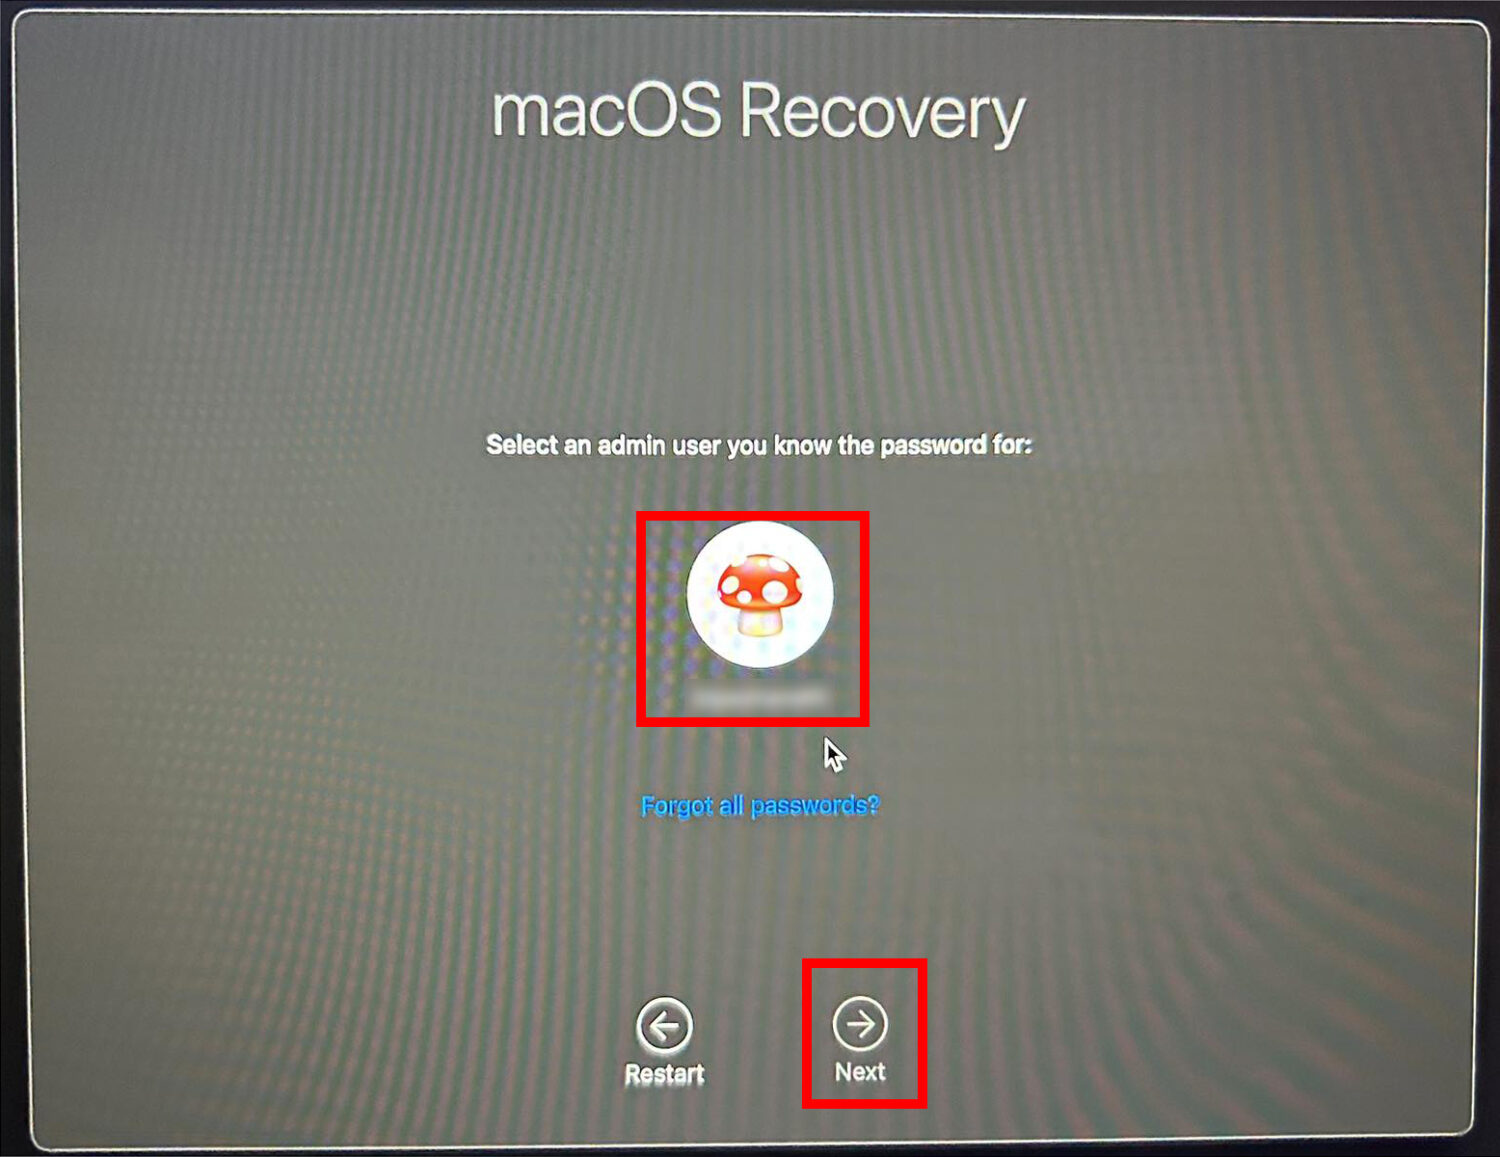
- Select the user account for which you remember the password and click Next.
- Enter the password for the account.
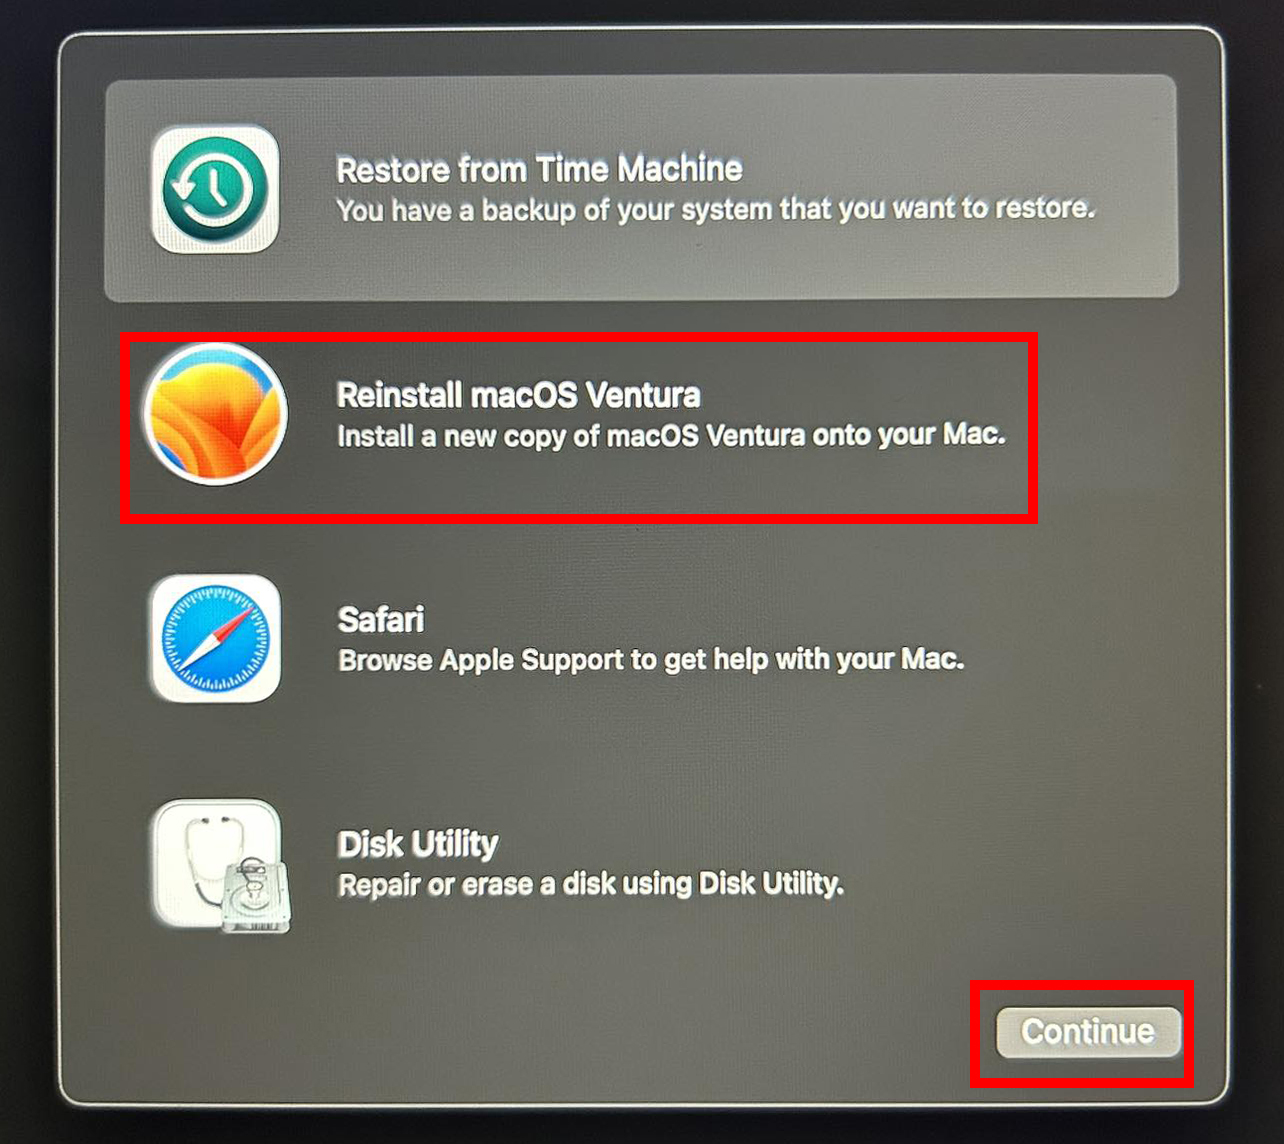
- You should now see four options on your screen.
- Choose Reinstall macOS (Edition name) and hit the Continue button.
- Follow the instructions you get on the screen to complete the installation of the Mac.
Recovery Mode for Intel Mac
- Shut down your Mac and wait for 10 seconds.
- Now, hit the power on button and immediately press the Command + R buttons until you see an Apple Logo.
- You should see a dark screen with a Recovery menu in place of the Apple menu on the Mac toolbar.
- That’s the Recovery screen, and there you should also see four options. One of those is Reinstall macOS (Edition name). Click on this.
- Follow on-screen instructions to set up macOS.
Alternatively, you can use the following key combinations to enter Recovery mode as well:
- Option + Command + R: install the latest macOS
- Control + Option + Command + R: install the operating system that came with the device
If you were upgrading to the latest macOS, hit Option + Command + R to enter Recovery mode.
Get a Different macOS Installer
If the existing bootable disk continues to give a failure during the macOS installation, try installing the OS from Mac App Store. Here is how:
- Launch Mac App Store and search for macOS Ventura or any other edition.
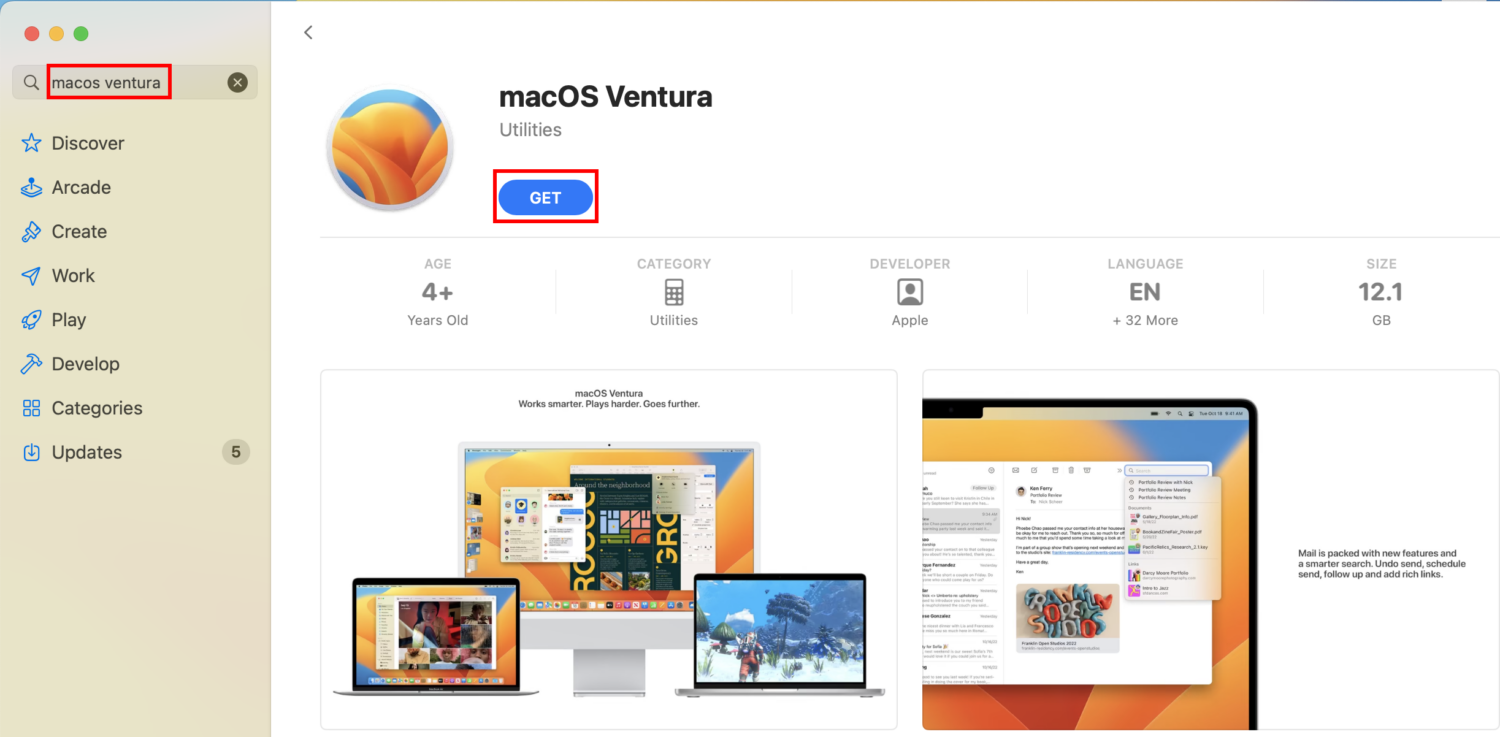
- When the appropriate item comes up, click on it to bring up the Get icon.
- Hit the Get button, and the app will take you to System Preferences (System Settings) > General > Software Update.
Visit the How to Download macOS portal to download or install macOS of your preferred edition.
Alternatively, visit Internet Archive and search for macOS Ventura ISO, macOS Monterey ISO, etc., to directly download the bootable macOS installers.
Install macOS After Erasing the Disk
When the Mac is quite old, it is obvious that the HDD or SSD could fail frequently. In such a situation, it is beneficial to erase the Macintosh HD and format it with Apple File System (APFS) before the fresh installation of macOS. Here’s how:
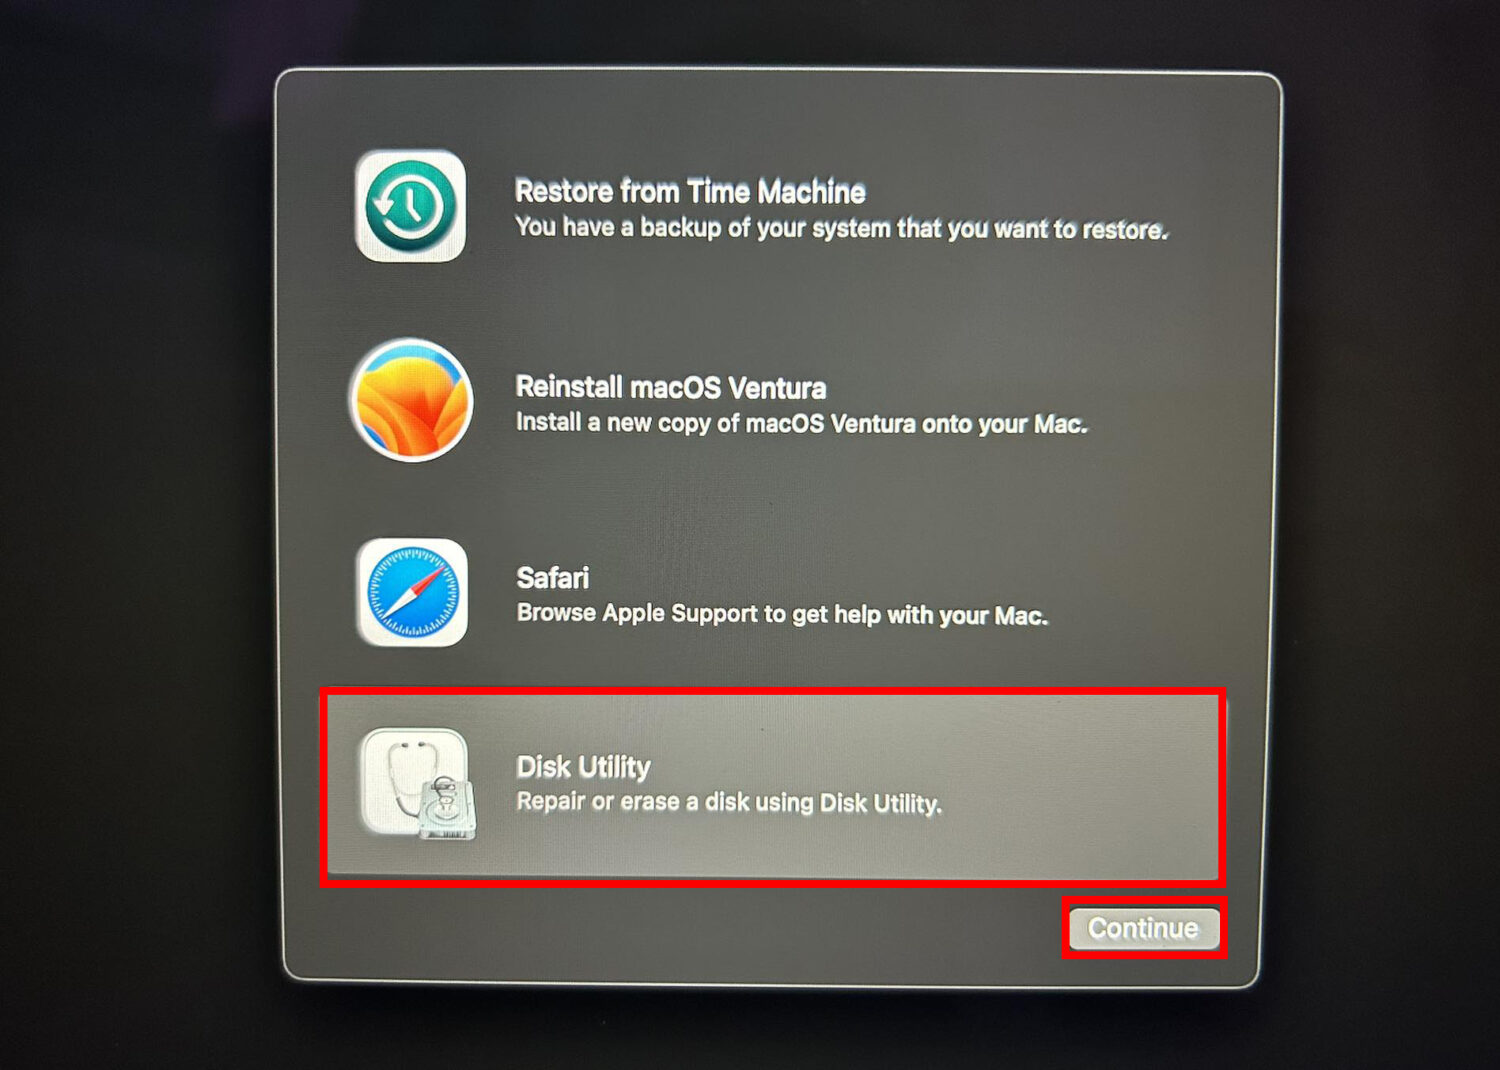
- Access the Mac Recovery screen by following the methods mentioned earlier.
- Click the Disk Utility option and hit the Continue button.
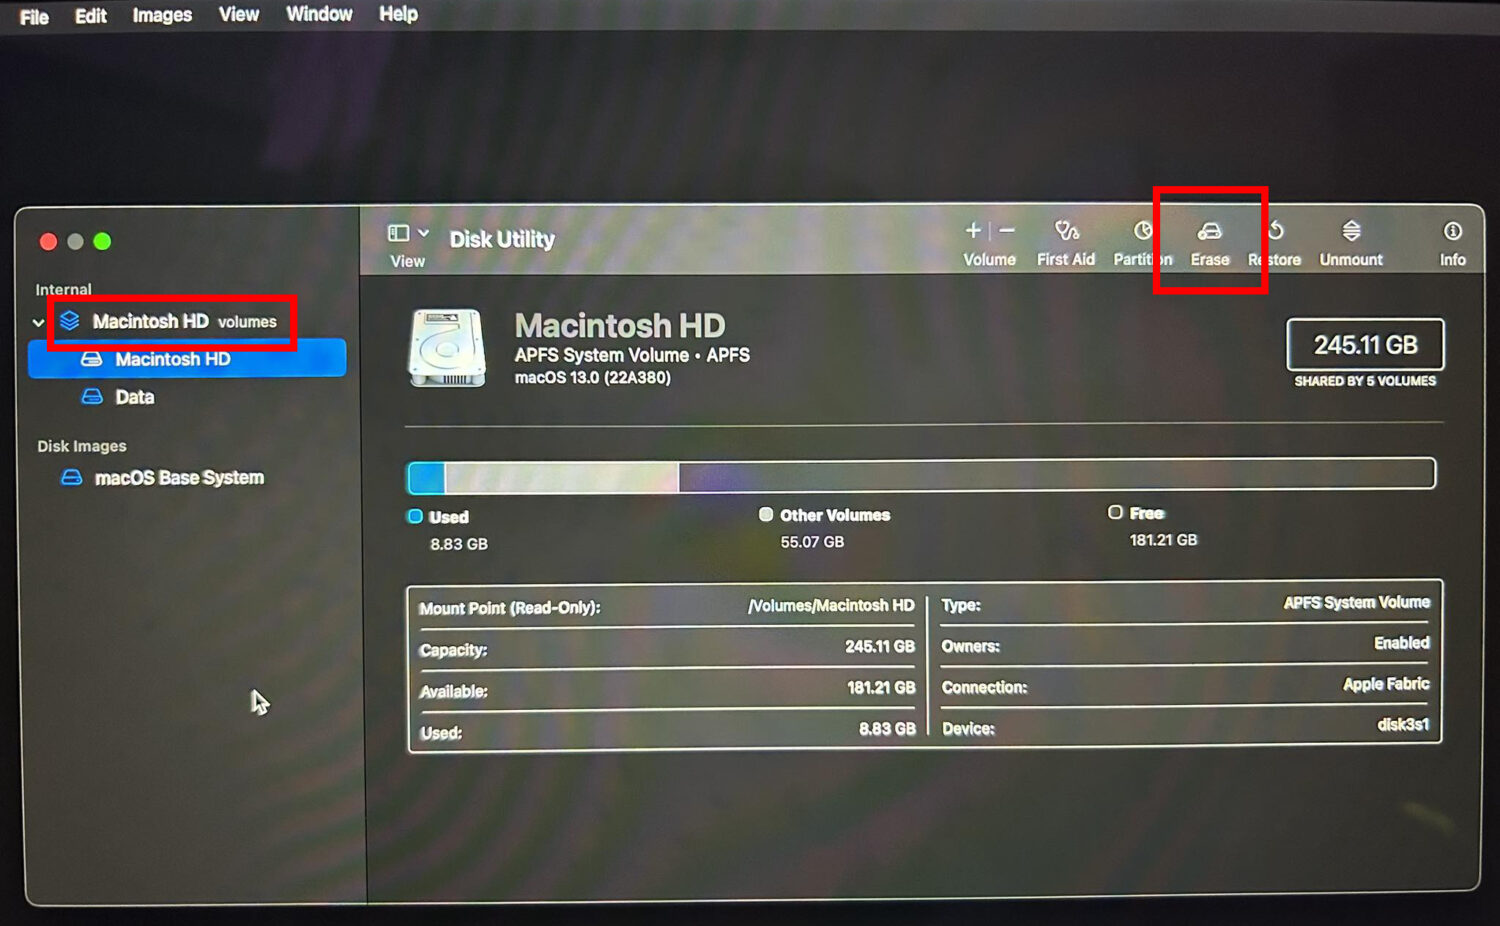
- Inside Disk Utility, select the Macintosh HD Volumes and click Erase on the toolbar.
- On the pop-up that follows, click Erase. The tool will automatically choose APFS.
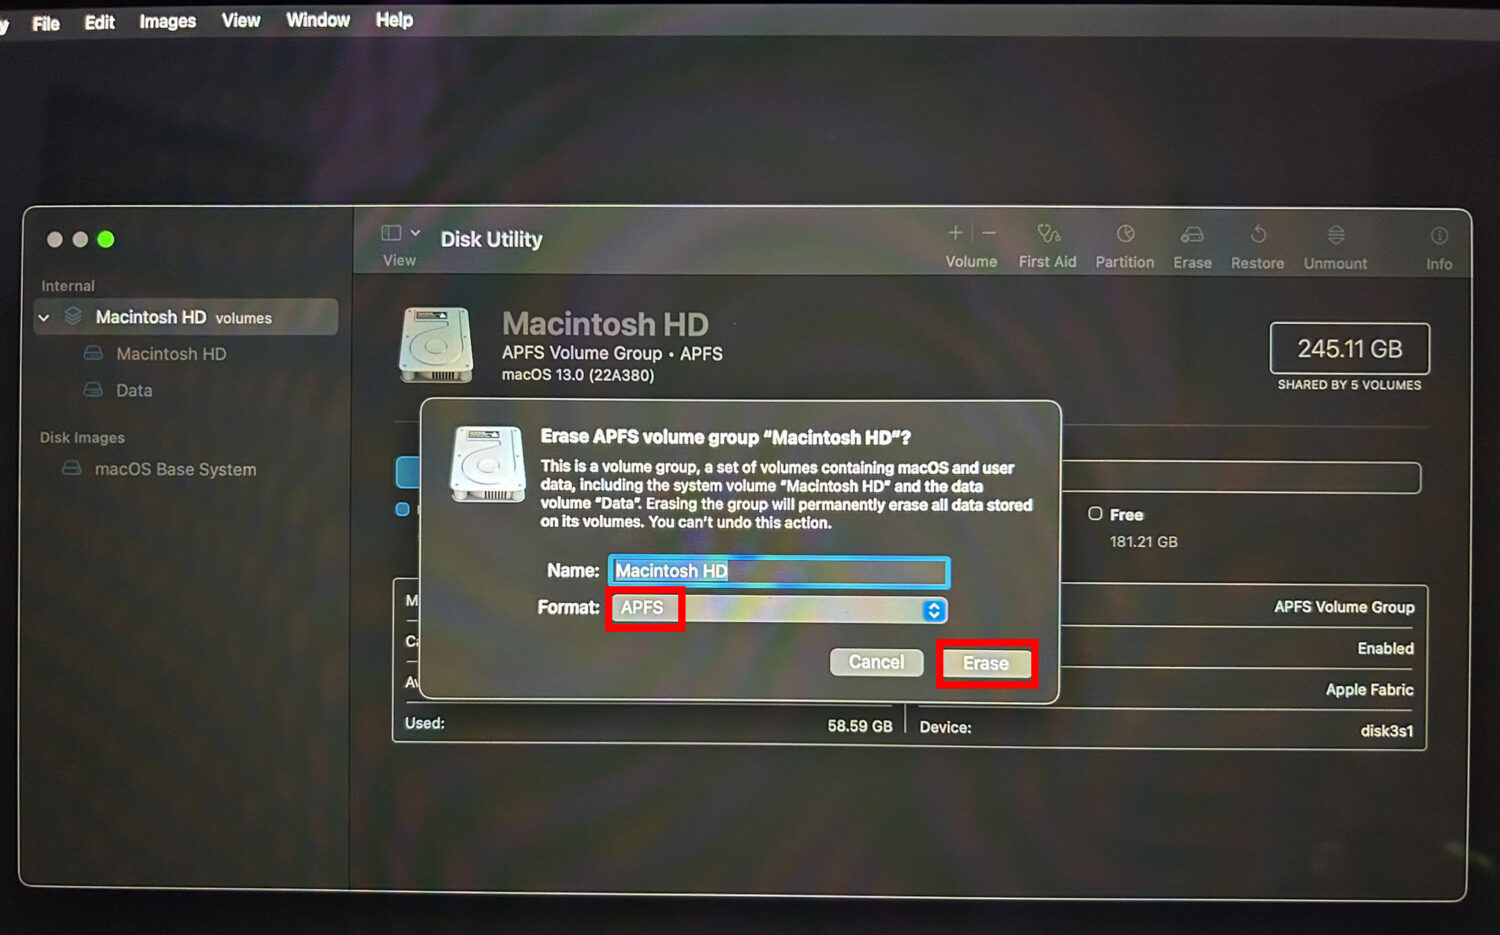
- Perform the on-screen instructions to complete the disk-erasing process.
- Close Disk Utility and return to the Recovery screen.
- There, click Reinstall macOS (Edition name) to continue with the fresh installation.
Get in Touch With Apple Support
If none of these work, you can get in touch with Apple Support virtually. Alternatively, you can visit the nearest Apple Authorized Service Center for in-person repairs.
Find below links to get expert support from Apple:
Conclusion
So these are all proven methods to fix the “Error occurred while preparing the installation/ update” issue. Try the fixes in the order they appear to save time and effort. Share the article with your friends and colleagues to become their savior should they face any similar issues with their Mac.
Next up, how to use OpenCore Legacy Patcher to install macOS.

