Gmail makes it really easy to organize emails and stay on top of what is important to you. If you use Gmail as your main email client, then you probably will be interested in optimizing it to get the most out of it.
Gmail actually has a bunch of customization options that you can tweak according to your need to better manage emails. Whether you want to change UI, get help with composing emails, or manage email send/receive behavior, all can be tweaked in the settings.
Top Gmail Settings in 2024
To help you get the best Gmail experience, I am going to show you some Gmail settings that you can tweak according to your need to be more productive or simply make Gmail look better.
Note: All the settings listed below are either in the Gear menu at the top-right corner of the Gmail web app or in the settings that you can access by clicking the See all settings button in the Gear menu.
Change Email Density
In the Gear menu, there is an option to change the density of emails so more emails can fit on the screen at a time. The Default option shows emails along with their attachment icons. You can switch to the Comfortable option to not show the attachment icons to decrease density.
If you want to further decrease density, then switch to the Compact mode and each row of the email will further shrink to show more emails.
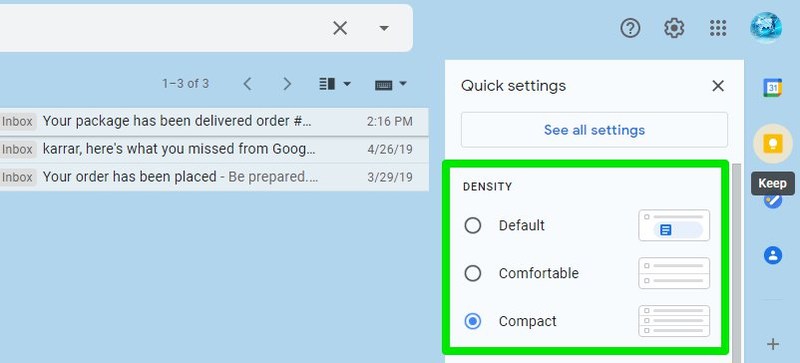
I personally like using the Compact mode as it makes it easier to skim through lots of emails without scrolling too much. However, you can try Comfortable mode too, if you are used to the Default mode, as it only hides the attachments icons while everything else looks the same.
Undo Sent Emails
It isn’t uncommon to accidentally hit the send button on an email while composing or remember to edit something in the email after sending it. If this happens to you often, then there is an option in Gmail to undo sent messages before a set period.
In the main Gmail settings, you’ll find the Undo Send option under the General tab. You can select a cancelation period of 5, 10, 20, or 30 seconds to undo a sent email before the selected time passes.
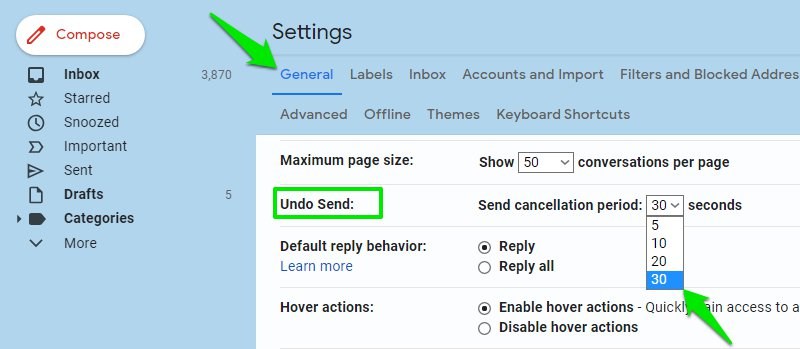
Once enabled, you’ll get an Undo popup whenever you send an email that will stay for the time period you have selected in the settings. You can click on Undo to stop the email, and it will be saved as an editable draft instead.
However, do keep in mind that this will delay your email delivery as Gmail will not deliver the email until the selected time has passed.
Change the Number of Emails Shown Per Page
You can increase/decrease the number of emails that are shown per page. If you receive many emails every day, then it’s only better to increase this number so you won’t have to click on the next page button often.
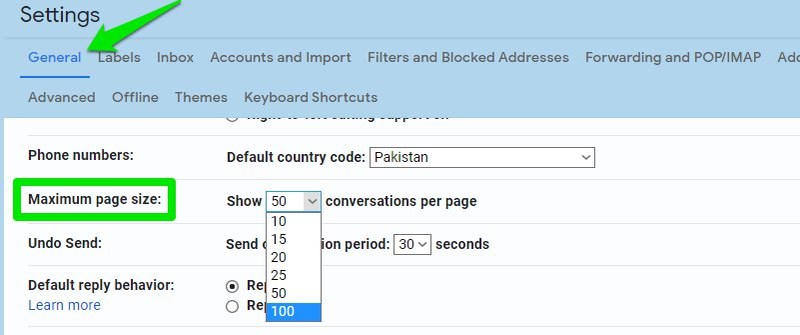
To change this, go to the Maximum page size setting under the General tab and select the number of emails there. You can select a minimum of 10 and a maximum of 100 emails per page.
Change Reading Pane
If you are tired of opening emails individually to view the content, then you can change the reading pane to show email content side-by-side with the list of emails. At the end of the Gear menu, you’ll find the section Reading Pane, where you can select Right of inbox or Below inbox.
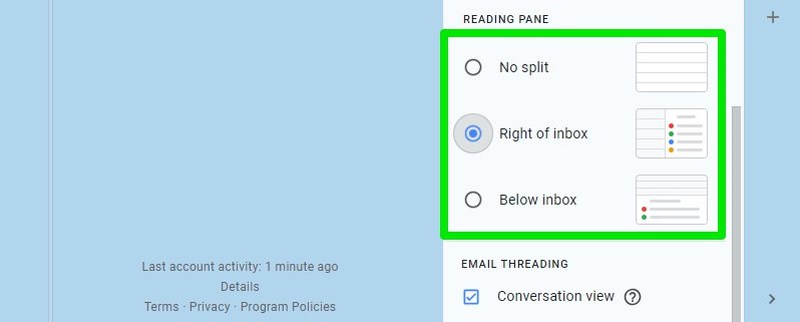
The Right of the inbox option will show the email content on the right side of the inbox with the list of emails on the left side. And the Below inbox option will show the email content at the bottom and the list of emails at the top. You can increase or decrease the size of panels as you find comfortable.
Disable/Enable Smart Compose
Gmail Smart Compose feature offers predictive writing suggestions to help you write emails faster by automatically filling in common sentences. The suggestions it offers are personalized to your writing style, and it’s further improved using smart AI.
However, there is a possibility you may not like it if it isn’t offering you good suggestions, and you find it more of a distraction rather than help. Whether you want to enable it or disable it, just move to the Smart Compose option under the General tab and turn it on/off.
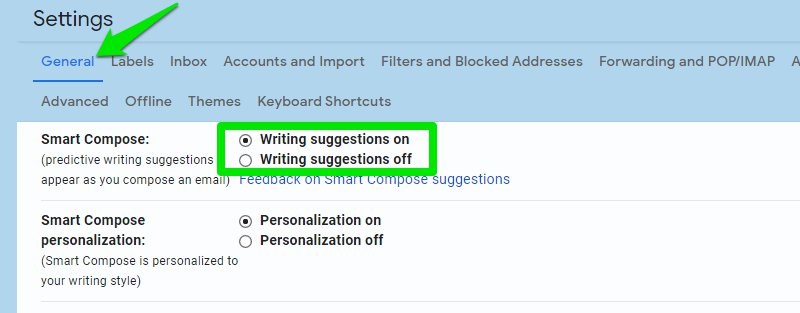
Right below this option, you can also turn off personalization for Smart Compose if you don’t want it to make suggestions based on your writing.
Disable/Enable Conversation View
Gmail groups emails under the same subject to make it easier to follow a conversation and reply, and it’s called Conversation view. However, you can disable it to separate each email and view it individually if you prefer the old email style.

To enable or disable the Conversation view, open up the Gear menu and scroll down to the bottom. Here uncheck/check the checkbox next to the Conversation view in the Email Threading section.
Disable/Enable Nudges
Nudges is a reminder feature of Gmail, it reminds you to reply to an email or follow up on a sent email in case you forget. Although Nudges is a handy feature, it can get annoying quickly for some people. As it’s still an AI-based feature that can notify you about emails you don’t even want to follow up on, which can get annoying.
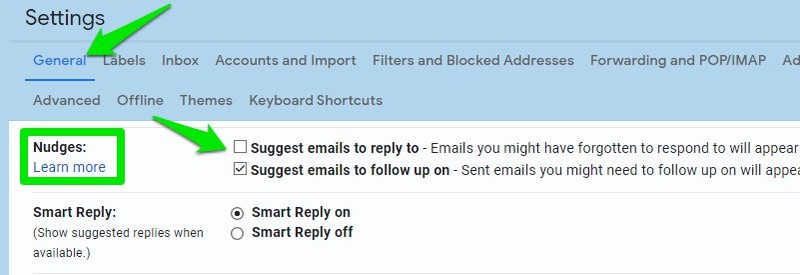
To disable/enable Nudges, you can move to the Nudges option in the General tab and edit the two options there. Of course, you can only enable/disable one of them if you want to partially use the Nudges feature.
Get Unread Messages Icon
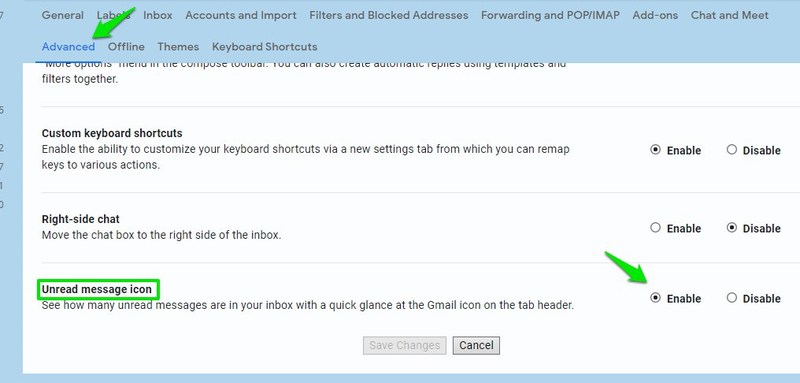
There is an option in Gmail to get an unread message count in the tab icon. This can be very useful if you need updates on the current unread emails in Gmail without having to switch tabs.
To enable it, go to the Advanced tab in the main Gmail settings and enable the option Unread message icon. Now you will see your unread emails count right on top of the Gmail icon on the tab. Although it only tracks unread emails below 100.
Personal Level Indicators
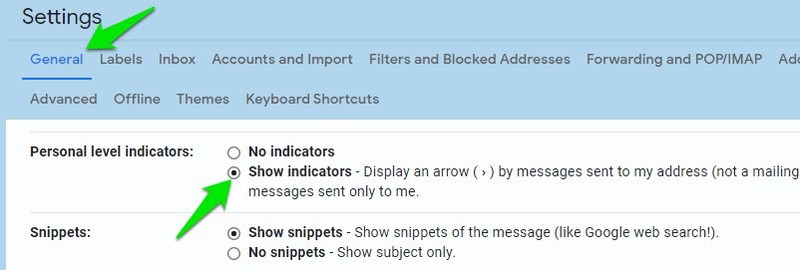
If it matters to you to know whether an email was directly sent to you, a group of people, or a mailing list, then you need to enable Personal level indicators in Gmail. This can be especially useful if you are having trouble figuring out if an email is a personal offer to you or just a mailing list advertisement.
In the General tab, scroll down to the very bottom and select Show indicators next to the Personal level indicators option. Once enabled, you will see a new arrow icon on top of emails with one, two, or no arrows inside it. One arrow means the email was sent to a group, two arrows means it was only sent to you, and no arrow means it was sent to a mailing list.
Send Emails from a Different Address
If you have more than one Gmail account — say work and personal account — then you can add them to your main account and send emails without logging into them. This can be really time-saving if you need to email from different addresses often and don’t want to switch between accounts.
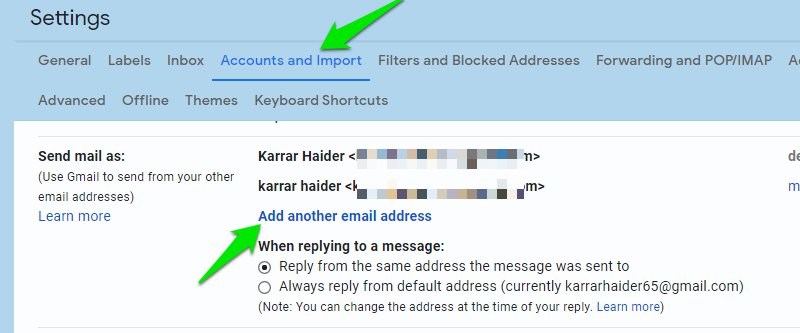
In the Gmail settings, go to the Accounts and Import tab and move to the Send mail as a section. Here click on Add another email address.
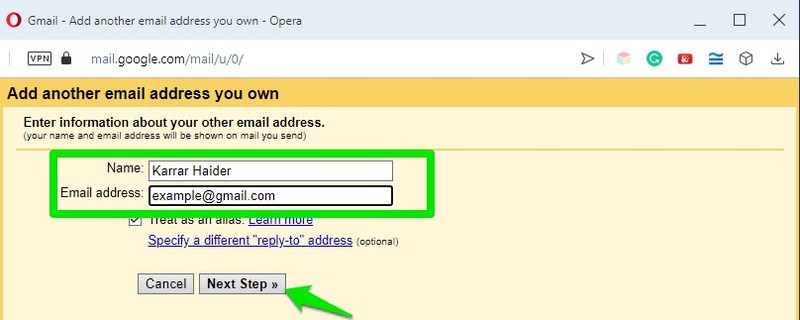
A new window will open. Provide the secondary email address and its name, and click on the Next step button. Now Gmail will send an email to this email address to verify it, and it will be added after you verify.
Once added, you will get the option to send emails from your main or secondary email addresses while composing a new email.
Use Priority Inbox
Although the default inbox works fine for most people, if you want to focus on important things first; then Priority Inbox might be better for you. As the name suggests, Priority Inbox creates sections of your inbox to show important unread emails first, starred emails second, and everything else in the third section.
The interesting thing here is that it will show you important emails from the All Mail label, so it will even show important emails from promotions and the social section. In case you don’t know how Gmail learns which emails are important to you, check out this Gmail support page.
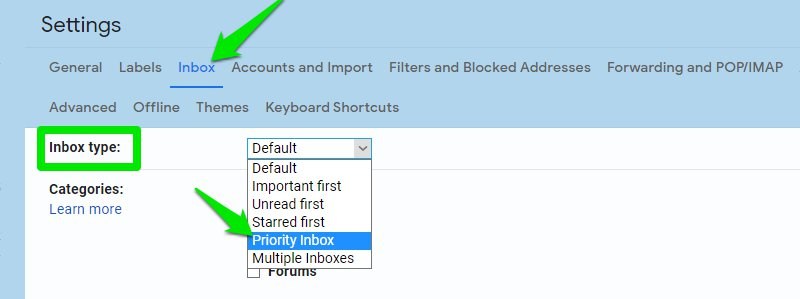
To switch to Priority Inbox, move to the Inbox tab in the Gmail settings and select Priority Inbox in the Inbox type section.
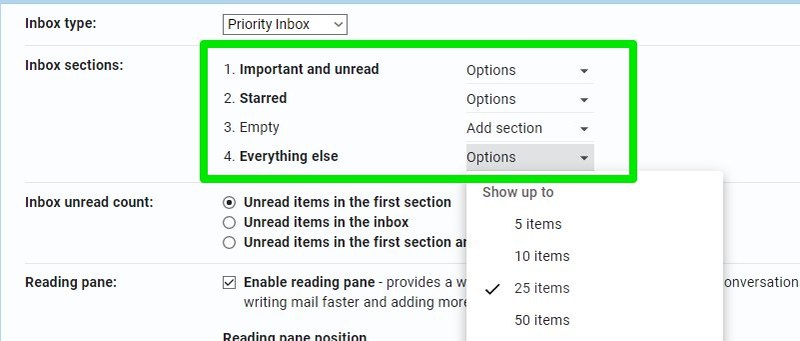
The sections here are fully customizable. You can add one more section, change the number of items in each section, change section priority, hide the section when empty, and do much more.
Use and Edit Keyboard Shortcuts
In case you aren’t already using them, Gmail has keyboard shortcuts for almost every action, basically enabling you to use it without touching the mouse. Here are all the keyboard shortcuts for Gmail. You can memorize the one that you need most often.
However, you need to make sure keyboard shortcuts are enabled in Gmail settings. Under the General tab, ensure Keyboard shortcuts on is selected in the Keyboard shortcuts section.

Now coming to the more interesting part, you can also edit Gmail keyboard shortcuts to use your own ones. However, you can only edit the main navigation and inbox management shortcuts, which are also the most important ones.
First, you need to enable this feature. Go to the Advanced tab and enable the option Custom keyboard shortcuts.

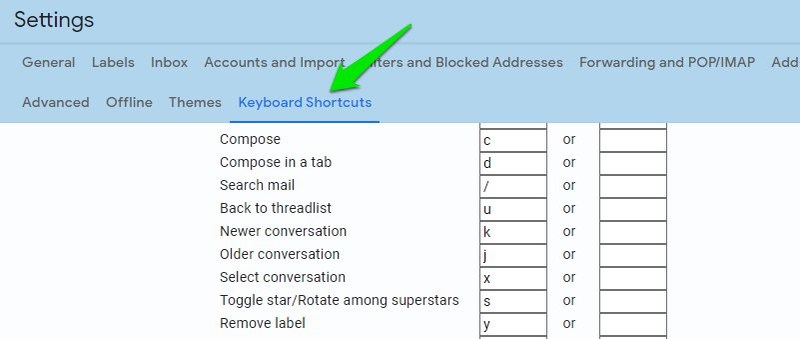
A new Keyboard Shortcuts tab will appear where you will see the list of customizable shortcuts. You can assign two shortcuts to each action by editing the boxes next to it.
Ending Thoughts
I personally take advantage of all of these settings mentioned above, and they really make emailing much easier in Gmail. Although some of these settings are enabled by default (like Smart Compose), it’s still good to double-check and make sure these settings are configured as you prefer.

