CPU overclocking is one of the best ways to extract more performance from your CPU without spending on a hefty system upgrade.
By achieving higher clock speed, overclocking helps you push the overall computing power of your system and the performance of your CPU-intensive software solutions.
A few years ago, the overclocking process was complicated, but modern, meticulously designed processors have made it a straightforward task.
Whether it is from Intel or AMD, modern processors provide headroom to enhance the clock speed and other metrics through overclocking.
So, let’s talk about CPU overclocking, how to perform it, and the best CPU overclocking software to streamline the process.
What Is CPU Overclocking?

CPU overclocking is the process of unlocking the base clock (the speed at which a CPU performs all the tasks) of a given processor and running it at a higher frequency to enhance its performance. Basically, it is a method of pushing your CPU to its maximum performance threshold, which ultimately helps the system execute more operations per second.
With overclocking, the number of CPU cycles increases, which is measured in gigahertz or Ghz. Overclocking can push your CPU’s speed from 3.6 GHz to 4.6 GHz or higher. Many gaming enthusiasts, video editors, architects, etc., often opt for CPU overclocking to extract more performance needed to run the games or perform rendering at their optimum settings.
This way, overclocking makes a CPU much more responsive and allows it to run as fast as possible, which is needed to run high-end software smoothly and perform resource-intensive tasks.
However, not all CPUs can be overclocked, as manufacturers can lock the multipliers. Intel processors with K or X prefixes and AMD CPUs with AM3+ or K prefixes can be overclocked. The major drawback with overclocking is the heat it produces, but it can be countered with adequate cooling and precision systems in place.
Benefits of CPU Overclocking
#1. Enhanced CPU Speed

Most people opt for overclocking to improve the CPU speed by taking the clock speed beyond its default parameters.
Increasing CPU speed allows the processor to perform more action per second, and it is beneficial for executing CPU-intensive tasks at a higher speed. In addition, rendering videos gets relatively more accessible and faster with an overclocked CPU.
#2. Better Performance
With CPU overclocking, the clock speed increases. This way, the system performance increases by a larger margin than its default settings. It also lets you execute tasks faster. This means you can easily run high-end applications with no lag issues.
Furthermore, resource-intensive applications will offer faster response time and deliver higher performance with CPU overclocking.
#3. Cost Savings
CPU overclocking lets you save a lot of money that you had to spend on expensive upgrades. Rather than buying a premium CPU to run modern games and editing software, you can perform overclocking to run your CPU faster and achieve better performance.
The only thing that you might have to spend money on is a high-performance CPU cooler, preferably a liquid cooler, if you don’t have it already.
#4. Higher Productivity

By enhancing the system’s computing speed with CPU overclocking, you can boost productivity for all your work. Whether coding or rendering, it enables you to execute CPU-intensive tasks faster. This means you can do more work in less time.
#5. Effective Multitasking
Overclocking the CPU helps you improve at multitasking because the CPU will be able to handle many tasks at once. Running multiple programs won’t slow down your PC; instead, help you manage tasks with convenience.
How to Overclock Your CPU?
You can overclock your Intel and AMD CPUs in two ways:
Intel CPU Overclocking Using Intel Extreme Tuning Utility
Step 1: Creating A Baseline Performance
The first step towards overclocking your CPU through Intel XTU is creating a baseline performance. You need to open Intel XTU first and choose any benchmarking option. If you go for Basic Tuning, it will run a system test and provide you with a score.
But if you opt for the Benchmarking option, it will show you benchmarking scores and the maximum temperature and frequency that your CPU has reached during benchmarking.
Step 2: Overclocking The CPU
You can do CPU overclocking through Intel XTU in two ways – Basic Tuning and Advanced Tuning. For this, you must adjust the Core Ratio.
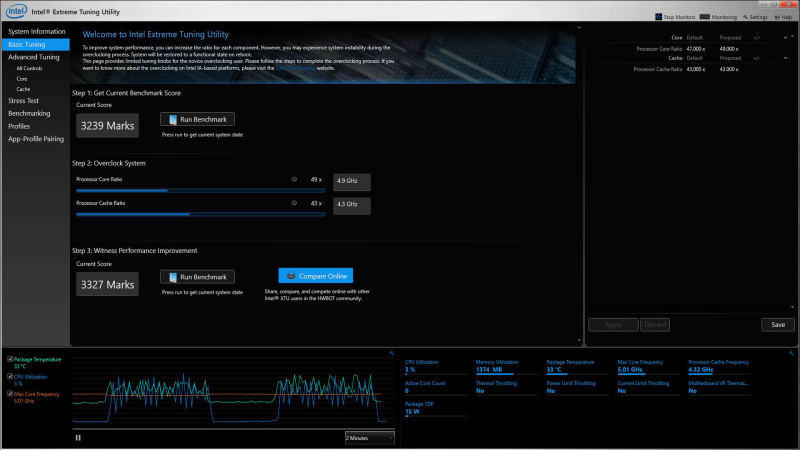
- Basic Tuning is ideal for beginners to adjust the settings. The first thing you have to do is slowly increase the Processor Core Ratio in the interface and the slider by one multiplier. You should also increase Processor Cache Ratio to adjust the frequency of your CPU to enable high performance.
- Advanced Tuning will also let you do overclocking but with more controls. In this tab, you can change the Processor Core Ratio according to each core by changing its multiplier. You can also fine-tune the Processor Cache Ratio, matching the multiplier.
Additionally, you have the option to increase Vcore to deliver more to the CPU in order to keep up with a higher core ratio. After making all the changes, you should press “Apply” in the interface. To stabilize overclocking, you should increase sliders by one multiplier and then reboot the system to perform a stress test.
Step 3: Checking the Change in Performance
After overclocking your CPU, you have to run a benchmark test from the Intel XTU interface again. After benchmarking, tally the new score with the previous one and check how much performance gain you have attained.
Step 4: System Stability Test
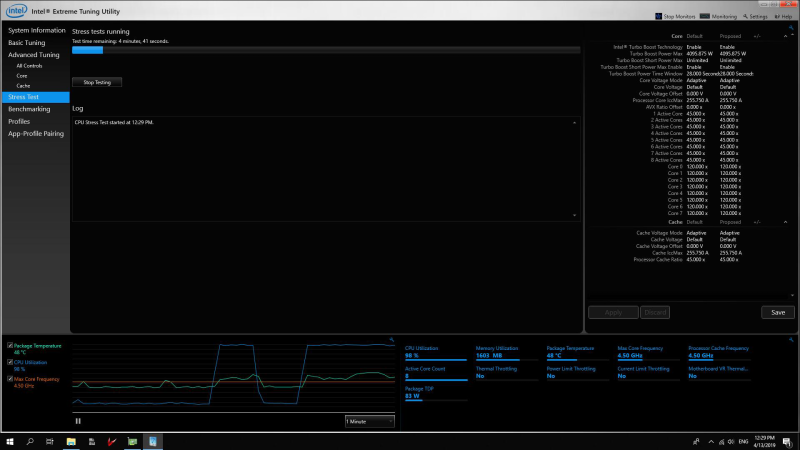
Lastly, you will have to do a system stability test to ensure your overclocked system will continue performing the best throughout the task. Through Intel XTU’s stress test facility, you can stress test the system for various duration to determine stability.
AMD Ryzen CPU Overclocking Using AMD Ryzen Master
Step 1: Choosing Profile and Control Mode
To begin with the process, first, you need to open the AMD Ryzen Master tool and then select the Creator Mode profile section. It will showcase all the CPU cores along with the choice to select the Control Mode function. Just put the Control Mode in the manual to overclock the AMD CPU precisely.
Step 2: Tweak CPU Core Values and Stress Test the System
In this stage, you will have to modify the CPU Core value to unleash the extra performance of your AMD Ryzen processor. You will have to determine how much you want to push. If you have a base clock of 3.6 GHz, then you can enhance it to 4.2 GHz or even 4.6 GHz, depending upon the CPU cooler and voltage supply.
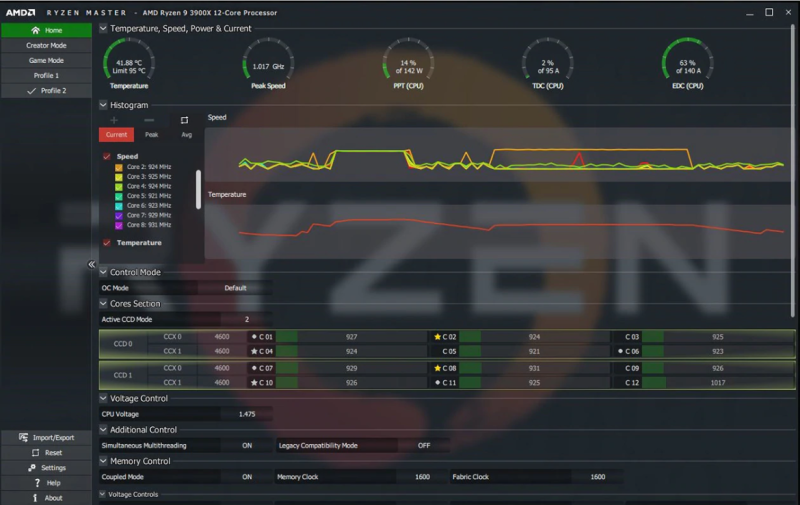
If the base clock is 3.5 GHz, then the core will show 3600, and you will have to increase each core by 50. Next, click on the Apply & Test button to run a small stress test of the modified core value. If it runs smoothly, then you can make further changes by the value of 50.
Continue until you get the desired value. You can make changes to the CPU voltage to provide more power to the CPU and increase room for overclocking.
Step 3: Finalize The Settings
Once you have boosted clock speed to a considerable level, like 4.3GHz or 4.6Ghz from 3.6GHz, you should finalize the settings. While pushing the CPU core value, you should keep on monitoring all the vitals. Continue pushing until you reach the desired result, or the system becomes unstable.
After getting the desired clock speed, you should run a final long-hour stress test and make sure it runs seamlessly for hours. The temperature should be at a manageable level, and it shouldn’t touch the maximum temperature limit. You can also run a benchmark test to check how much performance you have gained.
How to Overclock a CPU by Accessing BIOS Settings?
Here’s a step-by-step guide that will help you overclock your Intel and AMD CPU safely through BIOS settings.
Access the BIOS
Enter the BIOS of your motherboard, as it will help you to change the settings for overclocking. You can open the BIOS by restarting the PC and pressing the F2, F10, or Delete keys. After the BIOS opens, you need to go to the OC/Overclocking or Advanced CPU Core settings options.
Choose the Overclocking Option
The best option to do CPU overclocking is through a manual process, as it offers a lot of options. However, some modern motherboards provide an automatic overclocking function that lets you safely overclock the CPU.
Tweak the CPU Multiplier
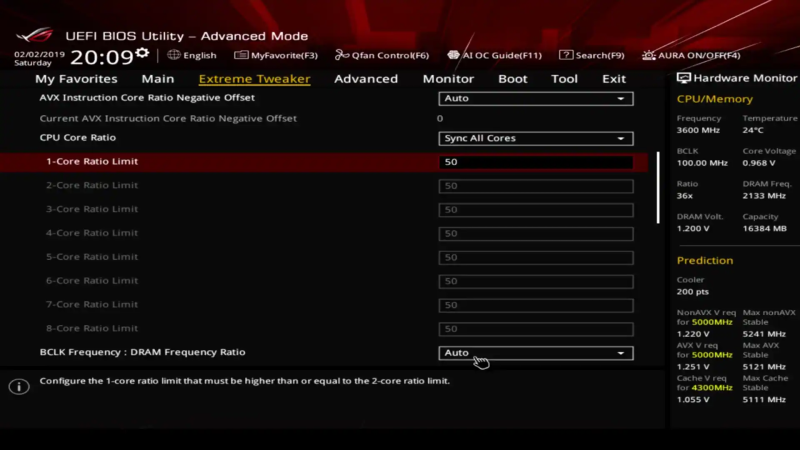
For manually overclocking the CPU, boost the CPU multiplier first. Generally, the base clock is set at 100 Mhz multiplied by your CPU’s base multiplier.
If your CPU runs at 3.5 Ghz, then the multiplier is 35. Now, gradually raise the multiplier by a single digit and ensure it is an iterative process. After increasing the multiplier of one core, you should proceed with the others and be slow with the process.
After specific enhancements, you should save the settings and restart the system for stress testing. In addition, you should also perform benchmarking to check the overclocked CPU’s stability and performance.
You can even tweak the CPU voltage through your BIOS to deliver more power to the CPU. The default CPU voltage is around 1.25, and you can slowly increase it to 1.5 and 2.1 depending upon repeated stress testing and benchmarking. By increasing the multiplier and CPU voltage, you can raise the clock speed from 3.5GHz to 4.2GHz, which will enhance the performance.
Precautions to Take Before CPU Overclocking
CPU overclocking may help you to unleash your CPU’s potential, but it involves high temperature and massive power usage. The processor runs much hotter than usual, and it goes to a point where it not only can lead to system failure but also worsen the system’s efficiency.
Importantly, running the CPU outside the standard limit without proper precaution also leads to potential damages due to high voltage and intense heat generation. Therefore, it becomes necessary to take appropriate precautions before performing CPU overclocking.
Checking Compatibility

Before you initiate CPU overclocking, the first thing you need to do is check whether your processor and motherboard support overclocking.
Intel processors with a K prefix and AMD ones with a K prefix or AM3+ socket support overclocking. There are many motherboards designed for overclocking, and they will provide all the overclocking controls.
Determining Safe Temperature and Voltage
As a precautionary step, you must check the safe temperature and voltage of your CPU. You can do it through BIOS or using any other tool. It will help you determine the temperature change after overclocking.
Depending upon the result, you will have to proceed with the CPU overclocking procedure. If your PC is already running at a high temperature, then you should fix the overheating problem.
Along with temperature, voltage also increases with overclocking and helps in fast data traffic. So, it is better to check the safe voltage of your CPU from the manufacturer’s site before proceeding.
Perform Stress testing

It’s ideal to perform a stress test of your CPU for a few hours to understand if the system is stable at the default clock speed. You can use any stress test tool to put all the cores of the CPU at 100% load and check how the system holds up. For this, you can use tools like CPUz to monitor the temperature during stress tests.
Assess CPU Performance
You must also check your CPU’s performance to measure the improvement through overclocking. There are many CPU benchmarking tools like Cinebench available on the internet that can simulate a rendering workload and a CPU performance score.
Measuring the Cooling Capacity
It would help if you measured the cooling capacity of your CPU cooler. It will decide whether the CPU cooler will be able to handle the high heat generated in overclocking or not.
In general, 80-95 degree centigrade is the highest temperature a CPU can handle, and you must ensure the cooler prevents the CPU from reaching that temperature.
Popular CPU Overclocking Software
If you plan to do CPU overclocking using a dedicated software solution, check out these powerful overclocking tools.
#1. CPU Overclocking
CPU Overclocking from Clevo Co. is a popular and powerful overclocking tool that can help you unlock the true potential of your CPU. The software is designed specifically to help you overclock your Intel CPU based on x64 architecture and running on Windows 10 version 14393.0 or higher.
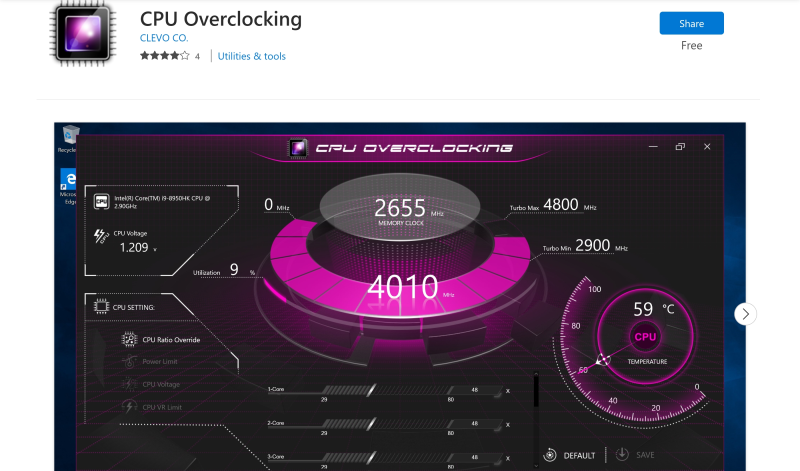
This overclocking software offers an intuitive interface that lets you simply overclock the Intel CPU with a few clicks.
The interface enables you to monitor all the critical vitals, including temperature and voltage while overclocking. However, this tool needs specific drivers to perform optimally and doesn’t work on systems based on Windows 10 S.
#2. AMD Ryzen Master Utility
If you use an AMD Ryzen processor, AMD Ryzen Master Utility can help you overclock your CPU and take its performance to the next level. All the Ryzen processors come with unlocked multipliers, so you can easily enhance the performance to achieve optimum results.
This tool provides a basic view of each basic control, including automatic overclocking and manual adjustment of voltage, memory, and DRAM timing for manual control.
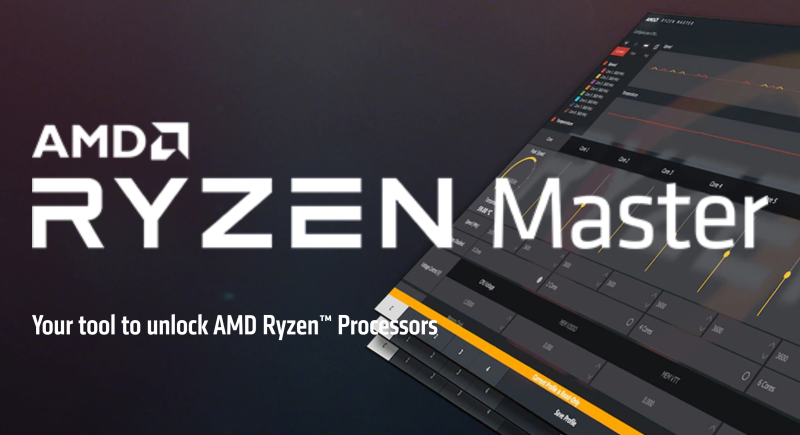
In the basic view, you will also see all the system vitals like PT, peak speed, and CPU temperature. In addition, the software can show you a histogram of per-core clock rates and temperature so that you can assess the overclocking process.
Furthermore, you will get an advanced view, which gives you four profiles to save your custom CPU overclocking configuration along with DDR4 memory. Not only can you tweak the performance parameters of your CPU cores, but you can also optimize the general system performance of certain applications.
#3. Intel Extreme Tuning Utility
Overclocking your Intel K or X series unlocked processor is made easy using Intel Extreme Tuning Utility Software. It enables both novice and experienced individuals to overclock their CPU with ease.
This tool provides a powerful interface where you get all types of basic controls along with some new features on new Intel components. Additionally, you will get both Basic and Advanced tuning features to overclock your CPU with complete freedom.
With this software, you can even measure performance gain and check the system after overclocking. The Benchmarking option makes it easy for you to test the performance of your system before you begin overclocking. However, it doesn’t work on all processors, especially very old ones. So, check the support list for more information.
Final Words
CPU overclocking was once a hobby for hardware enthusiasts. But now, many users and organizations perform overclocking to test the actual performance of their CPUs and enhance system speed. Doing this enables them to achieve faster performance and productivity in their operations, editing, coding, or gaming.
Next, check out the top GPU overclocking software to revive your graphics.

