Step-by-step guides for setting up two-factor authentication on your social channels.
Except for my online banking accounts, I would prefer my social media profiles to be the last ones to get hacked. Even when I use strong passwords and a password manager (while many won’t), I don’t change them periodically. This becomes a threat if a current password is out on the dark web.
And frankly, I don’t think I will be able to renew my 250+ passwords on a schedule. Still, I deploy a few other methods, like two-factor authentication (2FA), to secure my sensitive online accounts because strong passwords aren’t enough.
Two-Factor Authentication: Whats & Whys?
You haven’t been scammed yet if the last few words of the previous section left you thinking about its legitimacy. Scams are everywhere, and a few are so cleverly crafted that it’s next to impossible to spot them.
The thing is, we “click” a lot. Emails, SMSes, chat messages,….links are everywhere, and some (or most) of them are just traps. You click and see some genuine-looking website (which is actually a parody), enter your personal information, and it’s done. This is a typical phishing scam which makes the factor of password strength irrelevant.
Next are the brute force attacks, which make quick work of passwords like 123456 or qwerty, 1st and 3rd most common passwords of 2023, respectively.
Consequently, we need an additional layer of security.
Welcome, Two Factor Authentication!
First, not all online platforms allow settings 2FA. But when they do, you should configure it without any delay. This advice goes with every personally and professionally significant online presence.
However, this guide is only about setting 2FA on some of the most popular social media platforms and Gmail (because we all use it). Besides, I’ll be using Microsoft Authenticator for this tutorial. I have explained the app functionality in the following section, which you can skip if you are already its user.
How to use Microsoft Authenticator?
Available for iOS and Android devices, Microsoft Authenticator can be used without a Microsoft account.
Adding any account is extremely simple. One just has to tap the “+” icon and select the Other (Google, Facebook, etc.) for all the non-Microsoft accounts.
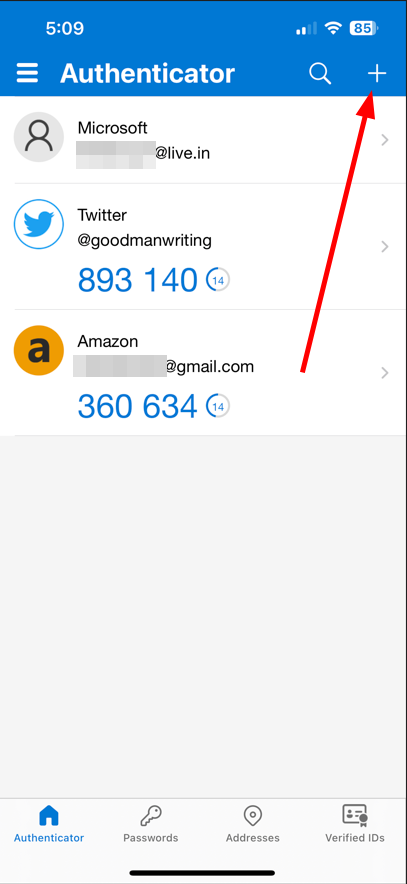
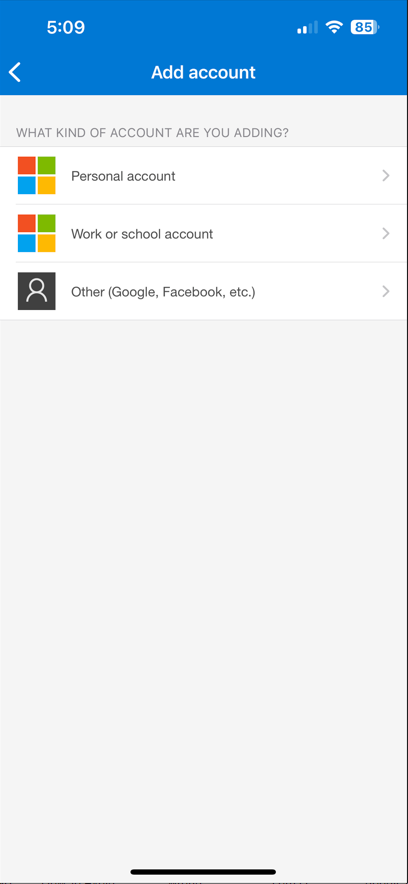
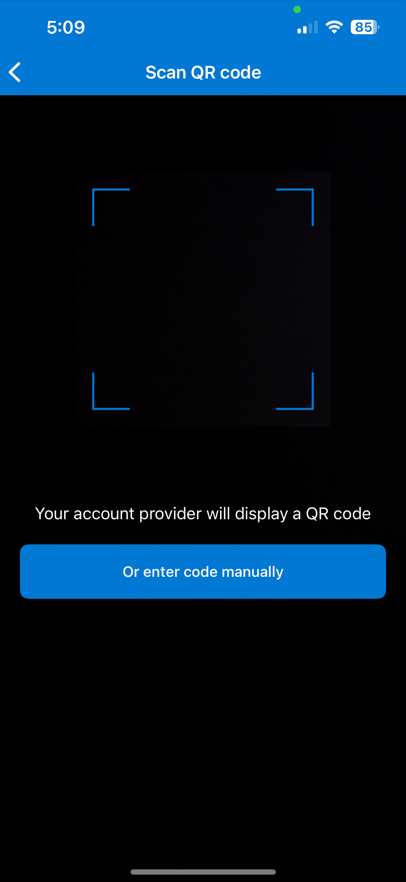
Lastly, one can scan the barcode from the subject platform or enter the code.
Afterward, every time you enter a password on any registered platform, you need to open the Microsoft Authenticator to enter the time-sensitive code as well to log in.
Importantly, these codes can be transferred to other devices if you turn on backup upfront. For Android devices, using a Microsoft Account is enough, while for iOS, iCloud syncs these codes with your new Apple device.
So that was a quick brush-up on using Microsoft’s authentication application.
Now, let’s start the 2FA tutorial, starting with the Google account.
Setting 2FA on Gmail
Gmail has no separate 2FA. Instead, you can turn it on for your entire Google Account.
First, sign in to Google. Next, visit myGoogleAccount, and click Security in the left pane. Click 2-Step Verification.

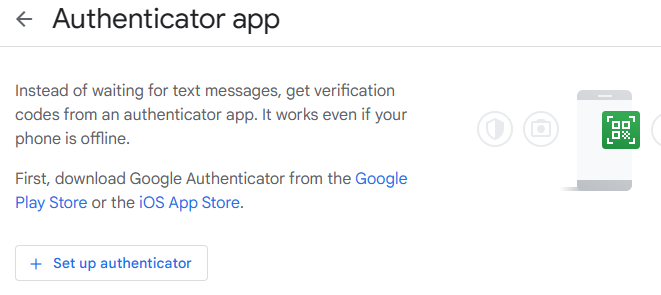
Scroll down and click the Authenticator app. The next screen will persuade you to download Google Authenticator, but don’t fall for it 😀 because it also works with other apps. Click +Set up authenticator.
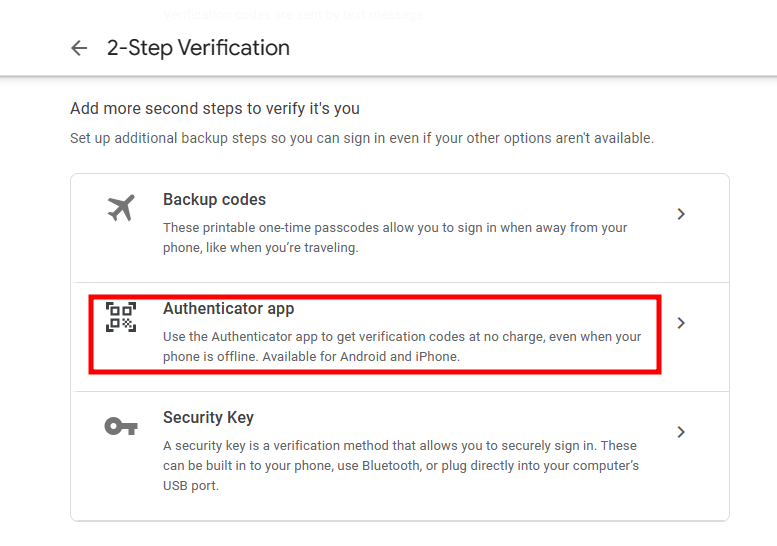
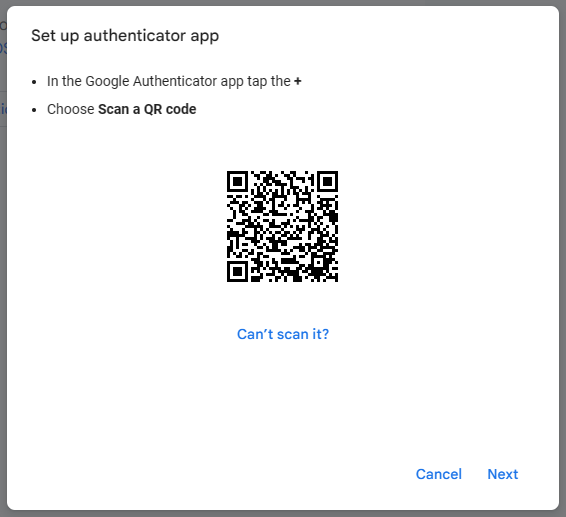
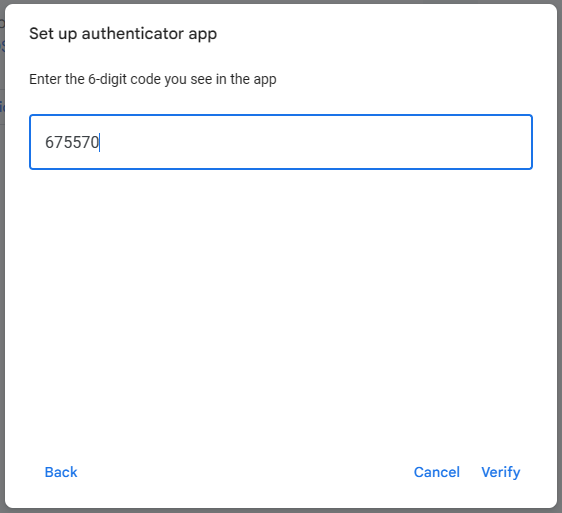
It gives a barcode to scan, which you can do with the Microsoft Authenticator app to add the OTP code in the next step. Click Verify.
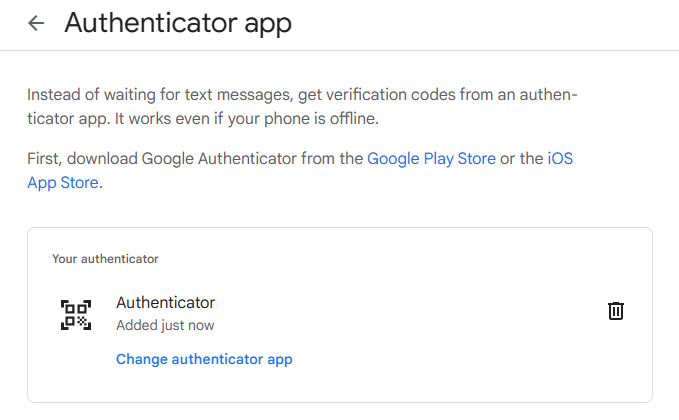
You can confirm the 2FA registration on the final screen.
Setting 2FA on Facebook (Web and Mobile)
On the Web
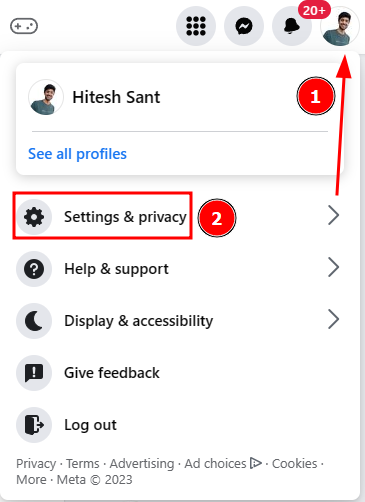
After you log into your Facebook account, click your avatar at the top right and then Settings & privacy from the drop-down. Finally, enter Settings into the subsequent screen.
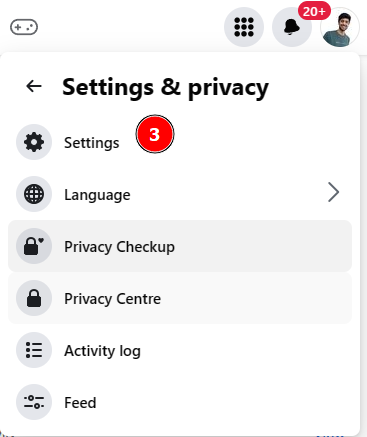
Click See more in Account Centre. Importantly, this takes you to the Meta Accounts Centre, where you can configure 2FA for all the connected accounts on the same dashboard.

For instance, I have connected my Facebook and Instagram profiles to the Meta account center. This way, I can tweak settings for both accounts in one place.
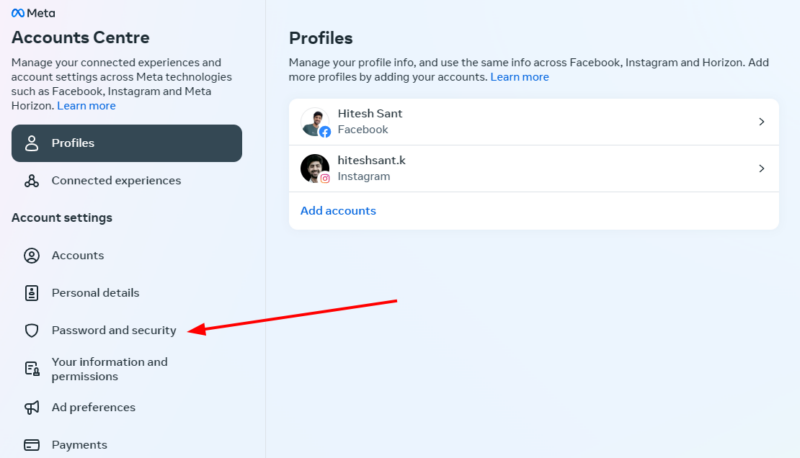
Now click Password and security and Two-factor authentication on the next screen.
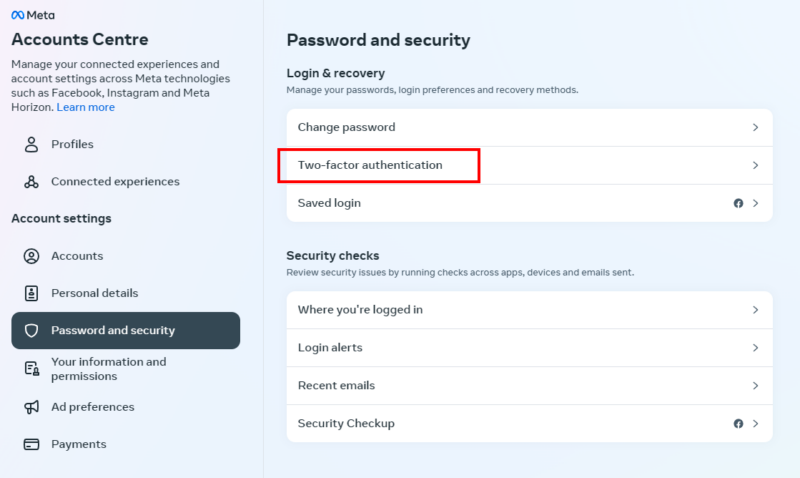
This is where you can set 2FA for all your connected Meta Accounts one at a time.
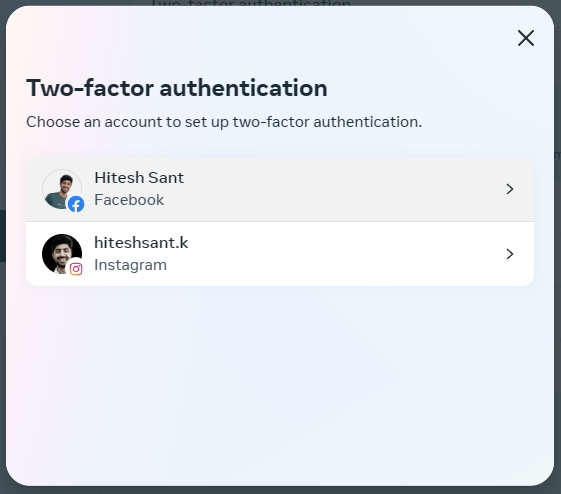
Click your Facebook profile, select any one of the preferred methods, and click Next on the following screen.
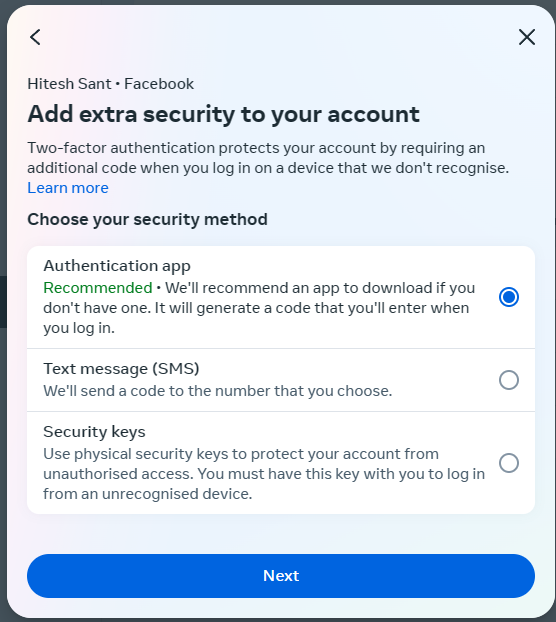
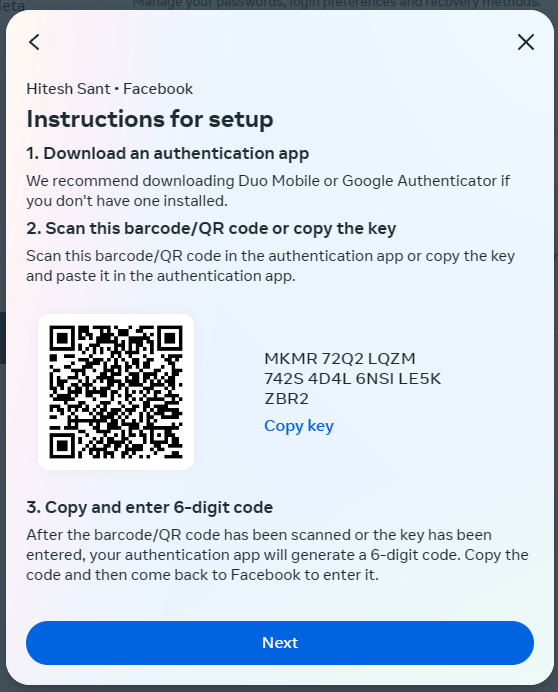
I have chosen the Authentication app. Now add the account by scanning the QR code on the next tab.
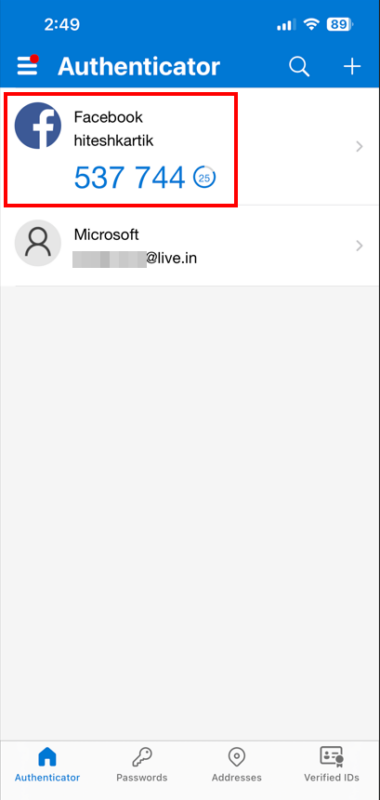
Finally, enter the OTP from the authenticator app, followed by your Facebook account password, to turn on the 2FA.
So, that was activating Facebook 2FA on the web. Let’s see how you would do that on your smartphone.
On the Smartphone
The process is very similar to the web. Open the Facebook application and tap on the Menu on the bottom right. Tap the gear icon and See more in Account Centre on the following screen.
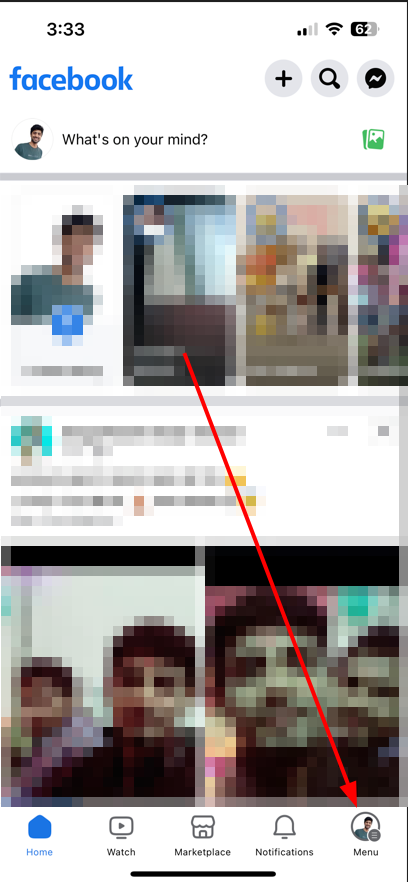
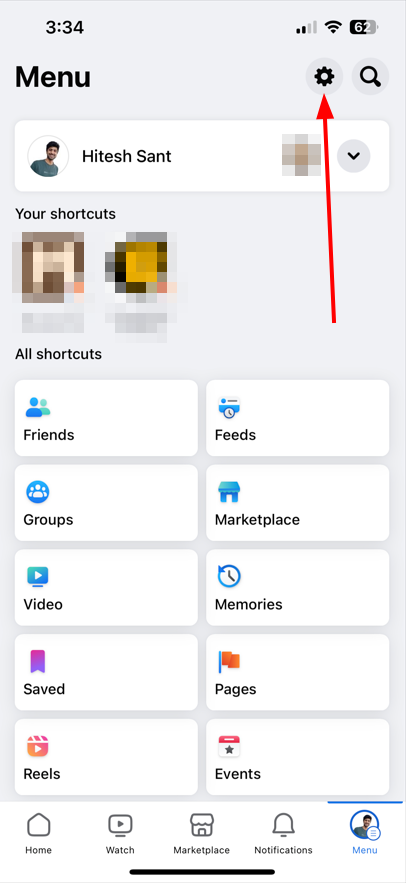
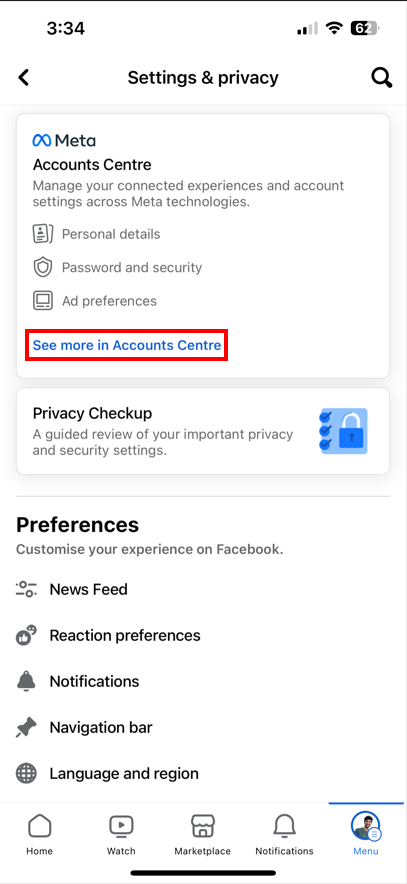
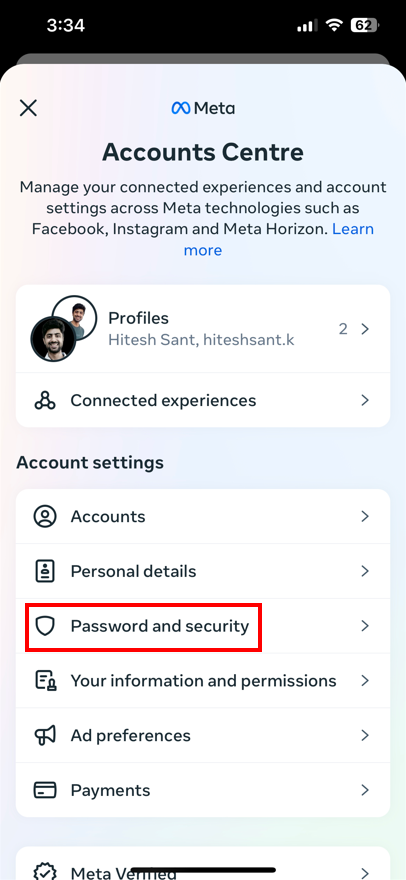
Enter Password and security, then Two-factor authentication, and finally, tap on the subject account.
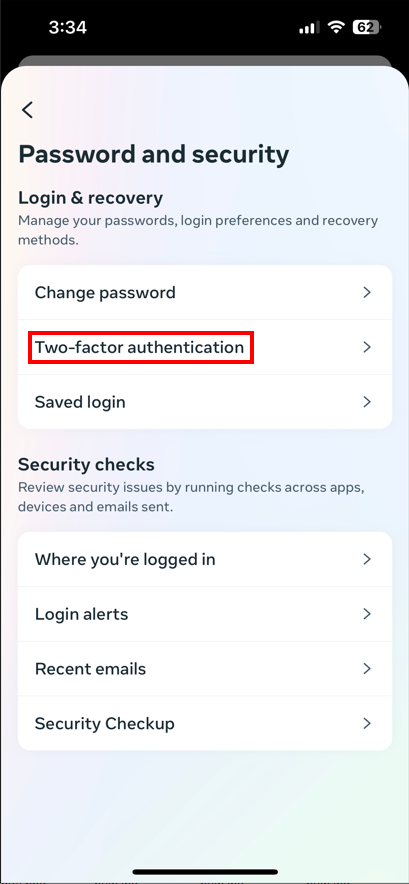
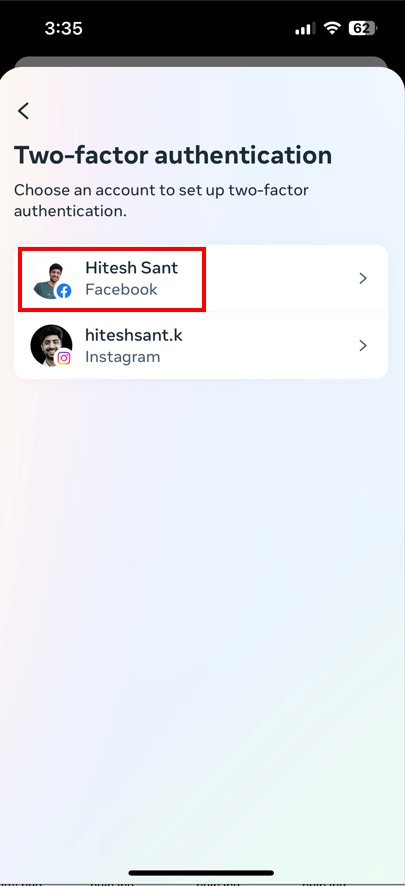
As we did on the web, select the authentication medium. Now you can either view the barcode and send it to another device to scan it from there. Alternatively, tap the Copy key to have the pairing code in the clipboard.
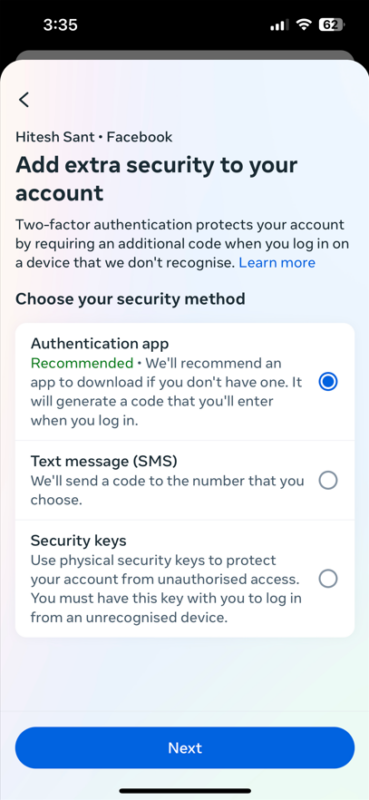
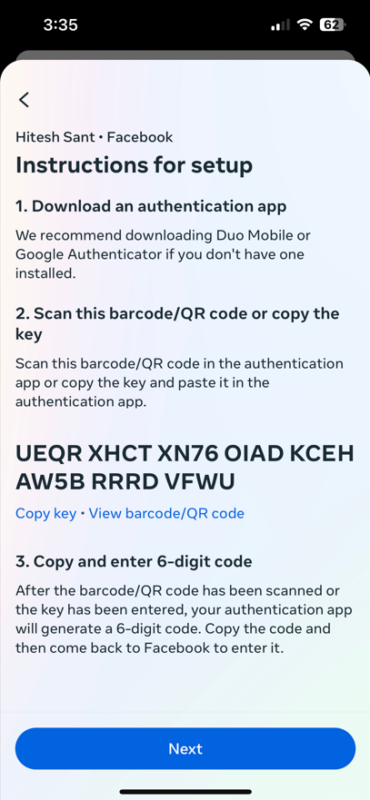
Open Microsoft Authenticator and add the Facebook account by using the manual code entry option.
Finally, enter the OTP to activate the 2FA.
Setting 2FA on Instagram (Web and Mobile)
Though you can set 2FA on Instagram along with Facebook in the Meta Accounts Centre, this section is for the rare breed not having a Facebook account.
On the Web
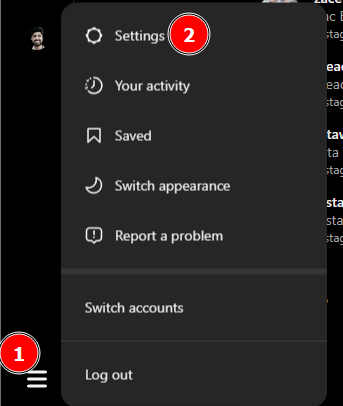
Start by logging into your Instagram account. Click the hamburger icon on the bottom left and enter Settings.
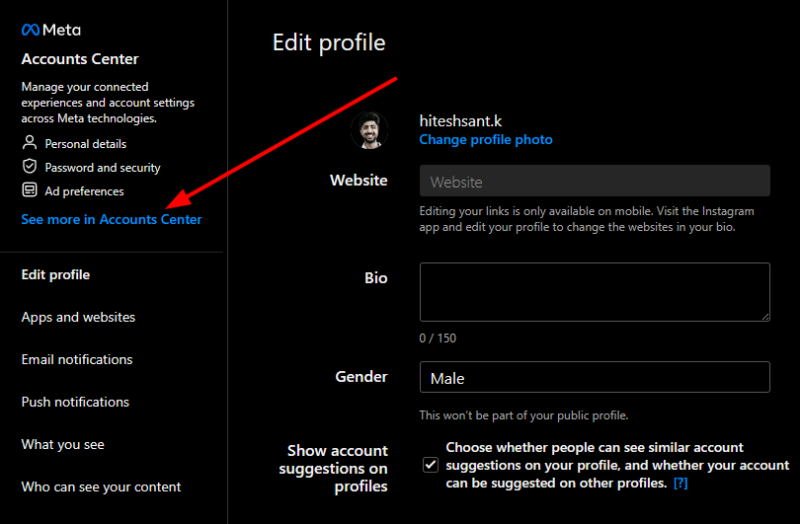
Now click See more in Accounts Center.
This lands you in the Meta Control Centre we have seen with Facebook.
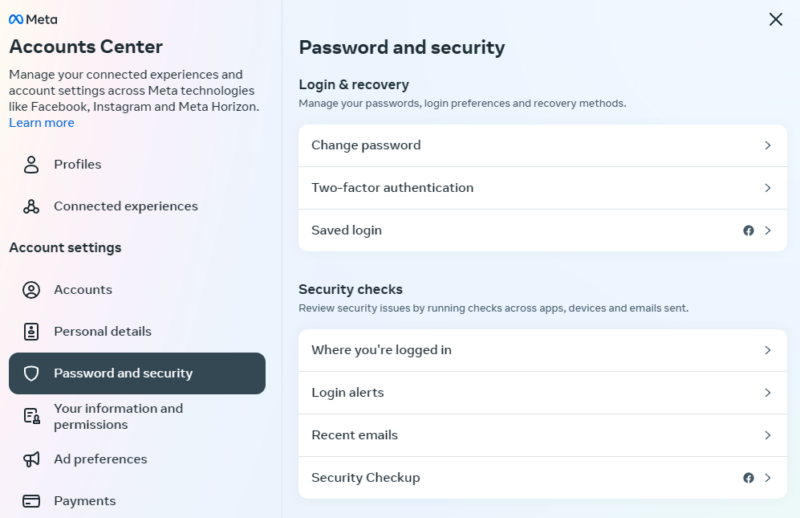
The following steps are the same as in the previous section, just that you have to select your Instagram profile instead of Facebook’s.
On the Smartphone
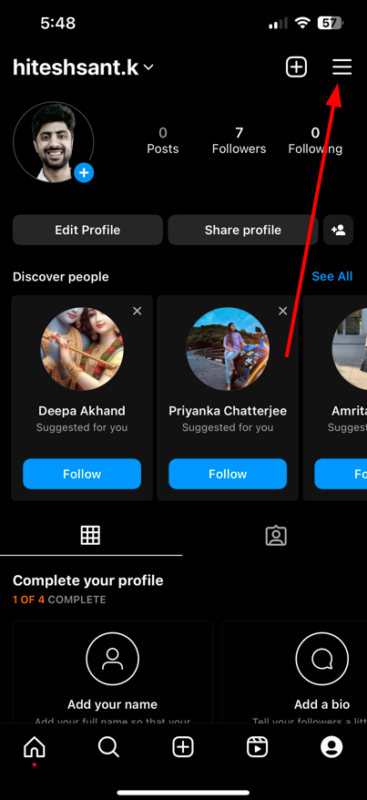
Open the Instagram smartphone application and tap the profile icon on the bottom right. Now tap the hamburger icon on the top right and enter Settings and privacy on the following pop-over.
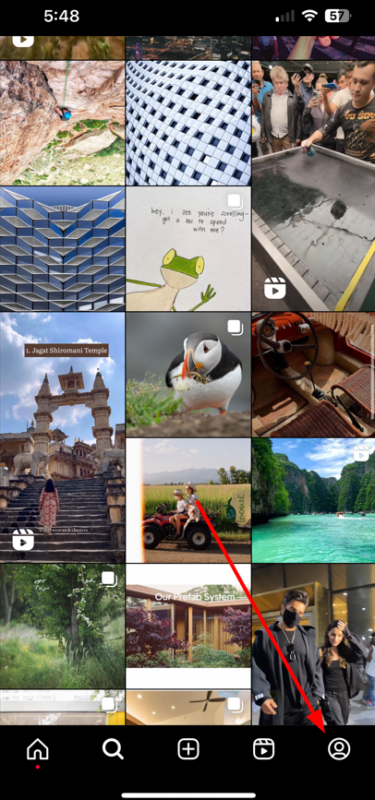
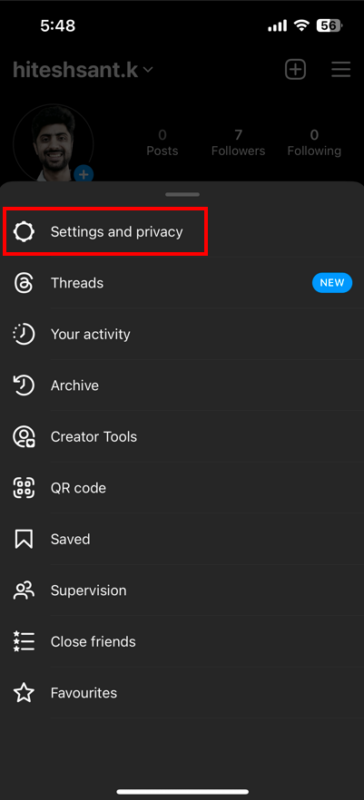
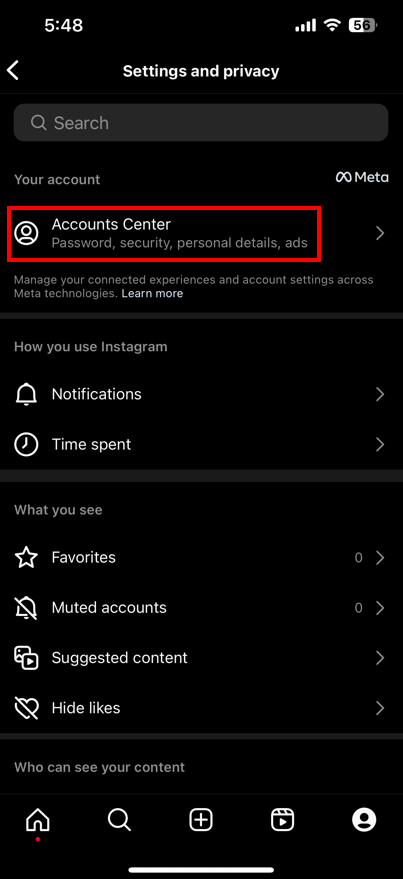
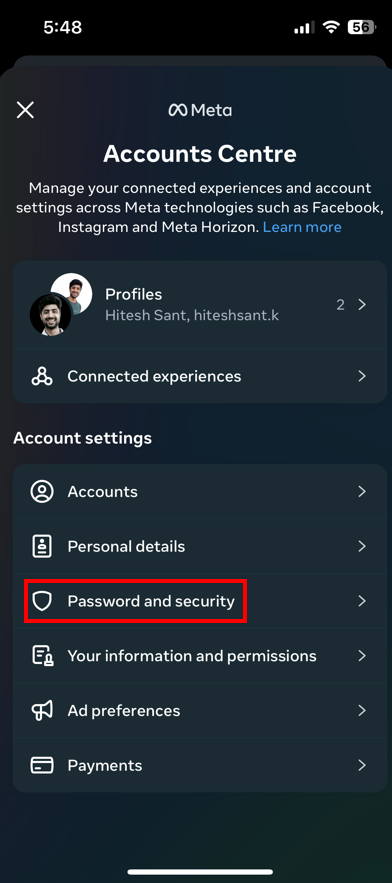
Tap Account Center, then Password and security, and finally, Two-factor authentication.
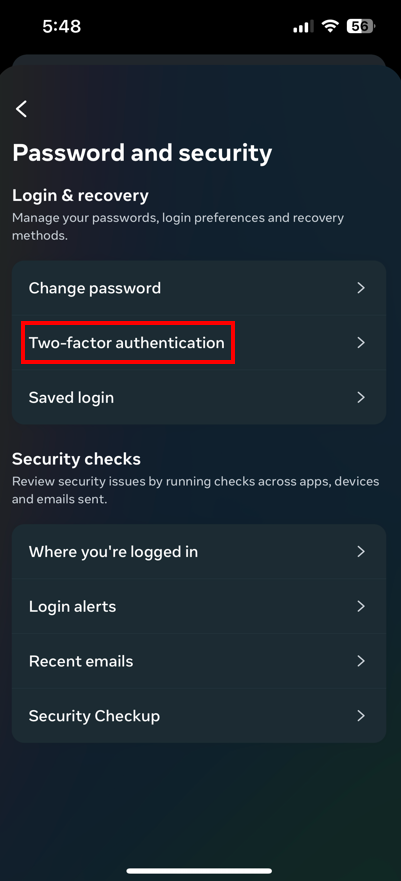
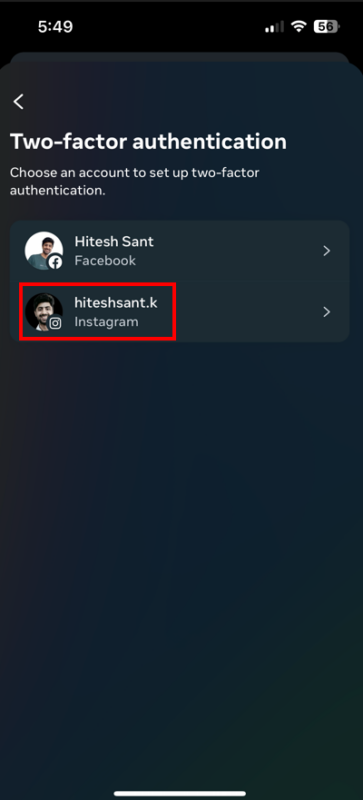
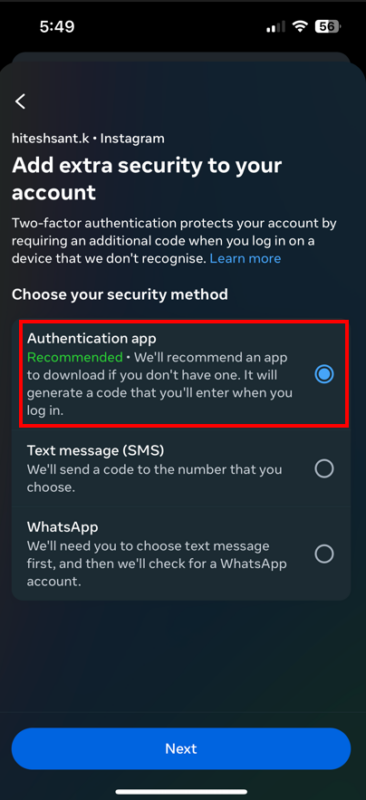
Select the Instagram profile, and choose the Authentication app as the security method. Now you can either scan the barcode by sending it to a different device or go with the Copy key option. Here you can paste the key in the authenticator add account section, as shown in the Facebook 2FA.
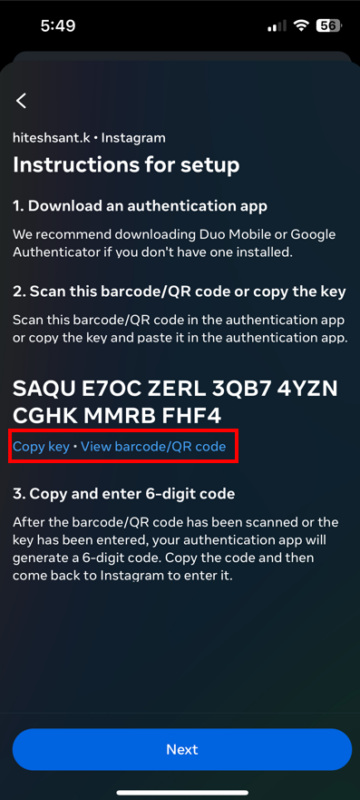
The final step will be pasting the OTP into Instagram to confirm the 2FA registration.
Setting 2FA on Twitter (now X)
While Twitter has been (sadly) renamed as “X,” it’s the iconic blue bird that resonates more among its users. Therefore, we’ll be calling that platform by its former name.
On the Web
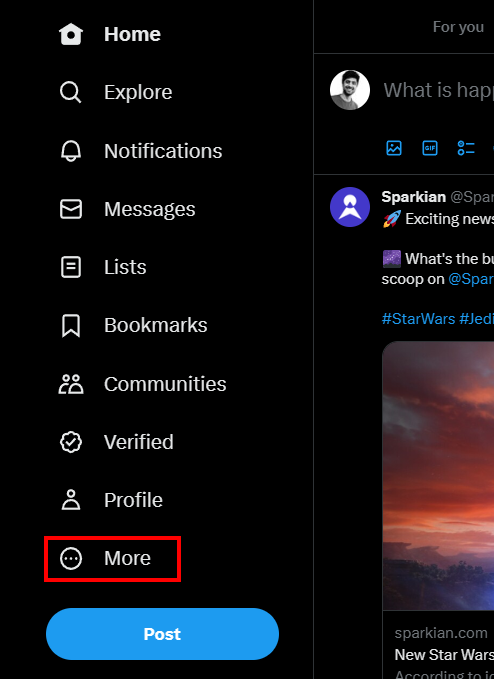
Open your Twitter profile in a web browser and click More in the left pane. Now click Settings and Support in the pop-over and Settings and privacy in the drop-down.
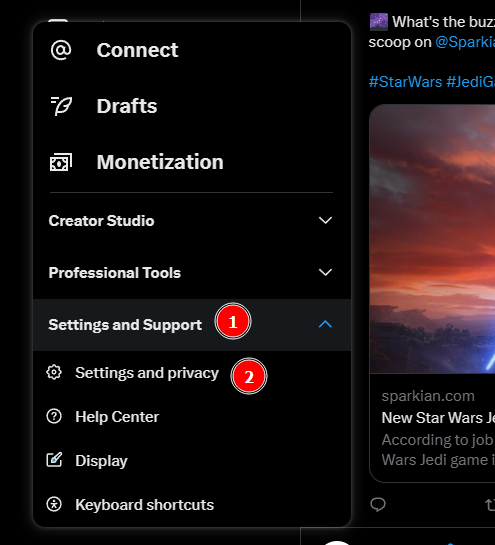
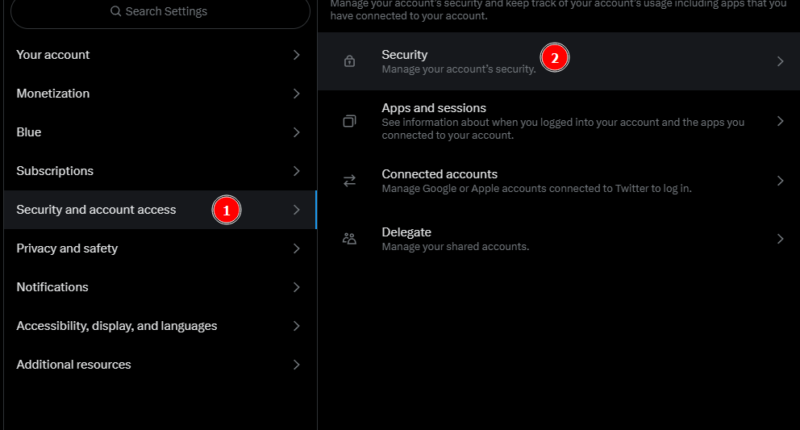
Enter Security and account access and Security subsequently.
Click Two-factor authentication.
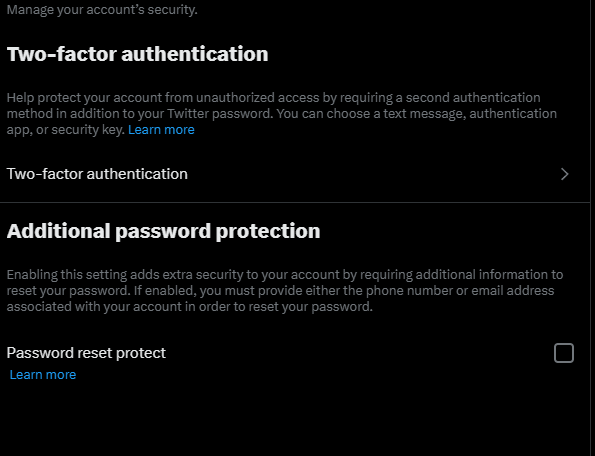
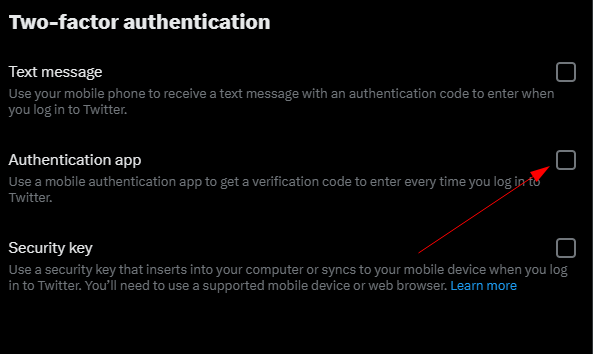
Now click the checkbox against the Authentication app.
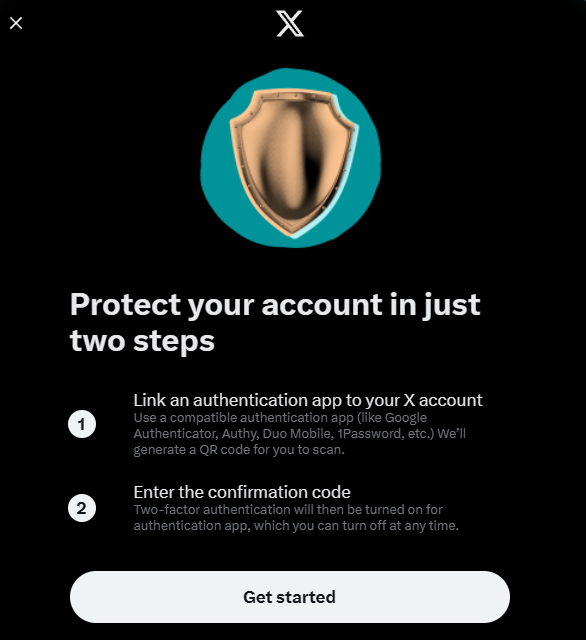
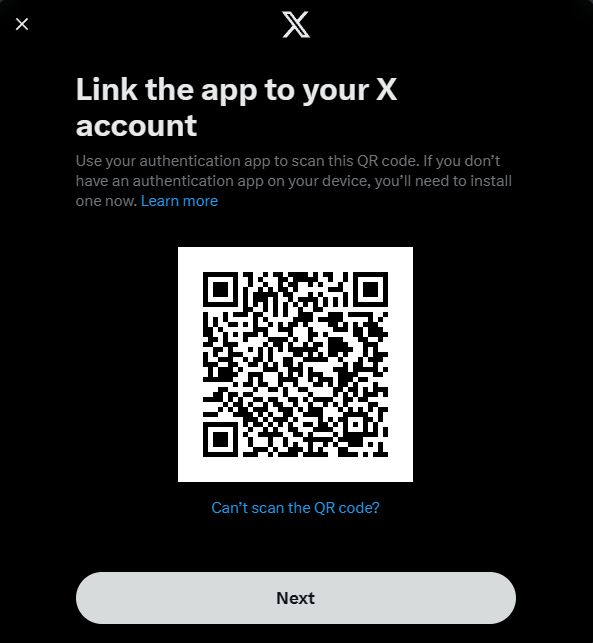
Click Get started on the popup and scan the QR code with the Microsoft Authenticator app on the next screen. Alternatively, one can click the Can’t scan the QR code? to get the key.
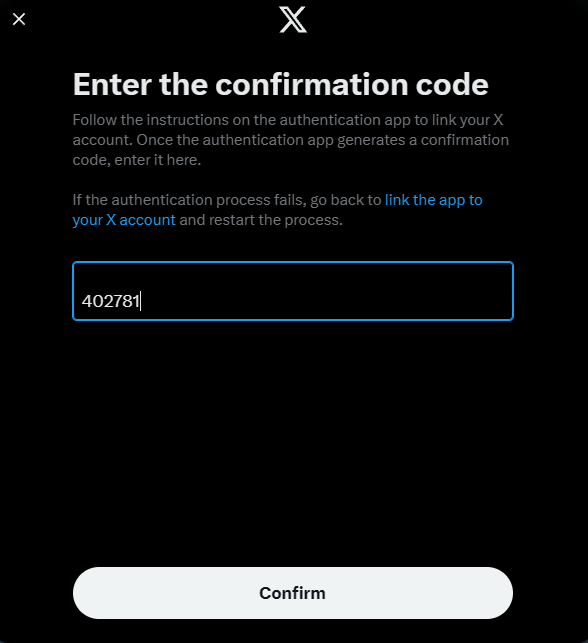
Lastly, enter the OTP from the authentication app to confirm the Twitter 2FA registration.
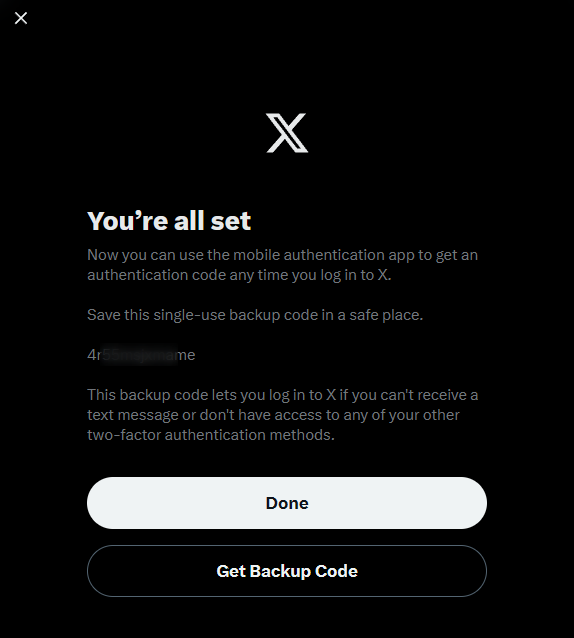
Note: Copy the backup code given at the end, which will serve as a second password should the 2FA doesn’t work.
On the Smartphone
Setting 2FA on the Twitter smartphone application is pretty similar to its web interface.
Open the Twitter application and tap over your avatar on the top left. Now tap on Settings and Support and then Settings and privacy from the drop-down menu. Next, tap on Security and account access to tweak the 2FA configuration.
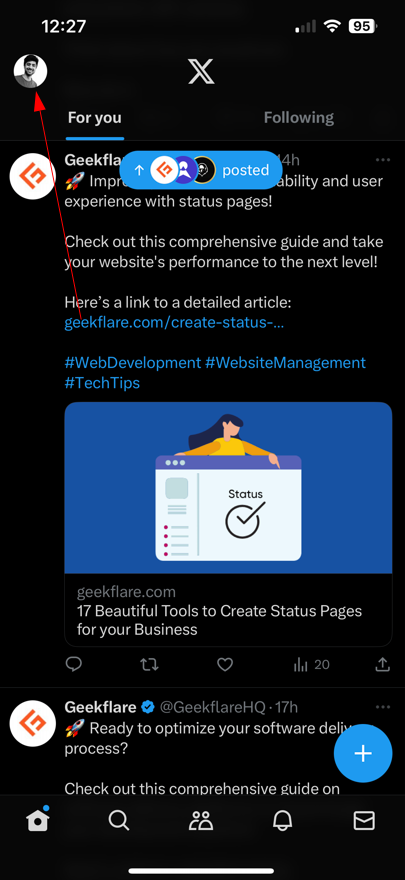
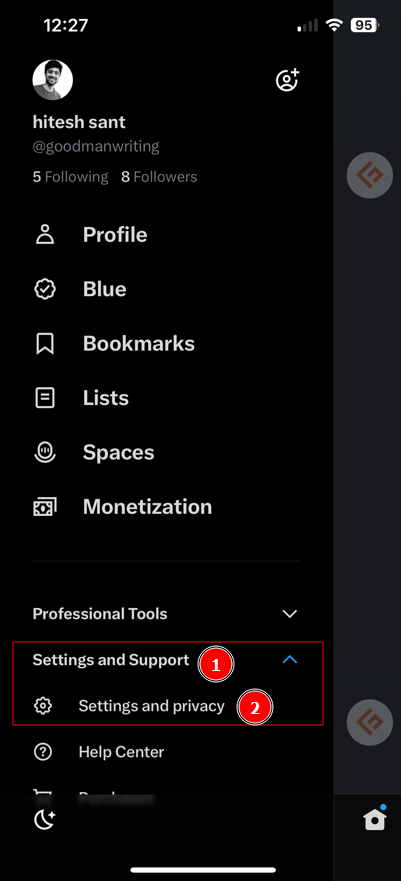
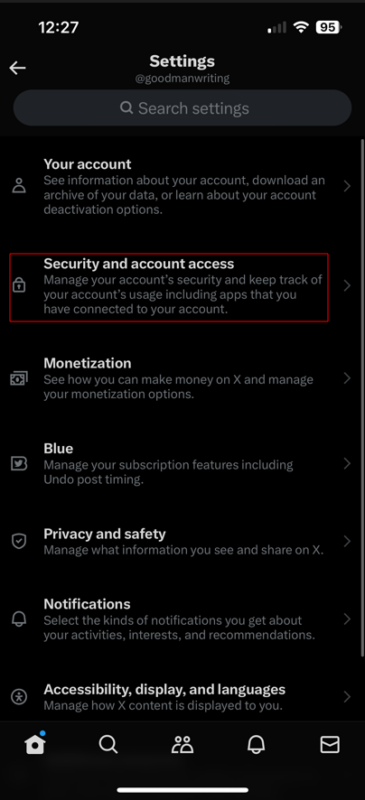
Now tap Security, then Two-factor authentication, and toggle on the Authentication app.
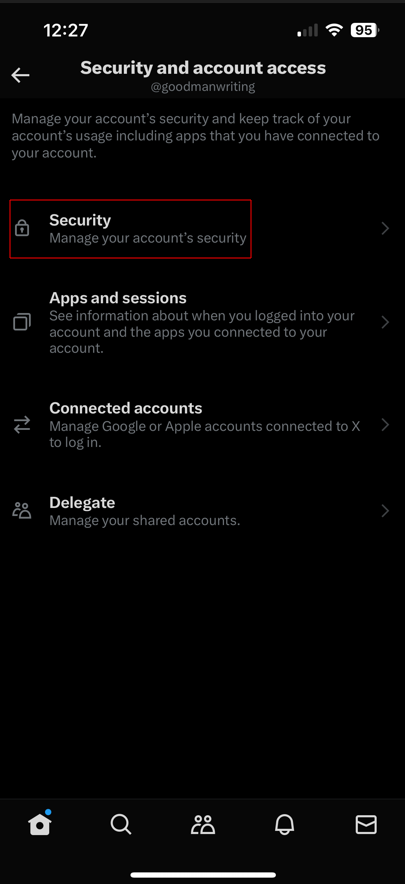
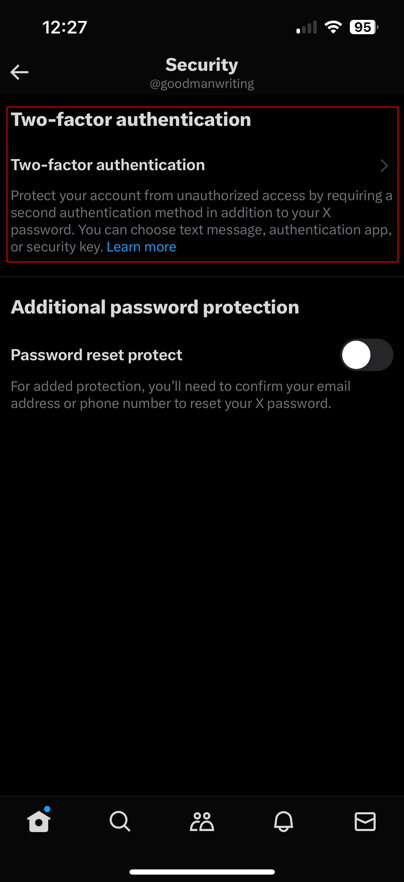
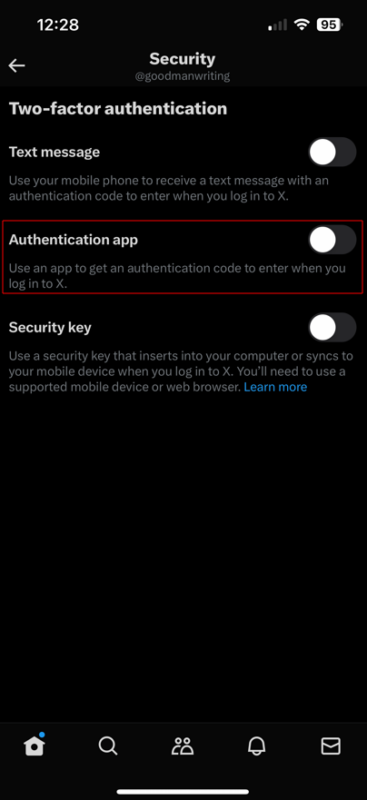
The last screen is where you can Link the app directly. It normally takes you to the installed authentication application. But if the redirect doesn’t work, click the Link on another device and enter the key in the Microsoft authentication app.
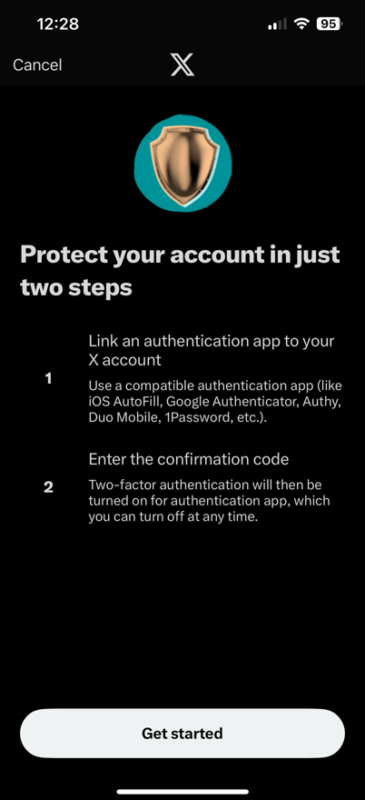
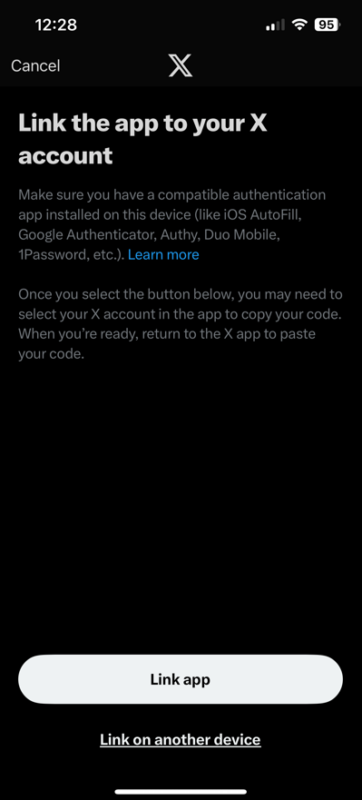
The last step is entering the OTP to validate the 2FA pairing.
Setting 2FA on Amazon (web and mobile)
Configuring 2FA on Amazon is similar to every other platform we have seen yet.
On the Web
Start by logging into your Amazon account and hovering over the top right item mentioned as Account & Lists. Click Your Account from the drop-down menu.
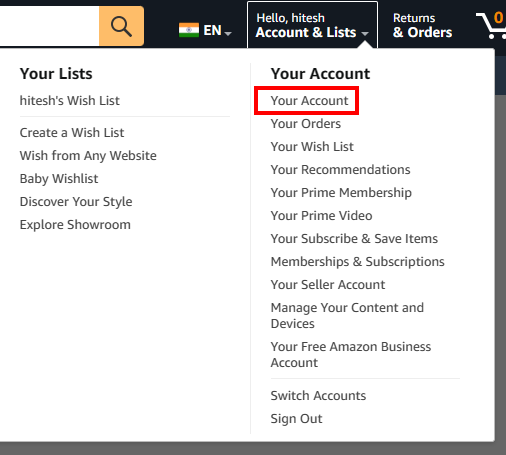
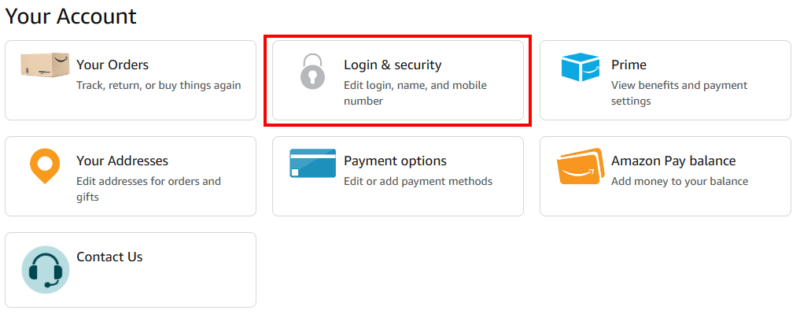
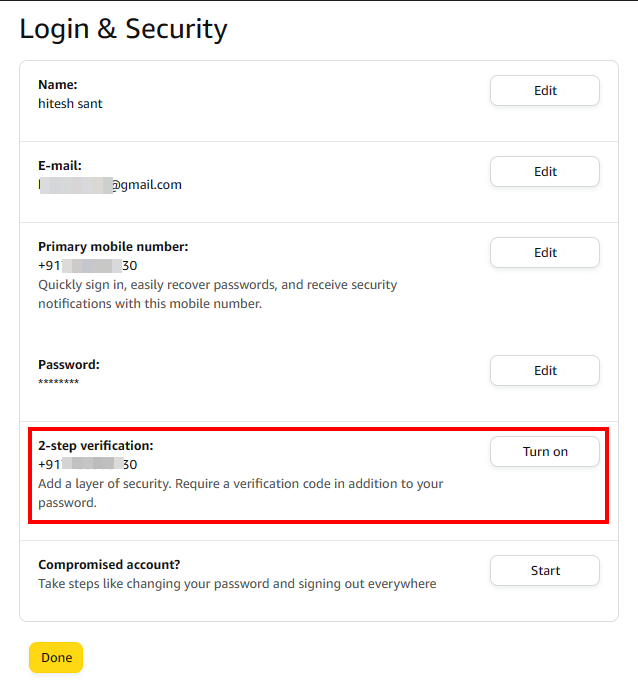
Enter Login & security.
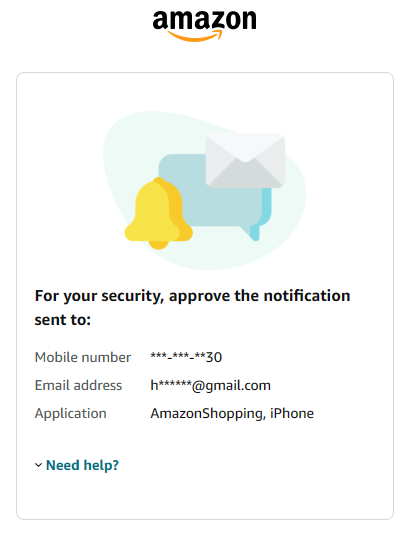
Subsequently, you may be asked for your password again and might need to approve a login request on your registered email address or phone number. Afterward, click Turn on against the 2-step verification tab.
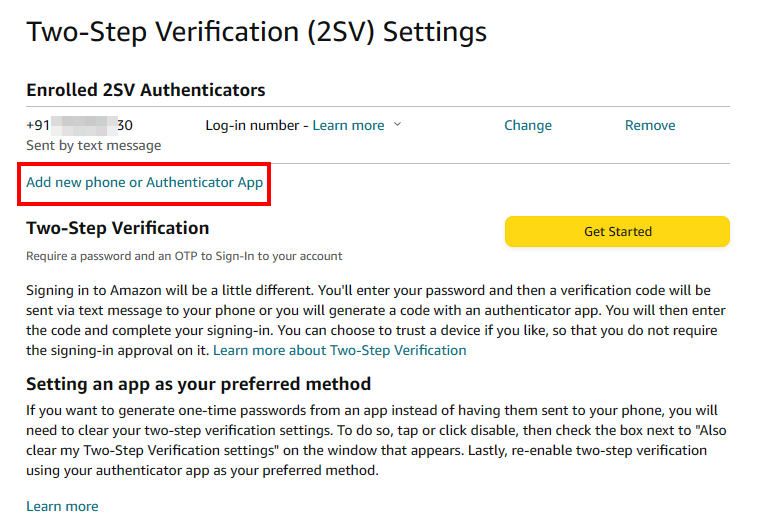
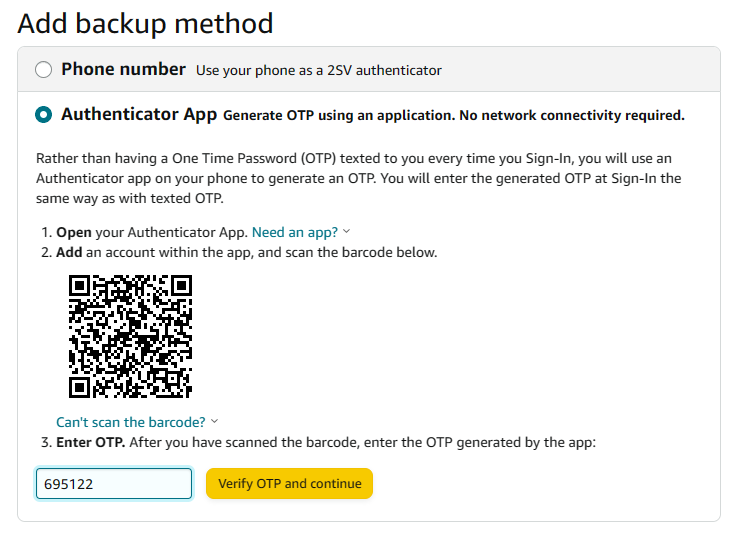
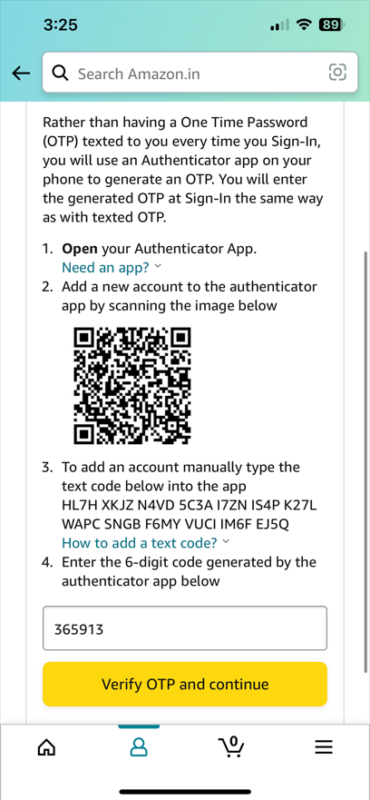
Now click on Add new phone or Authentication App, and ensure the Authentication app option is selected. Afterward, scan the barcode on the next screen, enter the OTP from Microsoft Authenticator, and Click Verify OTP and continue.
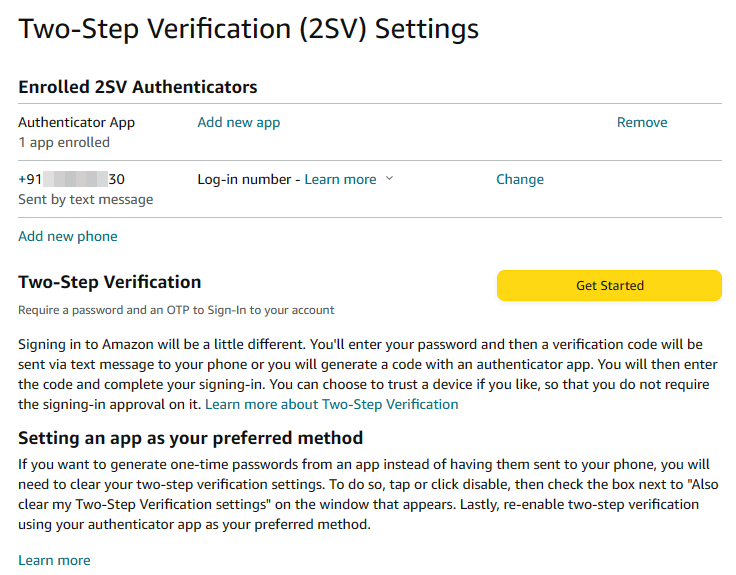
The final screen will show 1 app enrolled under the Authenticator app.
On the Smartphone
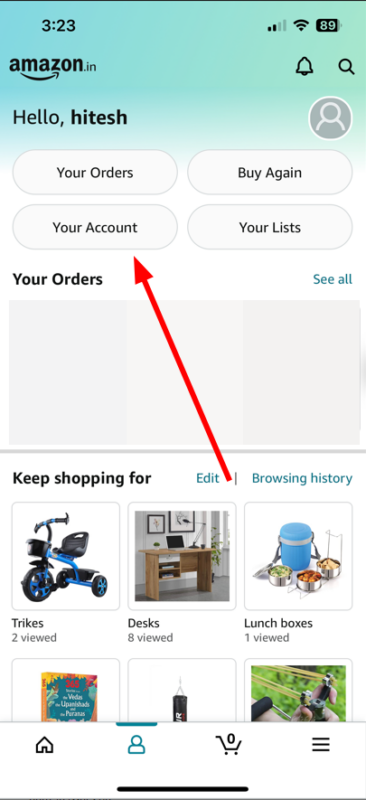
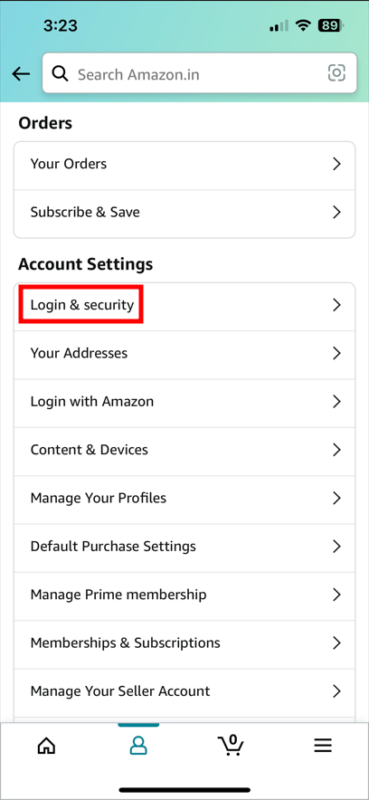
Open the Amazon application and tap Your Account in the profile section. Then tap Login & security and Turn on the next screen.
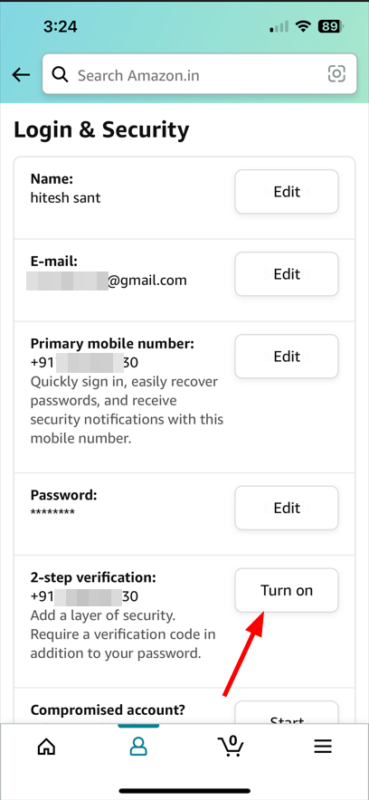
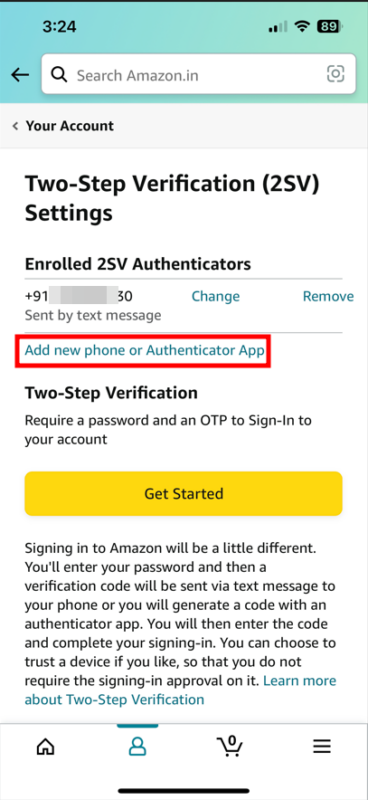
Next, tap Add new phone or Authenticator App. Here you can scan the code or copy the key and add it to Microsoft Authenticator, enter the OTP, and tap Verify OTP and continue to activate 2FA.
There are others!
Microsoft Authenticator is a fantastic app and works flawlessly. However, there are others you can check out in this list of two-factor authentication apps.
But I would not end this conclusion without telling you about the application I use personally, Zoho OneAuth. This works great, and I recommend you to try it, especially if one finds Microsoft’s offering unattractive somehow.
Use 2FA, and stay safe!

