Reverse image search allows the user to get information about an image through an image as the search query, instead of the traditional word-based prompt approach. Reverse image search gives you all the sources that have used that particular image. Furthermore, a reverse image search tool will find identical or similar images and also information that is related to the image like the context, use, or source.
It’s pretty popular because of the convenience it provides and the fact that it eliminates the guesswork. There are many instances when you’d want to do a reverse image search, for example:
- When you see a dress’s image online but don’t know where to buy it 👗
- When you fear somebody might be using your artwork or any visual property without your permission 👨🎨
- When you want to find out more information about an image 🖼️
In all those cases, when you put the image on Google, it’ll give you answers instantly. If you’ve been wondering how to do reverse image search on your iPhone or iPad, then follow the steps below.
How to Reverse Image Search on iPhone and iPad using Google Chrome
A straightforward process. With Google Chrome’s “Request Desktop Site” feature, you can do reverse image search easily.
Step 1: Open Google Chrome on your iPhone or iPad.
Step 2: Type “Google” on the search bar to open the search engine homepage.
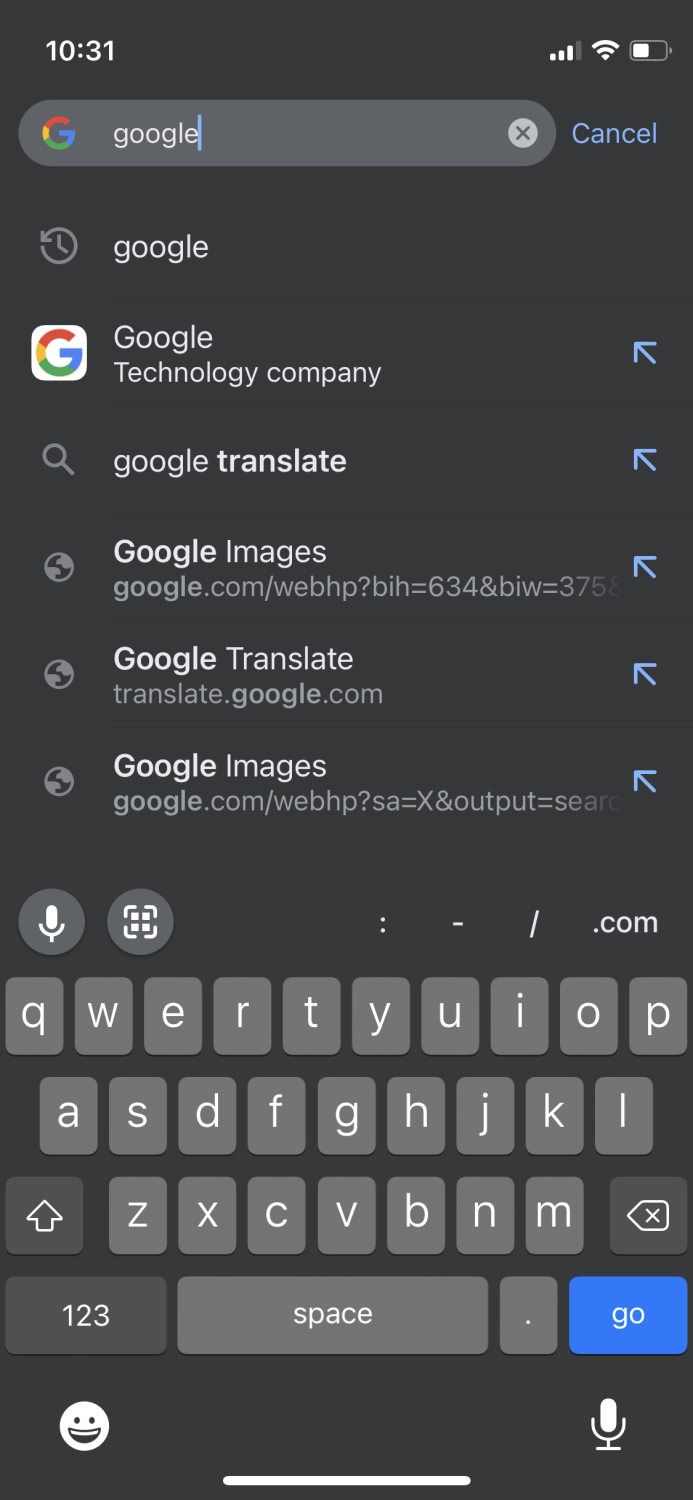
Step 3: Tap on the Google logo.
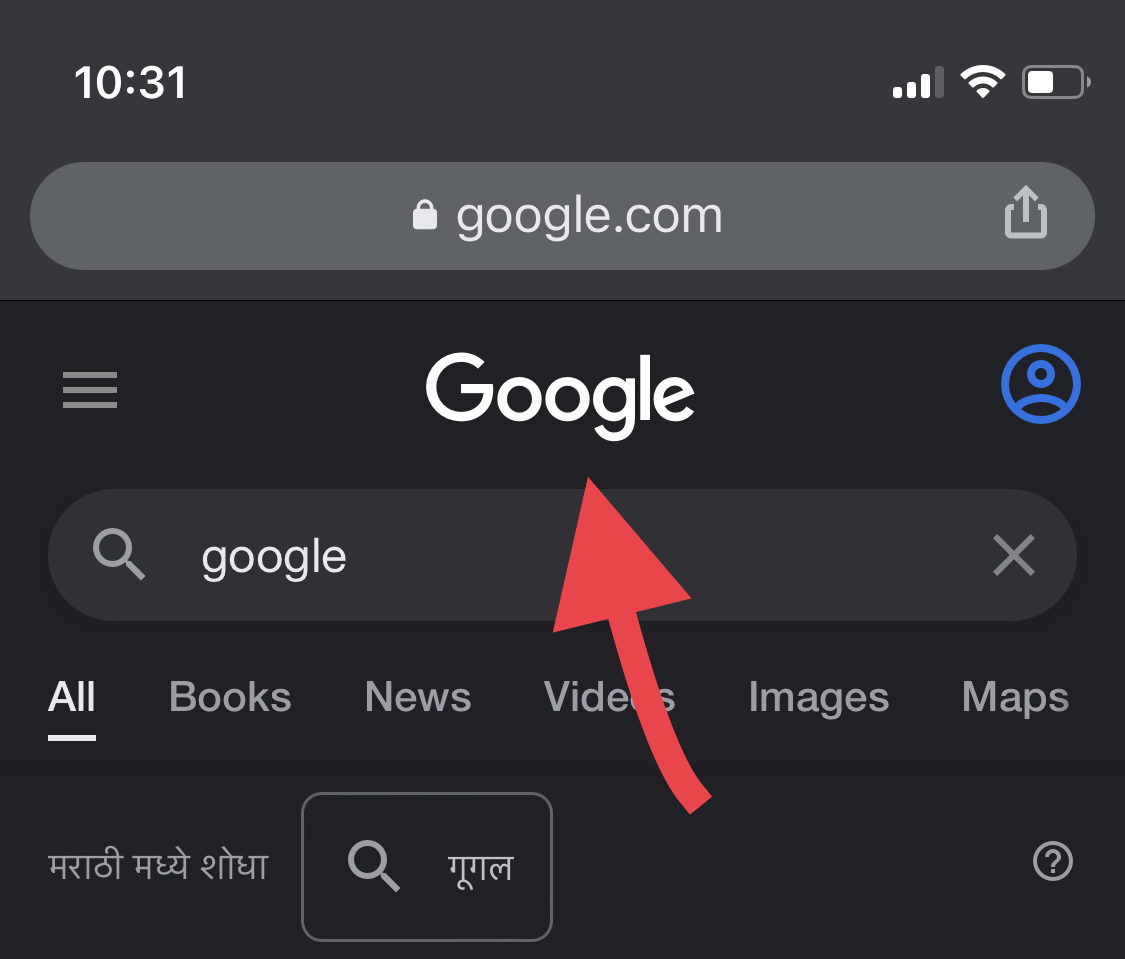
Step 4: Go to “Images”.
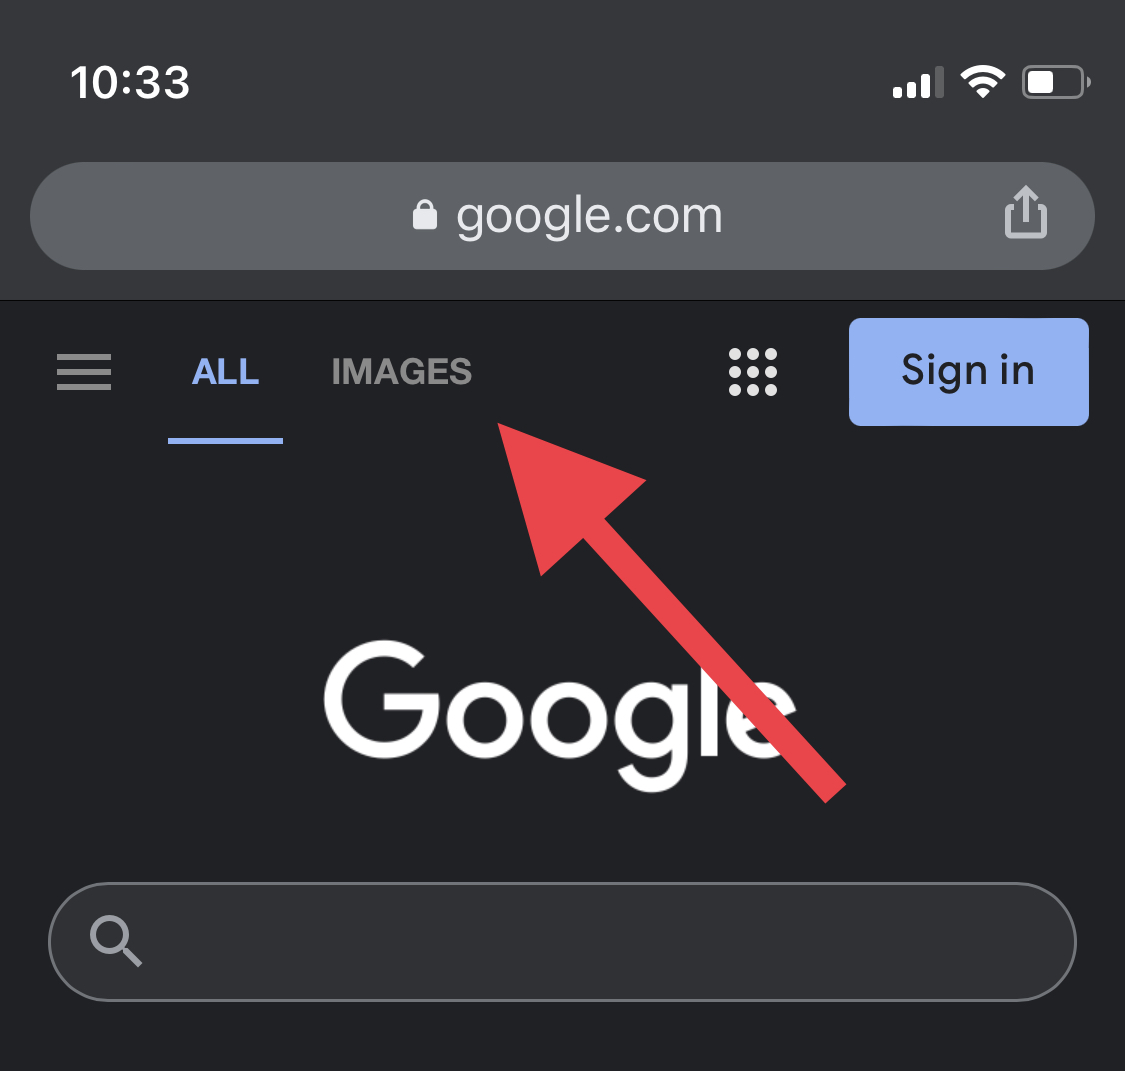
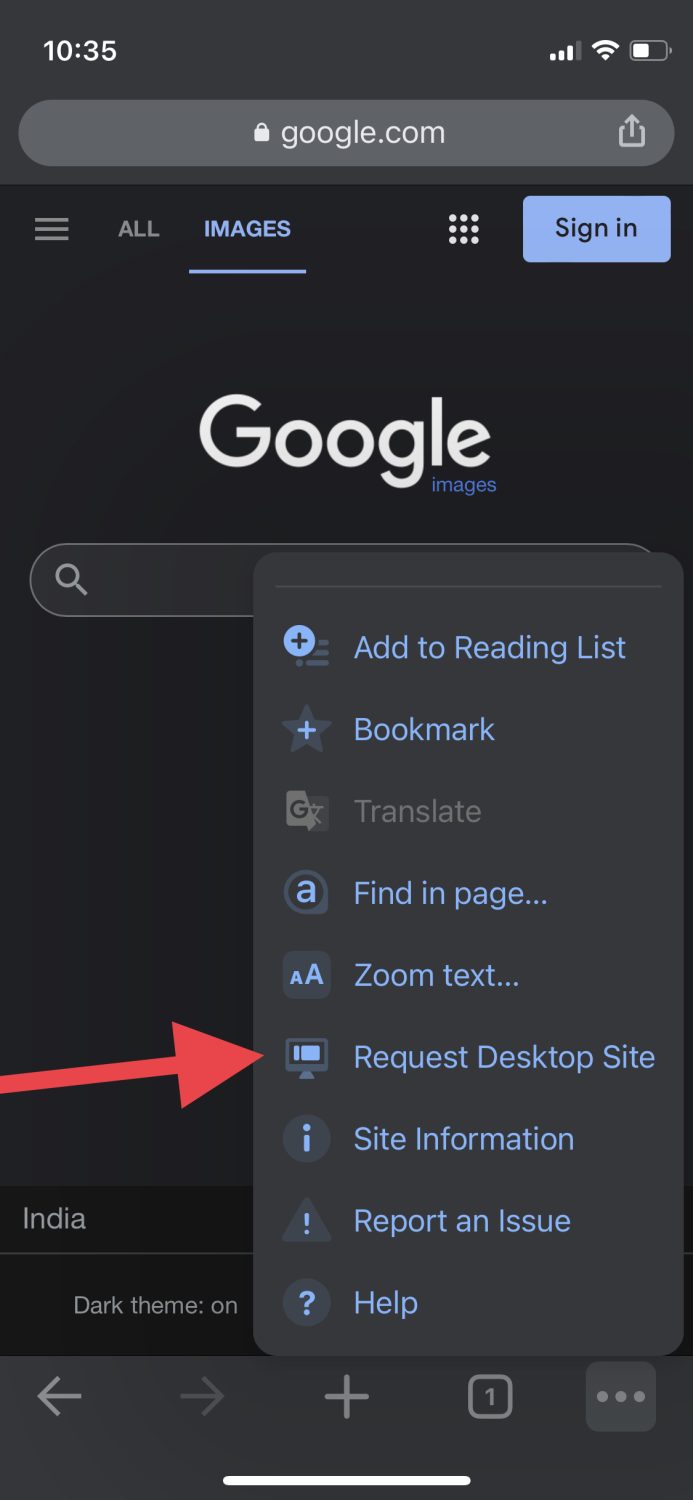
Step 5: Now, from the bottom menu, you’ll see the three dots. Tap on it.
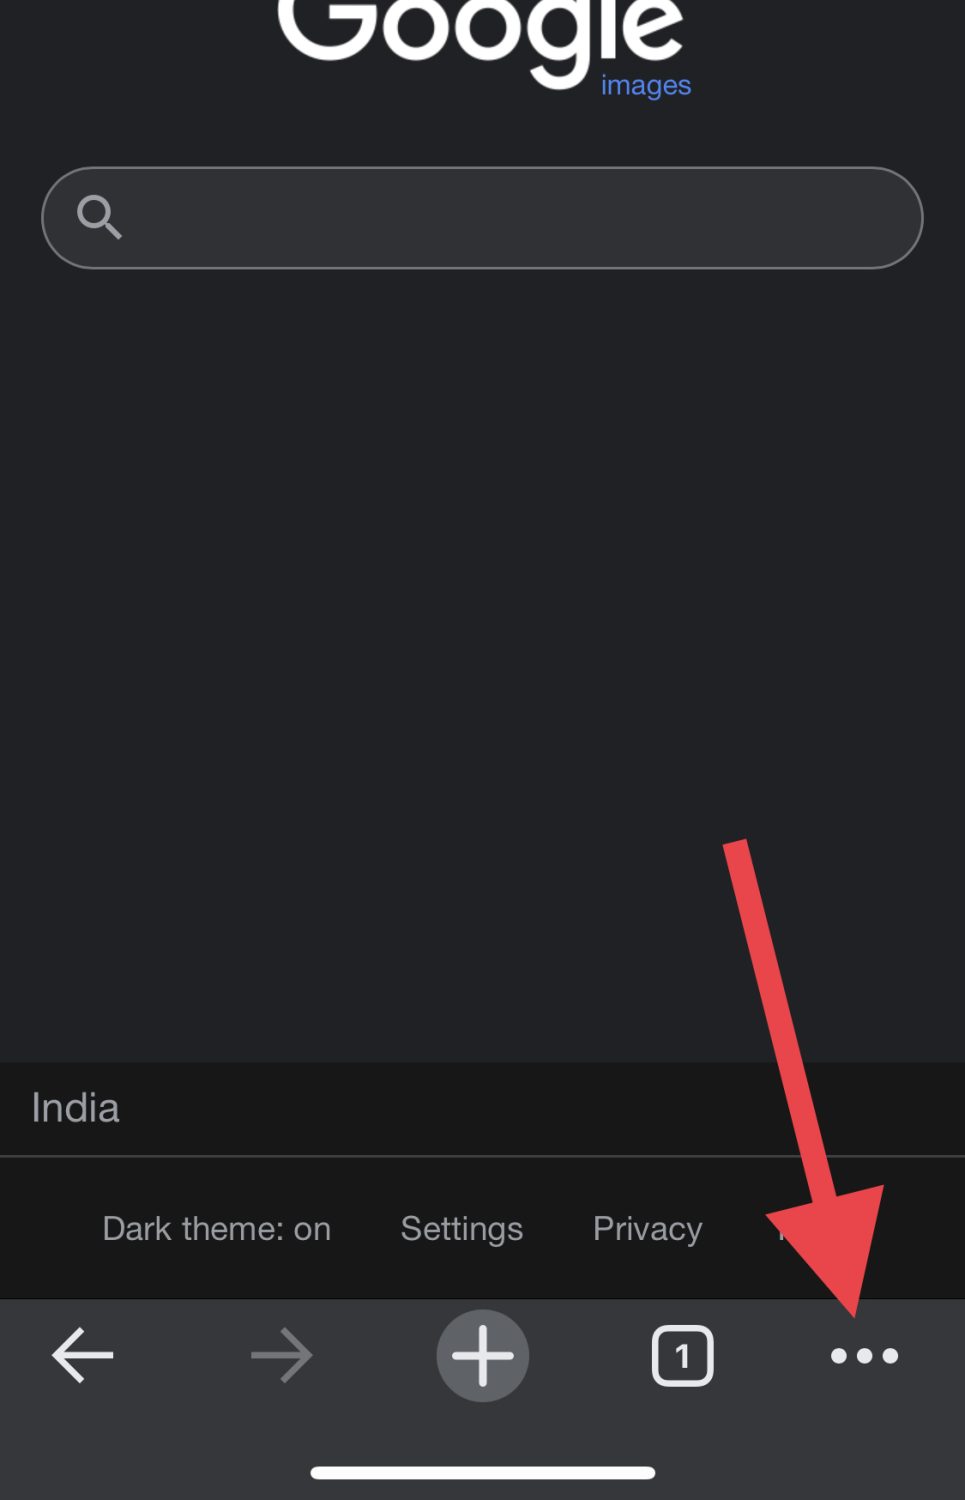
Step 6: Scroll down until you find the “Request Desktop Site” option and tap on it.
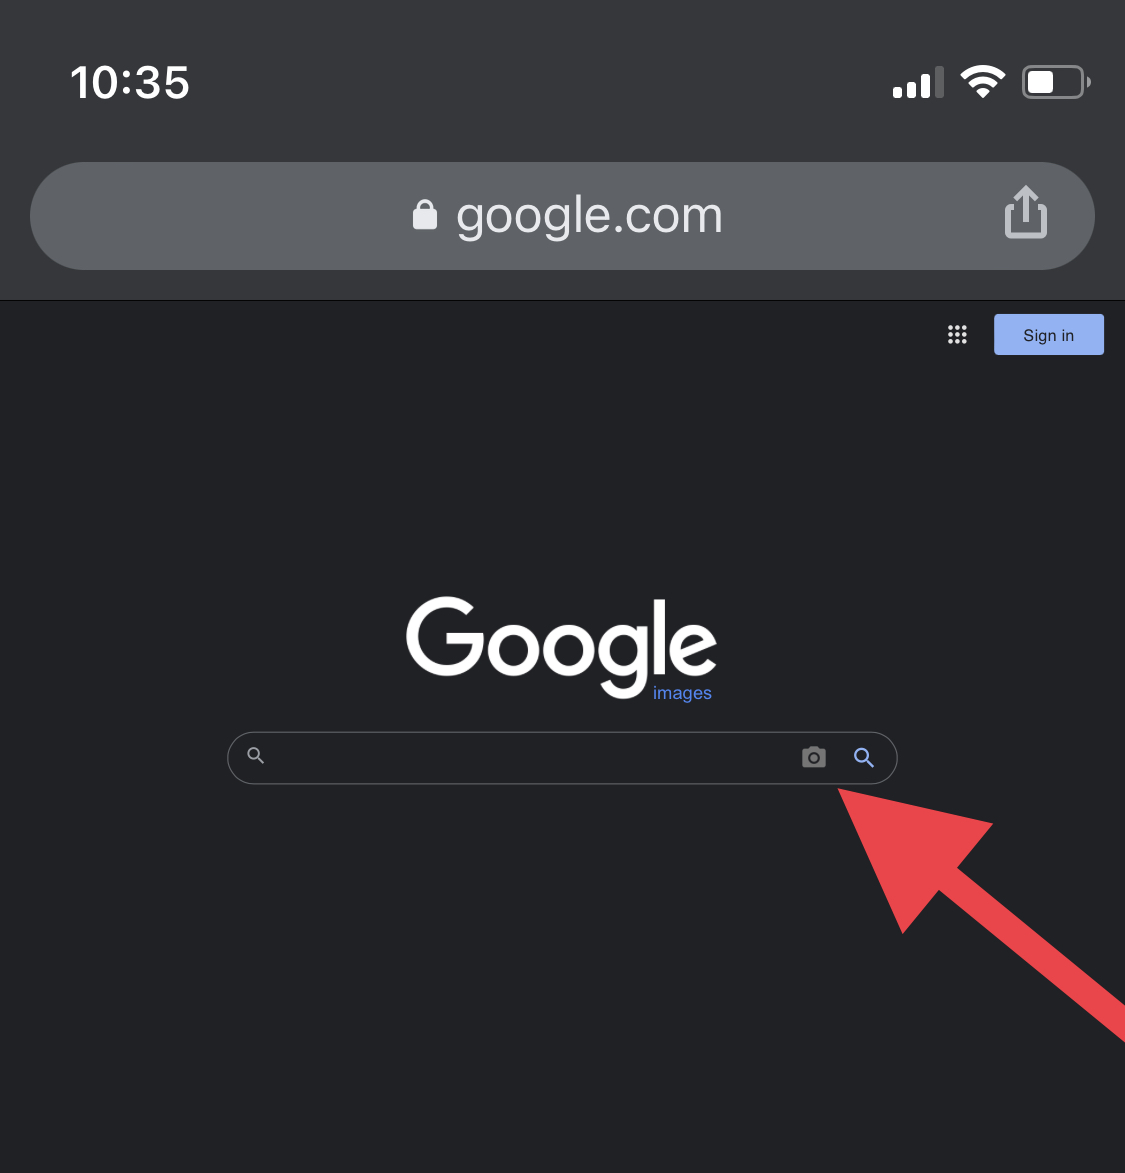
Step 7: The page will look something like the screenshot below. Tap on the little camera icon on the right side of the search bar.
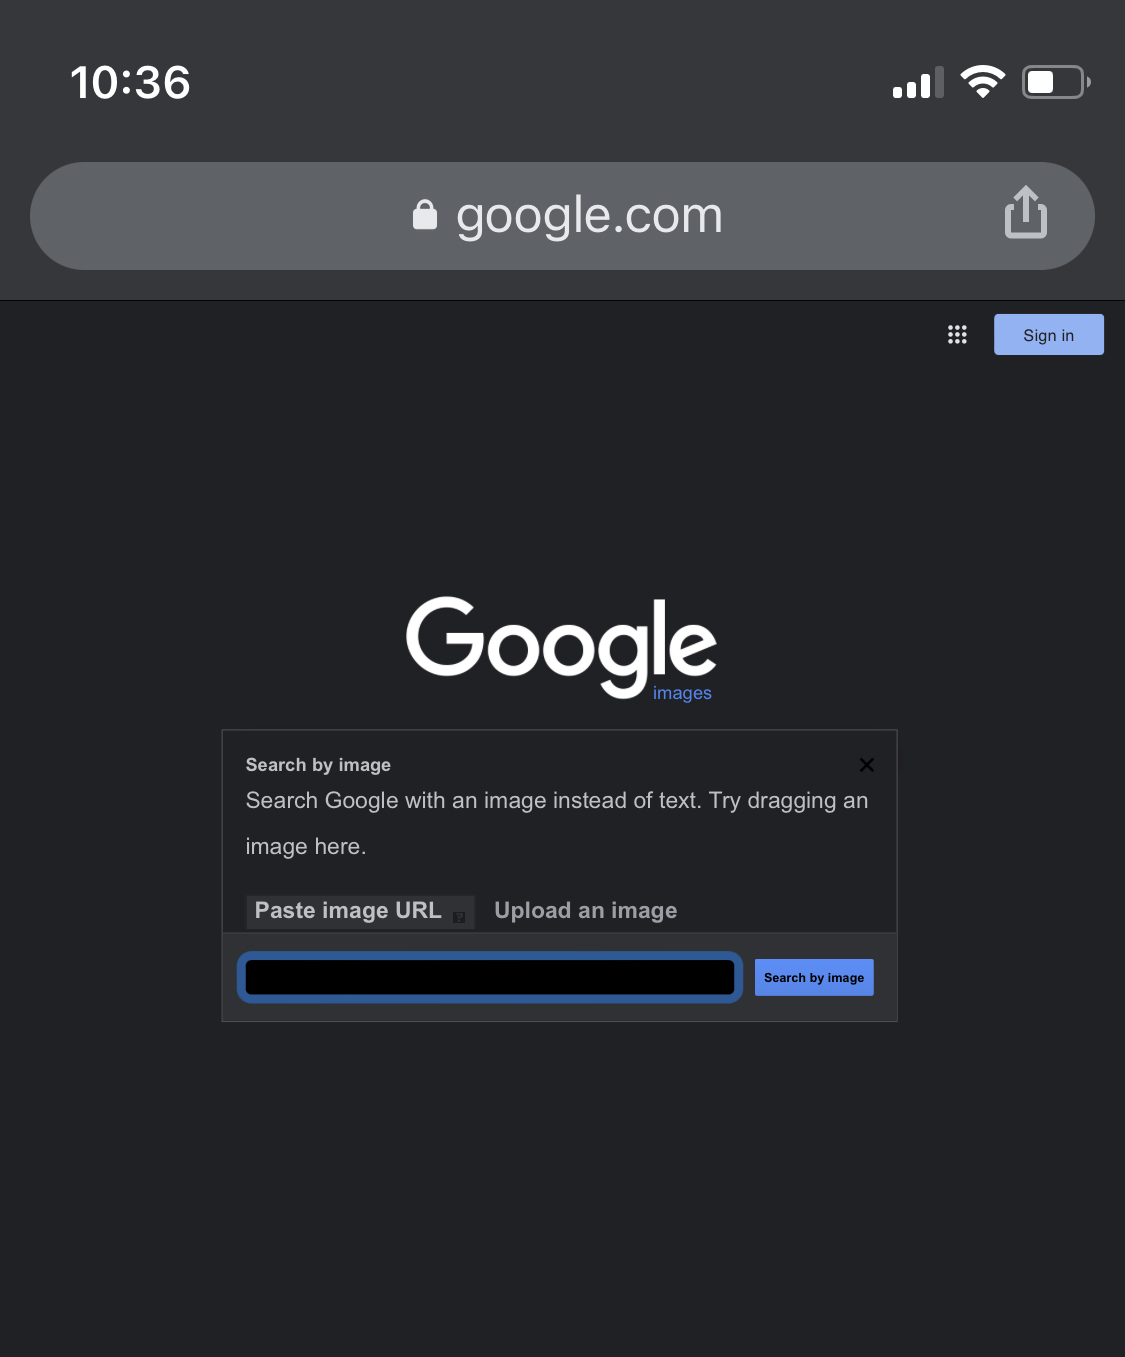
Step 8: Now, you can either paste the URL of the image or upload it from your device’s media gallery. Since I have it in my gallery, I’ll go with the latter option.
Step 9: Once you upload the image, you’ll see Google gives you all the sites that use the same image or similar-looking ones.

Voila! Now you know precisely where the image originated from.
While this is a free method to perform reverse image search, if you want more accurate or business-oriented results, you should opt for some of the best reverse image search software instead.
How to Reverse Image Search on iPhone and iPad using Safari
The steps to reverse image search using Safari is almost identical to doing it on Google Chrome.
Step 1: Go to Google.com search engine from the Safari browser.
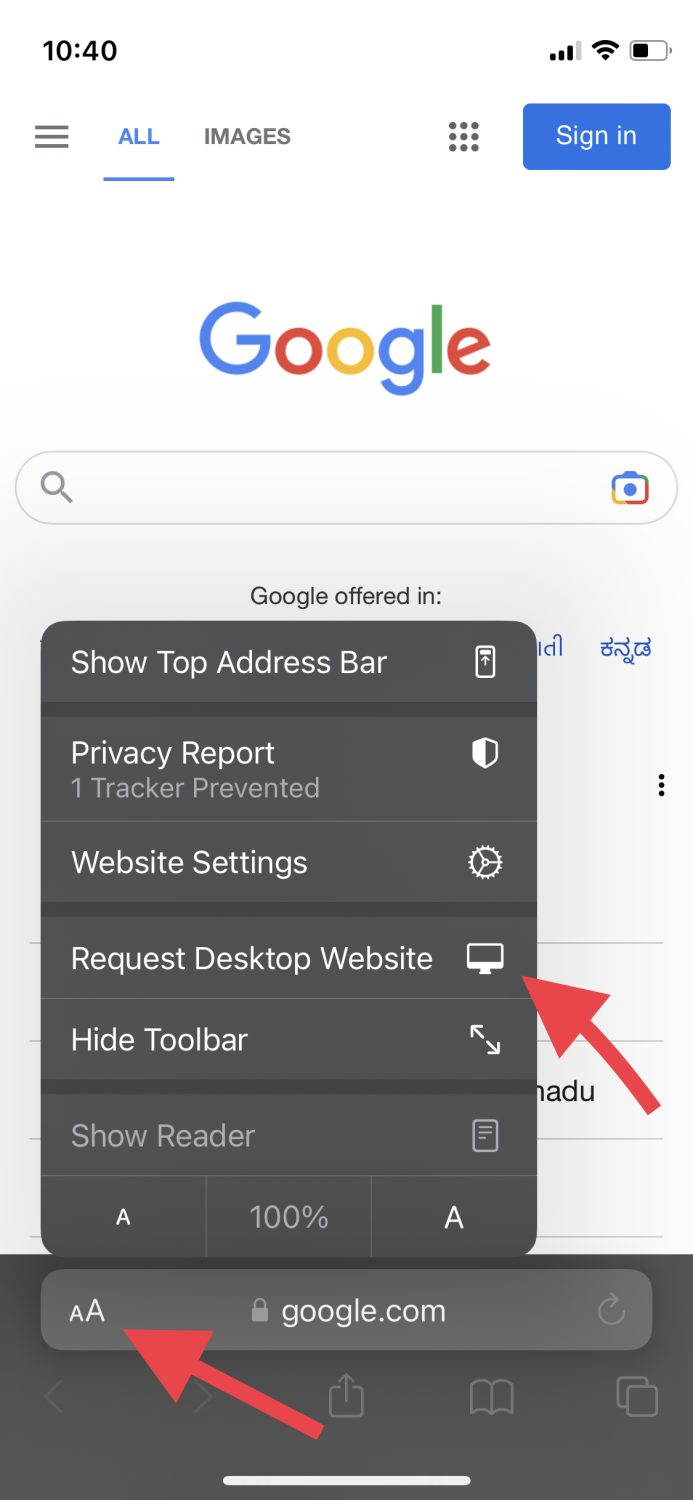
Step 2: Tap on this icon on the bottom left and select “Request Desktop Website”.
Step 3: Go to “Images”.
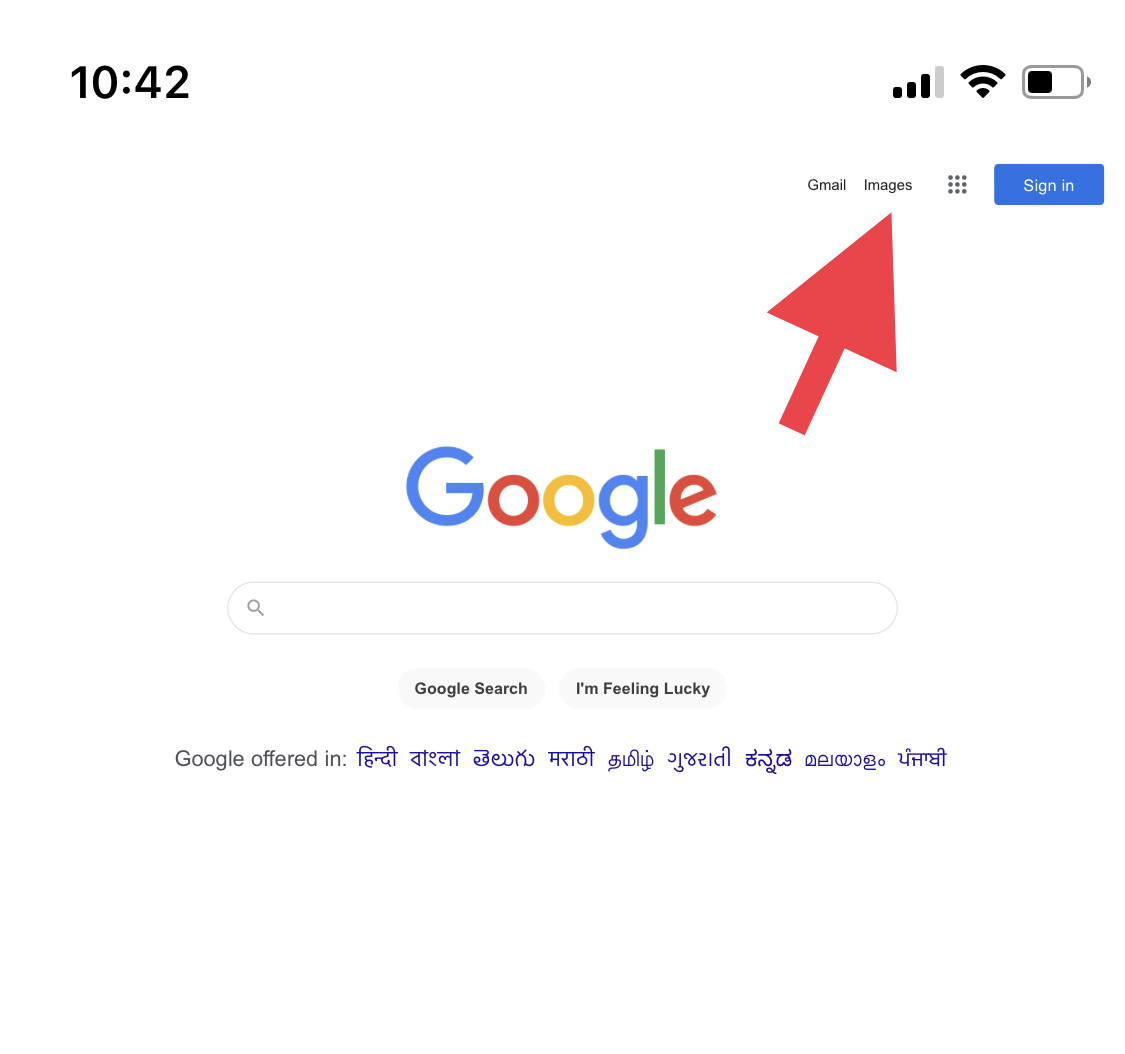
Step 4: As we did before, tap on the small camera.
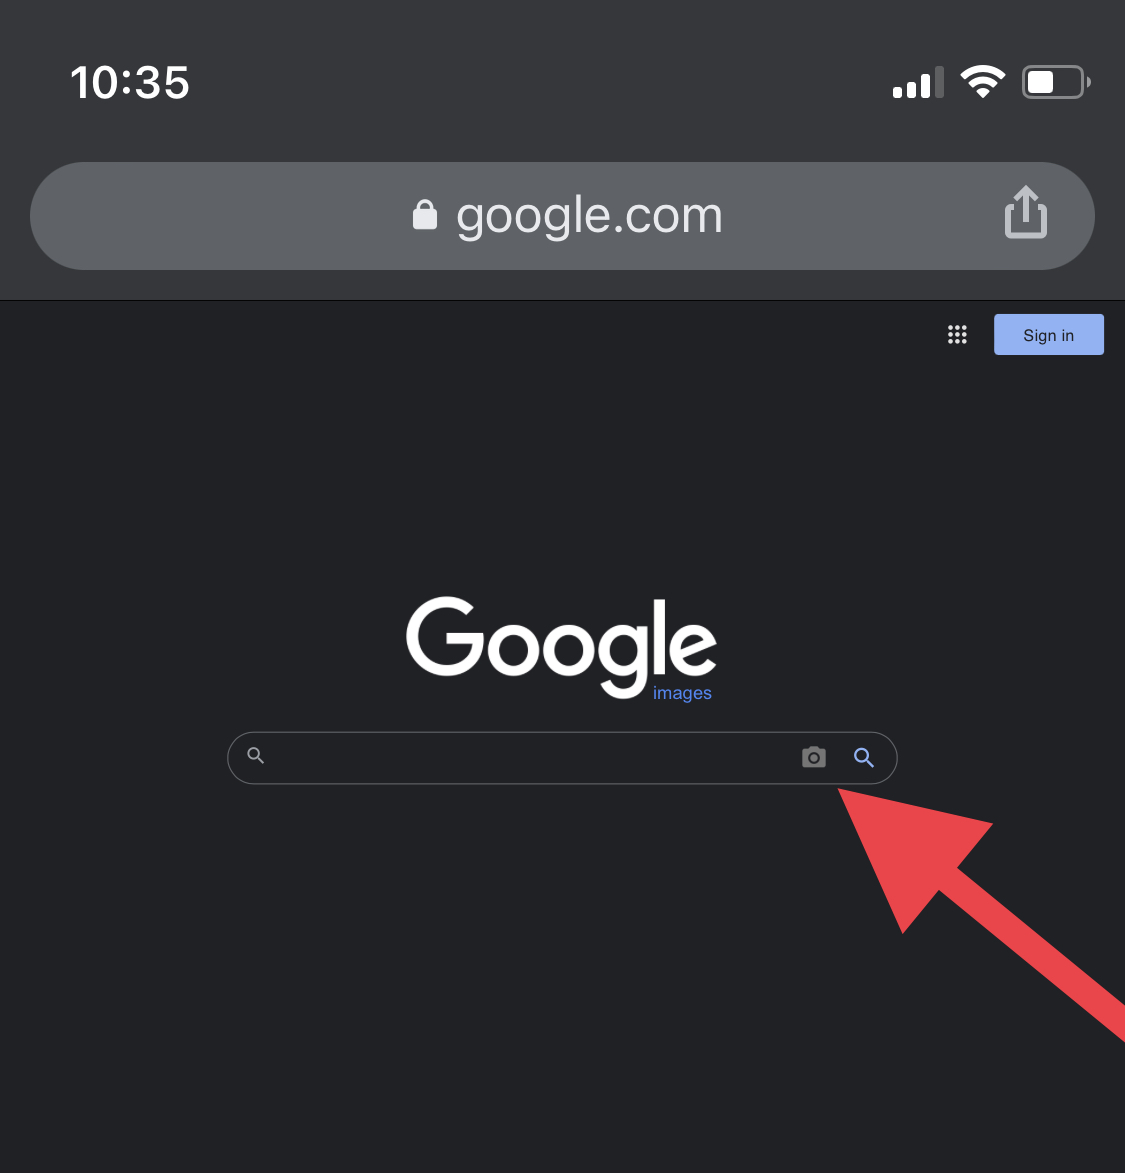
Step 5: Upload an image from your gallery or paste the link of the image.
The browser will then show you all the results matching that image.
How to Collect More Information from an Image Using Google Lens
Sometimes you’d want to know in-depth about the photo you just took or use that photo to help you achieve something, maybe translate a road sign or solve a math equation.
This can be made possible with the help of content recognition apps, and what better option would there be other than Google’s app itself. You can use their feature called Google Lens on iPhone and iPad to carry out these image-oriented tasks and make your life so much more convenient.
Also, their app will allow you to perform a reverse image search right from their homepage, so you don’t have to use another app to do it.
Conclusion
Now you know how to reverse image search on iPhone and iPad using several methods, and also how to obtain more information about a photo instantly.
You may also look at these reverse image search tools.

