Website monitoring tool tracks website performance, uptime, and availability, alerting users to downtime, slow load times, and security vulnerabilities. It ensures your site remains accessible and resolves issues before they impact users.
Website monitoring tools provide real-time insights into your site’s performance, helping you quickly spot issues and ensure smooth operation. Whether managing a small blog or a large online store, the right website monitoring tool can make a significant difference.
I’ve shortlisted the following website monitoring tools based on key features such as uptime monitoring, alerting options, user interface, performance tracking, integration options, reporting capabilities, pricing, and ease of use.
- 1. UptimeRobot – Best FREE Monitoring
- 2. Uptrends – Best for Web Application Performance Monitoring
- 3. Visualping – Best for Website Change Detection and Alerts
- 4. Pingdom – Best for Real User Monitoring
- 5. Checkly – Best for Small to Medium Business
- 6. Dotcom-Monitor – Best for Large Business
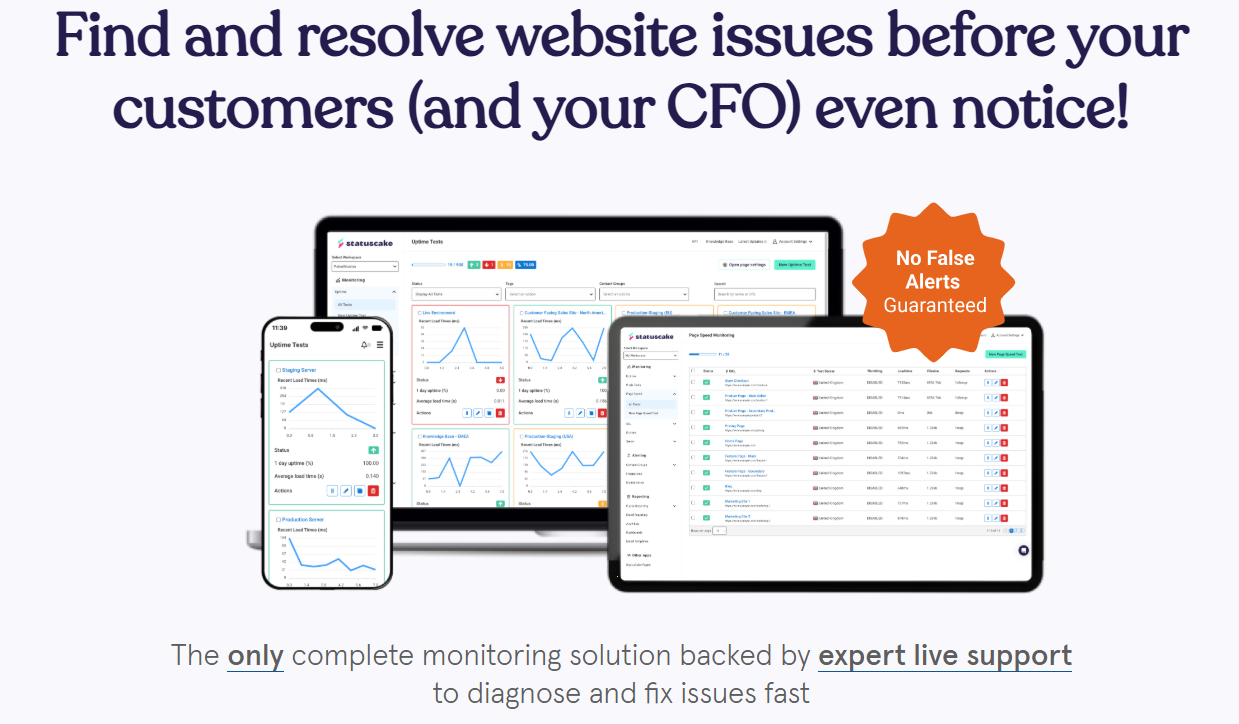
- 7. StatusCake – Best for Fast Uptime Alerts
- 8. Datadog – Best for End-to-End User Journey Tracking
- 9. Site24x7 – Best for All-in-One Monitoring
- 10. LogicMonitor – Best for Synthetic Monitoring
- 11. Uptime.com – Best for Reliability and Detailed Reporting
- 12. ManageEngine Website Monitoring – Best for Comprehensive Application Monitoring
- Show less
You can trust Geekflare
At Geekflare, trust and transparency are paramount. Our team of experts, with over 185 years of combined experience in business and technology, tests and reviews software, ensuring our ratings and awards are unbiased and reliable. Learn how we test.
1. UptimeRobot
Best FREE Monitoring

UptimeRobot is a leading website monitoring service that checks websites every 30 seconds and sends instant notifications for any issues. Trusted by big organizations like NASA and IBM, it helps you keep your websites running smoothly with minimal downtime.
UptimeRobot offers various notification methods, including email, SMS, voice calls, and Slack, to ensure you’re always informed. It also monitors SSL certificates, tracks domain expiration, and checks your website is online.
UptimeRobot has features like checking from different locations to avoid false alarms. It also sends repeated alerts, allows for maintenance times, and tracks how fast your site responds. These features help you quickly identify and resolve issues.
UptimeRobot also lets you create public status pages to inform customers during outages. Plus, it has mobile apps for Android and iOS, so you can easily monitor your site and get alerts on the go.

UptimeRobot Pros

Sends notifications via email, SMS, voice calls, and more.
Customizable status pages keep customers informed during issues.
Set alert limits and repeat alerts to ensure nothing is missed.
Invite team members with different roles to handle incidents.
UptimeRobot Cons
The free UptimeRobot plan has limited options.
The 30-second check interval requires purchasing the Enterprise package.
UptimeRobot Pricing
| Plans | Monthly Pricing | Offering |
|---|---|---|
| Free | $0 | 5 min interval, 5 integrations, basic status progress, Ping |
| Solo | $7 | 1 min interval, SSL, 9 integrations, Notify seats |
| Team | $29 | 100 monitors, 12 integrations, full status page, 3 notify and 3 login seats |
| Enterprise | $54 | 200+ monitors, 30 sec intervals, 5 notify and 5 login seats, Full-featured status pages |
2. Uptrends
Best for Web Application Performance Monitoring
Uptrends web monitoring tool ensures your website’s core functions, like logins and payment screens, work properly. Using the free transaction recorder Chrome extension, you can record and continuously test transactions on a global network of checkpoints.
Uptrends support monitoring general transactions, e-commerce checkouts, booking systems, and SaaS interactions. You can build and modify scripts using the Transaction Editor with basic CSS knowledge.
Uptrends provides performance insights, monitors step load times, captures browser snapshots, and generates waterfall charts to identify issues within your website. It can also monitor nested shadow DOMs, which ensure proactive issue resolution.
Moreover, Uptrends integrates into different workflows, allowing script management and updates through APIs. Features like version control, secure credential storage, and two-factor authentication help you improve security.
Uptrends Pros
Record, edit, and manage monitoring scripts with transaction recorder and editor.
Inspect step load times, browser snapshots, and waterfall charts for in-depth analysis.
Smooth CI/CD integration and API-automated script management.
Uptrends Cons
Encounter occasional delays in alert notifications.
It depends on external servers, which might introduce latency in specific regions.
Uptrends Pricing
| Plans | Monthly Pricing/Credit | Offering |
|---|---|---|
| Multi-step browser | $8.40 | logins and purchase flows, Easy-to-use API scenario builder |
| Single browser | $14 | Latest commercial browsers, visual timeline |
| Uptime and availability | $5.25 | Advanced root-cause analysis tools, HTTP(S), SSL, DNS, SMTP |
| Real User Monitoring | $9.20 | Real web and mobile errors, network, backend & frontend breakdown |
3. Visualping
Best for Website Change Detection and Alerts

Visualping is a leading website change detection and monitoring tool that focuses on visual, text, and HTML changes. Unlike traditional uptime monitors that only check if a site is “up” or “down,” Visualping alerts you to specific updates on a page, such as price drops, restocked items, etc.
The platform uses a snapshot method to compare a page’s current state against its previous version. When a change is detected, Visualping sends an alert containing a highlighted screenshot or text comparison, and you see the changes in one glance. It is easy to use for non-technical users and also offers advanced features like AI-powered noise reduction to filter out very minor updates.
Visualping offers enterprises tools for competitor monitoring, compliance tracking, and SEO monitoring. It integrates with collaboration tools like Slack, Microsoft Teams, and Google Sheets to send real-time updates to teams.
Visualping Pros
Provides side-by-side screenshots with highlighted changes for easy analysis.
Uses AI to ignore irrelevant changes like shifting ads or timestamps.
Can monitor specific areas of a page, as required, rather than the entire URL.
Visualping Cons
Higher frequencies (like 1-minute checks) require higher-tier plans.
Has a steep learning curve to set up alerts for complex actions.
Visualping Pricing
Visualping offers 3 plans: Personal, Business, and Solutions. The Personal plan is free for upto 150 checks and 5 pages, after which the price escalates depending on number of checks required. The Business plan starts at $100/month. The Solutions plan has custom pricing.
4. Pingdom
Best for Real User Monitoring
Pingdom offers synthetic monitoring to find slow load times and broken pages and real user monitoring (RUM) to show how real users use your site. This dual approach ensures comprehensive visibility into your website’s performance.
Pingdom excels in RUM, offering real-time insights into how users interact with your site. It also tracks behavior by device, browser, and location, helping you identify and resolve performance issues to optimize the user experience.
Pingdom optimizes web performance by analyzing load speed and resource usage, identifying bottlenecks, and suggesting improvements. Its API enables custom monitoring, while global tracking and real-time alerts keep you informed.
Pingdom provides a complete solution for monitoring website performance, enhancing user satisfaction, and ensuring efficiency. With load speed analysis, customizable API integration, and real-time alerts, it helps businesses deliver a smooth user experience and operate smoothly.

Pingdom Pros
Provides real-time, actionable data on website performance and user experience.
Combines synthetic and real user monitoring for in-depth insights.
Offers shareable, customizable reports for SLA compliance.
Supports API for custom app development and automated monitoring.
Optimizes performance based on device, browser, and location data.
Pingdom Cons
Android app reached its End of Life (EOL).
Lack of regular product updates.
Pingdom Pricing
| Plans | Monthly Pricing | Offering |
|---|---|---|
| Synthetic Monitoring | $10 | Transaction monitoring, page speed and uptime monitoring, maintenance windows, email notifications, and SMS alerting |
| Real User Monitoring | $10 | Unlimited sites and users, shareable reports, performance filtering |
| Enterprise | Custom | 500K to 5M pageviews, unlimited users, transaction monitoring |
5. Checkly
Best for Small to Medium Business
Checkly is a code-first 24/7 website monitoring tool that monitors your website, APIs, and applications to ensure maximum uptime and reliability. It helps you create, test, and deploy monitoring checks from your code repository, removing the need for manual setup.
Checkly provides comprehensive monitoring, user implementation, support, and maintenance features in a single subscription with no hidden fees, making it a suitable option for all types of website monitoring.
Checkly lets you keep an eye on things from the preview to the production environments so that problems can be found quickly. Likewise, it has detailed and intuitive dashboards and real-time incident management to help maintain high uptime and reliability.
Moreover, Checkly provides post-deployment monitoring with CI/CD tools like GitHub, GitLab, Jenkins, and Vercel. It integrates with Slack, PagerDuty, and OpsGenie and exports data to Prometheus for timely notifications and reduced mean time to recovery (MTTR).

Checkly Pros
Integrates with CI/CD workflows for pre-production and production environments.
Offers false positive reduction to avoid unnecessary noise.
Supports a wide range of tools like GitHub, Slack, and Prometheus.
Checkly Cons
Steep learning curve due to the code-first approach.
Limits advanced customization options for complex monitoring needs.
Checkly Pricing
| Plans | Monthly Pricing | Offering |
|---|---|---|
| Hobby | $0 | 1.5k browser check, single user, threshold-based alerting, Prometheus endpoint |
| Team | $80 | 20 users, SSL monitoring, all alerting channels, 10 sec/60 seconds check frquency |
| Enterprise | Custom | CSAML/SSO login, client certificates, SLA for 99.9% uptime, 24×7 escalation phone number |
6. Dotcom-Monitor
Best for Large Business
Dotcom-Monitor offers a comprehensive suite of web application monitoring tools designed to ensure web applications’ performance, reliability, and security. It uses real browsers like Chrome and Edge to simulate visitor interactions and ensure critical functions like checkouts and logins work smoothly.
Dotcom-Monitor monitors sites from multiple geographic locations worldwide to check responsiveness and potential errors. It sends instant alerts via email, SMS, or WhatsApp, allowing for quick problem resolution and fixes.
Dotcom-Monitor’s Digital Experience Monitoring (DEM) tracks and optimizes user experience. It also includes real-world speed simulations to ensure consistent performance across various network conditions.
Dotcom-Monitor works great for large companies that require scalable monitoring solutions. Real-browser monitoring, instant alerts, and detailed insights help enterprises maintain high service levels. Thus, big companies like Dell and Comcast trust and use Dotcom.

Dotcom-Monitor Pros
Offer a wide range of monitoring types, including browser-based and transaction monitoring.
Offers detailed insights into uptime, speed, and potential vulnerabilities.
Supports error diagnosis with synced video capture and playback.
Dotcom-Monitor Cons
It doesn’t have a Real User Monitoring (RUM) feature.
May experience occasional delays in alert notifications under high load conditions.
Dotcom-Monitor Pricing
| Plans | Monthly Pricing | Offering |
|---|---|---|
| Websites and APIs | $17.99 | HTTP/S, SSL, ping, insomnia scripts, port monitoring, postman scripts |
| Internet Infrastructure | $36.00 | Streaming media, DNS, FTP, SMTP, traceroute, streaming media |
| Page Performance | $26.96 | Chrome, IE, Firefox, content verification, detailed Waterfalls, DNS/SSL/Connect breakdown |
| Web Applications | $35.06 | Playback video, transaction Waterfalls, 1 min frequency |
7. StatusCake
Best for Fast Uptime Alerts
StatusCake is a comprehensive web monitoring software designed to ensure your website’s uptime, performance, and overall health. It monitors your website in the background and alerts you immediately if anything goes wrong.
StatusCake offers key features like 30-second uptime checks, page speed analysis, domain status monitoring, server performance checks, and SSL monitoring. With instant alerts, 30 global monitoring locations, and comprehensive reports reports, it helps you proactively manage potential issues.
StatusCake’s team collaboration features make it ideal for businesses of all sizes, from small companies to large DevOps departments. It includes tools for coordinated monitoring efforts and integrates with Google Single Sign-On for enhanced security and ease of access.
StatusCake Pros
Offer instant alerts via various channels, including email, SMS, and Slack.
Includes 30-second check rates from 30 different countries.
Helps Identify and improve slow-loading elements.
Offer a user-friendly interface with custom dashboards for quick insights.
StatusCake Cons
Lacks real user monitoring capabilities.
Takes time to set up different types of advanced monitors.
StatusCake Pricing
| Plans | Monthly Pricing | Offering |
|---|---|---|
| Free | $0 | Email alerts, Expiration Alerts, 5 min test interval |
| Superior | $20.41 | SMS alerts, 1 team member, 3 server monitors, SSL monitoring, Alerts through integrations |
| Business | $66.66 | 9 members, 30-sec interval, Team tool, Audit log, SSL Certificate Scoring, Memory Threshold Alerting |
8. Datadog
Best for End-to-End User Journey Tracking
Datadog’s Website monitoring software keeps your website running by sending out quick alerts if anything goes wrong. It also checks your website’s availability from different geographical locations worldwide and helps you meet your Service Level Objectives (SLOs).
Datadog connects with your system and logs to provide a complete view of your website’s core web vitals. It tests critical business transactions, displays user journey screenshots as they progress, and breaks down performance by device and location to help you quickly resolve issues.
Creating tests with Datadog saves time and doesn’t require any coding. The Web Recorder simplifies the setup process, which allows you to quickly create tests using a simple interface for recording user actions. Both technical and non-technical teams can quickly create and manage browser tests.
Datadog’s AI-powered tests are intelligent enough to update themselves as your website’s user interface changes. It reduces maintenance overhead, allowing dev teams to focus on building new features rather than constantly updating tests.

Datadog Pros
Robust alert and warning settings help reduce false positives.
Log management is effortless with full search, live access, and automatic S3 archiving.
Enable monitoring from multiple global locations, ensuring broad coverage.
Datadog Cons
Has a steep learning curve at the start.
Sends Unnecessary notifications about the DataDog component.
Datadog Pricing
| Plans | Monthly Pricing | Offering |
|---|---|---|
| Real User Monitoring (RUM) | $1.50 | Error tracking & crash reports, custom tracking, performance metrics |
| RUM & Session Replay | $ 1.80 | Video-like replays, DevTools, interactions on Heatmaps |
| Error Tracking | $0.25 | List all errors, watchdog Insights, custom search tags |
9. Site24x7
Best for All-in-One Monitoring
Site24x7 is a full-stack monitoring solution that monitors website availability and real-time performance from over 32 global locations to provide seamless service and gain user experience insights.
Site24x7 excels at monitoring critical internet services such as HTTPS, DNS, FTP, and SSL/TLS certificates to identify and resolve issues. Its synthetic web transaction monitoring simulates user interactions to improve functions like login forms and shopping carts.
Site24x7 offers detailed analytics on visitor interactions, segmenting performance data by browser, platform, and geography. Integrating synthetic and real user data allows for faster issue resolution to improve overall site performance.
Moreover, features like real-time blocklist checks, SSL/TLS certificate monitoring, and website defacement detection improve website security. It keeps your websites up and secure, helping businesses build trust online.

Site24x7 Pros
Provides deep performance analysis using synthetic and real user monitoring.
Customize monitoring parameters to fit specific business needs.
Offers flexible third-party integration to ensure a smooth workflow.
Automated anomaly detection identifies and fixes issues.
Site24x7 Cons
Depend on subscription tiers that limit access to advanced functionalities.
Lack of group notification system overflows notifications.
Site24x7 Pricing
| Plans | Monthly Pricing | Offering |
|---|---|---|
| Web Uptime | $9 | 25 sites, 1 min interval, 32 locations, 2 status pages |
| ClasssicWeb Perf | $36 | 40 sites, 10 status pages, 100k page views, 8 monitors |
| Enterprise Plus Web | $899 | 2500 sites, 30 sec intervals, 5m page views, 100 monitors |
10. LogicMonitor
Best for Synthetic Monitoring
LogicMonitor offers synthetic monitoring services to ensure your website’s uptime and performance. It improves the end-user experience through real-time checks and transactions that integrate seamlessly with cloud and infrastructure monitoring.
LogicMonitor performs web and ping checks globally, sending HTTP requests and pinging IP addresses both internally and externally. It generates downtime alerts after failed checks, making you aware of potential issues before they affect users.
LogicMonitor’s advanced synthetic transactions simulate real-world interactions. They correlate with infrastructure data to diagnose service failures. Besides, it also simulates transactions, checks content, and handles authentication globally to ensure optimal website performance.
Integration with over 2,000 IT tools gives LogicMonitor a complete view of website and IT infrastructure performance. Moreover, Its AIOps early warning system reduces downtime and improves availability with faster alerts.

LogicMonitor Pros
Real-time service checks and proactive downtime alert system.
Customizable alerts and detailed metrics for in-depth analysis.
AIOps early warning system for faster issue detection and resolution.
LogicMonitor Cons
The mobile app needs improvement due to bugs causing crashes and glitches.
Costs can rise significantly with an increase in the number of resources.
LogicMonitor Pricing
LogicMonitor offers custom pricing for its website monitoring services, with a demo trial plan.
11. Uptime.com
Best for Reliability and Detailed Reporting
Uptime.com offers synthetic monitoring to test critical website flows and private location monitoring for internal systems. Its reliable real-time alert system makes it suitable for companies of all sizes. Companies like Accenture, IBM, and Microsoft trust it.
Uptime.com ensures your website remains fast, reliable, and accessible worldwide with features like webpage speed monitoring, API monitoring, and real user monitoring (RUM). Its global monitoring network tracks performance across multiple locations, helping you swiftly identify and resolve issues.
Beyond monitoring, Uptime provides tools like creating status pages for effective incident communication. Overall, it’s a robust and user-friendly tool that keeps your website running smoothly.

Uptime Pros
Offers reliable real-time alerts to minimize downtime.
Can monitor internal system’s visibility with private location monitoring.
Deliver detailed and customizable reports for performance analysis.
Uptime Cons
Initial setup is difficult due to the complexity of the monitoring tools.
Present occasional delays in alerts during peak traffic times.
Uptime Pricing
| Plans | Monthly Pricing | Offering |
|---|---|---|
| Starter | $20 | 30+ checks, 15 min intervals, 4 locations, 50k RUM data |
| Essential | $67 | 50+ checks, 5 min interval, Global, 200k RUM data |
| Premium | $379 | 200+ checks, 1 min interval, 200k RUM data, 15 transaction |
12. ManageEngine Website Monitoring
Best for Comprehensive Application Monitoring
ManageEngine Website Monitoring offers real-user monitoring for real-time insights and synthetic transaction monitoring to detect issues before they affect users. It monitors URLs and SSL/TLS to prevent delays and security threats.
ManageEngine Website Monitoring provides a web page analyzer that assesses response time and page size, identifies performance bottlenecks, and offers valuable insights through PageSpeed scores. Its content monitoring ability looks out for unauthorized changes to website content.
ManageEngine Website Monitoring integrates with ITSM systems for automated corrective actions and streamlined operations. Besides, it helps maintain a positive digital experience and protects your brand reputation. Instant SMS, email, or Slack notifications keep you informed of issues.
ManageEngine Website Monitoring offers a robust monitoring platform for maintaining your web application performance, security, and user satisfaction. It combines essential monitoring features, real-time alerts, and efficient integration to ensure your website remains reliable and secure.
ManageEngine Website Monitoring Pros
Provides detailed webpage performance analysis with PageSpeed Insights.
Continuous SSL/TLS certificate monitoring.
Offers instant notifications through SMS, email, or Slack.
Integration with ITSM tools for automated fixes.
ManageEngine Website Monitoring Cons
Initial setup can be complex and time-consuming.
May involve higher costs for advanced features and large-scale deployments.
ManageEngine Website Monitoring Pricing
| Plans | Annual Pricing | Offering |
|---|---|---|
| Free | $0 | 5 apps or servers |
| Professional Edition | $395 | 10 monitors with 1 user, AMS included |
| Enterprise Edition | $9,595 | 250 monitors with 1 user, AMS included |
Best Website Monitoring Tools Comparison
Here, we compare the best synthetic monitoring tools based on monitoring capabilities, alerting ways, and pricing.
| Website Monitoring Tool | Monitoring Capabilities | Alerting Ways | Monthly Pricing (USD) |
|---|---|---|---|
| Uptime Robot | Uptime, SSL, domain expiration, port monitoring, ping | Email, SMS, call, mobile, Slack | Free plan; $7 |
| Uptrends | Uptime, API, transaction, real browser, RUM, SSL, DNS, Performance | Email, SMS, call, Slack, Microsoft Teams, PagerDuty, Webhooks | Free Trial, $8.40 |
| Visualping | Visual monitoring of website status, side-by-side comparison of present vs. previous state of the page. | Teams, Slack, Email, SMS, Webhooks, API. | Free plan, paid plans start $10 |
| Pingdom | Uptime, Performance, RUM, transaction | Email, SMS, Slack, Webhooks, Microsoft Teams | Free Trial, $10 |
| Checkly | Uptime, API, synthetic, advanced performance metrics, broken links monitoring | Email, SMS, Slack, PagerDuty, OpsGenie, Webhooks | Freemium, $80 |
| Dotcom-Monitor | Uptime, Performance, real browser, SSL, DNS, API, Web services | Email, SMS, call, WhatsApp, Slack, Webhooks | Free Trial, $17.95 |
| StatusCake | Uptime, Performance, domain status, server performance, SSL | Email, SMS, Slack, Webhooks, Discord, Pushover | Freemium; $20.41 |
| Datadog | Uptime, synthetic, RUM, APM, API, DNS, SSL | Email, Slack, Webhooks, PagerDuty, Microsoft Teams, OpsGenie, ServiceNow | Free Trial, $1.50 |
| Site24x7 | Uptime, synthetic transaction, RUM, SSL, DNS, API, server monitoring | Email, SMS, call, mobile, Slack, Microsoft Teams, Webhooks | Free Trial, $9 |
| LogicMonitor | Uptime, synthetic, ping checks, advanced synthetic transactions | Email, SMS, Webhooks, PagerDuty, Slack, Microsoft Teams | Free Trial, Custom Pricing |
| Uptime.com | Uptime, Performance, API, RUM, SSL, DNS | Email, SMS, call, Webhooks, Slack, Microsoft Teams | Free Trial, $20 |
| ManageEngine | Uptime, RUM, synthetic transaction, SSL, DNS, API | Email, SMS, call, Slack, Microsoft Teams | Freemium tier; $395 |
What Is Website Monitoring?
Website monitoring is continuously checking a website’s performance, availability, and functionality to ensure it is accessible to users and running smoothly. It tracks uptime, page load speed, and response times to identify and resolve issues quickly.
It’s crucial to monitor website changes, including content updates, structural adjustments, or SSL issues. Effective website monitoring helps identify and address problems that could negatively impact user experience, search rankings, or overall website performance. Regular monitoring ensures your site remains secure, fast, and user-friendly.
Why is Site Monitoring Important?
Website monitoring is important to identify potential issues on your website. It ensures your site remains accessible, fast, and secure, minimizing downtime, slow load times, and security threats. Utilizing web application monitoring software helps you maintain a reliable and user-friendly website, protecting revenue and retaining user trust.
Performance monitoring plays a crucial role in website maintenance. Regular checks can identify slow-loading pages and other issues that may frustrate users. Utilizing website speed test tools helps ensure optimal performance, while website defacement monitoring safeguards your site’s integrity.
Benefits of Website Monitoring Tools
Website monitoring tools can help you keep and improve your site’s performance and dependability in several ways. Here are some of the key benefits:
Minimize Outage
To handle unexpected issues, it’s crucial to be prepared and cautious about potential outages. Website monitoring systems can help by constantly checking critical functions and sending alerts for server failures or errors, allowing for quick resolution and minimizing downtime.
Brand Reputation
Your website is your brand’s identity. Maintaining its performance is crucial for preserving your brand’s reputation. Monitoring tools ensure your website operates smoothly and error-free. Continuous monitoring and real-time alerts prevent issues that could upset users and damage your brand’s image. A reliable website shows your brand is professional and cares about customer experiences.
Alerting/Getting Notifications
Real-time alerts provide immediate updates on issues, enabling quick investigation and resolution through channels like SMS, email, or Slack. These notifications help address problems like downtime or slow performance, ensuring smooth service operation.
How to Choose the Best Website Monitoring Tools
To keep your website running smoothly, selecting the right monitoring tools is crucial. Consider these key factors when choosing a tool:
Scope of Monitoring
When picking a monitoring tool, try to find one that covers everything—like uptime, performance, transactions, and security. This is a great way to monitor all the important stuff and catch any issues before they become big problems.
Frequency of Monitoring
To minimize downtime, choose a website monitoring tool that checks your site frequently—ideally every 30 seconds to a few minutes. This short interval is crucial for high-traffic sites, enabling rapid problem detection and swift resolution.
Geographical Coverage
To ensure your website works smoothly for visitors worldwide, choose a monitoring tool that checks your site from various global locations.
Uptime Monitoring
To ensure your website remains accessible, use reliable uptime monitoring services with quick alerts. This helps you address any downtime promptly before it affects too many users, and website uptime checker tools can help identify any issues with your site’s availability.
Performance Tracking
It’s also helpful to pick a tool that tracks details like load times and resource usage, such as CPU usage. This can give you a clearer picture of your site’s performance and help you make it faster and more responsive for everyone who visits.
Real User Monitoring
A website monitoring tool that combines synthetic monitoring with Real User Monitoring (RUM) offers significant benefits. RUM provides comprehensive insights into how real users interact with your site, enabling you to fine-tune settings for an enhanced user experience.
Alert System
Quick alerts are crucial to catching issues before they escalate. It would be best if you had a tool with a flexible alert system that can reach you however you prefer—whether through SMS, email, Slack, or something else. Even if you’re camping and don’t have internet access, text messages or phone calls can reach you.
Integration Capabilities
It can be handy if the website monitoring tool easily integrates with your existing systems, like your CI/CD pipelines or communication platforms. This way, everything works together smoothly, making your life easier. Besides, choose tools with custom integration features to create your integration.
User Interface
Any website monitoring tool with a simple, user-friendly interface makes operating it a breeze. It’ll save you time and make it easier for everyone on your team to use, whether they’re super techy or not. So, try getting a monitoring tool that has a clean and user-friendly UI.
Scalability
Think about the future. If you’re small today, you can go big tomorrow. Choose a website monitoring tool that can grow with you as your site traffic increases and your needs get more complex. Search for a tool that comes with scalable packages and features. You won’t switch tools when things get bigger—just switch the package.
What are 2 Popular Types of Website Monitoring Tools?
Synthetic Monitoring
Synthetic monitoring simulates user interactions to assess your website’s performance. By replicating real-world activities, it identifies potential issues early, measuring key factors like page load times, transaction processes, and overall availability. This proactive approach ensures your website operates smoothly before real users experience problems. Explore various synthetic monitoring tools for more options and actionable insights.
Real User Monitoring (RUM)
Real User Monitoring (RUM) tracks and analyzes the behavior of actual visitors on your site, providing real-time insights into their experience. RUM tools help you understand your website’s performance under real conditions by examining page load times, user interactions, and errors during live sessions.
Frequently Asked Questions
Website monitoring tools range in cost from $10 to $15 per month for basic options to $50 to $100 per month for advanced features. Prices may be higher for larger networks.
Yes, there are some free website monitoring tools available. UptimeRobot, ManageEngine, and StatusCake offer free plans with limited features, such as checking your website every 5 minutes or providing a few alert methods. These options can be sufficient for smaller websites.