Let’s check how to split screen on Windows 10/11 to multitask like a pro.
One of the many Windows hidden features that most users aren’t aware of is split-screen.
This was something I was in grave need of, as sometimes my 2-year-old baby shows up and says to play something on YouTube.
Instead, I used to disagree and hand him over one of my old laptops to watch him take the life out of its keyboard.
Thanks to the split-screen feature on Windows, that’ll stop now. 😉
On a more serious note, one can stop switching windows every time and divide the screen to get the job done.
So, let’s move on and see how to split screen on Windows 10/11.
Notably, this article has three methods to split-screen on Windows:
- Dragging windows manually (Windows 10/11)
- Using keyboard shortcuts (Windows 10/11)
- Using Windows in-built split option (Exclusive to Windows 11)
But first, make sure to turn on the Snap windows feature in settings:
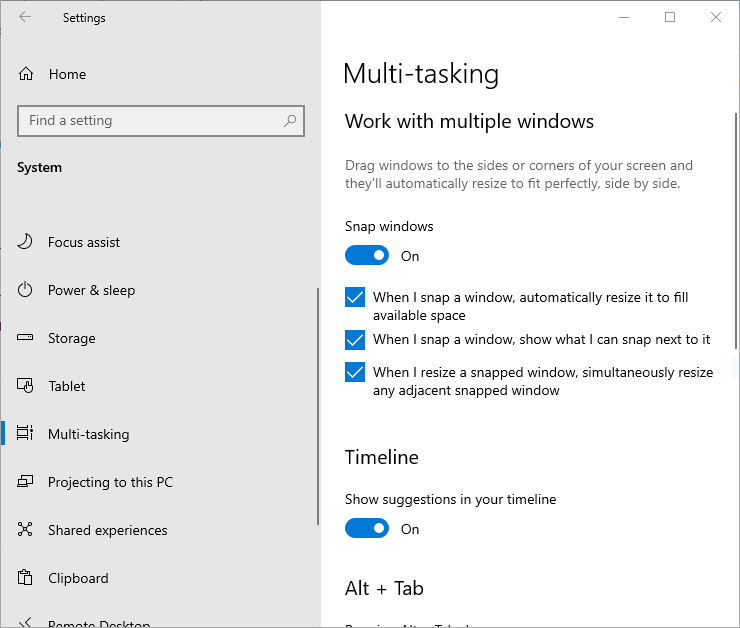
Windows 10 users can navigate to Settings > Multi-tasking and ensure that the Snap windows toggle is turned on.
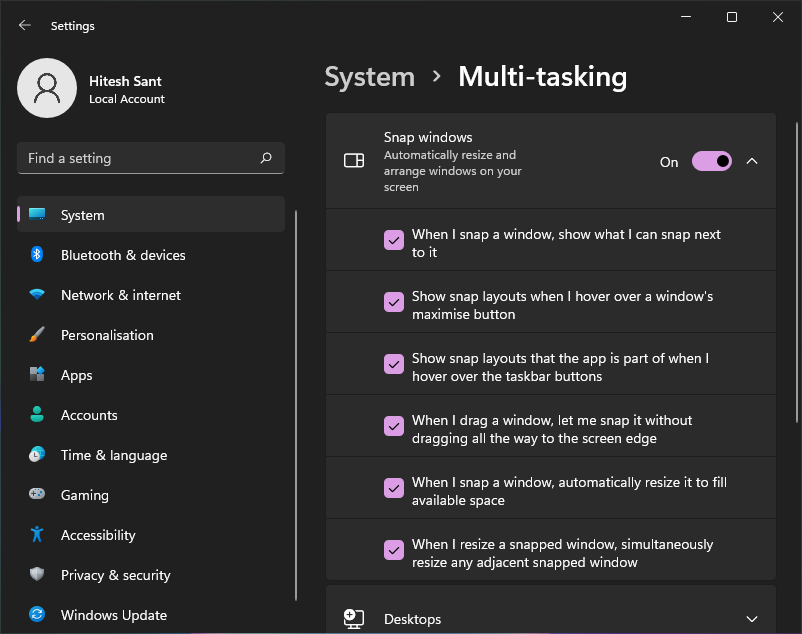
Windows 11 users can do the same by browsing Settings > System > Multi-tasking and confirming that Snap Windows is turned on.
Now let’s start to divide the screen into two, followed by three and four divisions.
Split Screen in 2 in Windows 10/11
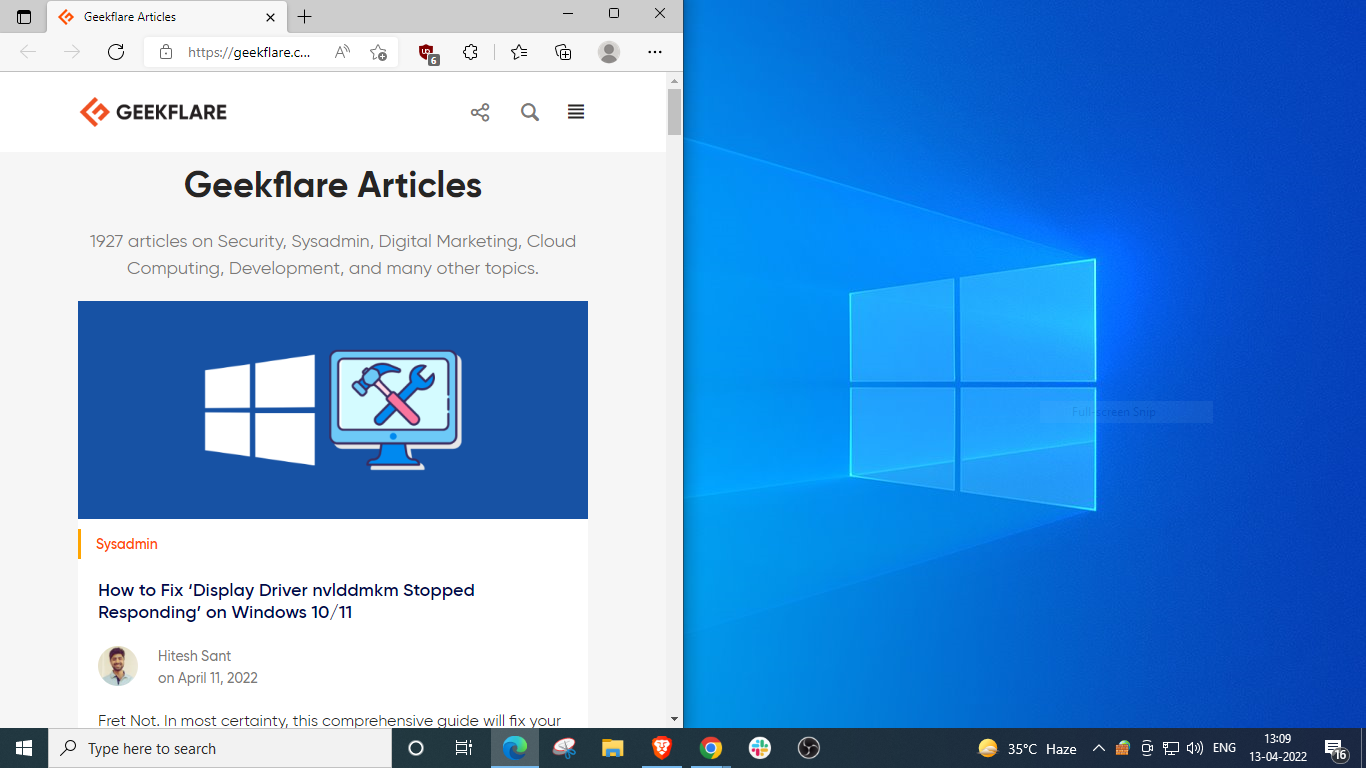
This is very simple. Just hold and keep dragging the window on either side till you see the split indication:
Subsequently, you can do this for the other window to split the display in half. In addition, you can resize the split by moving the border at your convenience.
However, there is a limit to how narrow you can go with a specific application. The most I could go with is Slack, with the other window taking roughly more than 75% of the real estate.

Alternatively, you can also use keyboard shortcuts.
Open the subject window, press and hold the Windows key ⊞, and tap the left arrow key ⬅️ to put it into the left half of the display. Afterward, place the other window on the other half by holding ⊞ and tapping ➡️.
Split Screen in 3 in Windows 10/11
Splitting Screen in 3 involves an arrangement like this:

The most straightforward way to achieve this combination is by dragging the windows one at a time.
Still, we’ll also try to replicate this with the keyboard shortcuts.
For this, open the first window and place it on the left half by holding the Windows key ⊞ + and taping the left arrow ⬅️:
Next, open the second window, hold ⊞, tap ➡️, followed by ⬆️.
Please note the Windows + Up/Down arrows also work as shortcuts to maximize/restore the windows.
So, don’t maximize the windows you want to put into the corners. Instead, let it hang somewhere in the middle and proceed with the above key combination.
Take a look:
Here, Windows gave suggestions to fill up the bottom right quadrant, but if you don’t see the options, you can simply hold ⊞, press and leave ➡️, and tap ⬇️.
Split Screen in 4 in Windows 10/11
Let’s do it the last time and divide the screen into four parts by dragging each one to a corner:
Alternatively, we can do this with Windows shortcuts as well. Please remember to avoid maximizing any window.
Here are the steps:
- Open the first one. Hold ⊞, press ⬅️, and then ⬆️ to put it into the upper left corner.
- Subsequently, open the next. Hold ⊞, press ⬅️, and then ⬇️ to send it under the first.
- Next, put the third window on the top right quadrant by holding ⊞, taping ➡️ followed by ⬆️.
- Similarly, fix the last one in the remaining space by holding ⊞, and pressing ➡️ and ⬇️ sequentially.
These were the methods valid for Windows 10 & 11. The following section entails an exclusive technique that’ll work only for Windows 11 users.
Split Screen for Windows 11
On Windows 11, you can hover over the maximize/restore icon to select the layout (2, 3, or 4 divisions) and start filling the preferred position sequentially.
However, you need to stick to the same layout for all your selections. Otherwise, it will keep changing the layout with every step, and you won’t see the desired final split.
It’s much like solving a jigsaw puzzle and putting in the pieces one by one.
Conclusion
So that was about splitting the screen into 2,3, or 4 sections on Windows 10 & 11.
Arguably, Windows 11 users can do it more quickly without dragging or using the shortcuts. So, now you can get more work done without having to switch screens or even PCs!
Read More About Windows
- The Complete Guide to Sticky Keys on Windows 10/11
- How to Definitively Fix Blurry Screens on Windows 10/11
- How to Install Windows 11 on an Unsupported PC: 3 Methods