Do you want to capture high-quality videos on your Mac for YouTube or DIY videos? Are your office colleagues whining about your video conference feed on your Mac?
All these questions have one solution— the Continuity Camera of Apple that allows you to use your iPhone or iPad as a webcam for your Mac. With a continued effort to sync all your Apple devices and their features, Apple introduced the Continuity Camera feature long ago, allowing only photo capturing and sending to Mac.
But, with the launch of macOS Ventura, you can now use your Apple mobile devices as an ad-hoc camera for your Mac. Keep reading to learn the requirements, techniques to use this feature, and how to become productive with Continuity Camera.
The Continuity Camera Feature of iOS

Continuity Camera is a camera-sharing application that comes as a factory-provided application on Mac and iOS devices. It’s capable of broadcasting the feed from your iPhone, iPad, and iPod cameras to a compatible Macbook and iMac device.
The camera-sharing occurs using Wi-Fi for wireless broadcasting and USB-C or Lightning cables for wired broadcasting. So, if you’re low on battery on the iPhone, you can plug it into one of the USB-C ports of your Macbook to recharge the device while continually using the iPhone’s camera for video calling or video recording.
You can use the Continuity Camera feature on Mac using any application that supports camera and microphone inputs. For example, the following are the compatible apps where you can broadcast your iPhone on Mac:
- Safari
- Google Chrome
- Keynote 8.2 or newer edition
- Mac Finder
- Apple Messages
- Apple Mail
- Apple Notes
- Apple Numbers 5.2 or later editions
- Apple TextEdit
- Apple Pages 7.2 or later version
- QuickTime Player
Continuity Camera works using the iCloud account. So, you must sign in both the Mac and iPhone or Mac and iPad using the same Apple ID.
Then, all you need to do is connect your iPhone or iPad for the first time to a Mac using a compatible USB cable. You’ll see the Authenticate or Trust Device prompt on both the Mac and iPhone or iPad.
That enables you to use your iPhone’s or iPad’s camera feed to capture images, document scans, or videos using your Mac. However, both devices must be near each other, Wi-Fi is turned on, and Bluetooth is active.
So, this is how to use Continuity Camera, which is pretty much automatic. You just need to ensure that you own both devices by using the same Apple ID and connecting devices physically using a USB cable once.
Requirements to Use iPhone/ iPad as Webcam on Mac
Until now, you can only use an iPhone as a webcam on a Mac. Like, For using the iPhone to make FaceTime calls on Mac, record video content, and broadcast video to Mac from a distance up to where you get Wi-Fi coverage.
For iPads and iPods, you can capture still pictures and send them over to compatible Mac applications like Mail, Messages, etc.
Your devices must meet the following system requirements to use Continuity Camera or iPhone as a webcam for Mac.
#1. Software and Hardware
You can use standard Continuity Camera features like taking pictures or scanning documents if you have the following:
- An iPhone, iPad, or iPod running on iOS 12 or later operating system
- Any iMac or Macbook that’s running on macOS Mojave or later
- You activated two-factor authentication on both devices
However, if you’re willing to use your iPhone as a webcam on Mac, you must satisfy the following software requirements:
- iPhone running on iOS 16 or later
- Any Macbook or iMac devices using macOS Ventura or later
- iPhone’s Continuity Camera feature is activated
- You’re not using any managed Apple IDs to log in to the Mac and iPhone
- The Mac and iPhone aren’t sharing their internet connection with compatible devices
- You’ve connected both devices via USB at least once
- The availability of Continuity Camera features like Centre Stage, Portrait Mode, Studio Light, Desk View, etc., will depend on the iPhone model you’re using
#2. Accessories
You can get the best experience using your iPhone as a webcam for Mac using an iPhone Continuity Camera Mount or MagSafe Camera Mount accessory. These tools enable you to snugly fit the iPhone on the Mac’s display near the Mac webcam.
So, the video recorded or broadcasted via the iPhone becomes more stable. Not to mention, you no longer need to hold the iPhone using your hand, which can be problematic during long video calls. Find below a curated list of the popular iPhone mounts you can use for this purpose:
- Belkin iPhone MagSafe Camera Mount
- Capstone Continuity Camera Mount
- Fumuxry Continuity Camera Mount
- Stouchi Aluminum iPhone Webcam Mount
- Stouchi iPhone Webcam Mount
Now that you have everything you need to use your iPhone as a webcam on Mac, let’s explore the technique and its tips below:
How to Use iPhone as a Webcam on Mac
First thing first! Ensure the Continuity Camera feature is turned on in the iPhone by following these steps:
Step 1: Open the Settings app on your iPhone.

Step 2: Tap General and go to AirPlay & Handoff.

Step 3: Continuity Camera should be active by default, but if it’s not, activate it.
Secondly, ensure the Bluetooth connectivity on both Mac and iPhone is also online. Here’s how to do that:
Step 1: Pull down the Control Center on the iPhone from the top-right corner.

Step 2: Check that the Bluetooth symbol is lit in deep blue, similar to the Wi-Fi icon.
On your Mac, do these:
Step 1: Click the Control Center icon on the Mac toolbar in the top-right corner of the screen.
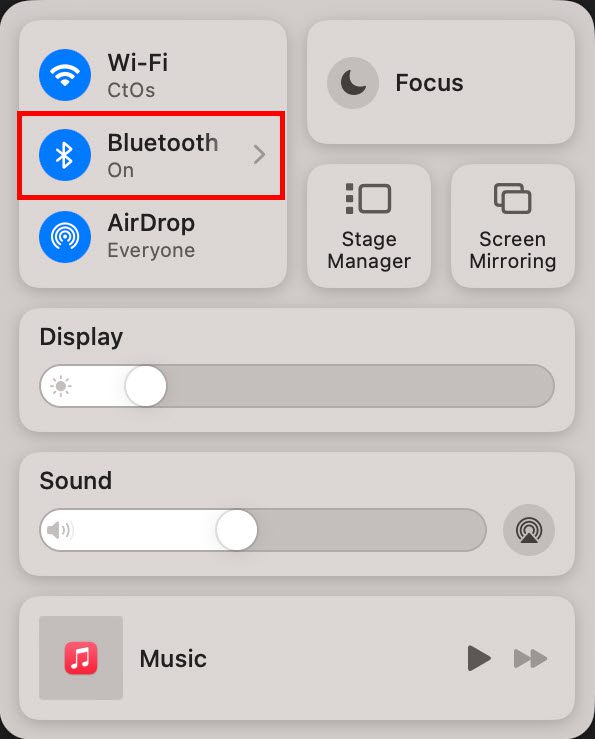
Step 2: The Bluetooth option should show the On sign.
Is there more than one Wi-Fi network at the workplace or home? Not sure if both the Mac and iPhone are using the same Wi-Fi network? Follow these steps to check on your iPhone:
Step 1: Pull down from the top-right corner of the screen to access Control Center.
Step 2: There, long press the Wi-Fi icon.

Step 3: On the next screen, you should see the name of the connected Wi-Fi network.
Now, follow these steps on your Mac to ensure the device is also connected to the above Wi-Fi network:
Step 1: Click the Control Center button in the top-right corner.
Step 2: Below the Wi-Fi icon, you should see the network name or SSID.

Step 3: If it’s not the same as the iPhone, click the overflow menu arrow.
Step 4: Click on the Other Networks option.
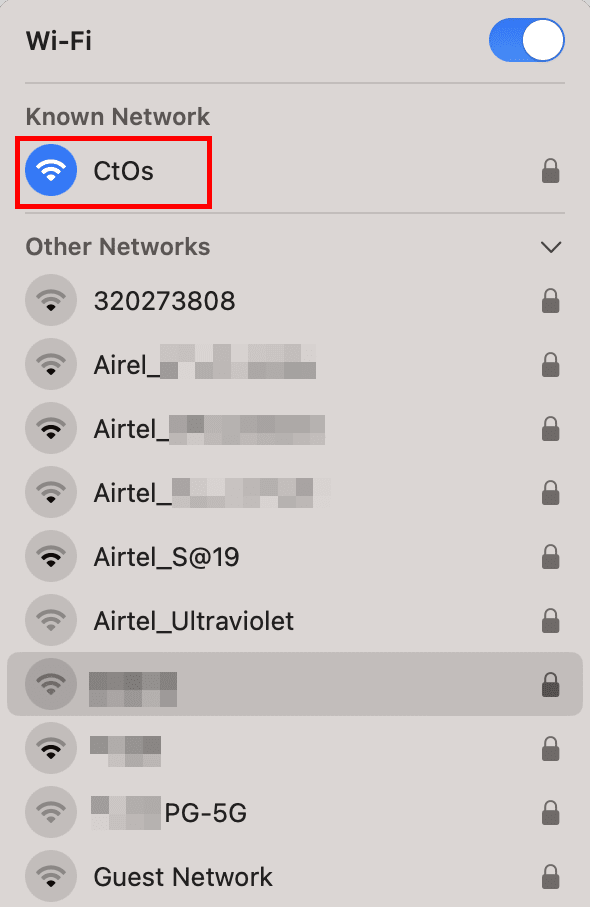
Step 5: Choose the same Wi-Fi network as above from the drop-down list.
Did you connect your iPhone with the Macbook before? If not, follow these steps too:
Step 1: Connect the iPhone to your Mac or iMac using the supplied USB cable.
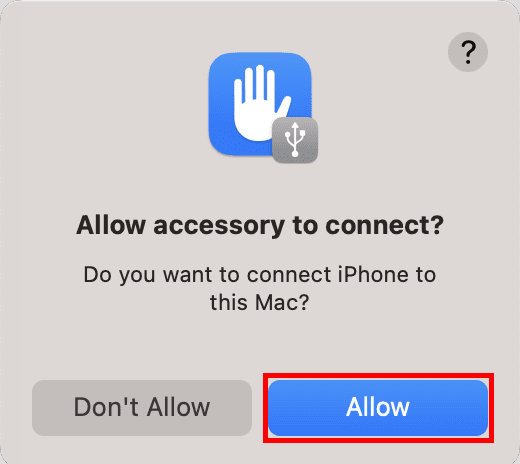
Step 2: On the Mac, click Allow on the warning that pops up.

Step 3: On the iPhone, tap the Trust button on the pop-up notification.
Step 4: Go to the Mac and open the Finder app from Dock.
Step 4: Click the iPhone device under the Locations option on the Finder navigation panel.

Step 6: Click Trust.

Step 7: You should now see the above screen on your Mac. This confirms that the iPhone is ready to be used as a webcam for Mac.
Now, using the iPhone’s high-quality camera as a webcam is super easy. Here’s how:
Step 1: Open a Continuity Camera-supported app, like the QuickTime Player.
Step 2: Mount the iPhone on the Mac using the MagSafe Camera Mount accessory.
Step 3: Lock the iPhone by pressing the Wake/Sleep or side button.
Step 4: On the Mac, click on the QuickTime Player interface.
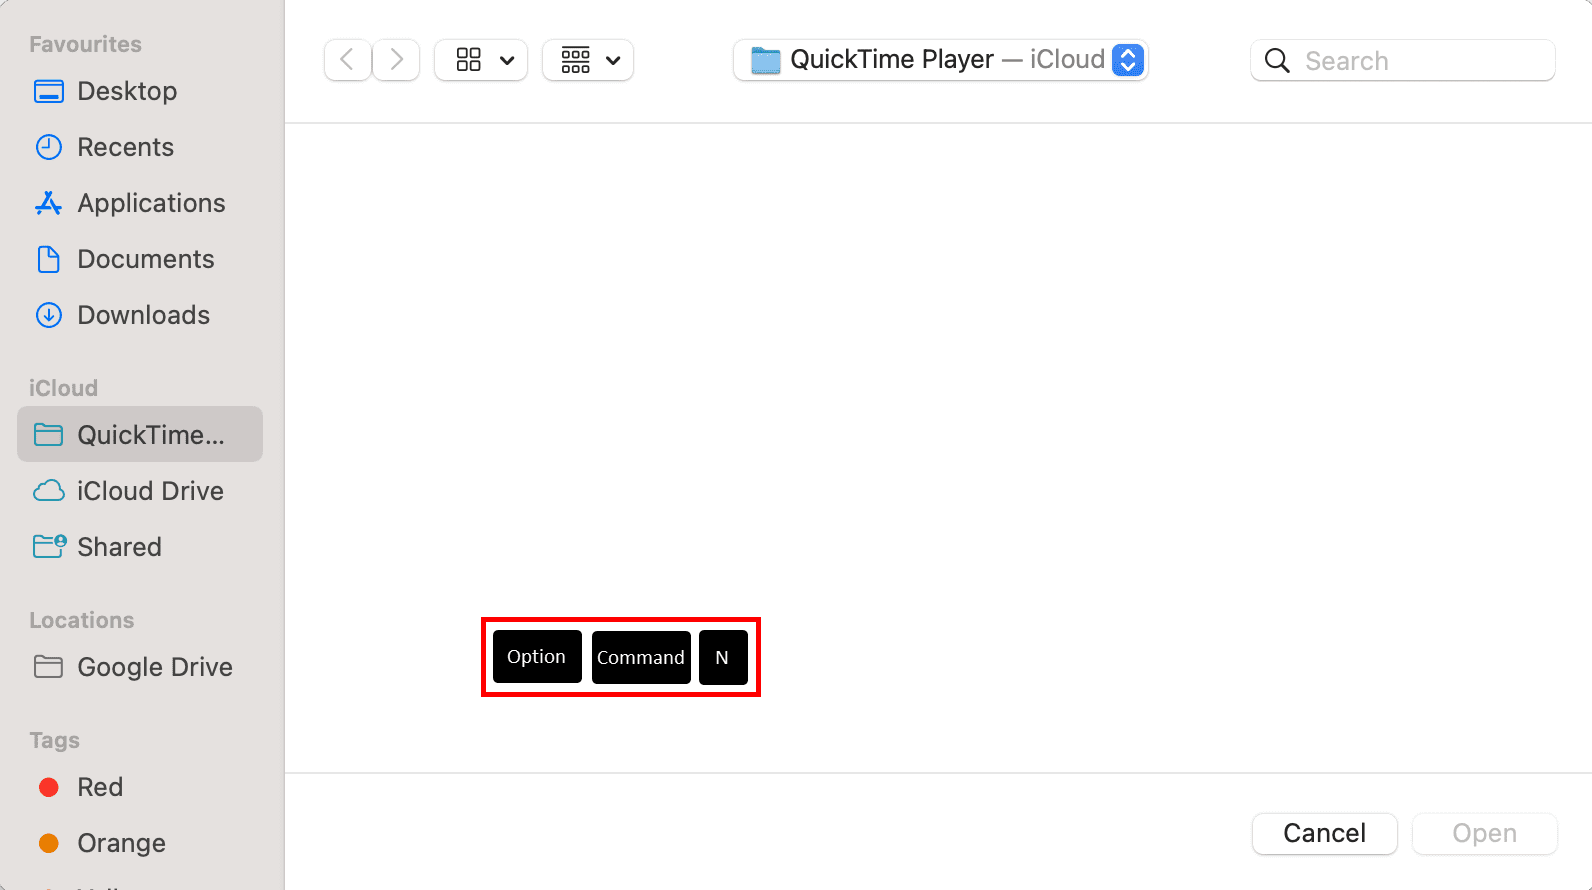
Step 5: Now, press Option + Command + N to start a new video recording.
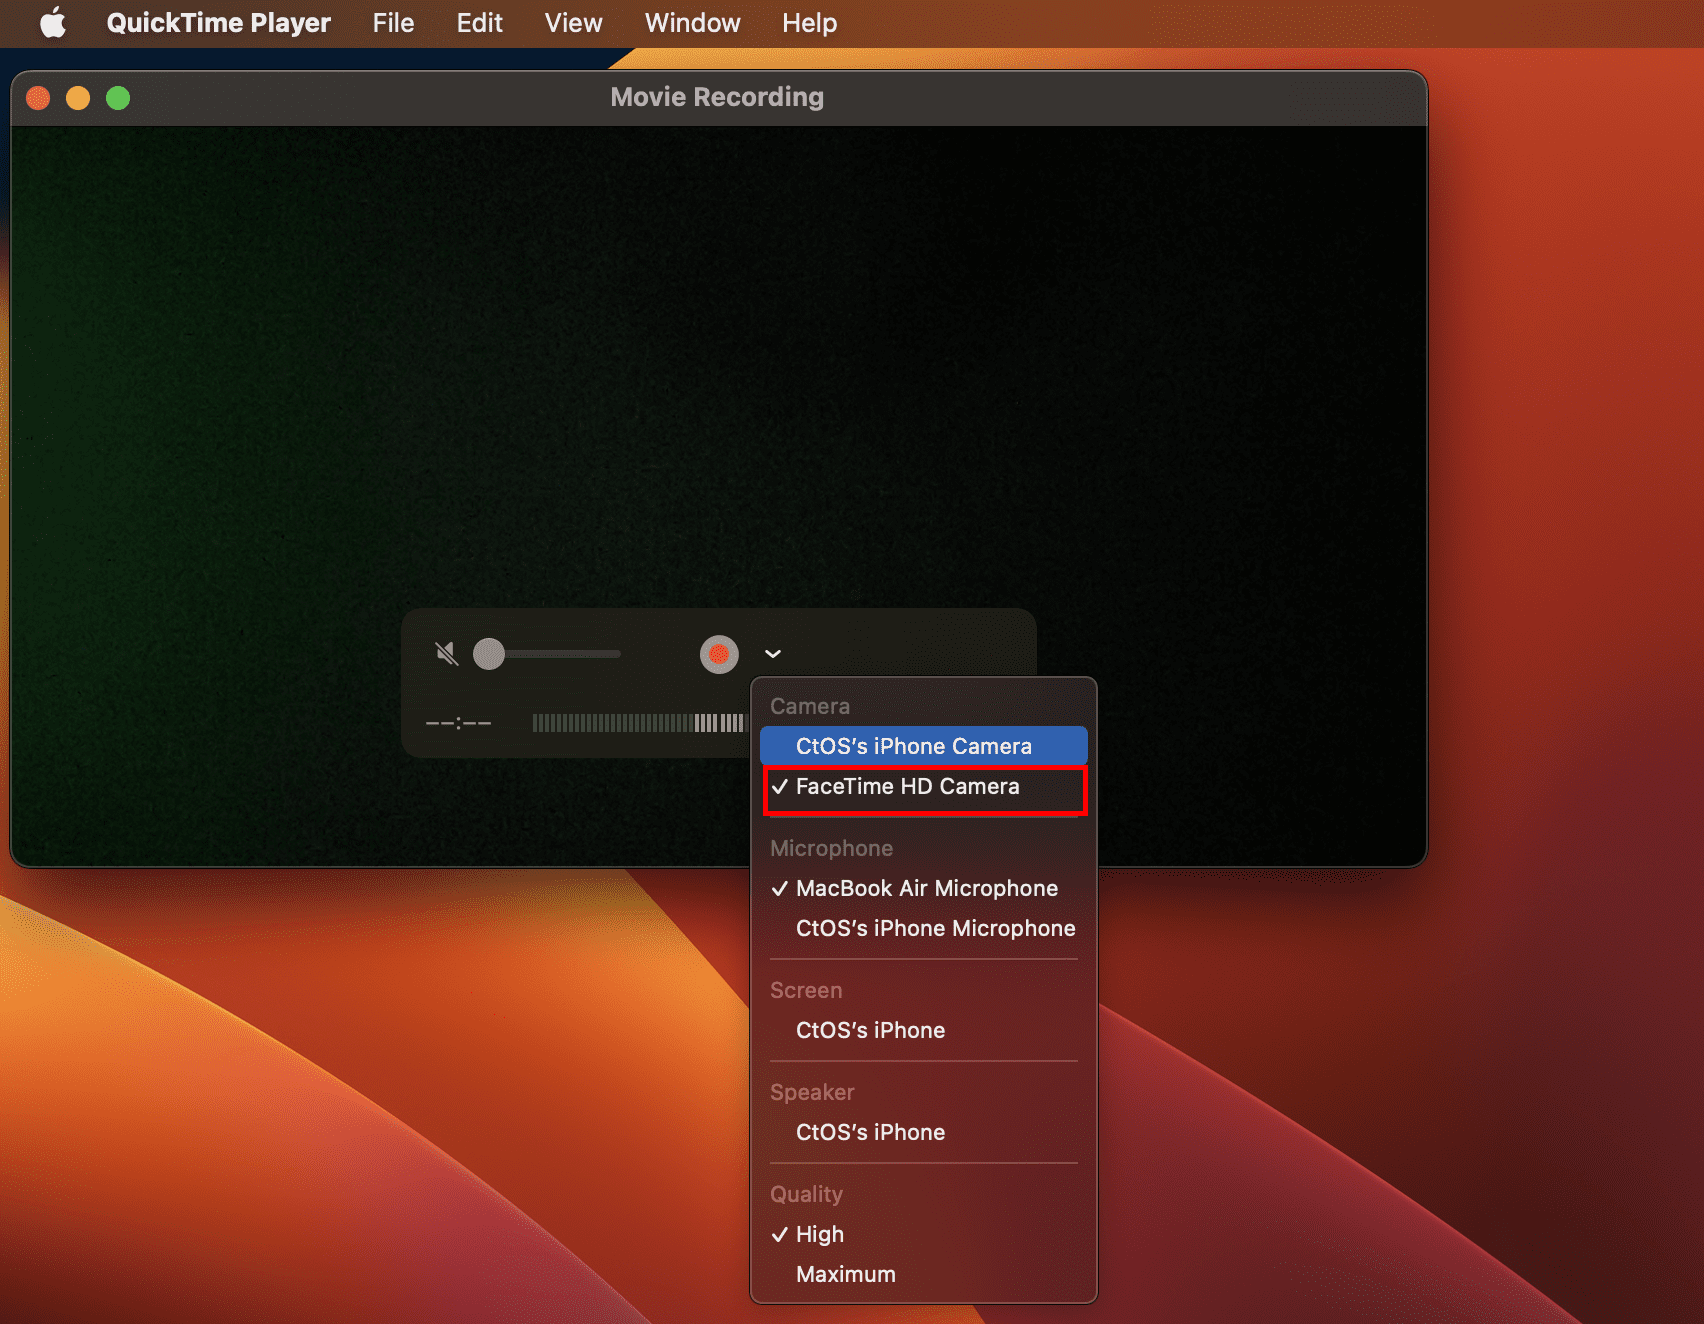
Step 6: The recording will start using the built-in webcam of your Mac.
Step 7: Click the drop-down arrow beside the Record (a solid red circle) button.
Step 8: A list of devices will open.
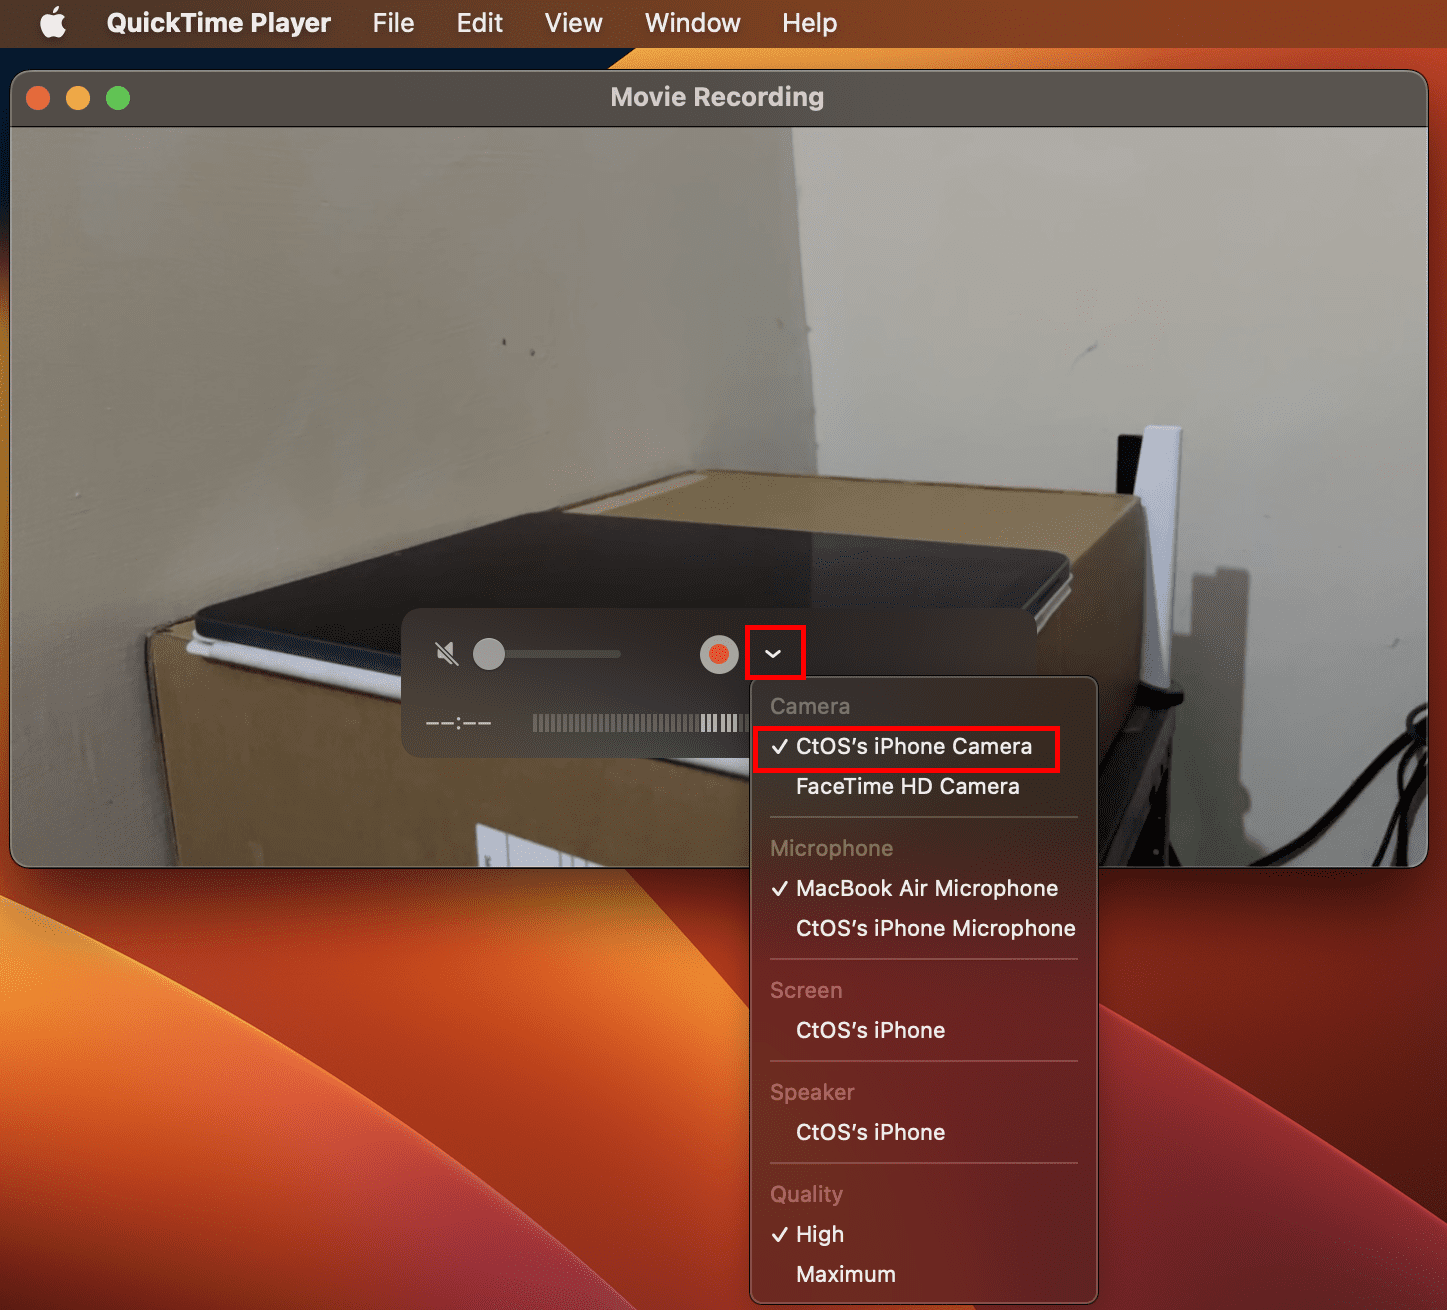
Step 9: There, choose your iPhone.
Step 10: The QuickTime Player will start getting video feeds from the iPhone.
Step 11: Click the Record button to start creating your video content.

- If you try to use the iPhone in this situation, it’ll show the above screen.
- When you’re done, tap Disconnect on the iPhone or press the Stop button on the QuickTime Player to stop using the iPhone as a webcam on a Mac.
An alternative way to switch to the iPhone camera feed on apps like FaceTime is the Video menu.

You should see it on the Mac menu bar. Click Video and switch to your iPhone in the Camera section of the context menu.
How to Use iPad to Take Pictures on Mac
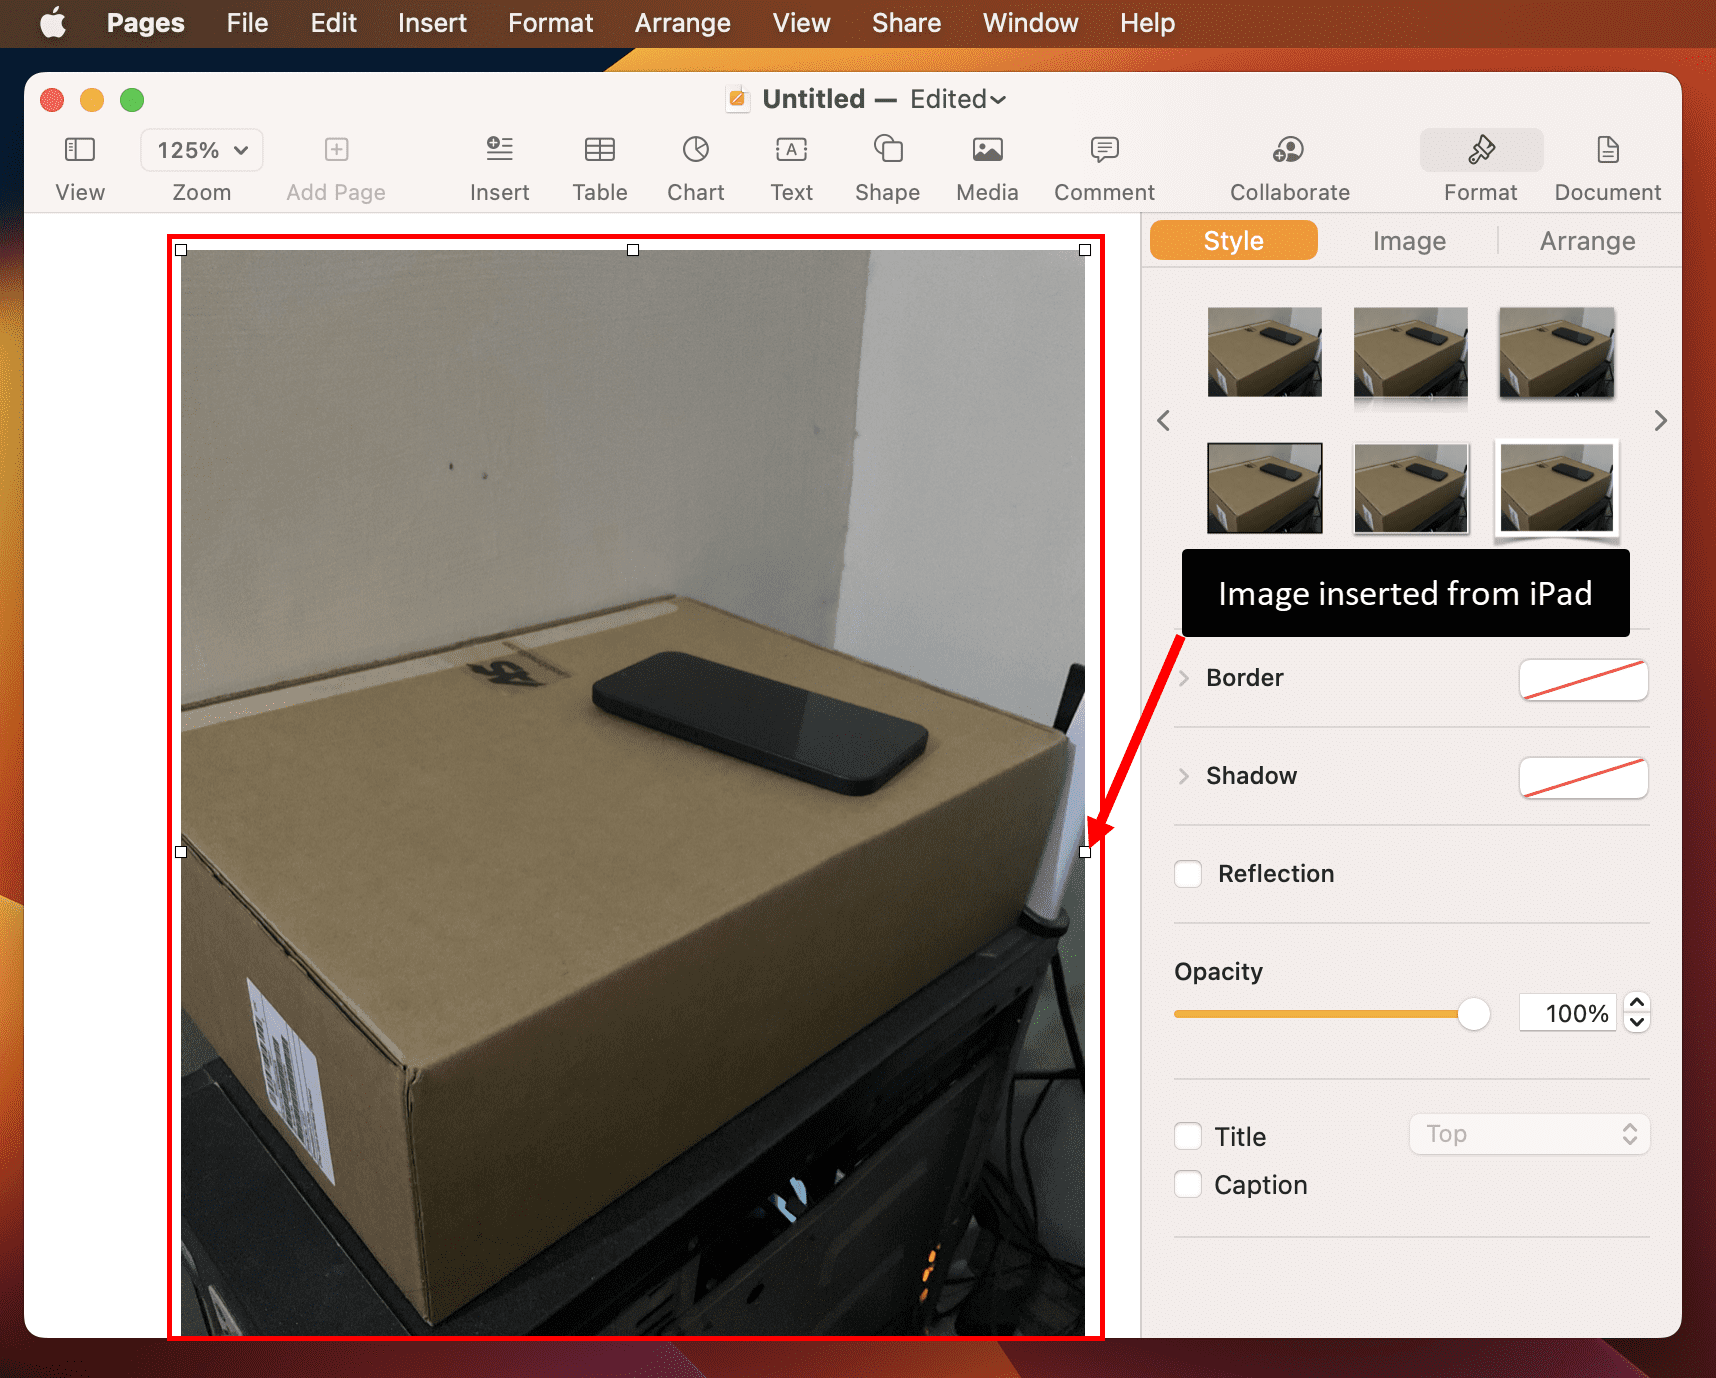
Step 1: Open a compatible app like Apple Pages.
Step 2: Click the Insert button on the Mac menu bar.
Step 3: Go to Insert from iPad.
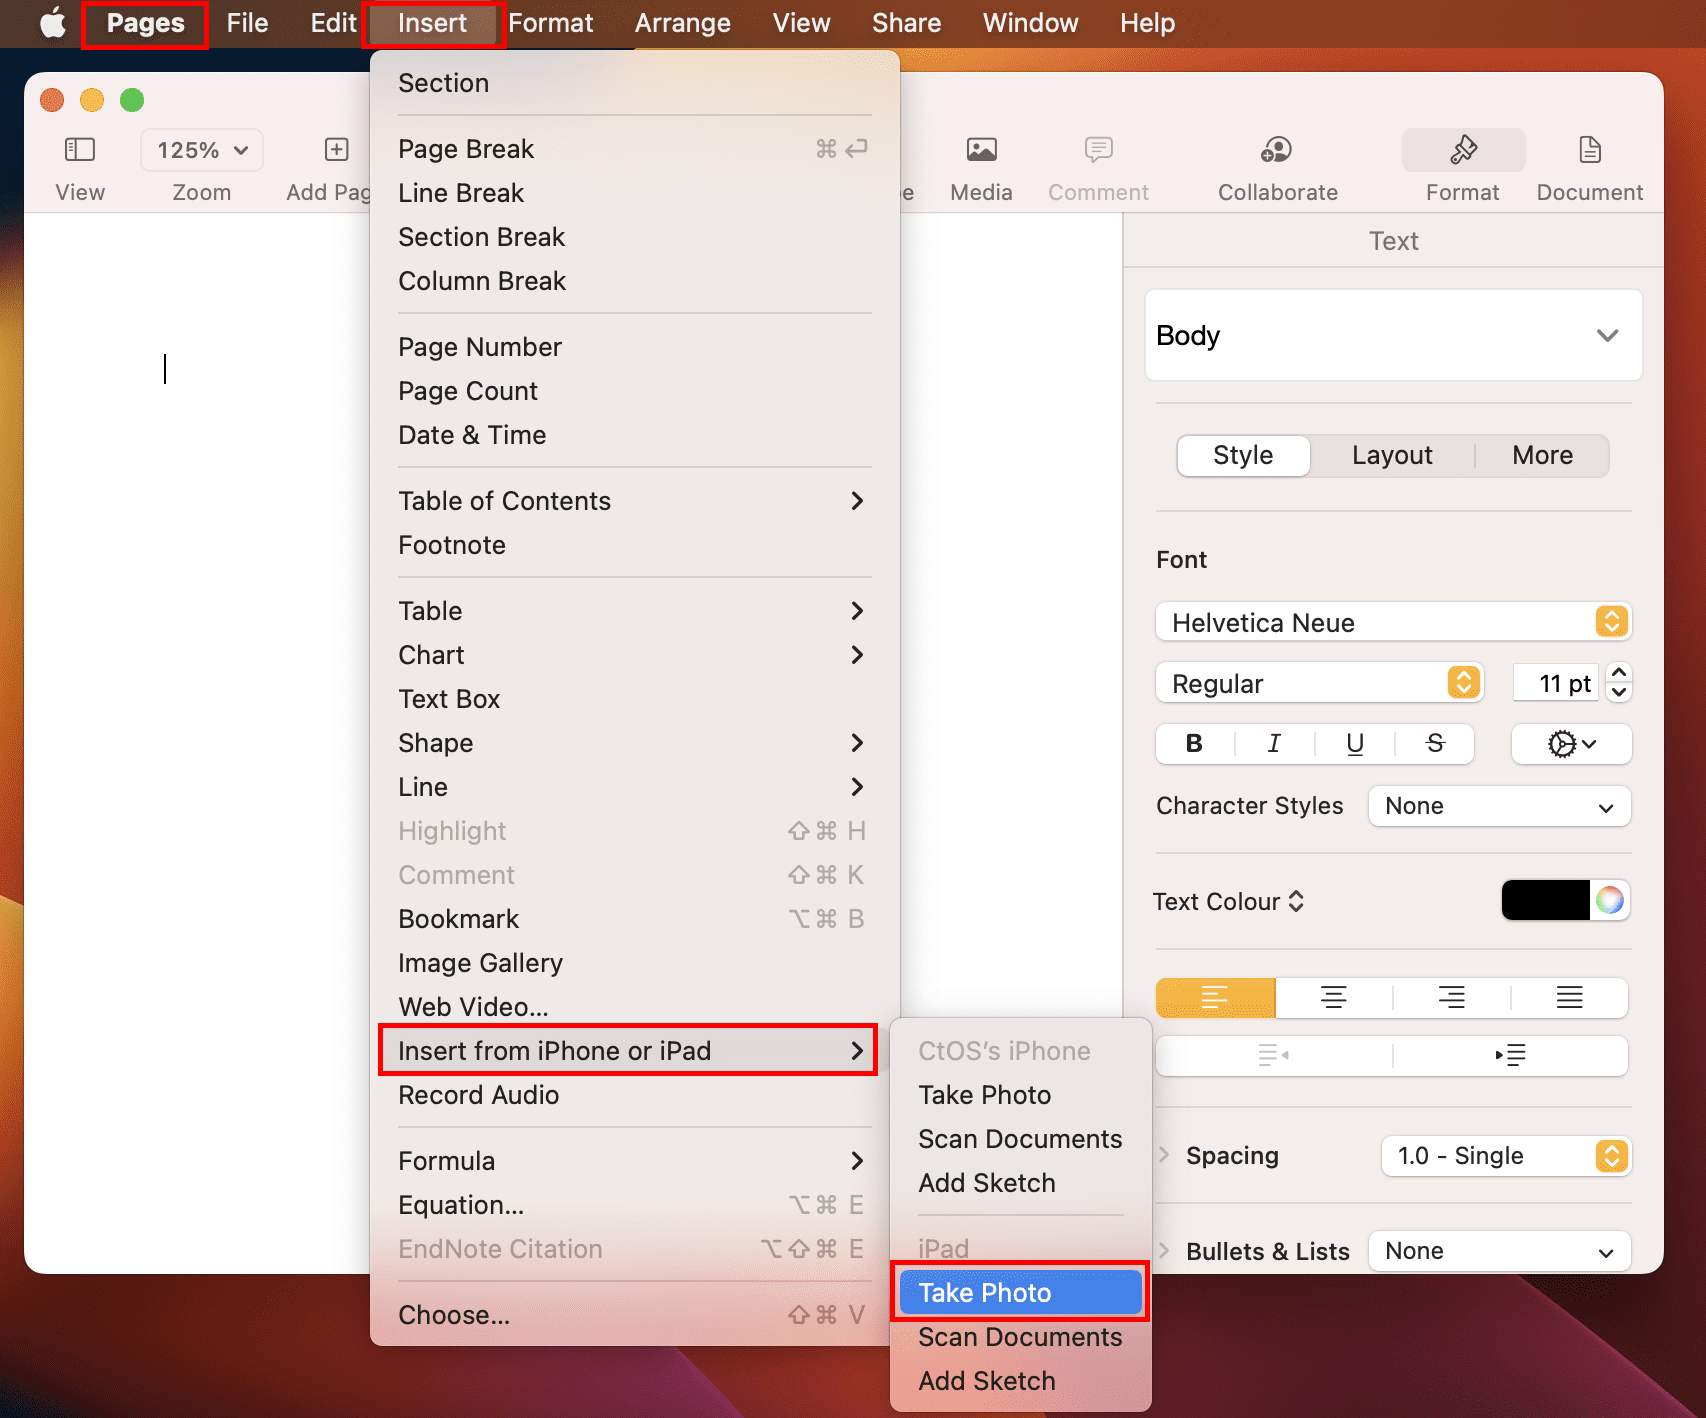
Step 4: Click Take Photo or Scan Documents.
Step 5: Use the camera shutter on the iPad to take the photo.
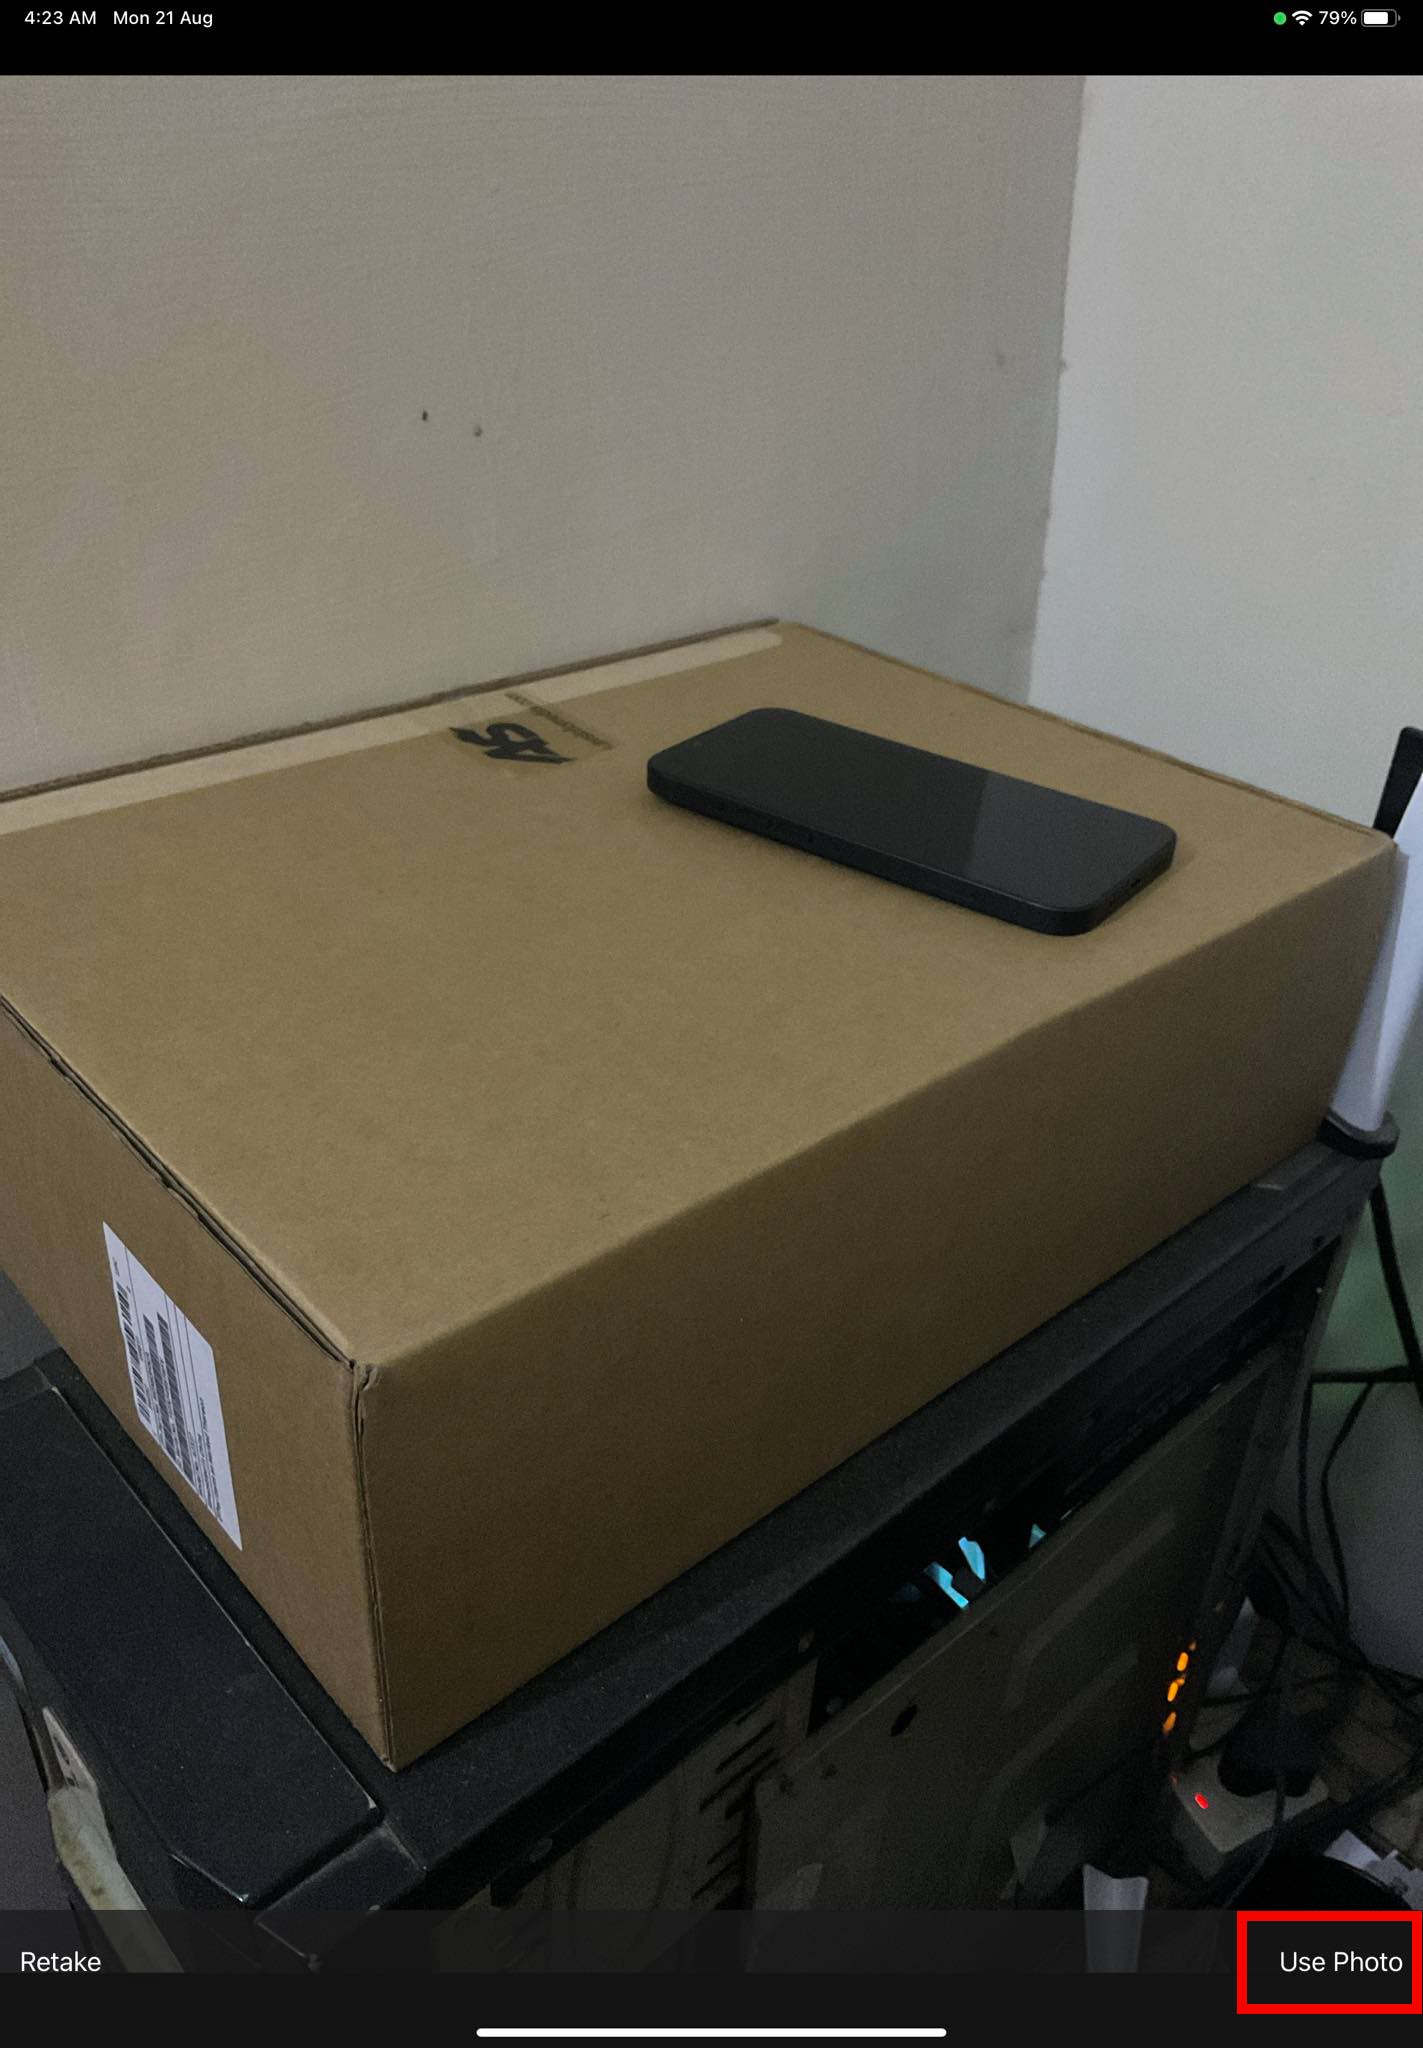
Step 6: Tap Use Photo to insert the image into the Apple Pages app.
How to Enable iPhone/iPad as a Camera on Chrome
Step 1: Open the Google Chrome web browser and go to its Settings page.
Step 2: Click the Search button and type Camera.
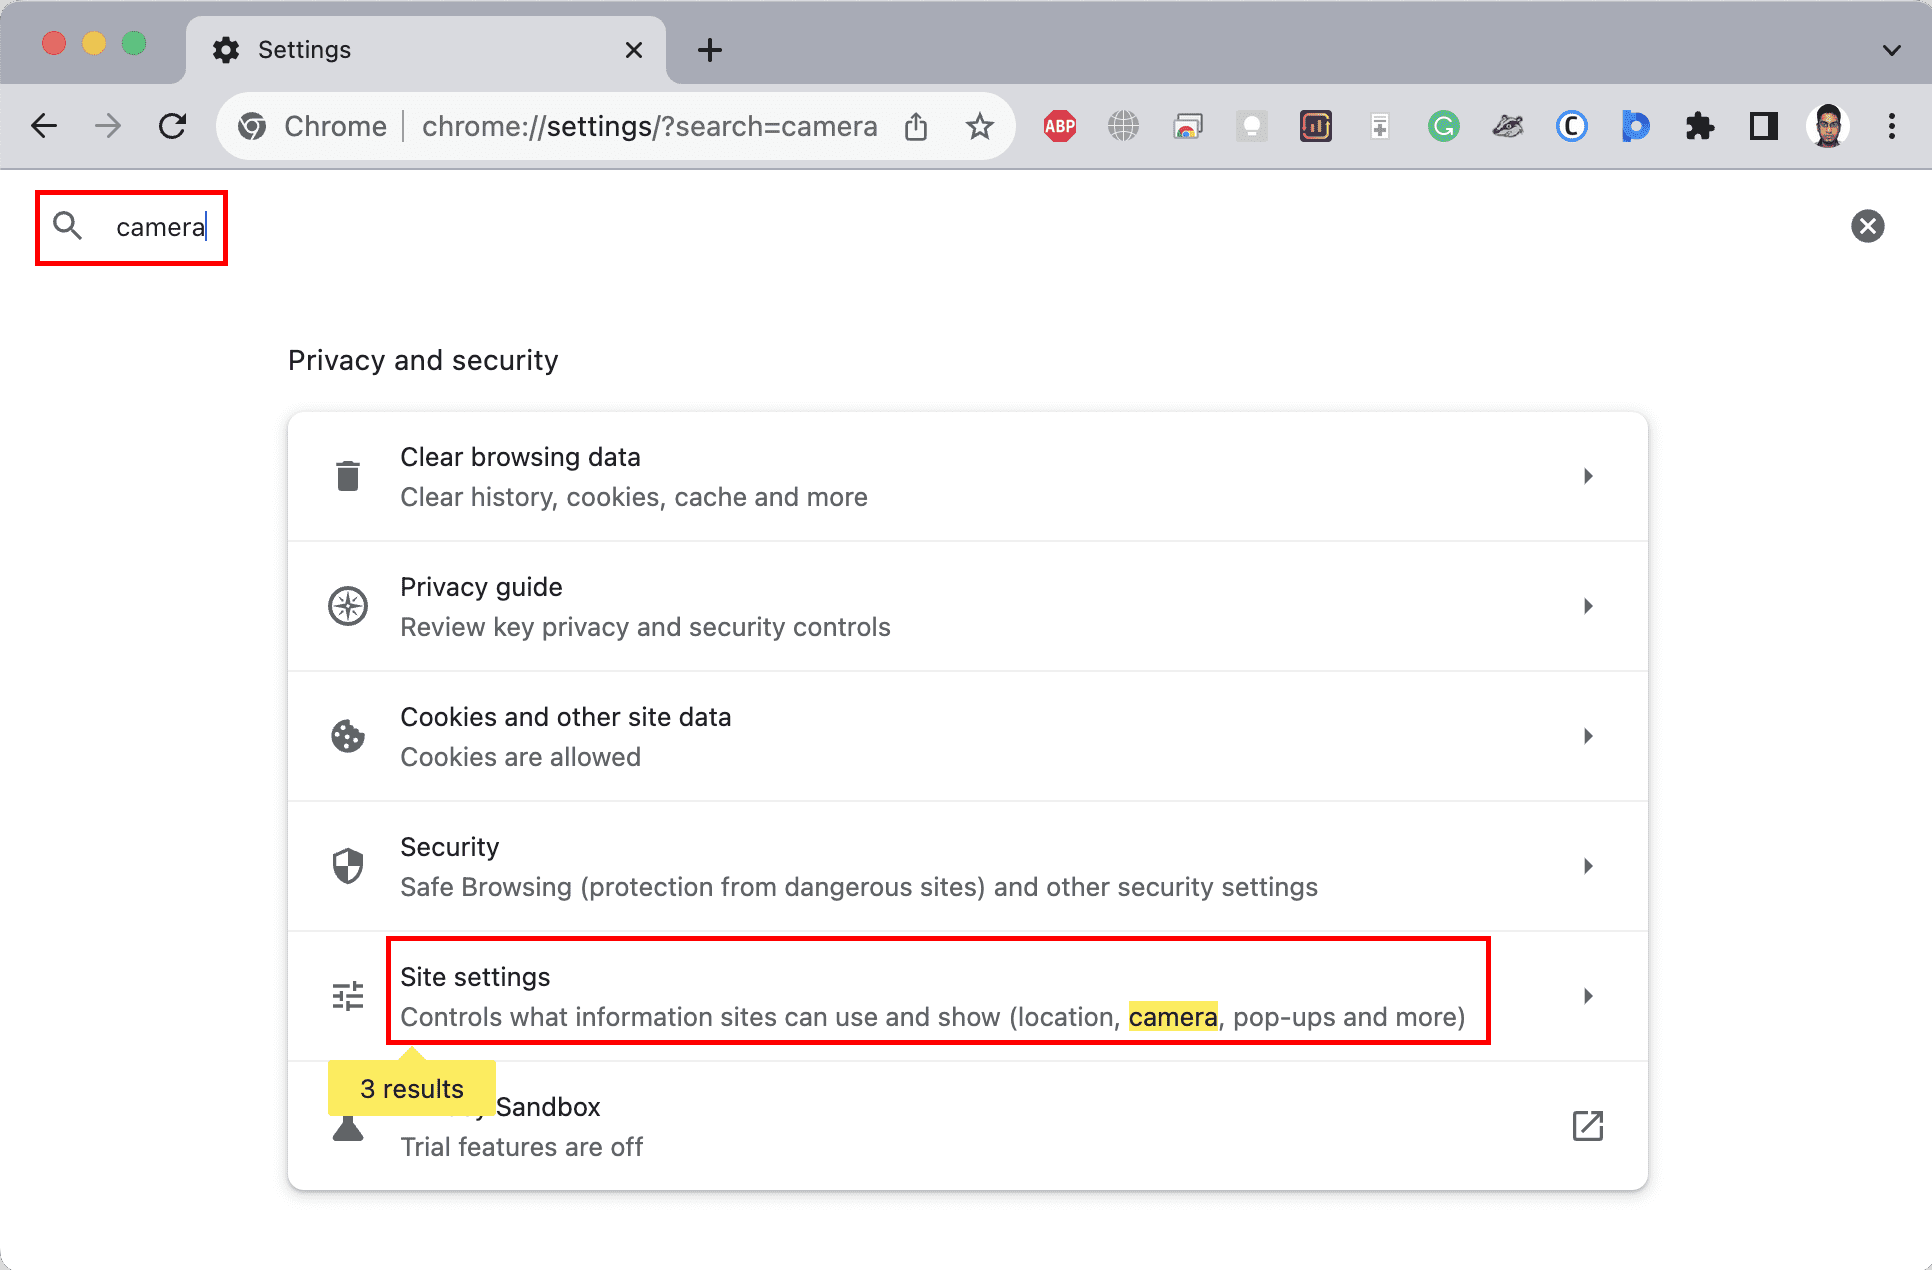
Step 3: Click on Site Settings.
Step 4: Inside Site settings, scroll down to Camera and access the setting.

Step 5: Click the FaceTime HD to switch to your iPhone.
Tips to Enhance Your Experience When Using iPhone as a Webcam
Here’s how you can make iPhone as a webcam for Mac more useful and effective when creating content, attending video calls, or hosting live DIY webinars:
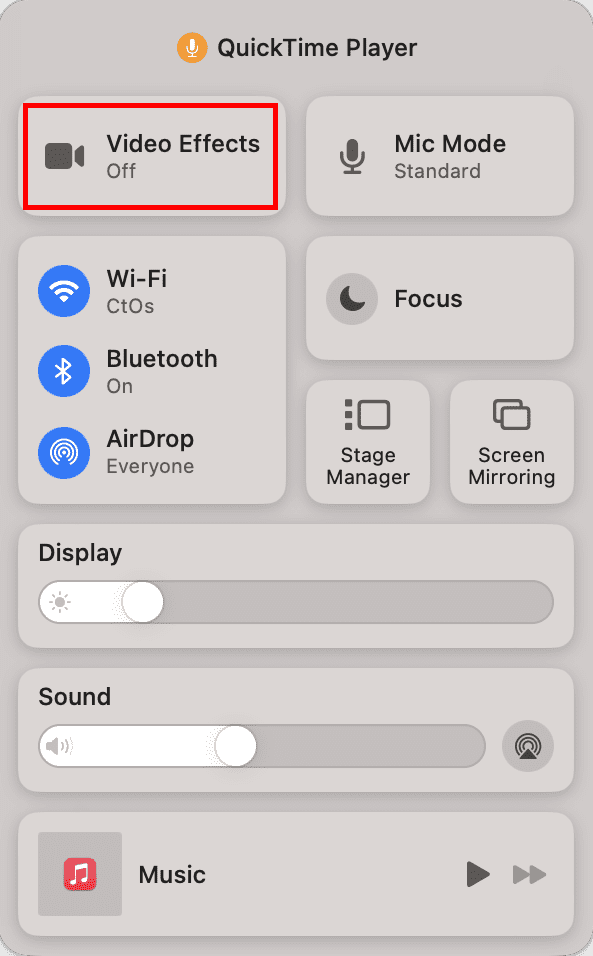
- Click the Control Center on Mac and click Video Effects.

- You can use Centre Stage to always put yourself at the center of the video when moving around.
- Use Portrait mode to blur the background and keep the focus on you during video calls.
- Activate Studio Light to illuminate your face for a better view by dimming the background behind you. It helps you in getting a great video call experience when your background is brighter than your face.

- Use Desk View to broadcast yourself and what you’re doing on your desk using FaceTime or other Continuity Camera-compatible apps. If you’re sketching, writing, or showing DIY activities on your desk, the iPhone’s Ultra Wide camera can capture all of those.
- Click Control Center and choose Mic Mode. Now, switch to Voice Isolation to focus the recording only on your voice. Alternatively, choose Wide Spectrum to include ambient sound.
Productive Use Cases of Using iPhone as a Webcam
Find below various use cases where you can utilize your iPhone as a webcam for Mac:
- Enhance the quality of video calls and conferences by utilizing the higher-resolution camera on your iPhone.
- Record professional-looking videos for YouTube, Twitch, or other platforms by taking advantage of the iPhone’s advanced camera.
- Improve the visual quality of remote interviews and job interviews by using the iPhone’s camera.
- Lead webinars or online workshops with improved video quality to engage participants effectively.
- Stream live events, tutorials, or gaming sessions with better video quality using the iPhone connected to the Mac as a webcam.
- Quickly add scanned documents to your Apple Pages files using the advanced cameras of your iPad and iPhone.
- You can also use the Desk View feature of Continuity Camera to demonstrate physical product usage like mobile unboxing, beauty product reviews, working with electronic PCBs, and more.
Continuity Camera Alternatives for Dated iOS Devices
When you need more features than what the Continuity Camera app offers, try using these webcam apps for iPhone:
DroidCam
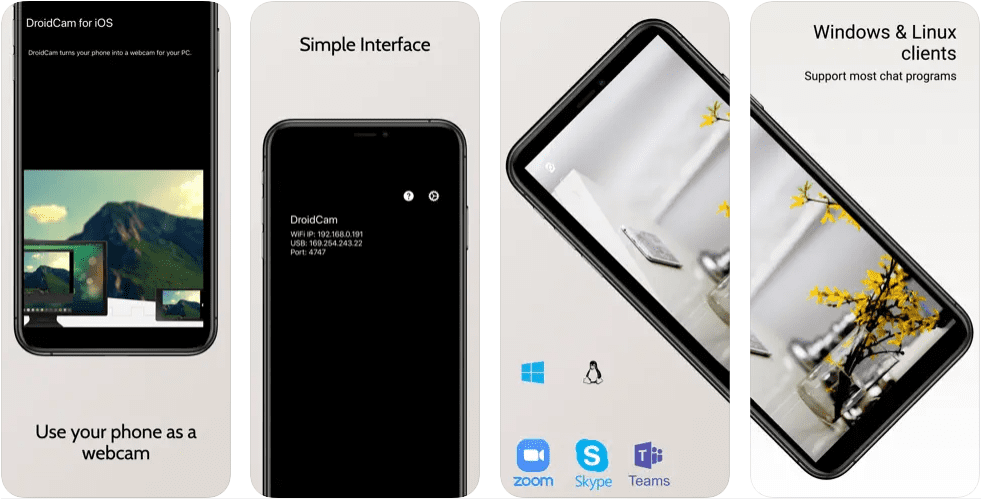
DroidCam is a popular phone-as-webcam app with freeware services. You can use your iPhone as a webcam or OBS camera to shoot streaming content, attend video calls, etc. It works using USB and Wi-Fi. Its paid plan includes features like Ultra Wide lens support on iPhone 11 and later devices, adjusting the camera remotely, enabling noise cancellation, etc.
Final Words
Now you know how to use your iPhone as a webcam on your Mac using the Continuity Camera feature. Try the above-mentioned methods to enhance video quality on Mac when hosting webinars, teaching students, or calling someone on FaceTime.
Next, check out the best video editing software.

