Inverting a picture on iPhone allows users to flip the colors on an image with their opposites. This can be a helpful method for casual users who want to experiment with their photography. For professionals, color inversion enables color correction, which helps them fix composition irregularities in images.
There are 3 main benefits of using picture inversion:
- Increasing accessibility for the visually impaired.
- Allowing users to express their creativity.
- Fixing color imbalances in the image.
Color inversion enables you to play around with your image’s composition. This can also be helpful if you want to try out new visual effects for abstract photography or if you want to step up your social media engagement skills by posting visually appealing content. It’s an excellent way to bring a level of personalization to your brand.
In this guide, we’ll discuss how you can invert your pictures on iPhone using various methods that are available in the iOS ecosystem. This includes utilizing the built-in feature on iPhones, third-party apps like Photoshop Express, and tools like Pinetools, that work directly on your web browser.
Invert a Picture Using the Built-in Feature on iPhone
There’s no direct way of inverting your picture on an iPhone. However, it has an invert option that reverses your iPhone screen. This way, you can view all the content on your phone in inverted colors.
Here are the steps for it:
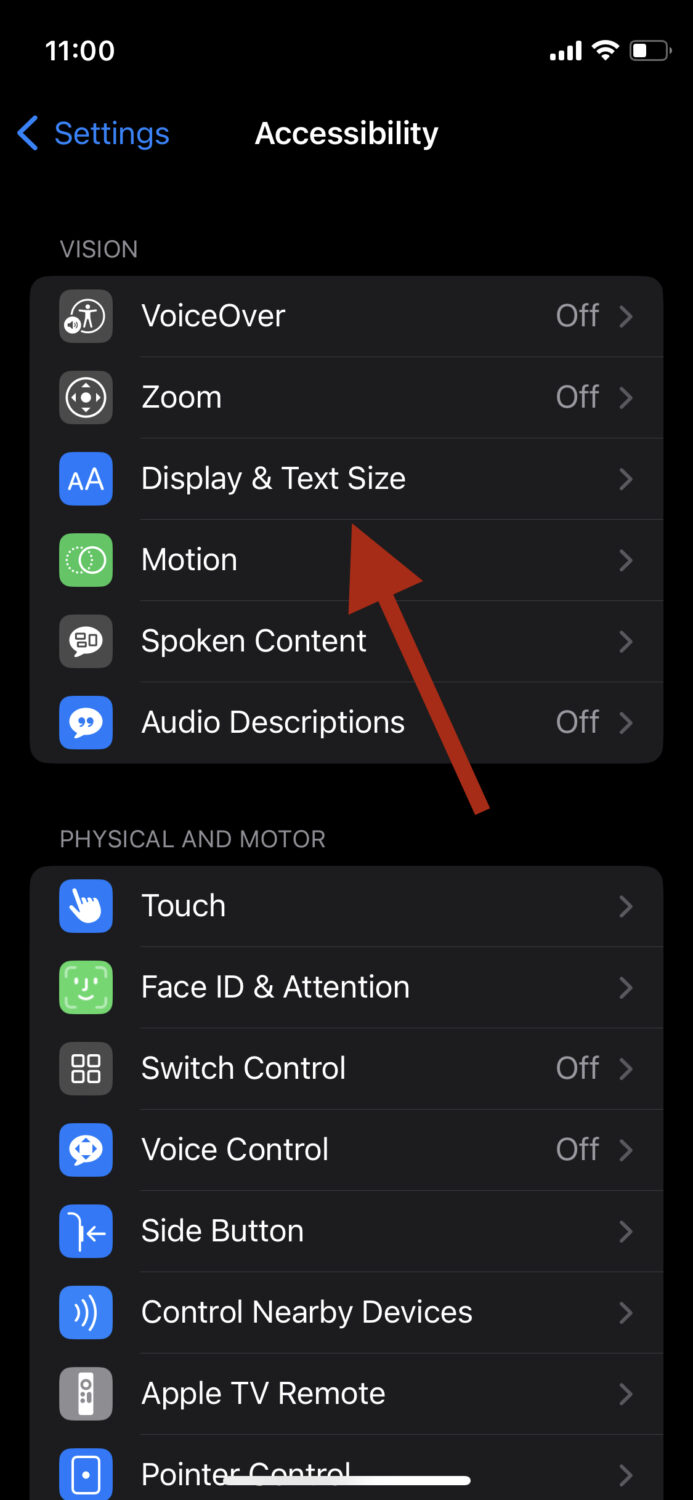
Step 1: On your iPhone, go to Settings > Accessibility > Display & Text Size.
Step 2: Scroll down and toggle on Classic Invert. This will invert your entire phone, including your photos.
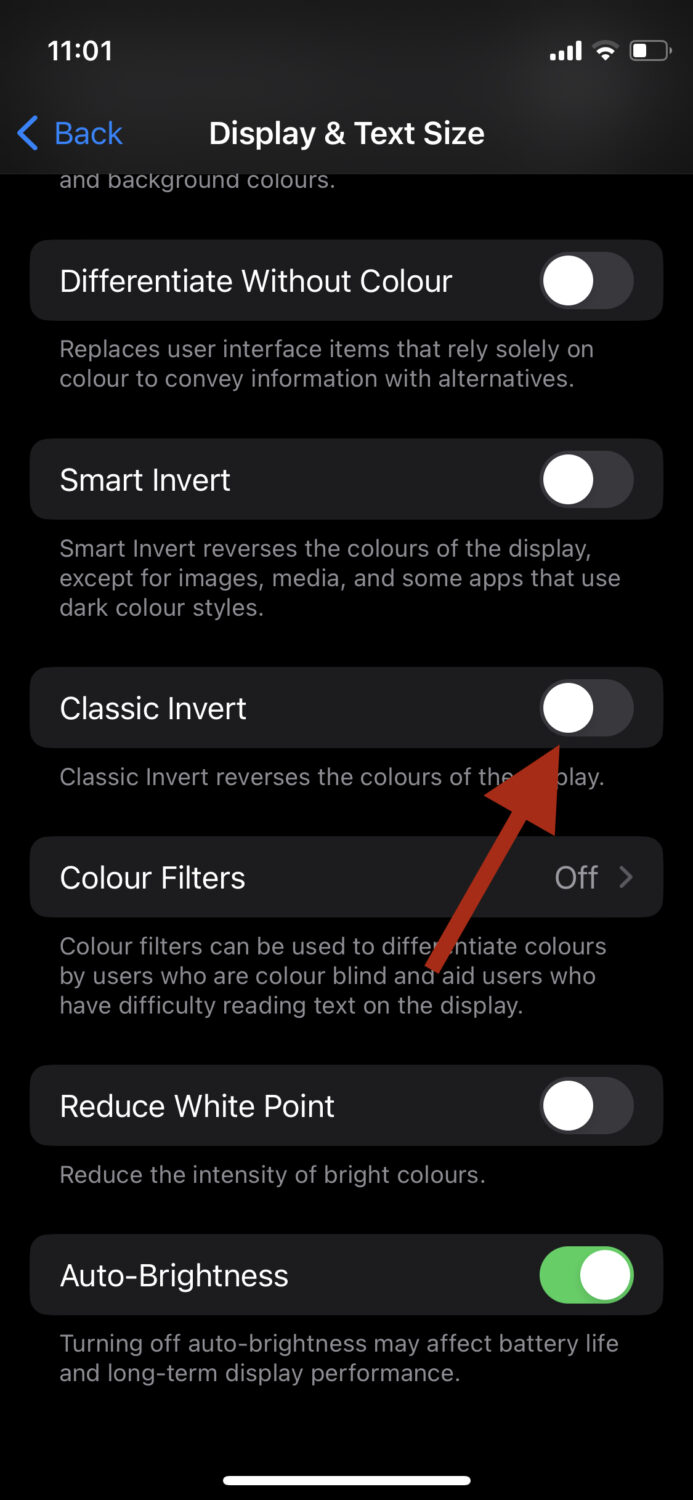
Now, you can view and edit your photos while the colors are inverted. To change it back to normal, you can simply turn Classic Invert off.
Invert a Picture Using Lightroom
Step 1: Download and open the Lightroom app on your iPhone.
Step 2: Once the app opens, tap on this icon at the bottom right to import your picture into it.

Step 3: Tap on All Photos at the top and tap on the photo you just imported.

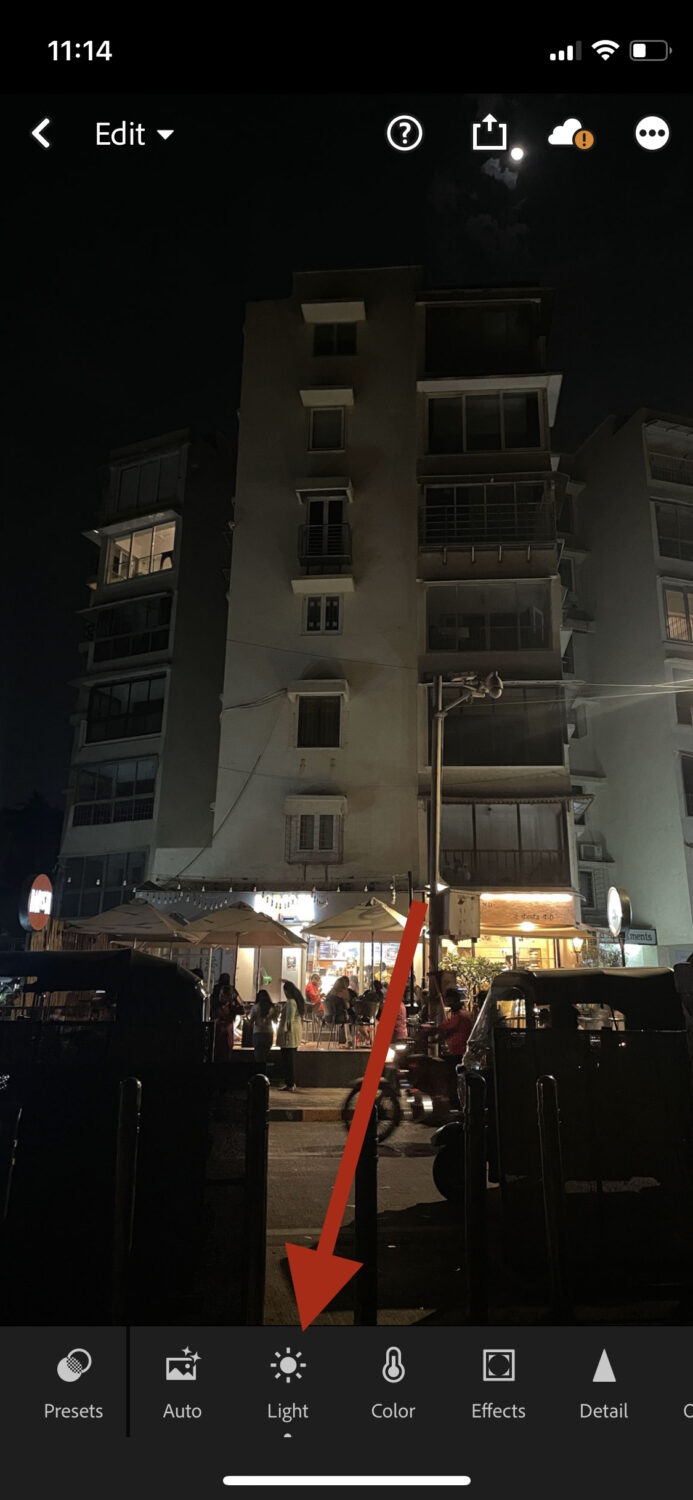
Step 4: The editor will open. From the options at the bottom, tap on Light.
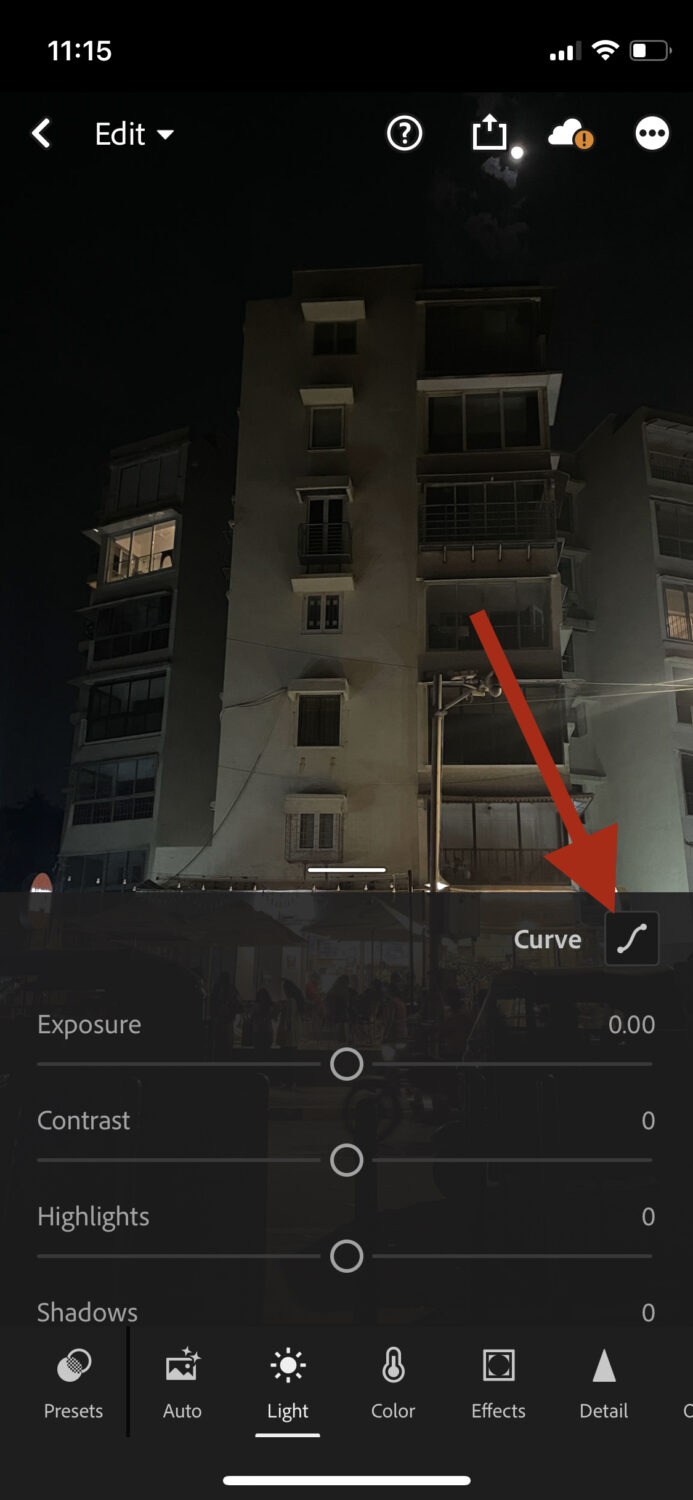
Step 5: Tap on Curve.
Step 6: In the tone curve, drag the bottom left point to the top left and then drag the top right point to the bottom right.
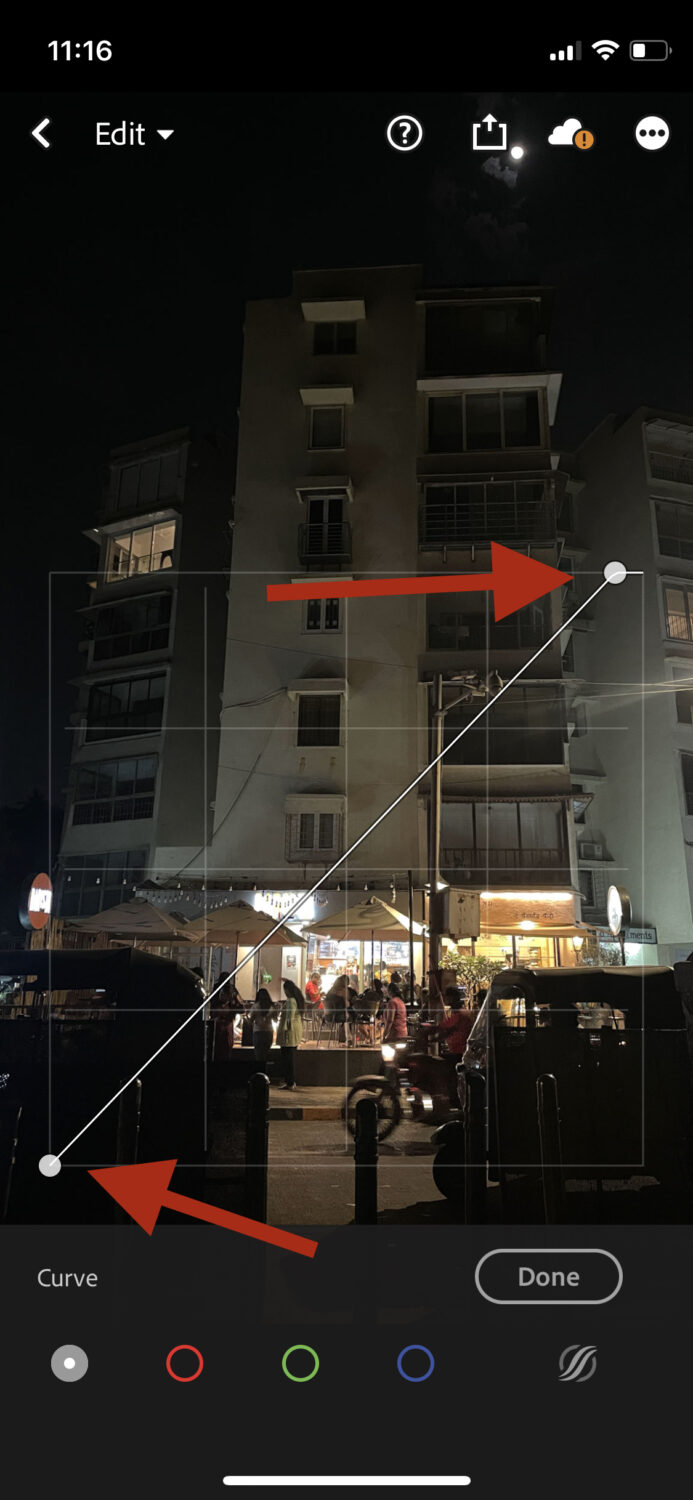
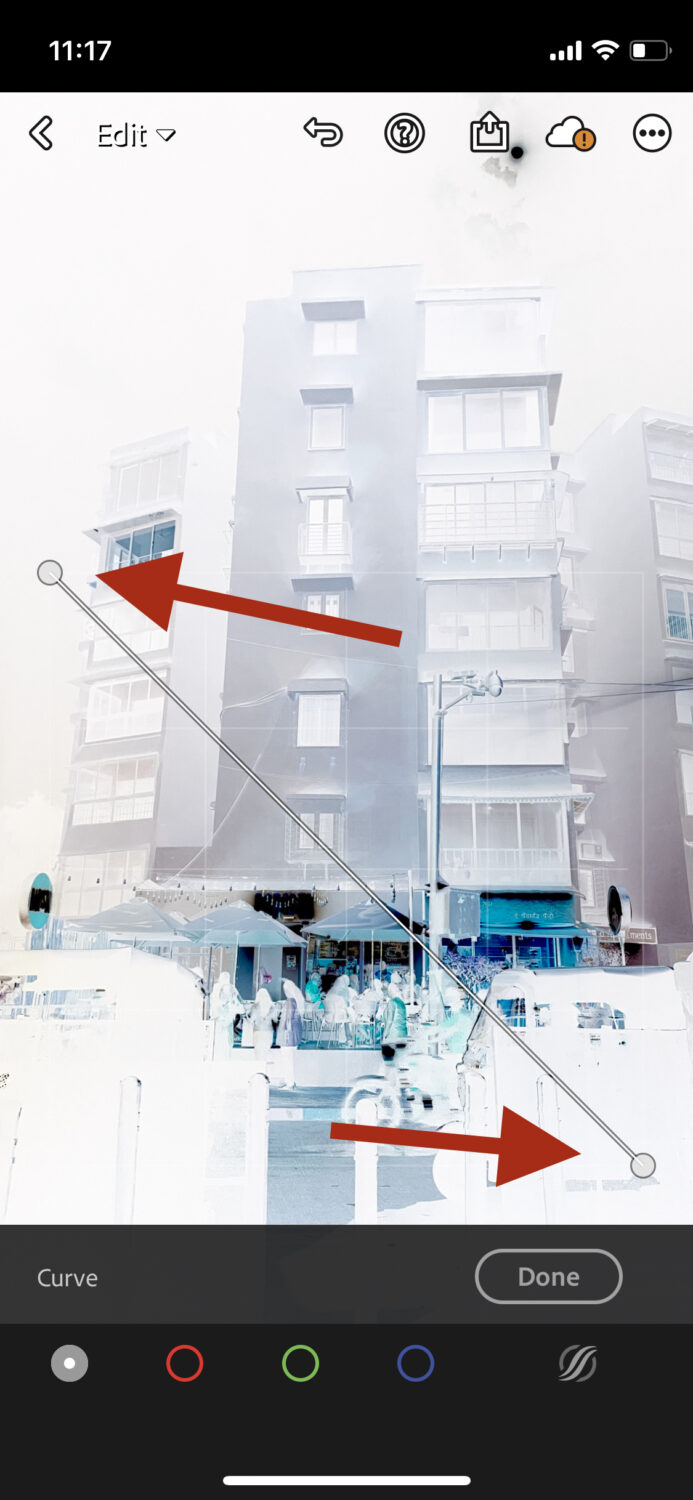
You can also further adjust the levels to your liking. Once you’re satisfied, tap on Done.
Invert a Picture Using Photoshop Express
Inverting pictures on an iPhone is a lot simpler on Photoshop Express because it has a direct button to do it.
Step 1: Download and open the Photoshop Express app on your iPhone.
Step 2: Once the app opens, import your desired photo into it.
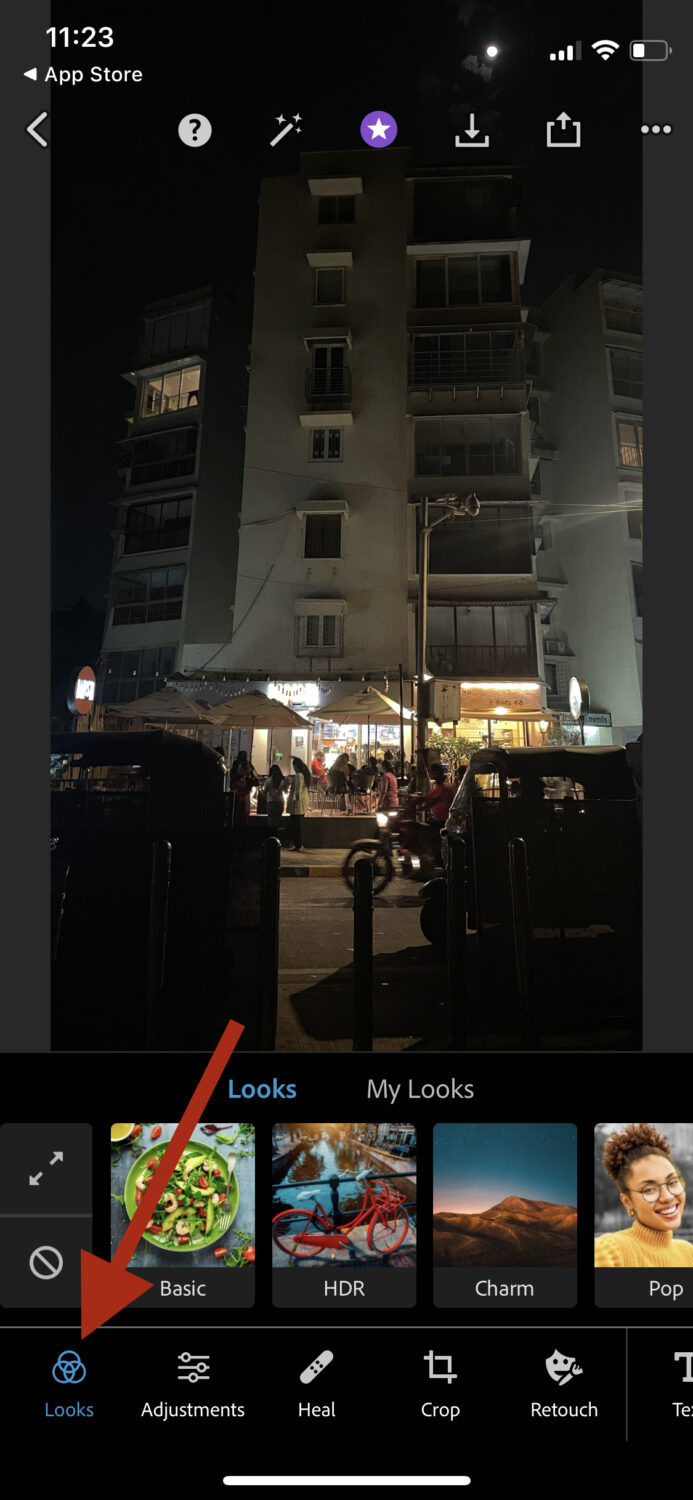
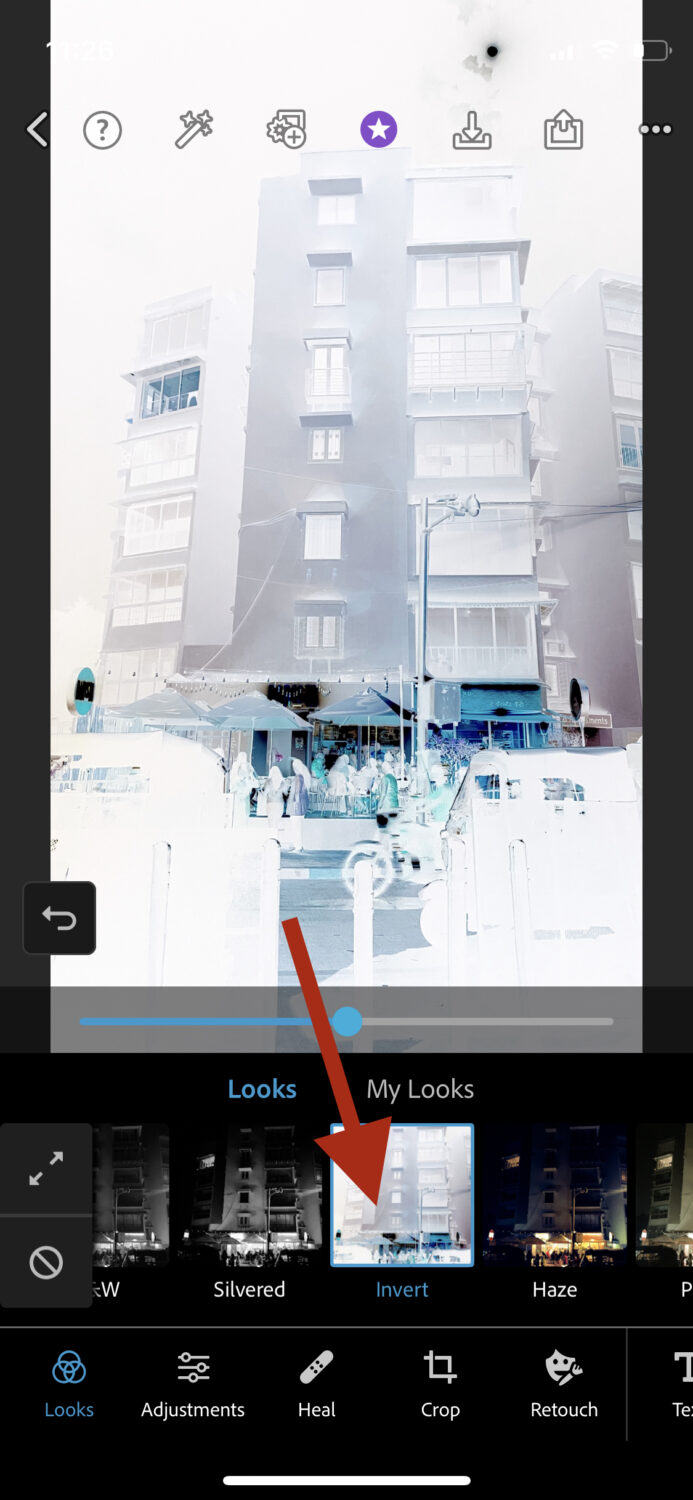
Step 3: When the editor opens, you’ll have many options at the bottom. Tap on Looks.
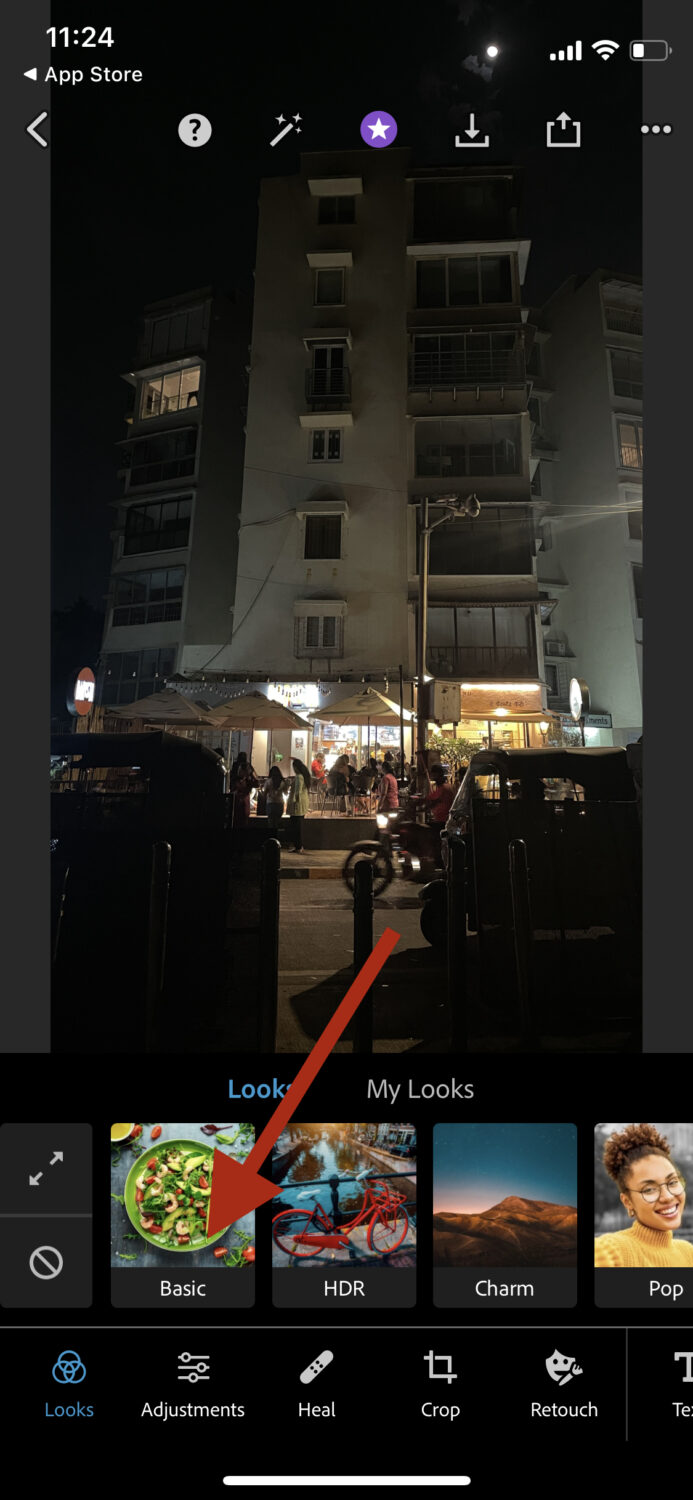
Step 4: Tap on Basic.
Step 5: Scroll to the right side and then tap on Invert.
Invert Your Picture Using Pinetools
Simple and to the point, Pinetools has an invert colors feature that is super quick. All you do is upload the image, and it’ll return back with negative colors.

Besides image inverting, it allows you to:
- Flip
- Darken
- Lighten
- Adjust contrast
- Adjust brightness
It’s a hub for all image editing-related requirements.
Invert Your Photo Using Pixelied
Pixelied lives up to what it advertises, which is much more than mere picture inversion. You can bank on Pixelied to give your photos that negative scale effect for free. Their user dashboard allows you to set invert balance as per your preference and export it in various formats.

Besides inversion, it offers various other color options that you can use, such as pixelating and cropping.
Invert Your Photo Using Photoaid
Photoaid features a 100% free color inverter to instantly invert pictures on your iPhone.

It allows you to:
- Invert
- Remove background
- Remove shadow
- Darken
- Colorize
- Crop
Photoaid is also available as an app that you can download to invert pictures on your iPhone.
What is Picture Inversion?
Picture inversion, in simple terms, swaps each color for its counterpart on the color wheel. For example, green becomes red, yellow turns to purple, black changes to white, and so on.
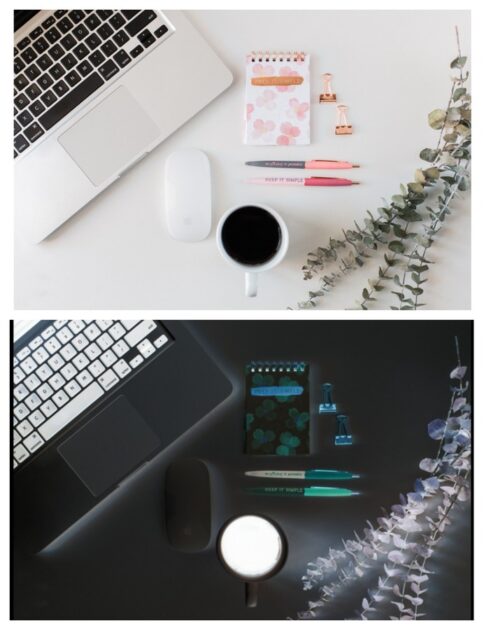
In the process, color inversion switches the darkest parts to light and the lightest parts to dark.
Let’s also look at some of the ways picture inversion is helpful to users.
Uses of Picture Inversion
There can be many reasons behind inverting a picture, and it all depends upon the context in which it’s being used. Here are 3 of the most common reasons for using picture inversion:
#1. Better Accessibility
Inverting photos can be beneficial for people with visual impairments, such as Photophobia (sensitivity to light), as well as other conditions where sensitivity is compromised. After you invert a picture, the photo becomes easier to view because of the lower brightness.
In addition, people with color vision deficiency can benefit from it because inverting a picture makes it easier to distinguish between shades and hues.
Overall, it makes accessibility better.
#2. Better Artistic Expression
If you’re an artist or a photographer and want to try out a different outlook for your picture or adapt a creative way to present it, you can consider inverting it.
It will help you create an effect or perspective that’s relatively more visually stunning. It helps add depth and complexity to photos.
#3. Easier Color Correction
When you invert a picture, you can easily spot the areas that are overexposed or underexposed. This can help you with color correction because now you’re well aware of what levels to adjust to get a perfect balance.
You can consider using any of the methods that we’ve mentioned here to invert the colors of your photos. One of the simplest ways to do it is the Photoshop Express app, as it’s the fastest. However, you can also use Photoaid as it’s completely free and works on your web browser. Ultimately, you’ll have to take into account ease of use as the main factor that decides which method you use to invert photos on your iPhone.

