Minecraft server hosting platforms provide dedicated servers with optimized hardware, such as NVMe SSDs, and low-latency online connections to deliver the best online gameplay experience to players. These dedicated servers also include customer support for non-technical users, modpack customizations, and access to a community of gamers at an affordable price.
Minecraft is a popular sandbox video game available on all major consoles, such as Microsoft Windows, PlayStation 4 and 5, and Xbox One. It was developed by Mojang Studios and released on November 18, 2011 to critical acclaim.
Geekflare has researched and curated a list of the best Minecraft server hosting platforms based on their pricing plans, performance, ease of use, and customer support.
You can trust Geekflare
At Geekflare, trust and transparency are paramount. Our team of experts, with over 185 years of combined experience in business and technology, tests and reviews software, ensuring our ratings and awards are unbiased and reliable. Learn how we test.
1. ScalaCube
Are you looking for a Minecraft server hosting at an affordable price? ScalaCube can help!
Get started by installing 1000+ unique modpacks with just one click and set up your server instantly. It supports servers, including Standard, PaperMC, Spigot, FTB, and others. You can choose a custom Modpack with Forge and access 13 mini-games, including SkyWars, TnTRun, Sponge, HungerGames, BuildBattle, etc.

The control panel also lets you create a Minecraft launcher and a custom forge server and edit your server and mod list. You can also change the launcher’s design and let your players join the server through your launcher.
The control panel is equipped with applications like PHP, MySQL, and Apache, in addition to SSH, FTP access, and PHPMyAdmin. Their servers run on Ubuntu. They provide you with server ROOT access as well.
They have data centers located across different continents, including North America, Europe, and Australia, and you have the flexibility of choosing the closest server to your location. Hence, it reduces latency and lets you access the server faster for an incredible gaming experience.
ScalaCube also provides DDoS protection and automated backups to restore your data. They offer free sub-domains so all the players can connect easily to your server.
ScalaCube Pricing
ScalaCube provides affordable Minecraft hosting at a base price of $2 per month for 10-player slots. They also offer 50% off the first month of the subscription!
2. DatHost
DatHost is a beginner-friendly Minecraft hosting provider. It aims to provide a seamless playable experience for users who don’t want to focus on server management.
To power Minecraft servers and high-demand mods, DatHost provides 16 GB RAM, top-tier AMD EPYC 7443 CPU, 30 GB enterprise SSDs, and a 10 Gbps uplink with unlimited usage. For a latency-free experience, you can choose any of its servers spread across 25 locations and 18 countries. Moreover, there is no limit on players.

DatHost supports both Bedrock and Java Minecraft editions. It also works with custom JARs – a way to customize server hosting plans with platforms like Spigot, Paper and Forge.
The provider doesn’t limit the user in terms of server customization. You’re free to edit server properties, run commands, or manage mods and plugins.
It also simplifies server management with options like automated tasks and one-click server wipes. If you’re a beginner, DatHost offers excellent customer support to help you with the technical aspects of setting up and managing Minecraft servers.
DatHost Pricing
DatHost’s Minecraft server hosting pricing starts at $13.62/month. You can also choose quarterly (10% off) or yearly (20% off) plans.
3. Apex Hosting
Creating a Minecraft server with Apex Hosting is simple and affordable. You just need to select the server version and size, and they will deploy your server in minutes. Additionally, you have the flexibility to change your package and server version anytime.
Apex Hosting features an easy-to-use control panel, Multicraft, which consists of video guides. They have implemented several modifications, making controlling your account effortless. Here, you can easily access the console, edit configurations, manage files, change the version of your server, etc.
With 1-click Modpacks, you can install the best plugins instantly. They offer Xeon CPUs and high-speed SSDs for greater Transaction Processing System (TPS), as well as lag-free servers available all the time.
Apex Hosting uses top-quality bare metal servers and tier-3 data centers to provide the best video gaming experience. They have 18 data centers located worldwide to facilitate lower latency for players on Java and Bedrock Edition. Their servers utilize powerful and latest hardware, ensuring 99.9% uptime.
Enjoy games in a protected environment because Apex Hosting provides DDoS protection to secure your server from attacks. It can even mitigate up to 300 Gbps DDoS attacks to protect your server and IP address. Additionally, you get automated backups to preserve your data.
Apex Hosting features a sub-domain name for free that you can use with your server, eliminating the need to buy dedicated IPs. You also get MySQL and FTP support, use Sponge, Bukkit, Spigot, or Paper, play on plugins like Word Edit, Essentialsx, etc., play mini-games, and generate maps.
Apex Hosting Pricing
You can rent a Minecraft server from Apex Hosting at a starting price of $5.99 for the first month, and a recurring price of $7.99/month.
4. Host Havoc
Enjoy unmatched gaming performance with enterprise-level hardware with Host Havoc. Every subscription enjoys the latest generation of Intel Xeon or AMD Ryzen processors and Intel U.2 NVMe SSDs for lag-free Minecraft multiplayer sessions.
In the industry, you’ll also have one of the fastest server provisionings within 30 seconds of payment receipt. Besides, Host Havoc supports all mod packs, and their automatic mod installer ensures Minecraft remains fun.

Host Havoc also integrates automatic backups so that you don’t lose the gaming progress. Additionally, you get FTP access to fully control your Minecraft server. And since internet bots can overwhelm gaming servers, Host Havoc offers robust DDoS protection to ensure uninterrupted fun.
Another good thing is Host Havoc gives you a free hand about adding as many players as you wish. Still, they indicate the number of recommended players for optimal gaming performance.
With 10 global data centers and a 99.9% uptime guarantee, Host Havoc leaves little to be desired. Factor in the 24/7 human support with an average response time of less than 15 minutes, and it becomes a real champion for anyone seeking a reliable Minecraft server hosting.
Finally, all subscriptions enjoy a 72-hour money-back guarantee to test the waters without any second thoughts.
Host Havoc Pricing
Host Havoc offers Minecraft server hosting at a starting price of $3.75/month with unlimited slots.
5. Indifferent Broccoli
Indifferent Broccoli is a gamer-centric server hosting company. They make it simple to host your Minecraft servers with their custom-built control panel and Discord integration. They are relatively new to the well-established Minecraft hosting space, particularly focused on quality customer support.
Indifferent Broccoli’s two-day free trial and one-click setup mean it’s a no-brainer to try them. You can start crafting Redstone circuits and shearing sheep on your server before you need to bring out your credit card.
Installing modpacks can sometimes be a pain, but they want to make it as simple as possible. If you run into any issues, you can reach their support staff via Discord or email, and they’ll help you set up RLCraft, FTB, Pixelmon, or whatever mod you’d like.
Also Read: Best RLCraft Server Hosting for Better Performance
Indifferent Broccoli is best for players in North America and Europe, as that is where they have server locations. They have 64GB and 128GB machines to ensure that RAM is never a lag-inducing issue for their customers.
Give Indifferent Broccoli a try if you’re looking for a friendly, helpful, and practical server host for your Minecraft servers.
Indifferent Broccoli
Indifferent Broccoli offers a 2-day free trial, followed by $16.99 per month for a 3GB Minecraft server.
6. GPORTAL
GPORTAL offers Minecraft servers at an unbeatable price, with instant setup and a RAM-based server model. Already during the booking process, you can choose your favorite from more than 250 modpacks and get the modpack pre-installed on your server. No unnecessary or complicated settings are required.
If you want to make your own settings, their easy-to-use web interface offers you all the freedom you need. You also get free FTP and MySQL access.
When it comes to protecting server users, they leave nothing to chance. They have developed their DDoS protection and combined the protection from partner Corero.
They offer a 99.9% uptime on network and data center operations per SLA, which they ensure by maintaining two separate facilities at all major locations, in other words, two separate data centers. These are operated via ring connection and are additionally supported by a further network hub. GPORTAL’s network and data centers are operated by themselves.
In case a problem or a question needs to be answered, they offer 24/7 support via phone, ticket, forum, wiki, and email. You enjoy gaming; they take care of the rest.
GPORTAL Pricing
GPORTAL provides Minecraft server hosting at a base price of $4.97/month or 2GB RAM and unlimited slots.
7. Sparked Host
Hosting your own Minecraft server for enjoyment or business purposes can be difficult. That’s why we here at Geekflare recognize Sparked Host as one of the easiest, most affordable, and most powerful solutions.
After you buy a service, which starts as low as $1.00 a month, your server automatically sets up for you. From there, you can immediately start playing via your Minecraft client or continue to set up the server to your liking with modpacks or plugins. No matter what you choose, our experience is that their trained support team is always right there to help.
Also Read: How to Download and Install Lunar Client for Minecraft?
So, why do we recommend Sparked Host?
Well, it’s a no-brainer. They are the best bang for your buck! Their servers use industry-leading hardware, which means your project, whether it is just starting out or already has a large player base, will run flawlessly on their platform. Just make sure you choose the right plan to fit your needs. Furthermore, they have amazing resources and documentation to get up and running in no time.
You might still have some reservations: starting a server is a big task. There is no need to believe me to tell you how great Sparked Host is, though. When I write, they have rated 4.6 / 5 stars on Trustpilot! Not only that, but Sparked Host guarantees “99.99% network” uptime, or you will be compensated by either time back on their service or money back. With reviews and promises like that, there is no way to go wrong when buying from them.
Sparked Host Pricing
You can rent a Minecraft dedicated server from Sparked Host at a base price of $2/month.
8. BisectHosting
Two server owners started BisectHosting in 2012 to provide the easiest and best-supported Minecraft server hosting experience in the industry.
With many Minecraft server types, plugins, and mods, hosting Minecraft servers can become extremely overwhelming and complicated for new users. For this reason, since day one, BisectHosting’s focus has been on providing quick and knowledgeable support with quick ticket turnaround times, day or night, allowing you to spend more time playing with your friends instead of troubleshooting your server.
When purchasing a server, you’ll be able to pick from hundreds of preinstall options, such as various versions of Vanilla, Paper, Spigot, Forge, and hundreds of available and up-to-date modpacks from CurseForge, FTB, Technic, and others. If you change your mind later, it’s not a problem, as what’s running on your server can be quickly swapped at any time.
Once paid, your server is instantly set up, and you’re given access to BisectHosting’s highly customized control panel, which includes automated modpack updates, drag and drop file manager, and many other tools to make complicated tasks a breeze. Power users will also be impressed with features like an in-browser config editor and customizable full server backups.
With Minecraft servers offered in 17 worldwide, you’ll be sure to find the perfect one for low-latency play for you and your friends.
BisectHosting Pricing
BisectHosting offers Minecraft server hosting at a base price of $7.99/month.
9. XGamingServer
Try XGamingServer’s dedicated Minecraft server hosting to explore blocky terrain, extract raw materials, craft items, tools, and build structures. There are many reasons why choosing XGamingServer for the Minecraft server is beneficial:
- It has no fixed game slots as the server is designed for performance.
- The fastest activation process lets you use the server within 5 minutes of placing an order.
- An intuitive control panel is designed for you to have smooth management over your game servers. The panel comes with many useful features to make your gameplay more enjoyable.
What’s more?
You will get automatic cloud backups to secure your files, an improved file manager, along with one-click launch of SFTP and MySQL databases. In other words, you will have complete control over your server.

After studying various vulnerabilities of different online games and attack strategies, XGamingServer has developed perfect protection against DDoS attacks. You will get high-performing servers and available machines to experience multiplayer games.
XGamingServer uses Intel i7 6700k/7700k, which gives a powerful performance and provides a bandwidth of at least 15 Mbps. Moreover, it also uses AMD Ryzen 7 3700X, which offers better control and power.
XGamingServer Pricing
You can rent a Minecraft server from XGamingServer at a base price of $8/month.
10. Shockbyte
Shockbyte has been offering hosting services for Minecraft since 2013 and has a strong reputation in the community. All their hosting plans support Java and Bedrock Edition fully up-to-date. Install its services with 1-click and enjoy the automatic update.
The supported server versions are CraftBukkit, Spigot, Forge, BungeeCord, Sponge, Snapshots, and Vanilla, in addition to Bedrock Dedicated Server, NukkitX, and PocketMine-MP. All the servers support multiple mod packs such as Feed-The-Beast, ATLauncher, Technic, and more.

You can change your plans, plugins, mods, and server type without losing your settings. Shockbyte is compatible with MCPE and MCPC, includes a Java Version Switcher, and supports custom JAR.
Your gameplay becomes more interesting by giving you a color-coded console, DDR4 RAM for fast performance, Multicraft CP, powerful CPU, and task scheduling options. You also get unlimited bandwidth and SSD storage, lower latency 1 Gbps port, DDoS protection, free sub-domain, and unlimited slots.
Shockbyte Pricing
Shockbyte’s Minecraft servers are available at a starting price of $2.99/month for 2+ slots.
11. Hostwinds
Hostwinds offers affordable Minecraft VPS hosting that is designed to keep your requirements as the baseline. Choose from various CPUs, different storage, various RAM, and bandwidth, and take charge of your server. It uses top-quality CPU cores and high-end SSDs to provide a seamless gaming experience.
Get impeccable network performance with Minecraft Hosting as long you play without facing downtimes or lag. While ordering your server, you will get some features along with your order such as solid-state drives, 99.9999% uptime, 1Gbps ports, custom ISO’s, friendliness guarantee, multiple locations, enterprise firewall, and more.

You will get full control of the server configurations and settings to have entirely personalized gameplay. You can also invite players to create a multiplayer environment. You will get McMyAdmin as the control panel for your servers. It also provides an intuitive and easy-to-use interface that allows you to customize your server quickly with less effort.
Hostwinds Pricing
You can rent a Minecraft server from Hostwinds at a base price of $4.99/month.
12. GGServers
Elevate your gaming experience with robust server hosting from GGServers. It uses powerful processors for better performance. Up to 4GHz is included in standard services, and up to 5GHz is available in premium.
GGServers provides unmetered storage for SSDs and NVMe. It also has mudpack support, and you can install the server you want with just one click. You have the flexibility to swap server types and modpacks anytime you need them.
Different types of servers that GGServers supports are Java Edition, Bedrock Edition, PaperMC, Spigot, Twitch, FTB, Technic launcher, Forge, Bukkit, ATLauncher, Voids Wrath, Pixelmon, and bungeecord.

If you are searching for a fully configured server for launch, try plugin packs to play Skyblock, Factions, and more. GGServers offers a customized control panel of Multicraft to help you manage your server with ease. Using it, you can get complete access to FTP files, chats, and your console.
GGServers has data centers located in 9 locations, including
- Oregon, Montreal, and Virginia in the USA
- London, Helsinki, Frankfurt, and Roubaix in Europe
- Singapore in Asia
- Sydney in Australia
For server security, it offers automated DDoS protection to mitigate threats online. It also offers 24/7/365 technical support via support tickets or live chat.
GGServers Pricing
GGServers’ Minecraft servers are available at a starting price of $3/month for 12 player slots.
13. PebbleHost
PebbleHost is yet another budget hosting option for Minecraft. Its standard plan offers a high-performing CPU, a 3.7 GHz Xeon, DDR4 memory, a 250 Mbps uplink, enterprise-grade SSDs, and unlimited slots.
Its data centers are available in the major locations of North America and Europe. They empower you with enterprise-level hardware, sub-user support, Java 8 support, task scheduling, and subdomain creator for free to let you enjoy nonstop gameplay.

The effortless control panel is stable and simple to use. Leverage it to start, restart, or stop servers, run commands from the console, manage plugins, track usage, auto reboot, and many more. You get MySQL database for free in addition to full access to FTP.
For enhanced privacy and security, PebbleHost offers 2-factor authentication, a built-in firewall manager, and DDoS protection. They continuously update their modpacks and add new ones regularly. At present, it supports modpacks with multiple versions, including CurseForge, FTB, Forge, SpongeForge, and Technic.
The Extreme plan includes a dedicated CPU and priority support and lets you control your server completely.
PebbleHost Pricing
PebbleHost offers affordable Minecraft servers, with a base price of $1/month.
14. SeekaHost
Playing Minecraft on the high-performing servers of SeekaHost is fun. Get started and play quickly with multiple players. Their powerful CPUs are equipped with up to 6 GB RAM and up to 5 GHz to enhance your gameplay.
Their servers have NVMe or SSD storage, and they also provide unmetered usage in all their plans. Create your server in a global data center for low latency.
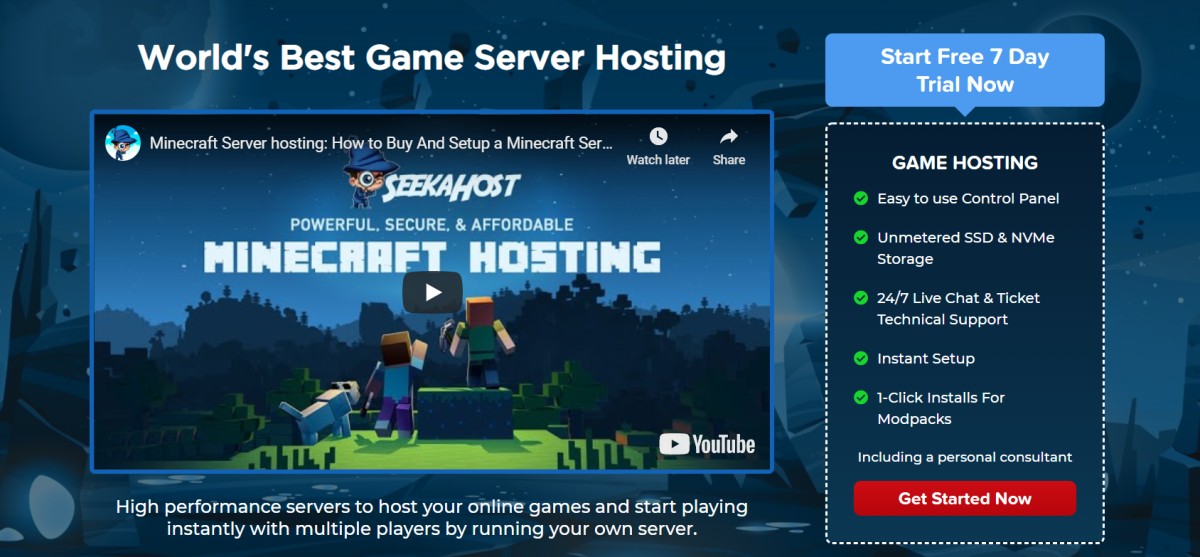
SeeksHost offers multiple Minecraft server types and modpacks that you can install with just a click. You can also leverage Bedrock Edition, Java Edition, Spigot, and many more that they constantly add. Their anti-DDoS solution is equipped on all the servers to protect you against online attacks.
Their experienced tech support is always available through a support ticket and live chat in case you need assistance with your server hosting or any other technical issues.
SeekaHost Pricing
SeekaHost’s Minecraft server plans start at $5.49/month for 1GB RAM and 4 player slots.
15. GTXGaming
GTXGaming is a premier host for Minecraft servers. They have built their control panel by focusing on functions and features, making it easier for beginners to use. Also, it provides advanced tools for expert gamers.
They offer Intel CPUs ranging from powerful E3 processors to the latest i7 or i9 CPUs. In addition, they have included the latest and most powerful AMD Ryzens. You will also get the advantage of switching from Minecraft to any game server that GTXGaming hosts.

GTXGaming covers almost the entire globe, including many cities from the USA, London, Spain, Sweden, Australia, Germany, and many more data center locations. All their data centers are protected from DDoS attacks to make it safer for users.
You can install Spigot and Craftbukkit through the mod manager with a single click. If you don’t find any versions, you can ask GTXGaming’s experts to install them for you. Additionally, seasoned gamers can get full FTP access.
Moreover, you can completely control the game server through the excellent web interface. Elegant sliders and drop-down menus also help you configure the server pleasantly. Expert gamers can utilize text editors to configure the server manually.
GTXGaming Pricing
GTXGaming’s Minecraft servers are available at a base price of $2.38/month for 8+ players.
16. Nodecraft
Getting started with Nodecraft for Minecraft server hosting is easy. Its custom interface – NodePanel 2 is the reason behind its ease of use, simplicity, and mobile friendliness. You can swap and save any one of the 28 games they offer without limitations on the slots.
Create your modded server, change configurations, and install plugins and modpacks effortlessly. You can even access its application from your smartphone. There are 100+ mod packs available on the panel for you to choose from Forge, Sponge, Spigot, and more.
Just keep on playing your game, and rest assured, Nodecraft will handle the maintenance part by automating updates. Say no to crashes and lags because Nodecraft does not overload your servers, as it allows up to 12 customers on a device.

Hence, you can quickly leverage CPU cores, RAM, and disk IOs. They provide you with 3.3+ GHz Xeon CPUs, 32 GB ECC RAM, enterprise-level 240 GB SSDs, and enterprise-level hard disks. Their network is reliable as they protect it with DDoS protection and a 1 Gbps uplink.
The entire infrastructure of Nodecraft is built on a Linux ecosystem for greater stability, performance, and security. They have 13 data centers located globally, including 4 in the United States, 1 in South America, 4 in Europe, and 4 in Asia-Pacific.
You have the flexibility to whitelist your players for extra security. You can also swap different games when you feel like it without extra cost.
Nodecraft Pricing
Nodecraft’s Minecraft server pricing starts at $9.98/month.
With that, we come to the end of our list of the best Minecraft Hosting Servers. And, if you’ve never used a Minecraft Hosting Server before, don’t worry. I’ve got you covered.
What Is a Minecraft Hosting Server?

Many gamers enjoy playing Minecraft solo. However, Minecraft multiplayer opens a gateway to a new world of creative possibilities you can “only” enjoy on a hosting server.
Put simply, a hosting server brings many gamers onto the same Minecraft world to form alliances, which can build together, fight wars, and do whatnot. Some of these hosting servers have thousands of active players at any moment.
These machines are configured to offer the best multiplayer experience to a globally separated pool of gamers.
Such servers come preloaded with tools to easily install mods, manage player slots, take backups, and ensure security from external interference like DDoS attacks. Besides, most Minecraft hosting server providers assure excellent uptime guarantees and maintain a worldwide presence with industry-leading hardware.
While you can always host a server on your personal hardware, it won’t be nearly as powerful. Moreover, you will spend much of your game time in server administration. That’s why these servers are great for a hands-off multiplayer experience for a subscription you can cancel anytime.
So, not only do these servers provide an excellent multiplayer Minecraft experience, but they also improve your overall gameplay. Since there are plenty of Minecraft Hosting Servers available, let’s see some factors that you should bear in mind when choosing a server that’s the best fit for your needs.
How To Choose the Best Minecraft Hosting Server?
There are a few factors you should take note of before choosing any Minecraft host.
❇️ Location: I would rank location as the most crucial factor because long distances from the host server would directly translate into high latency, which means laggy gameplay. So, check out the server location and choose the nearest possible, taking into account all players.
❇️ Number of players: Another make-or-break feature can be the allowed number of players, as such hosts have restrictions on how many can play together. This is mainly due to performance limitations, and having more than a certain number of players can result in a suboptimal experience.
❇️ Extensions: Almost all multiplayer gamers look for custom maps and mods to experience unique Minecraft gameplay. However, not all servers allow such flexibility. Therefore, check if the server supports Minecraft modding or, better, has one-click installation and update options for seamless gameplay.
❇️ Backup and Restore: Minecraft creation takes time and patience. It means you don’t want to lose it all to a technical glitch, which can happen with the best hosts. Therefore, carefully check about auto backups and a one-click restore functionality.
❇️ Ratings and Reviews: Even after all the research, you may see most Minecraft hosts offer a similar feature set, and there isn’t any groundbreaking thing about any specific provider. Ratings by present and past users can prove helpful in this case. And while most people turn to Trustpilot, I would also suggest checking with the Reddit community.
❇️ Money Back: The next feature to look for is a decent “no-questions-asked” money-back guarantee that should allow at least 24 hours of gameplay. This is important as the reviews can be “planted,” and you never know about the fellow Redditor’s authenticity.
In addition, you get to experience it from the inside: the user interface, the gameplay, the server’s strength, support, etc. A trial can give you the best “review” of everything, and having a money-back policy if things don’t work out is a nice addition.
❇️ Others: The features list can be quite long. Like, you can add an uptime guarantee, DDoS protection, premium hardware, etc. However, the real-world experience trumps them all. Consequently, the only thing you need is to opt for the trial and see yourself if a specific server host fits your bill.
Hence, going for a specialized Minecraft server hosting platform is better than building by yourself.
Don’t just go by the words; read on to find out why.
Improved Performance 💯
Nobody wants to play on a sluggish game network.
With a specialized server hosting by your side, you don’t have to worry about other applications running on your device that can slow down the gameplay. Besides, it will also not impact your resource usage. Hence, you can enjoy uninterrupted gameplay.
Better Control 🎮
Having your game backed up by a robust server gives you better gameplay control. The developers of Minecraft have built different mods and software plugins to enhance the appearance, tools and weapons, creatures and characters, and other game features. You can control all features you want to keep in your game and customize it how you want.
Enhanced Privacy and Security 🔐
Many hosting providers empower you with a control panel using which you can control your server to restrict who is entering your server. Hence, you can enjoy better privacy and enjoy your game without hassle.
You also get full network protection to mitigate online attacks like DDoS. So, you can enjoy a secure network without risking your data.
Greater Uptime and Low Latency 👍
Specialized hosting providers possess global data centers. Hence, you get your server hosted on your nearby data center for greater uptime and low latency. Many of them also provide server backups to preserve your data in case anything goes wrong.
Saving Device Resources 👨💻
They offer high-performance CPUs and SSDs in the hosting plans. This way, you don’t run short of your device resources, which can impact your gaming performance by slowing down your computer. Combine this with PC optimizer software, and lag will be a thing of the past!
Now, let’s check a few commonly asked queries about Minecraft Server Hosting. This should give you a more comprehensive idea about the servers and how they work.
FAQs
There isn’t a one-size-fits-all answer, as it actually depends on the number and types of extensions. Furthermore, the type of game, especially if it’s a modded version, also determines the amount of RAM you may need to play the game without any lag. Additionally, it depends on the number of active players on the server. More players equate to a greater amount of required RAM. The possibility of a RAM upgrade relies on the hosting provider, so it’s advisable to inquire about this beforehand.
Hosting providers optimize server performance and minimize latency for players in different regions by strategically locating data centers, employing content delivery networks (CDNs) to ensure a low-latency network, and implementing load balancing.
However, there can be multiple more niche techniques to handle such a geographically dispersed user base.
In addition, not all servers might have such optimizations in place. So, normally, it’s best to pick the host having an optimally located server from the users.
Normally, yes, but ultimately, it depends on the specific server host to allow the installation of 3rd-party plugins and mods.
Like many others, this is a feature that some server hosts might offer. However, you should contact the support upfront about your specific requirements before signing up.