A VPN connection for your Smart TV provides access to geo-locked content in different countries. It ensures a safe and secure online connection for your Smart TV, protecting you from malware and trackers targeting your online activity.
Using a VPN connection hides your real IP address and encrypts your internet traffic. This makes it more challenging for streaming platforms to detect your actual location and provide content based on it. Moreover, VPNs provide multiple servers in different countries, allowing you to access a particular country’s Netflix, Hulu, and Disney+ content.
The Geekflare team has tested, reviewed, and listed the best VPNs for Smart TV based on streaming capabilities, security standards, device compatibility, price, and performance.
- 1. ExpressVPN – Best VPN for Secure and Uninterrupted Streaming
- 2. Proton VPN – Best All-rounder VPN for Smart TV
- 3. Hotspot Shield – Best Streaming Optimized Servers
- 4. VyprVPN – Best for Bypassing Geo-restrictions
- 5. NordVPN – Best for Advanced Users
- 6. CyberGhost VPN – Best User-Friendly VPN for Smart TV
- 7. IPVanish – Best VPN for Beginners
- 8. Private Internet Access (PIA) – Best VPN with Unlimited Device Connections
- 9. Mullvad – Best Open-Source VPN for Smart TV
- Show less
You can trust Geekflare
At Geekflare, trust and transparency are paramount. Our team of experts, with over 185 years of combined experience in business and technology, tests and reviews software, ensuring our ratings and awards are unbiased and reliable. Learn how we test.
1. ExpressVPN
Best VPN for Secure and Uninterrupted Streaming

ExpressVPN remains the top choice for Smart TVs, thanks to its MediaStreamer feature, which is explicitly designed for seamless streaming. It allows you to stream your favorite content without the need for traditional VPN protection, making it ideal to bypass geo-restrictions and access your favorite streaming platform and its libraries without restrictions.
While ExpressVPN is known for its fast streaming speeds, it also offers the flexibility of 8 simultaneous connections. It doesn’t restrict you to your Smart TV, and also supports streaming on Amazon Fire TV, Apple TV, Android TV, Windows, macOS, and mobile devices.
For extra security, ExpressVPN uses TrustedServer technology and advanced leak protection, ensuring your online activity stays secure while you stream.
Based in the British Virgin Islands and with a strict no-logs privacy policy, ExpressVPN keeps you private while streaming. All its servers are streaming optimized and span 105 locations worldwide, giving you unrestricted access to content from virtually any region.
ExpressVPN Pros

Seamless streaming without traditional VPN protection through MediaStreamer
Offers native app on Apple TV
Streaming-optimized servers in 105 locations worldwide
Comes with TrustedServer technology and advanced leak protection for added security.
Supports 8 simultaneous device connections
ExpressVPN Cons
Expensive when compared to competitors
Fewer features on offer
ExpressVPN Pricing
ExpressVPN offers flexible pricing plans, starting at $6.67/month with its yearly plan. It also provides 3 extra months of protection.
2. Proton VPN
Best All-rounder VPN for Smart TV

Proton VPN focuses on speed, privacy, and security. It uses Perfect Forward Secrecy, which always protects your streaming sessions, even if the encryption keys are compromised.
The VPN provider’s Secure Core feature routes your traffic through multiple servers to enhance privacy. Additionally, its Stealth protocol is designed to bypass VPN blocks, making it perfect for accessing content in restricted regions and hidden streaming libraries.
With over 8,000 servers across 112 countries, the platform offers plenty of options to bypass geo-blocks and enjoy global content on your Smart TV. Proton VPN, with its no-logs policy, is based in Switzerland, outside surveillance jurisdictions, further ensuring your data remains private.
You can stream on your Smart TV, Android TV, or Amazon Fire TV, and Proton VPN allows you to connect up to 10 simultaneous connections. This gives you the flexibility to also connect Windows, macOS, Linux, Android, iOS/iPadOS, and Chromebooks without restrictions.
ProtonVPN Pros
Perfect Forward Secrecy and Secure Core for secure and private streaming sessions
Offers Stealth protocol for bypassing VPN blocks
Large network of over 8,000 servers in 112 countries
Allows 10 simultaneous device connections
Offers a Free plan
ProtonVPN Cons
No native Apple TV app
The interface needs refinement
Lacks kill switch
Proton VPN Pricing
ProtonVPN starts at $4.99/month with annual billing. It also offers a free plan, but it is restricted to a single device connection and limited servers.
Curious to know more? Check out our Proton VPN review before trying it out.
3. Hotspot Shield
Best Streaming Optimized Servers

Hotspot Shield’s focus on speed and security makes it an ideal choice for streaming on Smart TV. Its proprietary Hydra Protocol optimizes servers specifically for streaming services to offer the best streaming speeds without interruptions.
Additionally, Hotspot Shield provides military-grade encryption and a no-logs policy, keeping your privacy intact even when streaming. It also keeps your Smart TV browsing safe by preventing you from being a victim of harmful sites.
Hotspot Shield has 1800+ servers in 80+ countries, letting you easily bypass geo-restrictions and granting you access to a wide range of streaming content from across the globe. Moreover, it is compatible with most Smart TVs and prominent platforms.
The platform offers up to 10 simultaneous device connections, which covers all your devices under one subscription. While it features core and advanced features needed for privacy and security, unfortunately, they aren’t available on Smart TVs.
Hotspot Shield Pros
Hydra Protocol optimized for streaming speeds
Large network of 1800+ servers in 80+ countries
Comes with a free plan
Supports 10 simultaneous device connections
Hotspot Shield Cons
Lacks kill switch
No native app for Apple TV
Doesn’t accept crypto payments
Based in the US
Hotspot Shield Pricing
Hotspot Shield premium plan starts at $7.99/month (billed yearly). You can try out their free plan, but it has a 500MB daily data limit and support for only one device connection. It also lacks advanced features found on paid plans.
4. VyprVPN
Best for Bypassing Geo-restrictions
VyprVPN is a solid choice for Smart TV users who want secure and seamless streaming. Its Chameleon protocol helps bypass geo-restrictions even in strict countries while maintaining fast streaming speeds.
VyprVPN improves your security and privacy with the latest VPN protocols and industry-standard AES 256 encryption. It comes with all the core and advanced security and privacy features, but the Smart TV version gets the kill switch and partial capabilities of VyprDNS.
It supports 10 simultaneous device connections and is compatible with most Smart TVs, Android TVs, and Amazon Fire TV devices, allowing you to stream securely on your Smart TV and other devices.
The VPN provider is based in Switzerland and has 700 servers globally spread across 100+ locations, all of which are streaming-ready. Its no-log policy guarantees that none of your browsing data is stored, offering an extra layer of privacy for those concerned about security.
VyprVPN Pros
Chameleon protocol for bypassing geo-restrictions in strict regions
Features partial capabilities of VyprDNS on Smart TVs
Supports 10 simultaneous device connections
Comes with streaming-ready servers
VyprVPN Cons
No native app for Apple TV
Doesn’t accept crypto payments
Small server network
VyprVPN Pricing
VyprVPN starts at $5/month on the purchase of the 1-year plan. All plans offer the same features, and there is no need for add-ons.
5. NordVPN
Best for Advanced Users
NordVPN, with its SmartPlay, stands out from other VPN providers by combining security measures and geo-unblocking capabilities. Its proprietary NordLynx protocol, with AES 256-bit encryption, focuses on providing exceptional streaming speeds and privacy.
NordVPN has included core features like an internet kill switch, Split tunneling, and Custom DNS. It isn’t limited to just streaming, and with Specialty servers (P2P, Obfuscated, Onion Over VPN, Double VPN, and Dedicated IP), you can browse and torrent from your Smart TV.
The platform is based in Panama, follows a strict no-logs policy, and has over 6400 servers in 111 countries. This provides easy access to geo-locked content and lower latency.
It is compatible with most smart TVs and is known for its exclusive support for all prominent and emerging platforms. Moreover, it allows 10 simultaneous device connections, which means all your devices are covered with one subscription.
NordVPN Pros
Handy SmartPlay for geo-unblocking and secure streaming
NordLynx protocol for fast streaming and security
Offers specialty servers, including streaming-optimized servers
Comes with native app support for Apple TV
Large network of over 6400 servers in 111 countries
Supports 10 simultaneous device connections
NordVPN Cons
Steep learning curve for new users
Pricing is higher than competitor products
NordVPN Pricing
NordVPN charges $3.59/month (when billed annually) for its Basic plan. While the Basic plan lacks advanced features, the Plus plan checks all the boxes, except for the 1TB cloud storage available on the Complete plan.
Check out our NordVPN Vs. ExpressVPN comparison if you want a premium VPN.
6. CyberGhost VPN
Best User-Friendly VPN for Smart TV
CyberGhost VPN is an easy-to-use Smart TV VPN with a handy favorites tab for easier access to selected servers. It stands out with its dedicated streaming servers, which offer excellent speeds and result in uninterrupted streaming.
CyberGhost VPN has 11,500 servers in 100 countries, all focused on bypassing geo-restrictions associated with streaming services. It features the latest VPN protocols and is paired with industry-standard encryption algorithms for secure and private streaming. In addition to basic settings, you get App Split Tunneling and Wi-Fi protection on all supported Smart TVs.
One of CyberGhost’s key benefits is connecting up to 7 devices simultaneously. Thus, you can easily secure your Smart TV and other devices without sacrificing speed or performance.
For privacy, CyberGhost is based in Romania and follows a strict no-logs policy. It is compatible with most Smart TVs and major prominent platforms, providing decent and reliable coverage.
CyberGhost VPN Pros
Dedicated streaming servers for optimal streaming speeds
Large network of 11,500 servers in 100 countries
Comes with Wi-Fi protection
Offers 7 simultaneous device connections
CyberGhost VPN Cons
1-year plan isn’t available
No native Apple TV app
Lacks VPN kill switch
CyberGhost Pricing
CyberGhost’s price starts at $6.99/month for the 6-month plan. Add-ons are available at an extra cost that varies depending on the platform.
7. IPVanish
Best VPN for Beginners
IPVanish is an ideal choice for beginners as all actions on it are straightforward. It offers secure and private streaming with the latest VPN protocols and industry-standard encryption algorithms.
IPVanish follows a strict no-logs policy and has 2,400+ servers in over 130 locations. This allows you to access a wide range of content from anywhere in the world. All servers are streaming-ready and resistant to ISP throttling.
While IPVanish offers many core and advanced features on prominent platforms, it falls short on Smart TVs by offering only split tunneling and a VPN status indicator.
IPVanish, unlike other VPNs, offers unlimited simultaneous device connection support. Like others, it is compatible with all major platforms but offers a native app for Apple TV (tvOS).
IPVanish Pros
Streaming-ready 2,400 servers in over 130 locations
Comes with unlimited simultaneous device connections
Offers Native app for Apple TV
IPVanish Cons
Lacks VPN kill switch
Based in the US
IPVanish Pricing
IPVanish pricing starts at $3.33/month for a 1-year plan. If you want additional IPVanish services, consider choosing IPVanish Advanced, which starts at $4.49/month for an annual plan.
8. Private Internet Access (PIA)
Best VPN with Unlimited Device Connections
PIA’s availability of a 10-Gbps server network makes it an ideal choice for streaming. Its strong encryption and VPN protocols maintain superior privacy and security while streaming. Moreover, its no-logs policy ensures that your data isn’t stored.
PIA is known for its extensive server network, which includes 35,000 streaming-ready servers spread across 91 countries, allowing access to geo-restricted libraries of streaming services.
As ISP throttling is one of the main reasons for streaming interruption, PIA overcomes it by blocking local networks. Its standout MACE Ad-blocker, available on most Smart TVs, further enhances streaming by blocking intrusive ads.
For compatibility, PIA shines with its native app support on all major smart TVs (Android TV, Apple TV, and Amazon Fire TV). It also offers unlimited simultaneous device connections, so you aren’t limited to streaming on Smart TVs.
PIA Pros
Massive server network of 35,000 servers in 91 countries
Comes with MACE Ad-blocker for blocking intrusive ads
Supports unlimited simultaneous device connections
Offers native app support for Apple TV
PIA Cons
Lacks VPN kill switch
Based in the US
Lacks annual plan
Private Internet Access Pricing
PIA pricing starts at $7.50/month for a 6-month plan.
9. Mullvad
Best Open-Source VPN for Smart TV
Mullvad VPN is a privacy-first VPN provider that provides open-source commitment and transparency. It uses the OpenVPN and WireGuard protocols, along with AES-256 encryption, to keep you secure and private while streaming.
One of Mullvad’s standout features is its MultiHop functionality, which routes your internet traffic through multiple servers. Based in Sweden, it has a server network of 600 servers in 40+ countries, ensuring solid server coverage to unblock streaming platforms.
Mullvad comes with all the core features needed for security and privacy. Additionally, the strict no-logs policy ensures that none of your data is ever stored. While it is available on Windows, macOS, Linux, Android, and iOS, it falls short with Smart TVs, needing to sideload. This causes incompatibility issues and isn’t meant to be used by beginners.
Mullvad Pros
Open-source VPN with transparency and privacy commitment
Offers MultiHop functionality for enhanced privacy
Includes core security features
Consistent pricing across all plans
Mullvad Cons
Requires sideloading – has incompatibility issues.
Lacks discount on longer plans
Small server network
Offers only 5 simultaneous device connections
Mullvad Pricing
Mullvad Pricing remains consistent at $5.42/month, irrespective of the plan purchased.
How do you install and use a VPN on a Smart TV?
Below is a detailed guide on how to install and use a VPN on your Smart TV, along with different methods to get you covered.
1. Install a VPN Directly on Your Smart TV
Most VPNs now offer native apps, making it simple to install a VPN on your Smart TV. The steps are generally the same across different platforms, so here’s how you can easily get started:
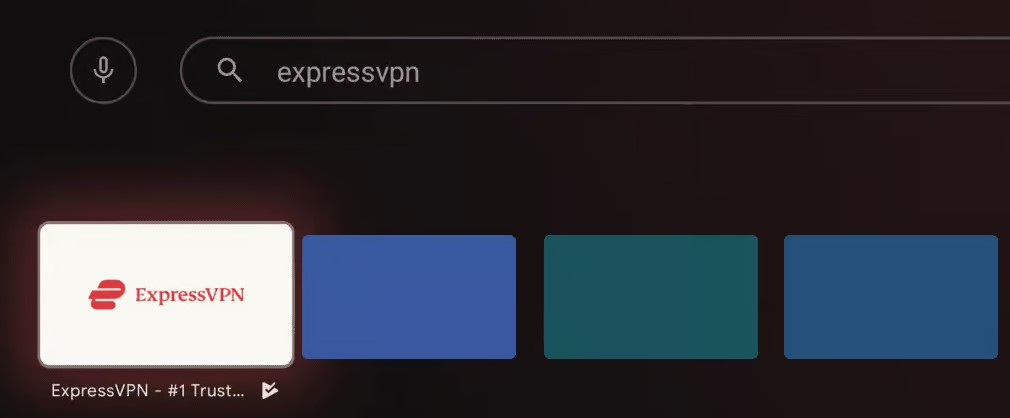
- On platforms like Android TV and Apple TV, you can open the respective store and search for the VPN app. For newer Android TV or Amazon Fire TV, you can use the search function directly to find the app.
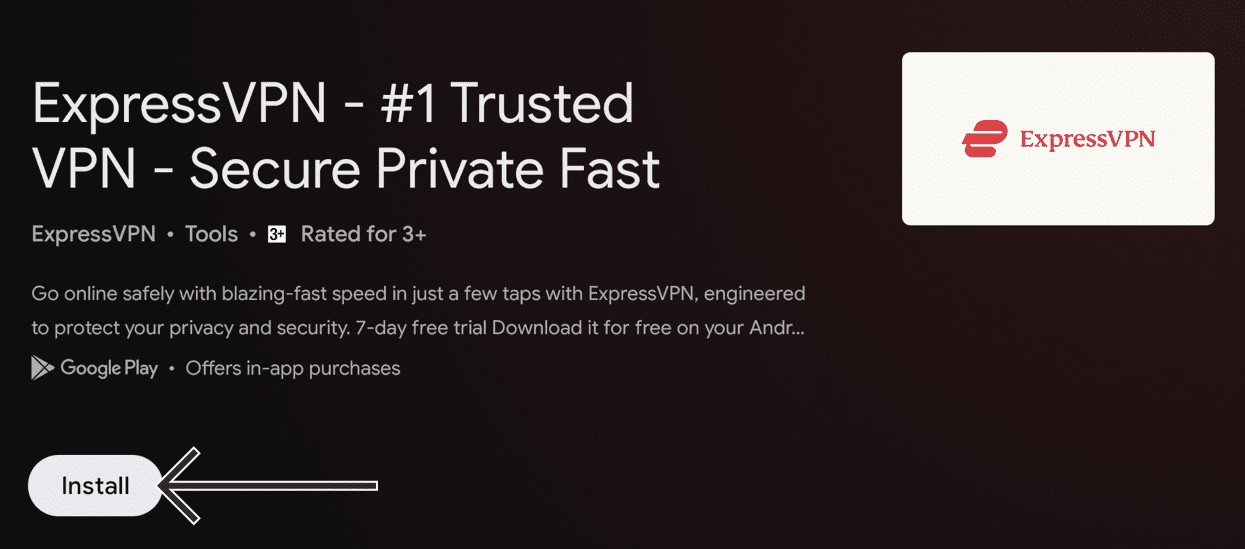
- Once you’ve found the VPN app, click on the dedicated button to start the installation process.
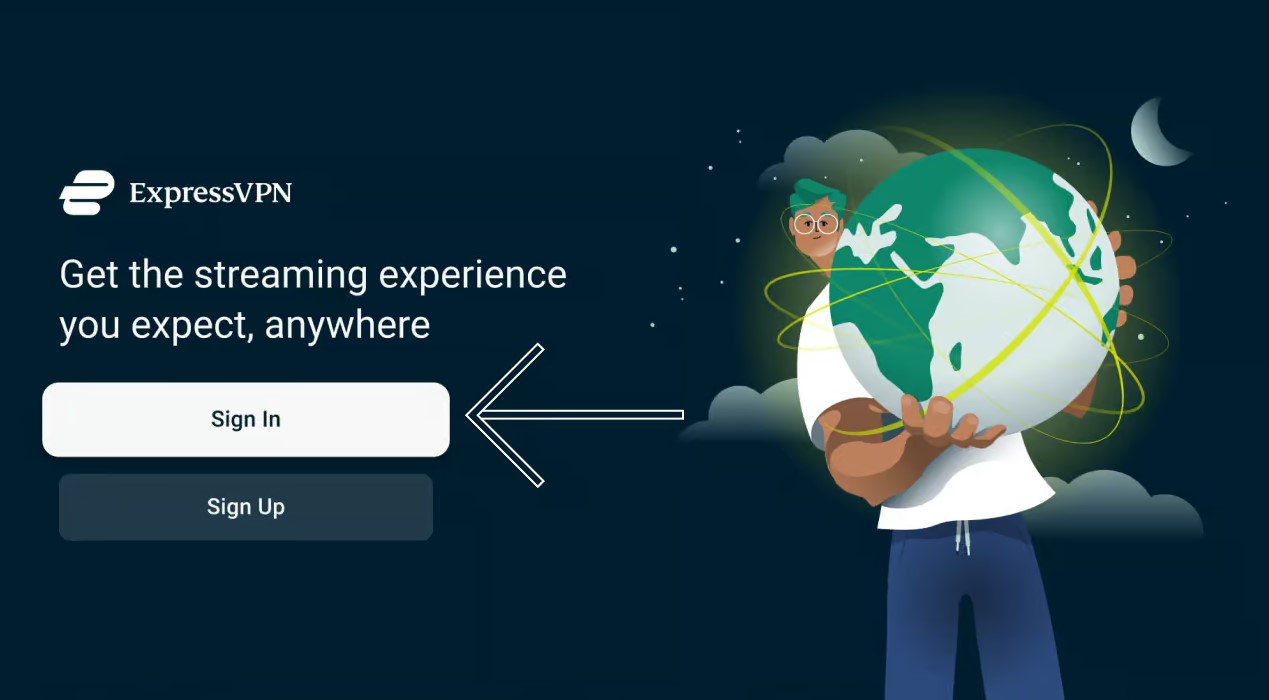
- After the installation is complete, open the app, sign in with your credentials, and connect to a server of your choice for secure streaming.
2. Install a VPN on Your Router
Installing a VPN on your router is slightly complex, as the steps will vary depending on the router model you’re using. Below are some general steps you can follow to set up a VPN on your router:
- Download the VPN Firmware: Visit your VPN provider’s website and download the firmware for your router model.
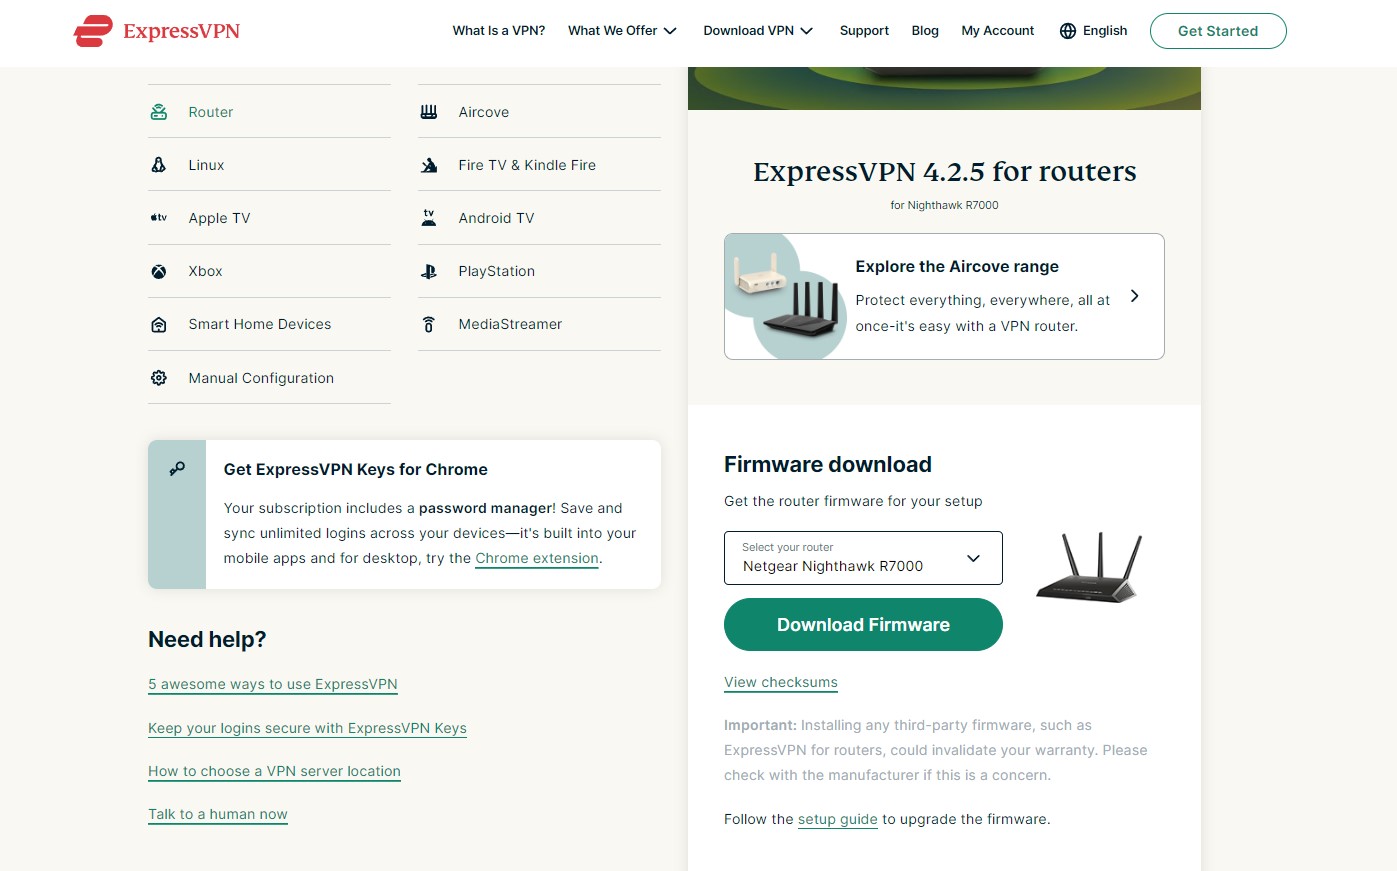
- Connect Your Router to the Internet: Ensure your router is connected to the Internet via a modem or another router.
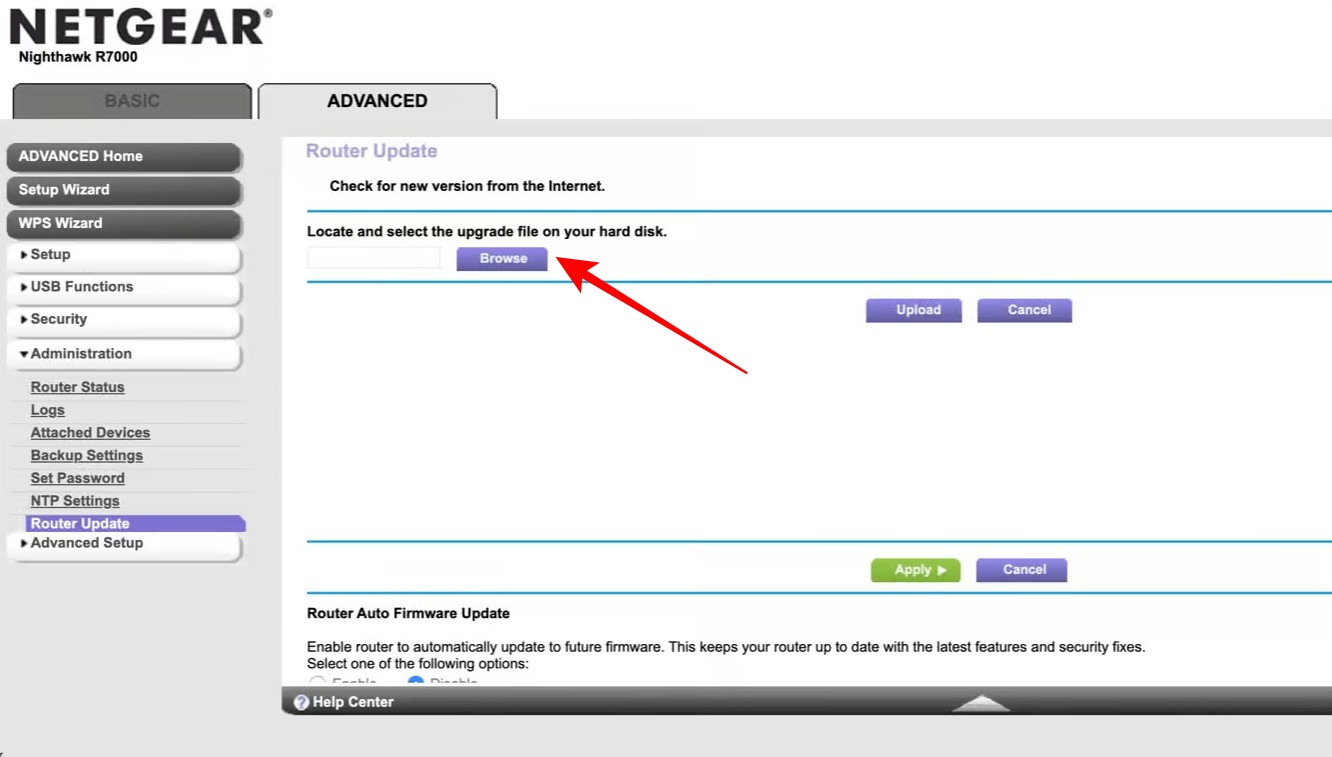
- Install the VPN Firmware: You can access your router’s admin page through your browser (e.g., 192.168.1.1), go to the firmware upgrade section, and upload the downloaded VPN firmware.
- Connect to the VPN Router: Once the installation is complete, connect your devices, including your Smart TV, to the router running the VPN.
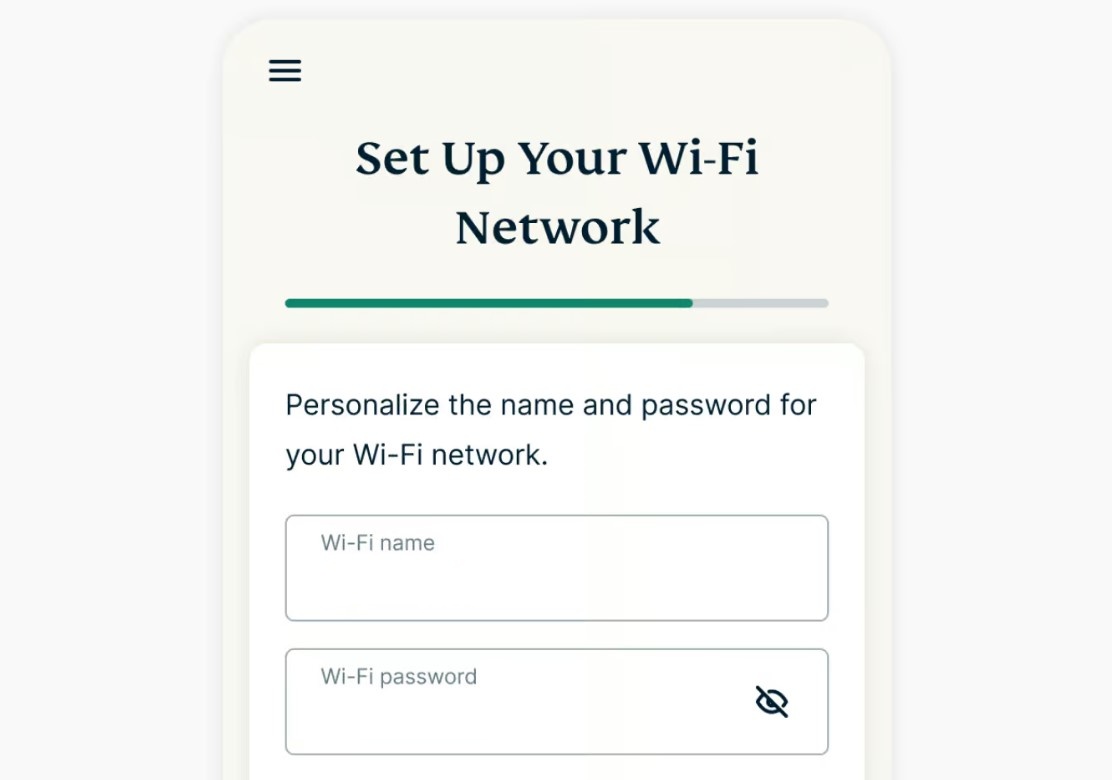
- Complete the VPN Setup: Sign in to your VPN account through the router’s admin page and follow the on-screen instructions to finish the setup.
Note: It’s ideal to contact your VPN provider’s customer support for assistance when installing a VPN on your router. You can also check out the knowledge base or guides for reference.
3. Use VPN on Smart TV using Hotspot
If you don’t have a compatible router or can’t install a VPN on your router, there’s an easier alternative. Using a Windows hotspot, you can share your VPN-connected network through a hotspot using Internet Sharing.
Note: For the demonstration, we used Windows 11 and ExpressVPN. Regardless of the VPN you use, do not connect to it until the final step.
The steps to use VPN on your Smart TV through a hotspot are shown below.
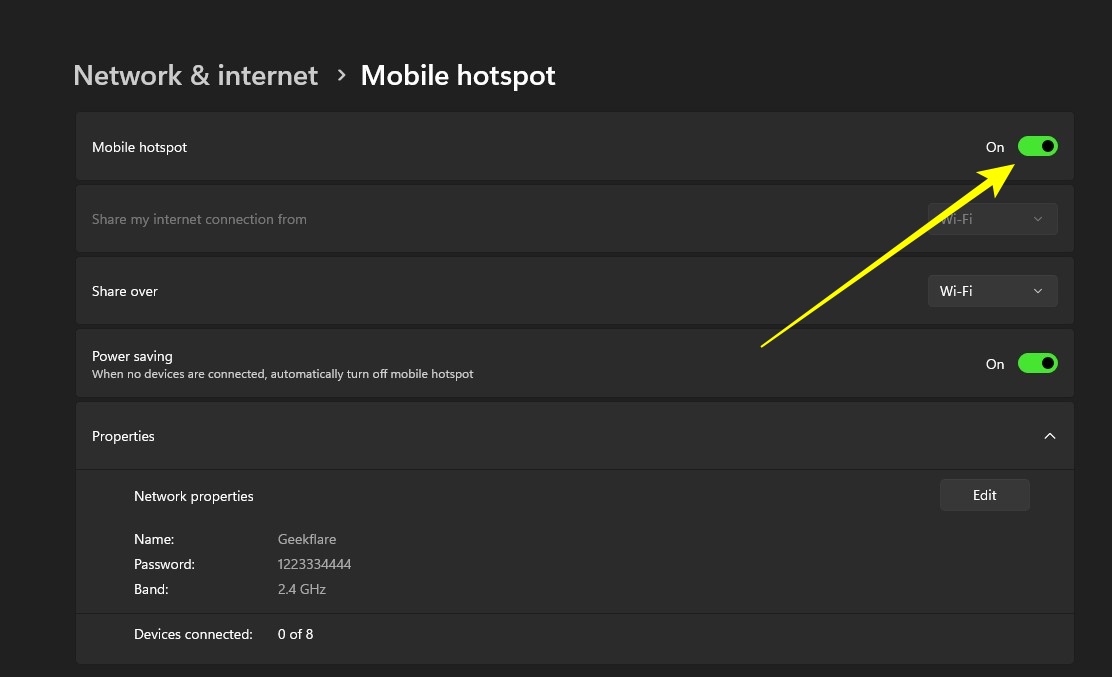
- Turn on Mobile Hotspot: Navigate to Settings > Network and Internet > Mobile Hotspot, and turn on Mobile Hotspot toggle.
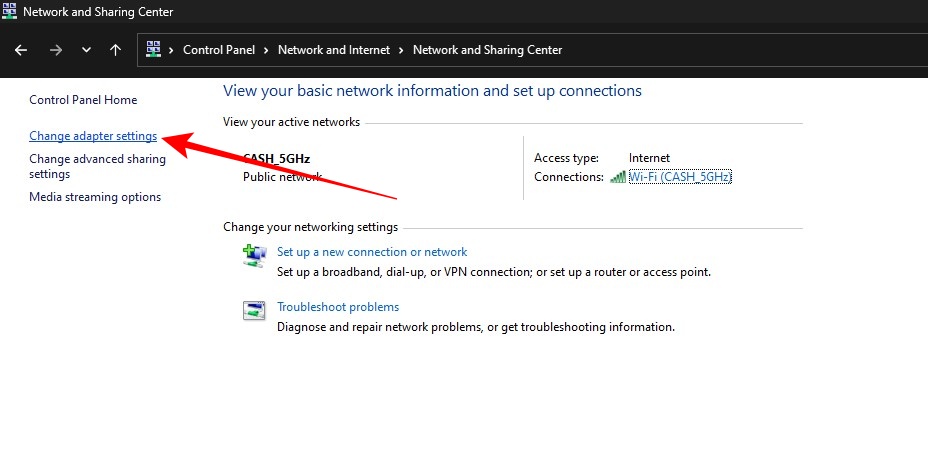
- Open Network Sharing Settings: Go to Control Panel > Network and Internet > Network and Sharing Center and click Change adapter settings.
- Check Mobile Hotspot Connection: Ensure your Mobile Hotspot is successfully turned on. It should be labeled as Local Area Connection and use the Microsoft Wi-Fi Direct Virtual Adapter.
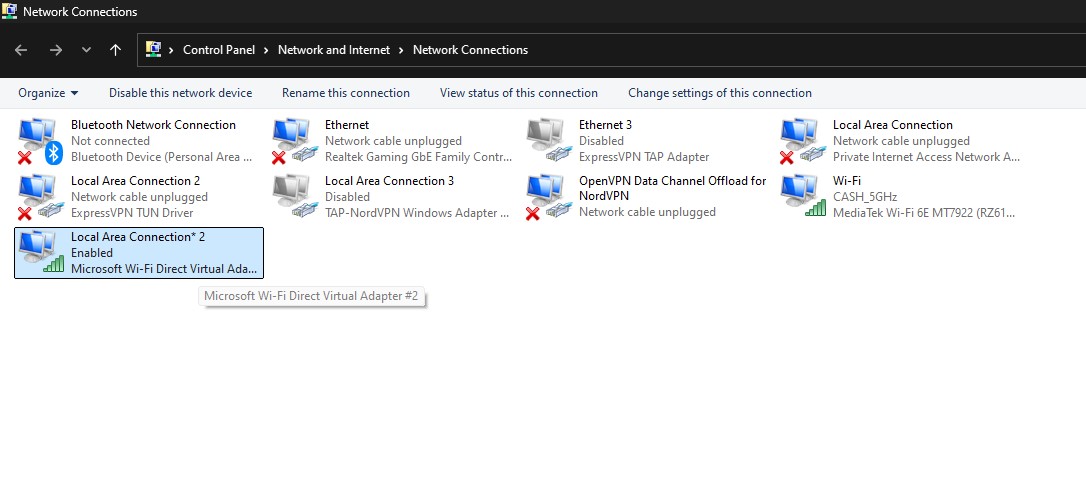
- Configure the VPN Adapter: Locate your VPN’s TAP adapter, right-click it, and select Properties. Go to the Sharing tab, check both boxes, and select the network created by your hotspot (Local Area Connection).

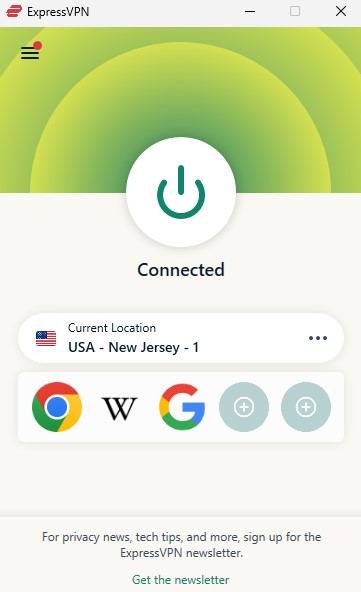
- Connect to a VPN Server: Finally, open your VPN and connect to a server. Your VPN-protected network will now be shared across the hotspot.
If everything is set up correctly, your Smart TV will be connected to the VPN network. To verify, check the IP address on both devices, and they should remain the same.
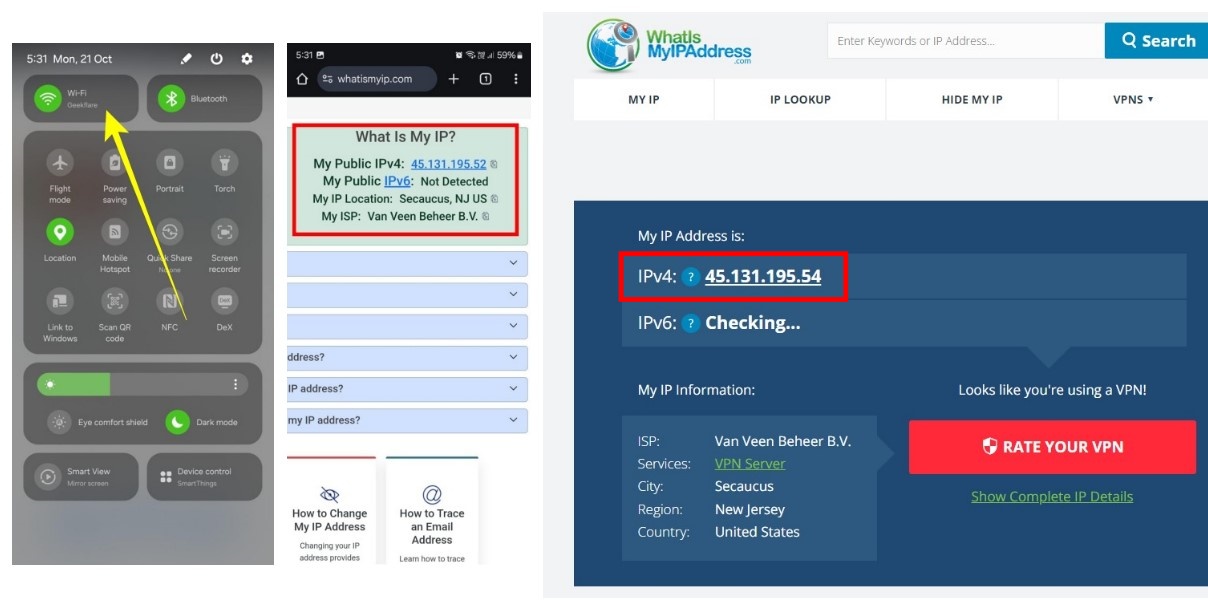
(To test, the hotspot created on Windows is connected to a smartphone, and as expected, the IP found in the results on both devices was the same — meaning that the VPN network is successfully shared over the Windows hotspot).
How to Choose the Right VPN for Smart TV
There are 7 crucial aspects to consider when choosing a VPN for your Smart TV, and they are listed below.
- Platform Compatibility: Ensure the VPN is compatible with your Smart TV or streaming device. Whether you’re using Android TV, Amazon Fire TV, Apple TV, or another device, having a VPN that offers native apps for these platforms will simplify the setup process and offer the best streaming experience without complicated configurations.
- Streaming Service Unblocking: To enjoy a wide range of content, choose a VPN with obfuscated service or special protocols that bypass restrictions set by major streaming services like Netflix, Hulu, BBC iPlayer, Disney+, and others. Several VPNs, such as Namecheap FastVPN, Proton VPN, NordVPN, etc., offer streaming service unblocking.
- Speed Loss: Streaming in FHD/4K requires fast internet speeds, and a VPN can sometimes slow the buffer speeds. It’s important to select a VPN that offers minimal speed loss and overcomes internet connection throttling by the ISP. Focus specifically on VPNs with servers optimized for streaming and unlimited streaming speeds to ensure smooth playback without buffering.
- Server Network: A larger server network means more options to bypass geo-restrictions and access content from different regions. VPNs with a wide range of server locations will provide better flexibility in choosing the region you want to connect to, unlocking content from multiple countries.
- Security and Privacy: A strong VPN should not only unblock content but also protect your data. The best VPN services have robust encryption standards, core and advanced security features, and a strict no-logs policy to protect you when streaming on your Smart TV.
- Customer Support: A VPN provider with solid customer support can make all the difference, especially if you’re new to using VPNs or encounter any issues. Look for services that offer 24/7 support through live chat or email to help with quick troubleshooting and setup assistance.
- Price: While price is important, don’t make it your primary deciding factor. Focus on value over cost by looking at each plan’s features. Consider whether the VPN has over 6 simultaneous device connections, streaming/obfuscated servers, and core security/privacy features with unique offerings.
Choosing the right VPN for your Smart TV ultimately comes down to balancing streaming capabilities, privacy, price, and ease of use. Consider VPNs that offer native apps for your platform, excellent streaming speeds with streaming-optimized servers, over 6 simultaneous device connections, and a wide server network to unlock geo-blocked content.
Look for core/advanced security features, unique offerings curated for streaming, and a no-logs policy to keep your data safe. Finally, select the one that fits your requirements.
If you’re unsure, try out the free trials or money-back guarantees offered by most VPNs to find the best fit for your needs.