Image upscaling transforms low-resolution photos into clear, vibrant and captivating visuals. This process also boosts color, contrast and vibrancy for a superior viewing experience.
Image upscaler is a helpful tool for photographers and content creators, offering benefits such as increased resolution, adaptability for high-resolution screens, and an improved overall viewing experience.
While the traditional image upscaler fails to generate clarity and increase new details, picking a tool with the implemented AI model matters a lot. It’s possible to upscale low-resolution images to 4K, 8K, or even 10k with AI image enhancer software like Winxvideo AI.
Photoshop and Lightroom also do a decent job at image upscaling, although the final result may not be the best for most beginners.
Let’s take a look at how to upscale images without losing quality using image upscaling software like Winxvideo AI, Adobe Photoshop, Adobe Lightroom and GIMP.
1. Upscale Image to 4K/8K/10K with Winxvideo AI
Winxvideo AI Overview

Despite its video-centric name, Winxvideo AI offers powerful AI-driven tools for image enhancement, upscaling, and super-resolution.
Boasting the capacity to upscale and enhance images up to 10K, it distinguishes itself by adopting advanced AI models trained on diverse subjects for optimal upscaling while preserving intricate details.
With the capability to upscale images up to 4X and support for resolutions up to 10K, Winxvideo AI provides you with ample flexibility for various applications, including printing and digital use.
The Winxvideo AI image upscaler leverages sophisticated AI models trained on millions of image pairs, ensuring superior upscaling of low-resolution images while retaining fine details. The resulting images showcase sharper edges, realistic portrayal of textures like hair, and stunning scenery clarity.
Beyond pixel augmentation, Winxvideo AI automatically addresses common image issues by deblurring, denoising, and overall enhancement. The High-Quality Engine guarantees impressive results, enhancing overall image aesthetics. The inclusion of GPU hardware acceleration significantly boosts image processing speed, ensuring a swift and efficient upscaling process.
Winxvideo AI image upscaler works on Windows and caters to everyone with its user-friendly interface, making the upscaling process accessible to both novices and experienced users.
How to Upscale An Image to 4K with Winxvideo AI

Use the following steps to learn how to get started with Winxvideo AI.
Step 1. Free download and install Winxvideo AI on your computer. Then launch Winxvideo AI.
Step 2. Click on the “Image AI” button on the main interface to open the image upscaling window.
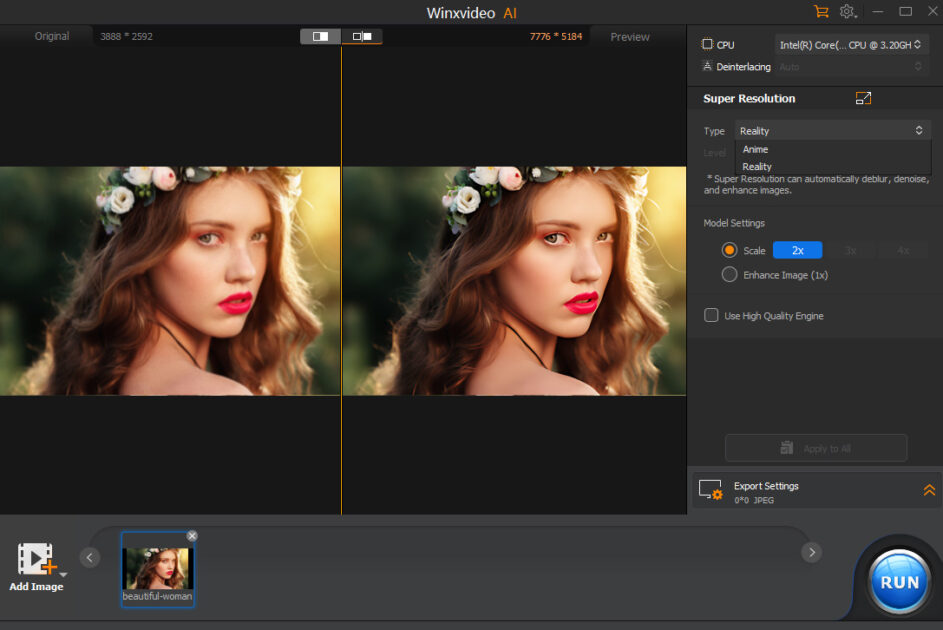
Step 3. Select “Type” and “Model Settings”. Select Reality or Anime under the “Type” option. Reality Mode works for all types of images except animated cartoon images. If it’s an animated cartoon image, select Anime Mode. Under Anime Mode, you can select the denoise level.
Scale: increase the image resolution by 2X, 3X, or 4X. It allows you to upscale images to 4K, 8K, or even 10K.
Step 4. Adjust the export settings. Set the output image format, JPG or PNG, quality slider (0%-100%), and location to store the upscaled image.
Step 5. Click the “RUN” button at the bottom to start to upscale the image to a higher resolution with enhanced quality.
2. Upscale An Image without Losing Quality in Photoshop
Adobe Photoshop Overview
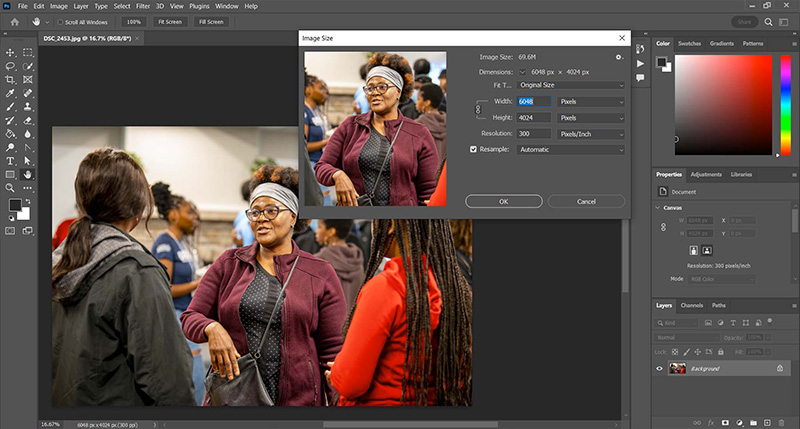
Adobe Photoshop introduces its AI feature, Super Resolution, designed to quadruple the number of pixels in your photos. Although particularly beneficial for revitalizing photos captured with older cameras, it proves its worth even with modern high-res cameras, especially in tasks like working with tightly cropped pictures.
It employs an artificial intelligence upsampling algorithm, trained on millions of photos, promising superior results in upscaling images. While it excels with raw files straight from the camera, its adaptability extends to other formats like JPEGs, PNGs, and GIFs. The feature is currently limited to images smaller than 500 megapixels.
However, it’s important to note that while its image upscaling may not perfectly emulate the resolution it claims. The full version of Photoshop, coupled with the Adobe Express Premium plan, demands a subscription fee of US$22.99 per month. This can be a hefty investment, especially for occasional users or those on a budget.
Photoshop’s approach to upscale images tends to be manual and intricate. While this allows for unparalleled customization, it lacks the quick and one-click fixes offered by other programs. Simple adjustments on other photo editing software may turn into a series of layer applications, masks, and opacity tweaks in Photoshop.
How to Upscale Low-resolution Images in Adobe Photoshop

Follow these steps to learn how to upscale an image in Photoshop using its Super Resolution feature.
Step 1. Open a raw file to start the Super Resolution process. The magic begins as raw files automatically unfold in the Adobe Camera Raw tool.
Step 2. Right-click on the image and opt for the Enhance feature. On macOS, use the Command-Shift-D shortcut, while on Windows, employ Control-Shift-D. Go to the Raw Details setting to enhance raw data.
To the right of Raw Details, spot the Super Resolution checkbox. Check it and maneuver around the preview image to witness the anticipated results.
Use the magnifying glass icon to zoom out for a broader view, then click back on the area you wish to scrutinize. Once satisfied, hit the Enhance button.
Step 3. For a swift move, press and hold Option on MacOS or Alt on Windows while clicking the Enhance option. This skips the Enhanced Preview dialogue box, streamlining the process.
Step 4. Fine-tune the image upscaling with precision. Zoom in closely and use the scales on the tool’s right edge to refine aspects like sharpness, texture, and noise removal. This meticulous adjustment ensures that your upscaled image meets your standards.
3. Upscale An Image to High Resolution with Lightroom
Adobe Lightroom Overview
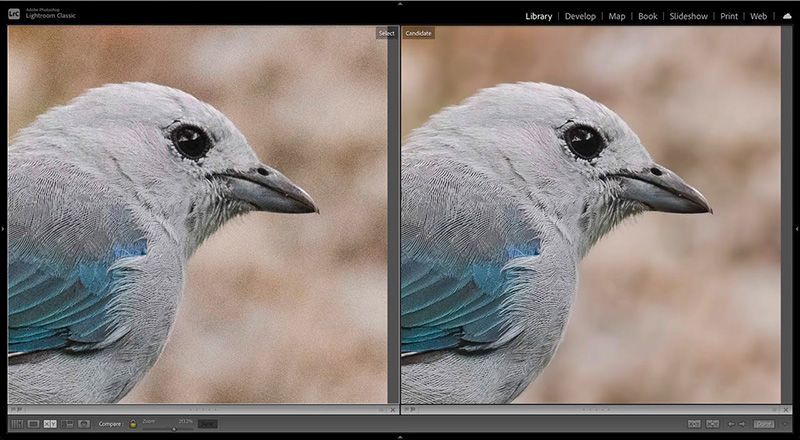
Adobe Lightroom’s Super Resolution is a practical tool suitable for upscaling various image types, particularly useful for scenarios like cropping and revitalizing older images, offering versatility in image enhancement. Its Super Resolution generates significantly larger files.
For example, a 10-megapixel RAW file becomes over 144 megabytes—sixteen times larger than the original. This can lead to rapid depletion of disk space, especially with higher-megapixel files.
The enhancement algorithm takes 10–20 seconds per image, adding to the workflow time. This may become noticeable when working with batches of images. While Super Resolution enhances sharpness in already-sharp images, it cannot rectify focus issues.
It fails to create sharpness where it was lacking initially. You will be disappointed if expecting it to salvage out-of-focus shots.
The image upscaling process in Lightroom also requires substantial GPU power, which might pose a challenge if you have older hardware or less powerful systems.
How to Upscale An Image in Adobe Lightroom

Step 1. Select an image in the Develop module for upscaling.
Step 2. Head to Photos > Enhance in the top menu bar. Alternatively, right-click (or Option-click on a Mac) and choose Enhance from the pop-up menu. For keyboard enthusiasts, use the Ctrl+Alt+I shortcut (Ctrl+Option+I on a Mac).
Step 3. Choose Super Resolution in the Enhance dialog box. Click and hold on to the preview to observe the image’s pre-upscaling appearance. Additionally, you have the flexibility to click and drag the cursor across the preview, allowing exploration of different areas within the upscaled image.
If using a RAW file, the Raw Details option is available, providing additional benefits for RAW files. However, this doesn’t apply to JPEG files. The Create Stack option combines both the original and enhanced images as a single stack, but users can opt to keep them separate.
Step 4. When satisfied with the preview, click Enhance. The process takes a few seconds, with an estimated time within the Enhance dialog box.
4. Upscale An Image with GIMP (Free & Open Source)
GIMP Overview
GIMP’s Image Upscaler excels in enlarging images without losing quality, thanks to advanced interpolation algorithms for superior results. The customizable interface, extensibility through plugins, and cross-platform availability contribute to GIMP’s status as a free alternative often referred to as “Free Photoshop.”
Being a free and open-source image editor, GIMP provides essential features for image manipulation, composition, and artwork creation without the need for a subscription. It offers a customizable user interface, allowing users to tailor the workspace to their preferences.
GIMP may experience freezing or slowdowns when dealing with large image file sizes, requiring multiple restarts and causing frustration during extensive editing sessions. The online version of GIMP needs improvement, especially in terms of uploading and exporting multiple formats. You may encounter limitations in the online editing experience.
How to Upscale An Image for Free with GIMP

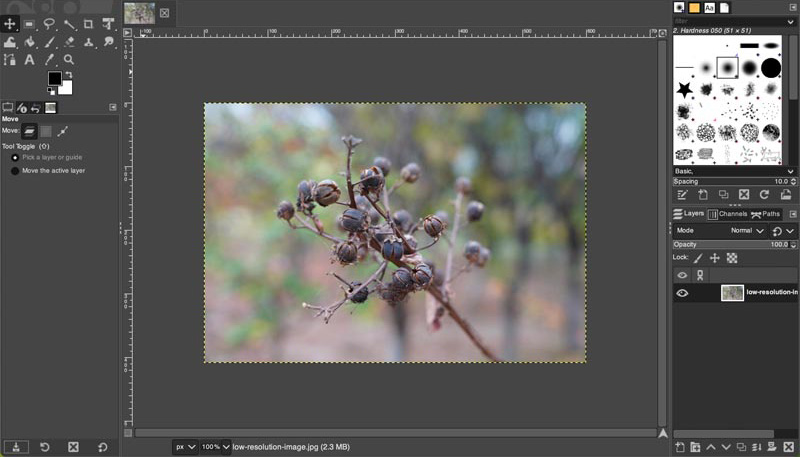
GIMP’s Image Upscaler is to increase the size of an image. Here’s how to upscale an image without losing quality with GIMP.
Step 1. Launch GIMP on your computer and open the image you’d like to upscale.
Step 2. Head to the top menu and select “Image,” followed by “Scale Image.” This action prompts a new window to appear.
Step 3. Within the newly opened window, input the desired dimensions in the Width and Height fields. Check the “Keep aspect ratio” option to maintain the image’s original proportions, preventing distortion. Tailor the dimensions according to your specific requirements.
Step 4. Click on the interpolation options provided, including None, Linear, Cubic, or Sinc. Make a judicious selection based on the desired outcome for your upscaled image.
Step 5. With all parameters set, click the “Scale” button to initiate the resizing process to upscale the image to the new dimensions.
Step 6. Navigate to “File” and choose “Export As…”. Enter a file name and select the preferred format before clicking “Export” to cement the changes made to your newly upscaled image.
Conclusion
Whether you’re looking to upscale an image for printing, digital displays, platform requirements, or any other purpose, the above methods for upscaling images should make the task easier.
However, if the source image has a very low resolution or if the upscaling process is not executed properly, it can lead to a loss of image quality. To get better-upscaled images, you need a great image upscaler and enhancer with techniques like super-resolution and AI models.
Photoshop and Lightroom are complex pro-level photo upscaling apps. Winxvideo AI combines simple-to-use features with powerful capabilities, making it overall a joy to use. If you are new to photo editing, consider software that’s designed for beginners and is easier to learn initially.

