
Text-based content alone may not provide enough information for AI agents to understand a website’s visual structure.
For tasks such as checking webpage layouts or comparing website designs, agents also need website visuals. Website screenshots provide these visuals for AI applications to analyze.
LangChain agents can be connect third-party screenshot tools to can capture webpage images and process them. In this article, we will explore how to give an agent screenshot capabilities using Python.
How to Connect Screenshot Tools to a LangChain Agent
LangChain agents can use external tools to perform tasks beyond text processing. You can connect Geekflare’s screenshot tool to an agent so it can capture website images and use them as part of its workflow.
Geekflare provides a Python package called langchain-geekflare that connects its screenshot capabilities to LangChain.
The GeekflareScreenshot tool can capture full-page or viewport screenshots and supports options such as device emulation, image formats, CSS selectors, and dark mode.
Set Up the Python Environment
Before creating the agent, let’s install the required package and configure the API keys.
Prerequisites
Make sure you have:
- Python 3.10 or later.
- A Geekflare account and API key.
- An Anthropic API key for Claude.
- Basic knowledge of Python and LangChain.
Step 1: Install the Python Package
Open your terminal and run:
pip install -U langchain-geekflareThis installs the Geekflare integration for LangChain.
Step 2: Configure Your API Keys
Get your API key from the Geekflare dashboard and your Claude API key from the Anthropic Console.
Set both as environment variables.
For macOS or Linux:
export GEEKFLARE_API_KEY="YOUR_GEEKFLARE_API_KEY"
export ANTHROPIC_API_KEY="YOUR_ANTHROPIC_API_KEY"
For Windows PowerShell:
$env:GEEKFLARE_API_KEY="YOUR_GEEKFLARE_API_KEY"
$env:ANTHROPIC_API_KEY="YOUR_ANTHROPIC_API_KEY"
Replace the placeholders with your actual API keys. Keep them private and avoid adding them directly to your Python code.
Step 3: Capture a Website Screenshot with Geekflare
Before connecting the screenshot tool to a LangChain agent, let’s see how to use it directly. This helps us understand the screenshot options and the output returned by Geekflare.
Create a Python file named screenshot.py and add the following code:
from langchain_geekflare import GeekflareScreenshot

screenshot = GeekflareScreenshot()

result = screenshot.invoke({
    "url": "https://news.ycombinator.com/",
    "full_page": True,
    "device": "desktop",
    "type": "png",
    "theme": "light"
})

print(result)
Here, we’re capturing the full Hacker News webpage in PNG format using a desktop layout and light theme.
Understanding the screenshot parameters
Geekflare provides several options to customize how a webpage is captured.
| Parameter | Description | Example |
|---|---|---|
url | Website URL to capture. | https://news.ycombinator.com/ |
full_page | Captures the entire scrollable webpage. | True |
device | Selects the device layout. | desktop or mobile |
type | Sets the image format. | png, jpeg, webp |
theme | Sets the webpage color scheme. | light, dark, auto |
selector | Captures a specific webpage element using a CSS selector. | .header |
delay | Waits for a specified number of seconds before capturing. | 3 |
highlight_links | Highlights clickable links, buttons, and input fields. | True |
You can also use options such as block_ads, hide_cookie, skip_captcha, disable_animations, and add_timestamp to customize the capture.
Understanding the output
Run the Python file:
python screenshot.pyGeekflare returns a JSON response containing the screenshot status, capture details, and a data field with the hosted image URL.
For example, the response includes:
{
    "apiStatus": "success",
    "apiCode": 200,
    "data": "https://cdn.geekflare.com/...png"
}
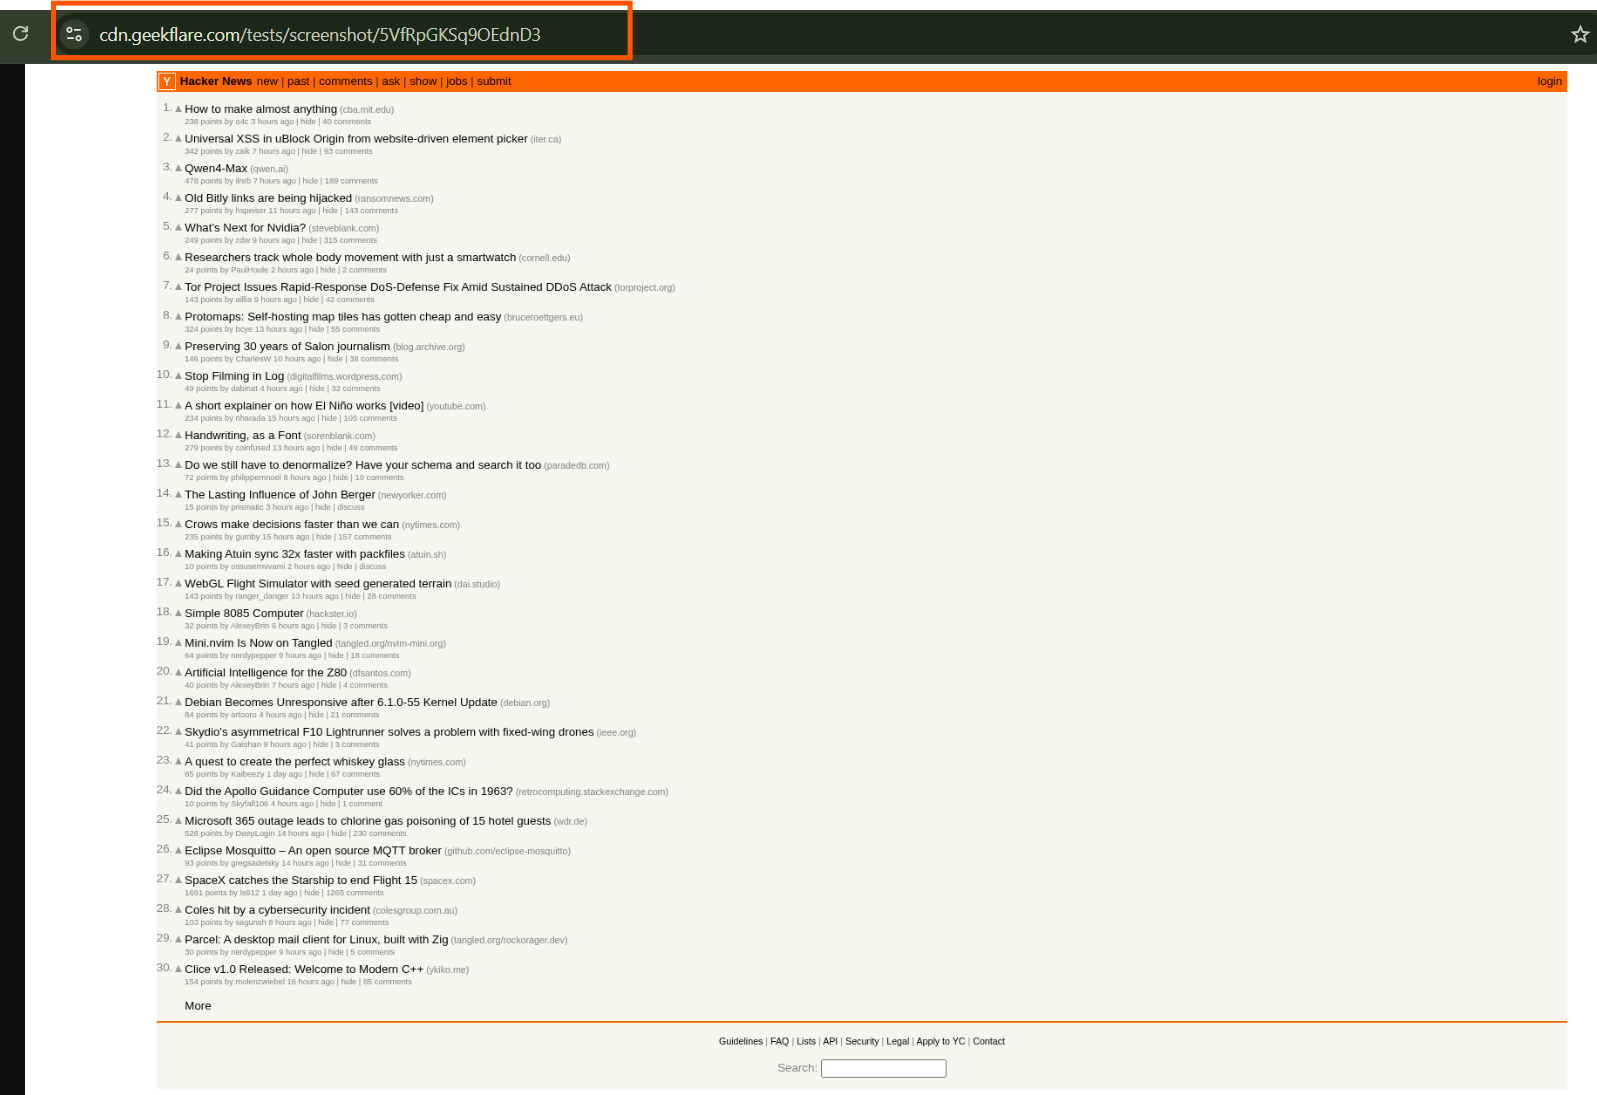
Open the returned image URL in your browser to view the captured webpage.
The direct tool call lets you capture a website screenshot using Python. Next, we’ll connect this tool to a LangChain agent so it can request screenshots based on a user’s prompt.
Step 4: Connect the Screenshot Tool to a LangChain Agent
You can also let a LangChain agent decide when to capture a screenshot based on the user’s request. Add GeekflareScreenshot to the agent’s tool list and provide a prompt describing the capture task.
from langchain.agents import create_agent
from langchain_geekflare import GeekflareScreenshot

agent = create_agent(
    model="anthropic:claude-haiku-4-5",
    tools=[GeekflareScreenshot()]
)

response = agent.invoke({
    "messages": [
        {
            "role": "user",
            "content": "Capture a full-page PNG screenshot of https://news.ycombinator.com/ using a desktop layout and return the screenshot URL."
        }
    ]
})

print(response["messages"][-1].content)
The agent interprets the prompt, calls Geekflare’s screenshot tool with the requested options, and returns the result.
Step 5: Run the Agent
Save the code as screenshot_agent.py and execute:
python screenshot_agent.pyThe response includes the screenshot URL. Open it in your browser to view the captured webpage.
Note:
This example retrieves the screenshot URL. To analyze the screenshot’s visual content, you need to pass the image to a vision-capable model as an additional step.
Here is the output Screenshot:
Frequently Asked Questions
Can LangChain capture website screenshots?
Yes. LangChain agents can use external screenshot tools, such as Geekflare’s GeekflareScreenshot, to capture webpage images.
Can I capture a full-page screenshot using Geekflare?
Yes. Set the full_page parameter to True to capture the entire scrollable webpage.
Which image formats does Geekflare support?
Geekflare supports PNG, JPEG, and WebP formats for website screenshots.
Can I capture screenshots of specific webpage elements?
Yes. You can use the selector parameter with a CSS selector to capture a specific element on a webpage.
Conclusion
Connecting screenshot tools to LangChain gives AI agents access to visual information from websites. Geekflare makes this possible through its GeekflareScreenshot tool, which lets developers capture full-page screenshots and customize them using different capture options.
You can use the tool directly in Python or connect it to a LangChain agent to capture screenshots based on user prompts. This provides a practical way to add website screenshot capabilities to your AI workflows.