

You probably already know how much video matters. If you’re here, you’re likely trying to pick between Movavi and Canva.
Let me start with this, they are very different tools.
While Canva has grown its video side a lot lately, it still works primarily around design. You can generate clips, add overlays, sync cuts to a beat, and do a few more little things, but the DNA is still design tool that also does video.
Coming over to Movavi, it flaunts “video” as the first point on its resume. And that now leads with customizable templates and one-click AI tools sitting right next to the classic timeline editing.
So, there isn’t much of a Canva vs. Movavi debate for video editing because Movavi is in a different league. Similarly, Canva is at a whole new level when it comes to images.
Still, we’ll compare them for both video and images. By the end, you’ll know which one fits your use case.
Movavi vs. Canva: For Video
To make it interesting, I took a royalty-free sample video from Pexels and tried to get creative with both tools. The results show what each one can do.
Movavi Video Editing
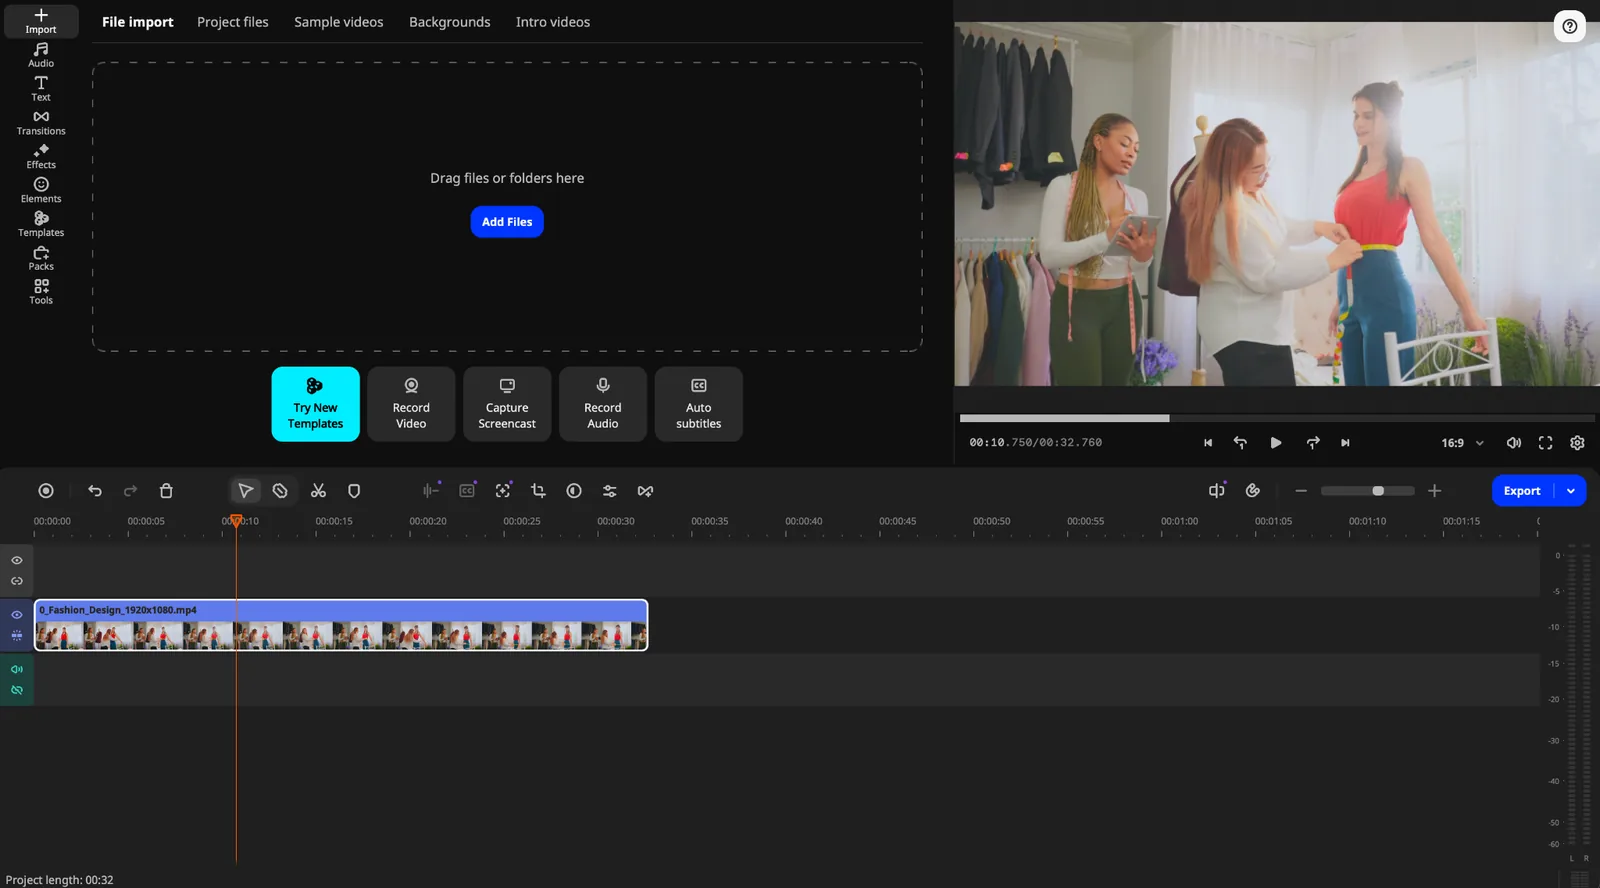
The first thing I noticed about Movavi Video Editor‘s interface is that it doesn’t look scary at all. It feels like an editor that even a beginner can use. All menus are clearly labeled, all of them are right there in the open, so finding just the feature you need is always a couple of clicks away.
I think it’s absolutely possible to finish a first project in Movavi in less than an hour even if you’ve never opened a video editor before.
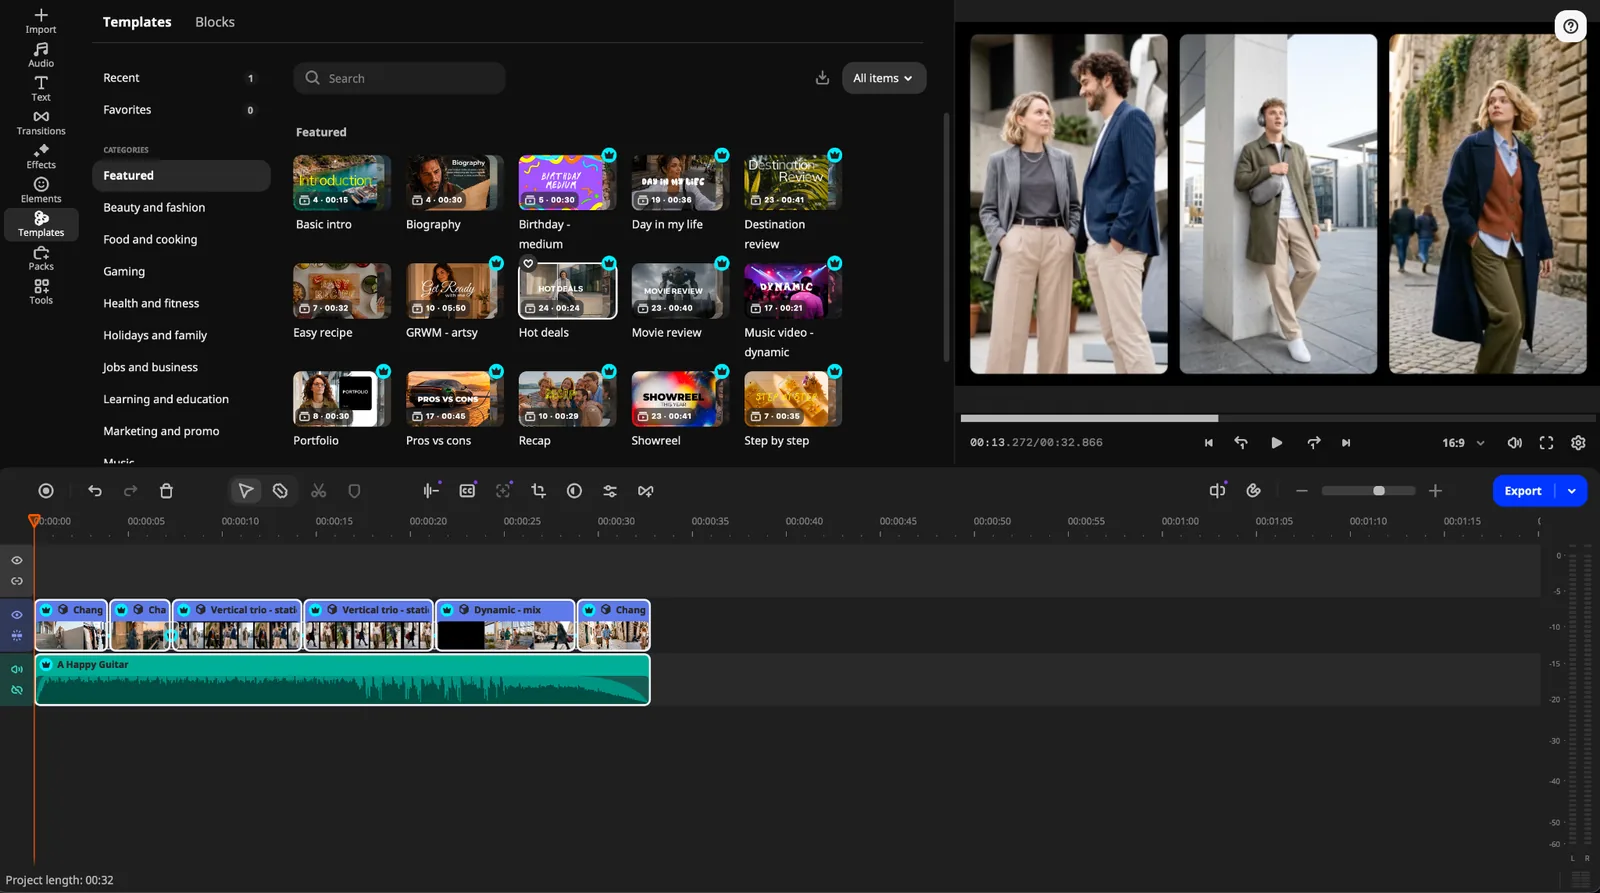
The biggest fresh addition is Movavi Video Templates, and they’re a different from Canva’s design templates. Movavi Video Templates is a multi-style library of customizable, pro-looking, modular templates for any kind of video with the editing, music, transitions, and text already built in.
Each one is made of Blocks, short pre-edited parts like an intro, a countdown, or a set of quick cuts, where you drop in your own clips, photos, and text. You can use a template as-is, reorder, add, or delete Blocks, or build a whole video from Blocks alone.
I tried one, and the result looked professionally edited within minutes. There are templates for YouTube reviews, vlogs, birthdays, weddings, promos, fitness projects, and a lot more. Several come with the full version, and the complete library is available with a Movavi Templates subscription.
Then there’s Movavi Ideas, which is a nice touch for beginners. It’s a free collection of editing tricks made for Movavi Video Editor users, with new ones added every week. Each idea shows you the finished look first, then walks you through recreating it in a step-by-step tutorial that takes less than a minute to follow. If you know how to use an editor but have no clue what to do with your footage, this is a great place to start.
What also surprised me is how much of the boring work is automated. Movavi has leaned hard into one-click AI, and these tools are genuinely easy to use.
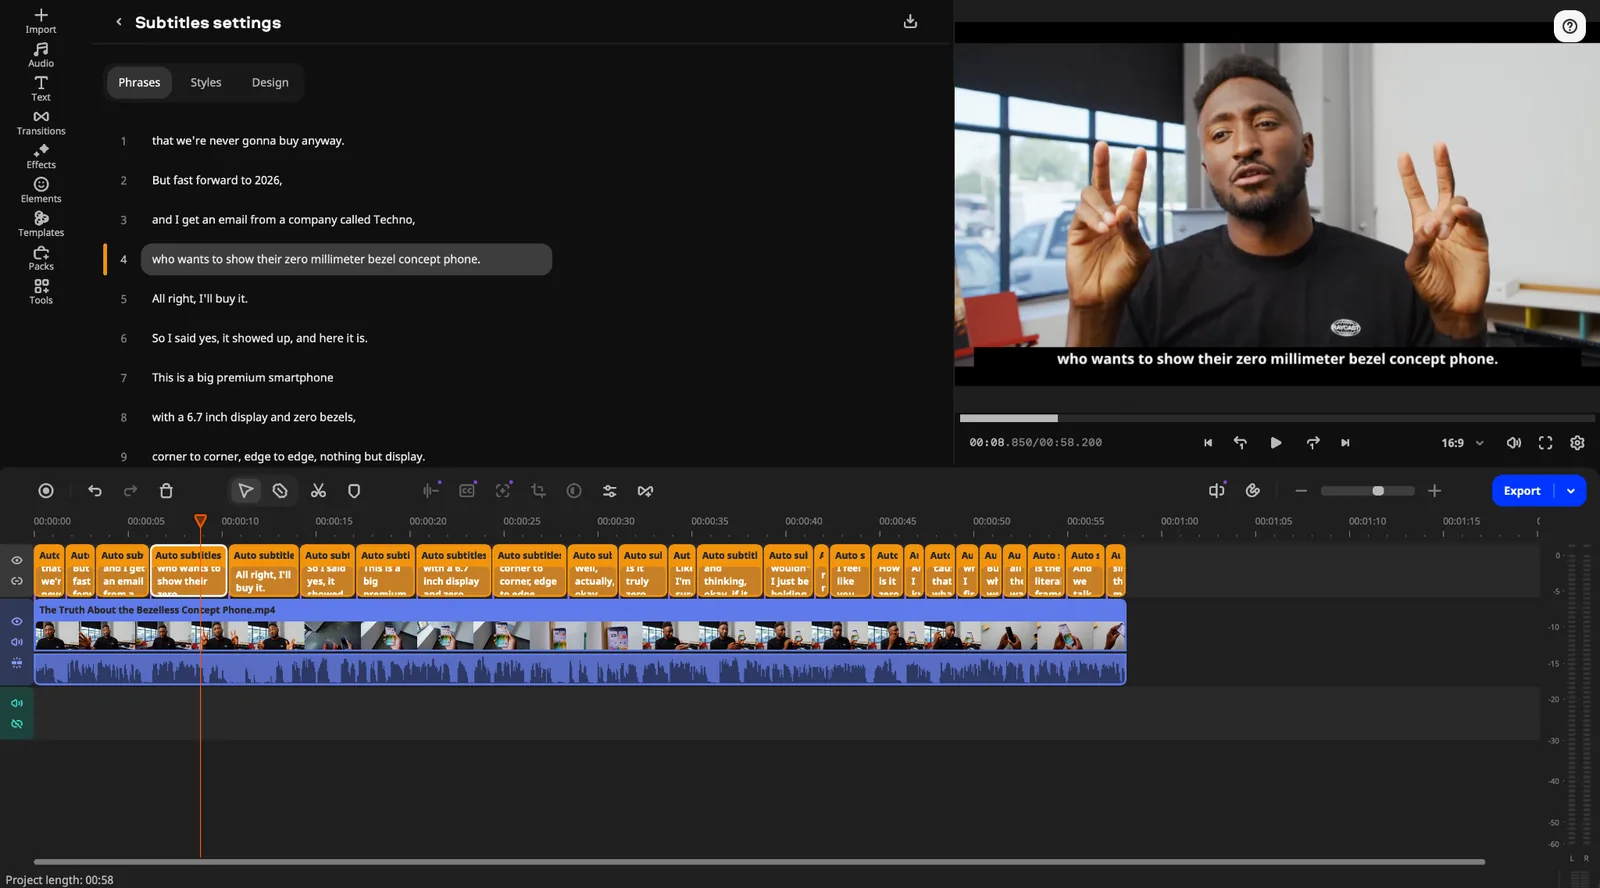
The one that impressed me most is the auto subtitles. It turns speech into captions with near-instant results, and there are dozens of caption designs to pick from: everything from clean and minimal to the bouncing styles you see all over Reels and Shorts. It even has a word-highlighting mode that syncs each word to the audio as it’s spoken.
Since I needed speech to test this feature, I decided to download a random YouTube review to try things out, and the result surprised me. I had little to edit manually, since the program managed to understand most of the speech properly.
Next, I ran a clip from my old phone through AI video denoise. The feature clears visual noise while keeping faces and edges sharp. And there’s a matching AI audio noise removal tool too, which strips out wind, traffic, and steady hums in a single click while leaving the voice intact.
Then there’s auto-tracked cropping, which is the tool I think social creators will care about most. It takes a horizontal clip and reframes it to vertical while keeping the speaker or product in the center as they move. In my hands, the reframing stayed locked on the subject throughout. It’s built to follow one main subject, so it works best when there’s a single speaker or product in the frame.
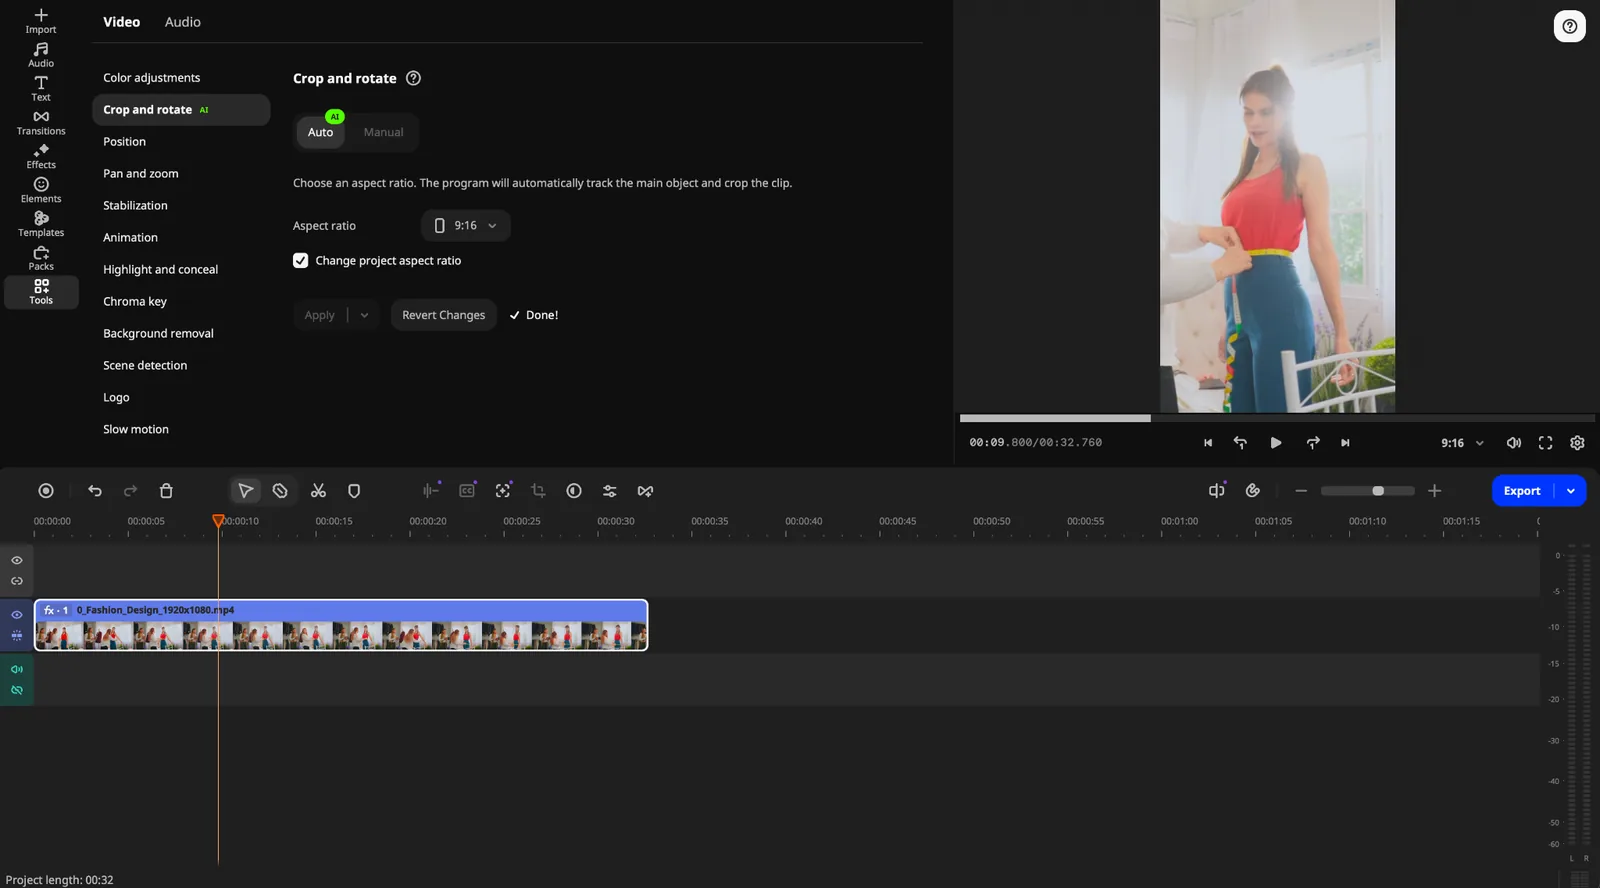
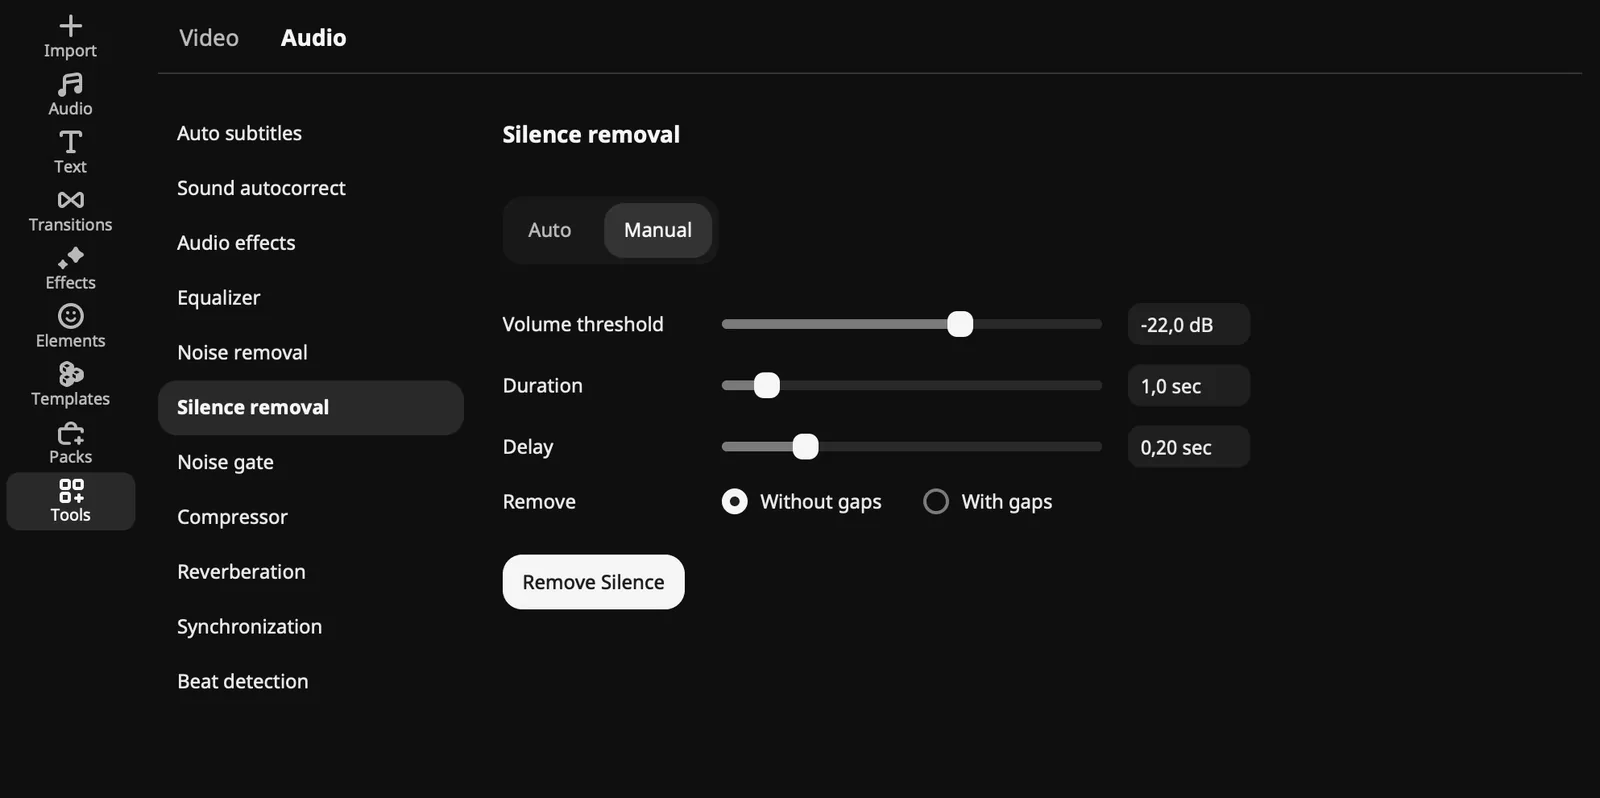
Rounding out the automation set is auto-silence removal, which looks for dead air and cuts it automatically. And AI motion tracking and background removal are there too. The former locks images, videos, or emojis onto a moving object with one click, and the latter removes background without a green screen.
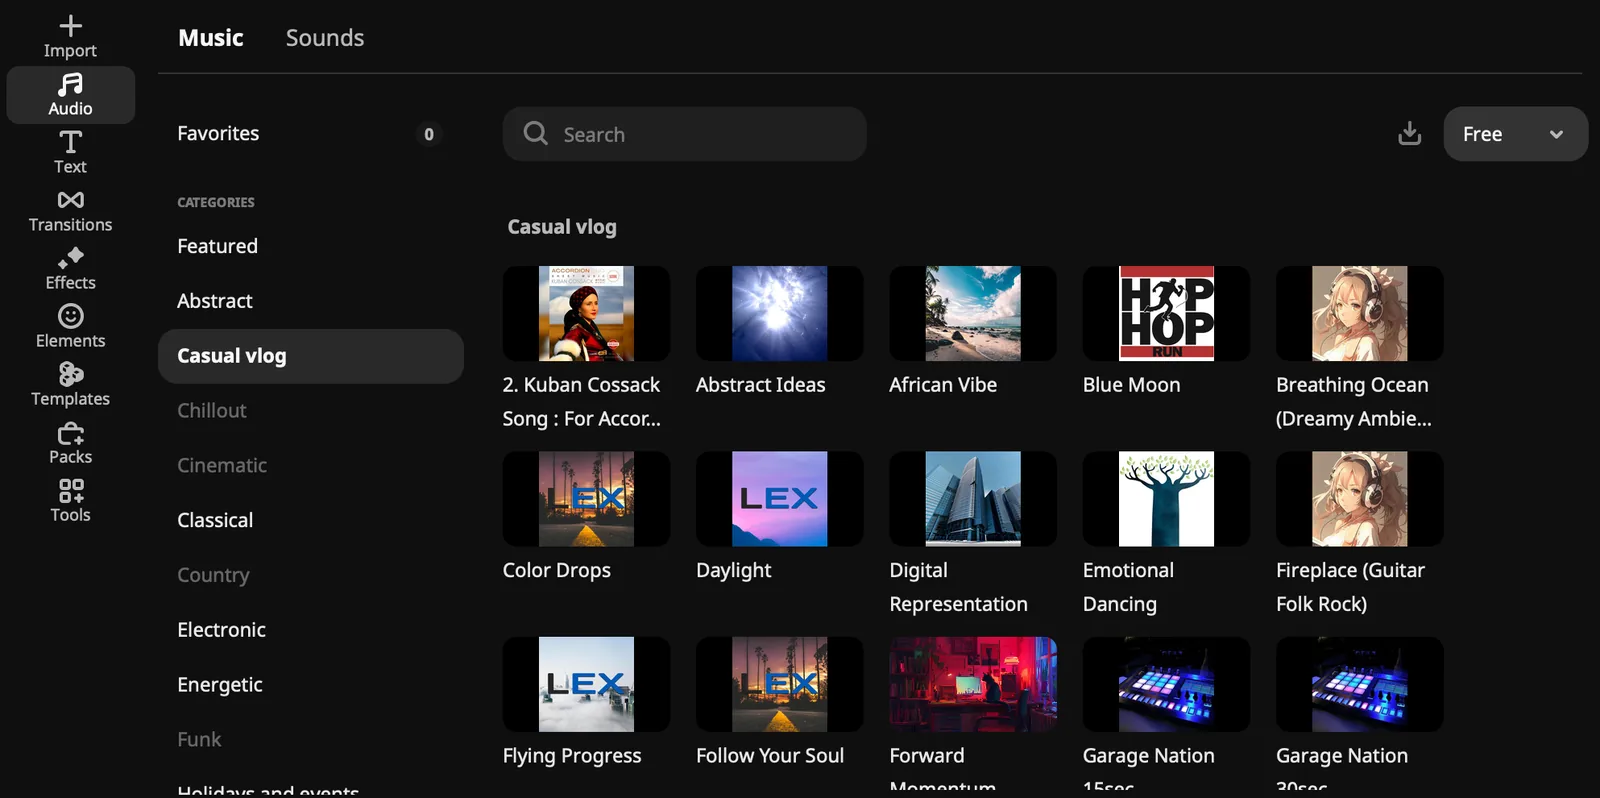
Now for the classics. You have a stock audio library with a decent collection of copyright-free music and sounds, sorted by mood and theme, from casual vlog tracks to cinematic and holiday ones.
Alternatively, the interface lets you record or upload custom audio and video, and you can even capture a screencast right from the import screen. The audio side goes deeper than it looks, too: there’s an equalizer, a compressor, a noise gate, reverb, beat detection to snap cuts to the music, and one-click Sound autocorrect presets for voice recordings.
I tried to add some titles, and there are many presets available at no extra cost, from clean, minimal text to bubbly party styles.
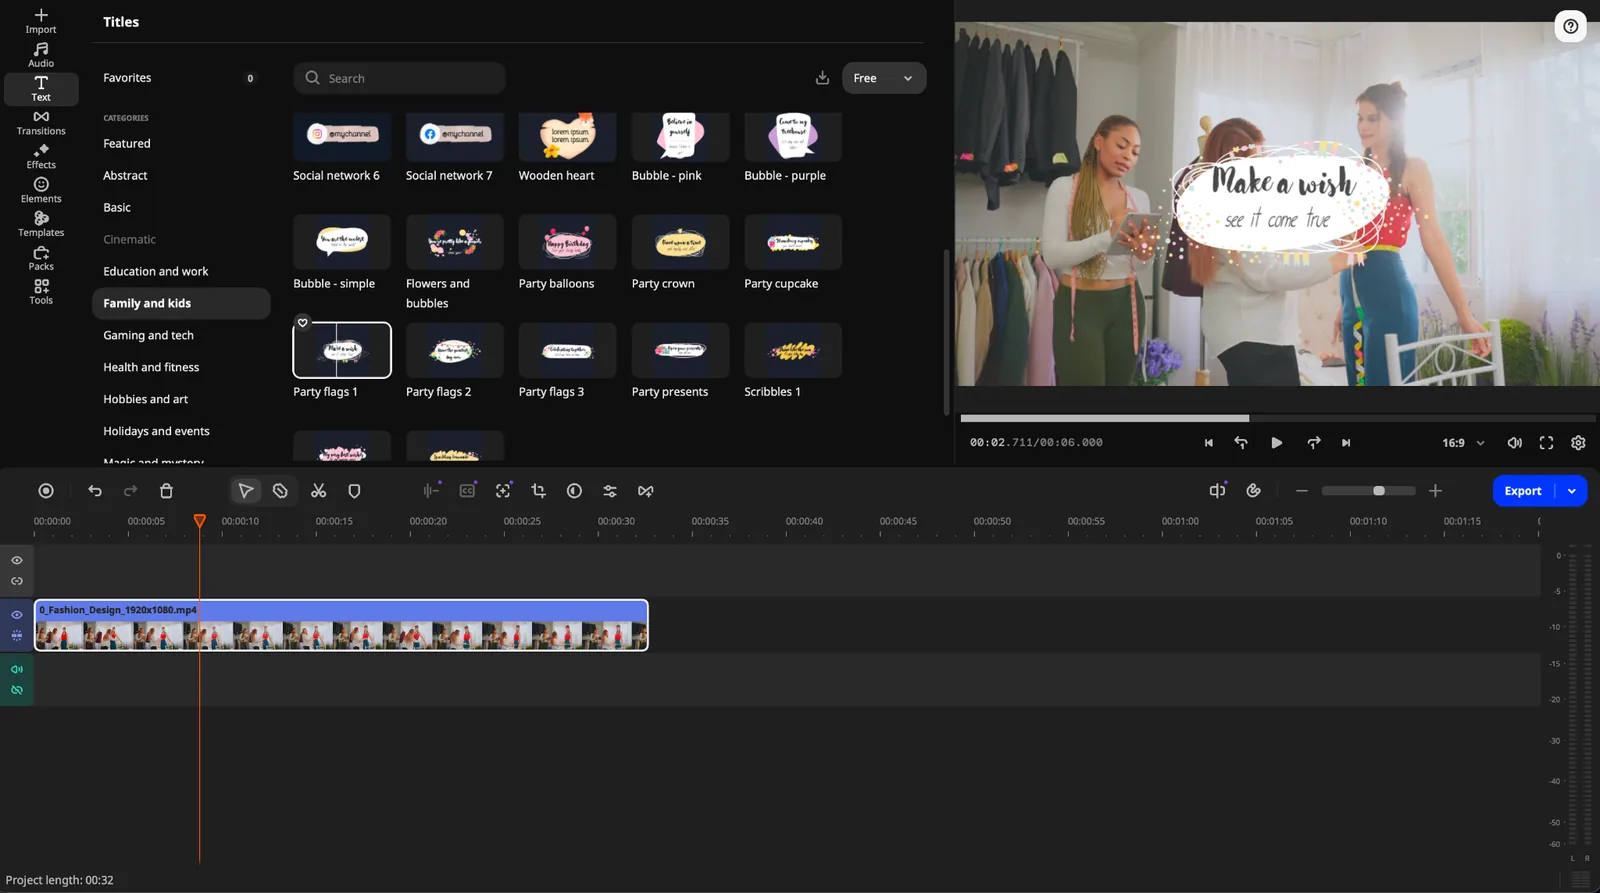
This is for overlaying text elements with default animation styles, and you can change the font, color, outline, and background, then save your own version as a preset. In addition, these are handy for opening and end credits, and there’s even a countdown timer title.
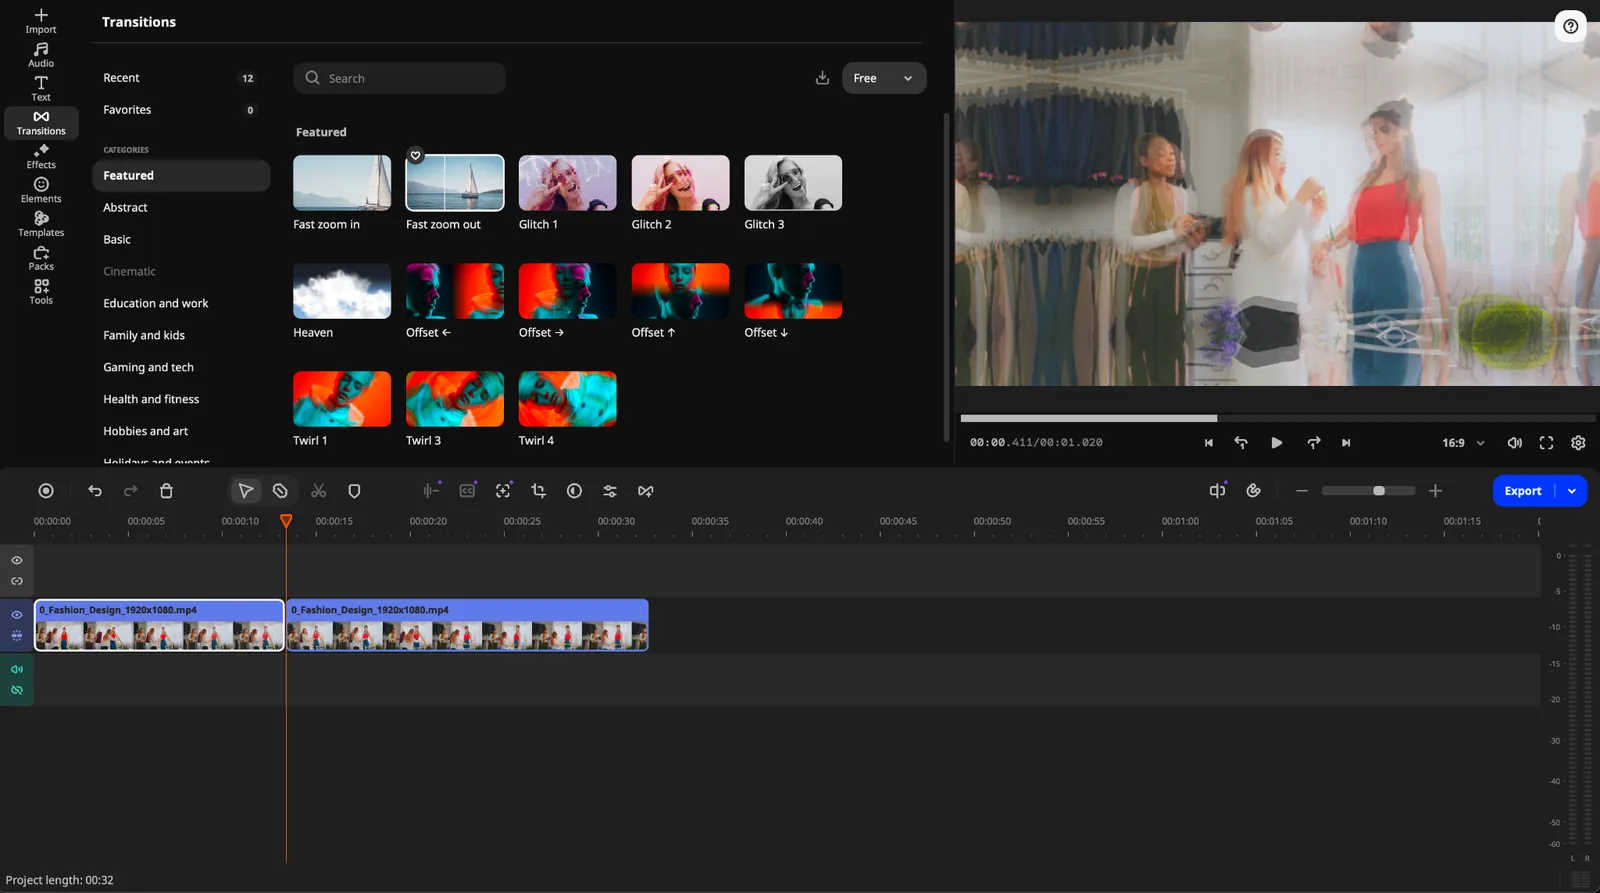
Movavi Video Editor also comes with plenty of transitions to put at the start, end, or between clips, from simple fades to glitches, zooms, and twirls. You can set the duration for each one.
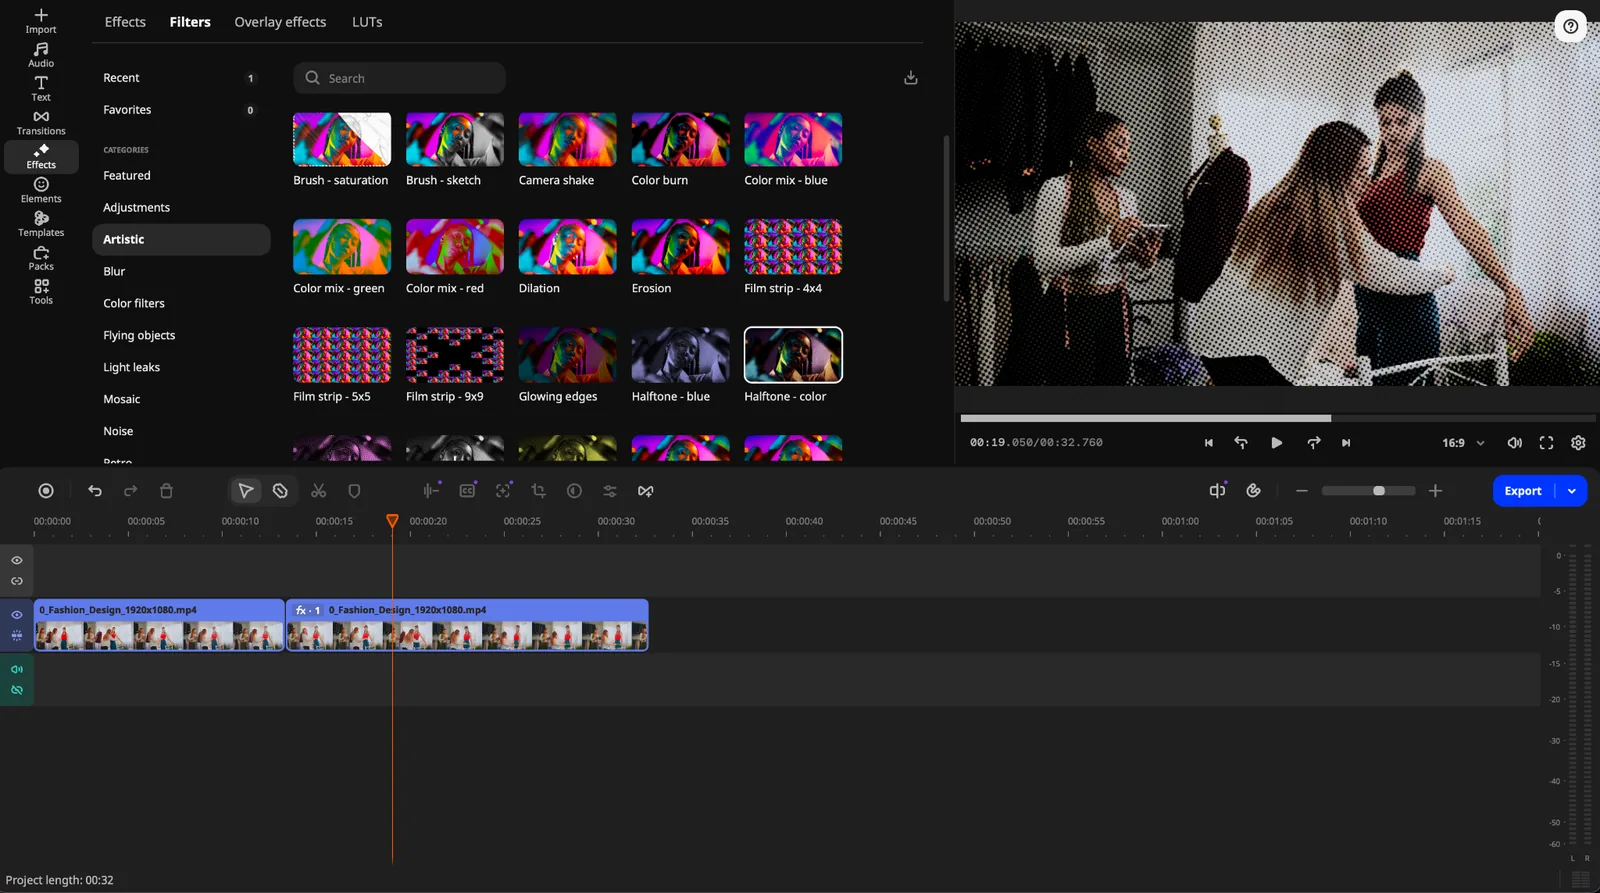
The next thing I did was play with Movavi’s filters, overlays, and LUTs a bit. There are hundreds of built-in effects to choose from to make your videos look even cooler: flares, glitches, shakes, retro looks, blurs, mirror effects, and more. You can apply one effect to several clips at once, and if you have your own .cube LUT files, you can import them too. For example, you can see I’ve used the halftone effect to add this cartoon-ish look:
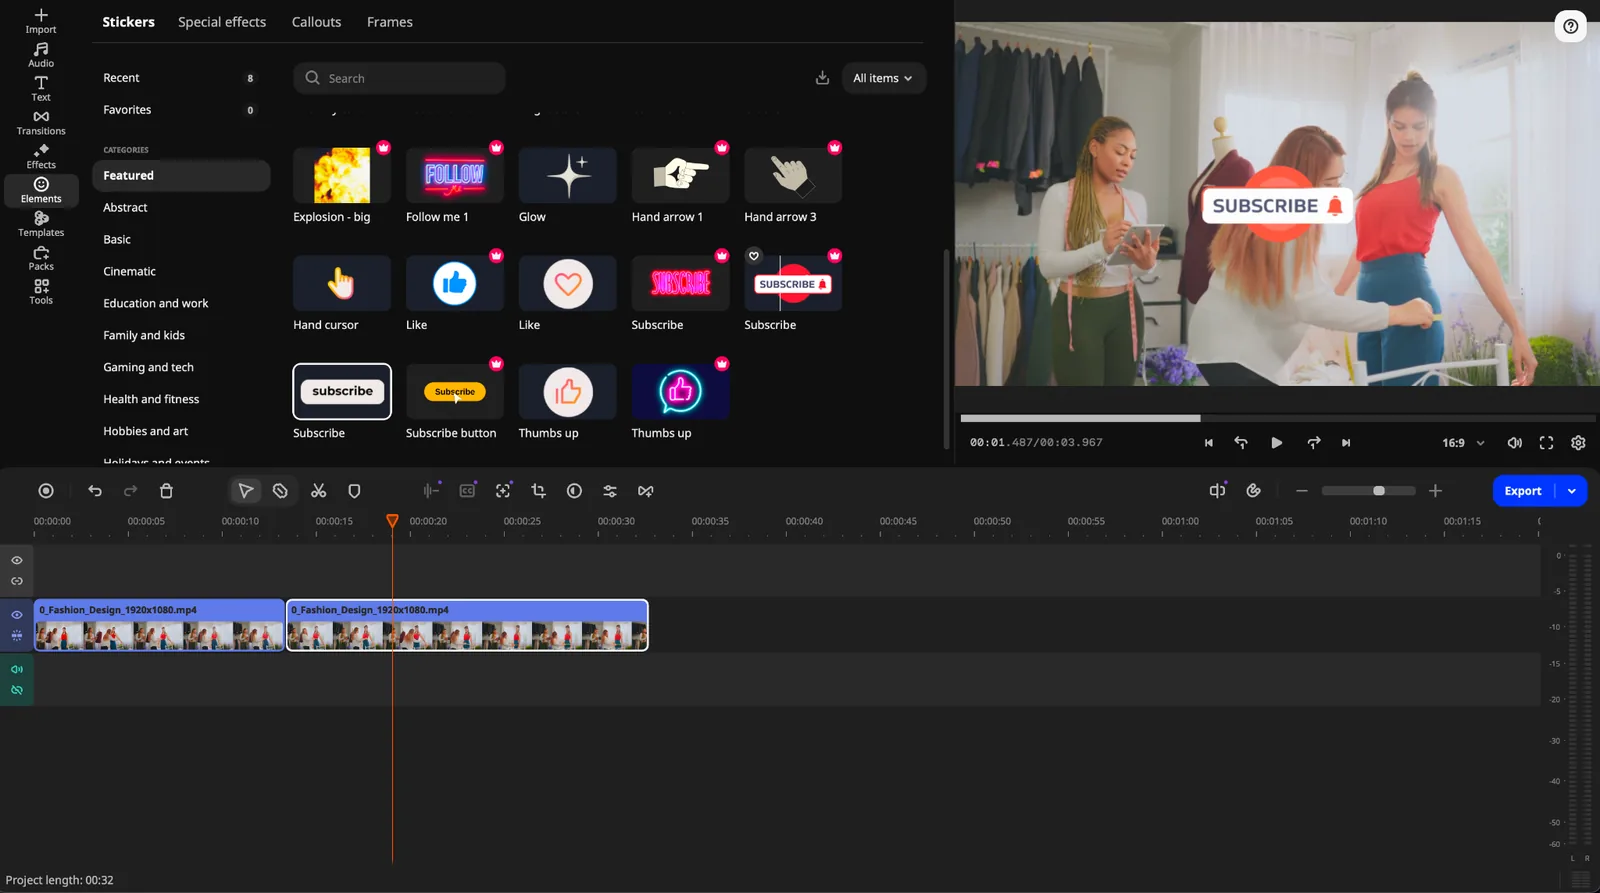
Next, you have stickers, special effects, callouts, and frames. Stickers and callouts are for highlighting certain video elements or to give specific messages at any time during the clip. For instance, the subscribe button, which pops up in many YouTube videos, will come under this category. Unlike titles, they don’t have editable text, but you can resize and rotate them, and even motion-track them to follow a moving object.
Beyond the effects, the Tools panel has the more traditional editing features: chroma key, stabilization, pan and zoom, slow motion, scene detection, and a Highlight and conceal tool to blur or spotlight parts of the frame.
And if all of that still isn’t enough, the Movavi Effects subscription adds over 10,000 extra effects and 1,500+ music tracks for any mood and theme: blogs, social media, business, family, holidays, education, and more. What I like is that you can preview any of them on your own video for free, and even save the result with a watermark before buying.
Overall, there are a ton more things I can do and write about. However, in that case, we will drift apart from the scope of this article, which is to compare Movavi and Canva.
So, I’ll stop here and start with Canva.
Canva Video Editing
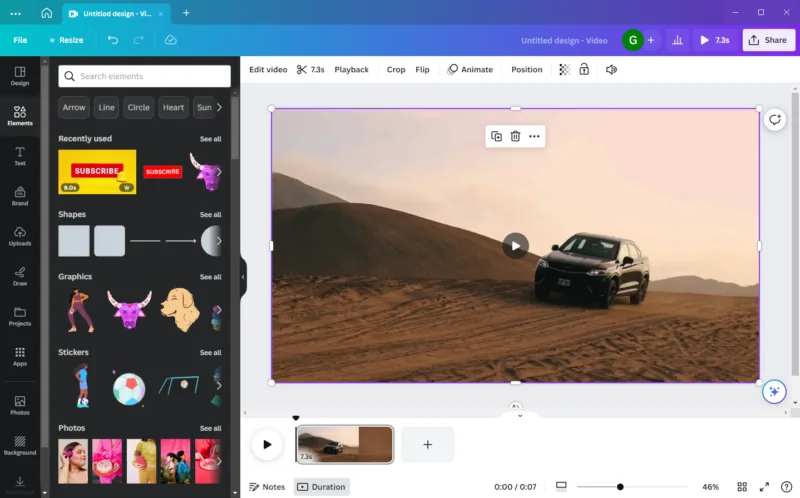
Though Canva has a powerful web application, I downloaded its Windows version for this test. From the first look, I could tell this tool wasn’t built mainly for video editing. Anyone who has used a video editor can spot it.
In the version I tested, there was no visible timeline, the signature of such tools, which showed its video limits upfront.
Good to know
Canva has since added a multi-track timeline, keyframe animation, and AI clip generation powered by Google’s Veo 3. The screenshots below are from our original test, so the current editor looks a little different.
Regardless, I started with Edit video at the top.
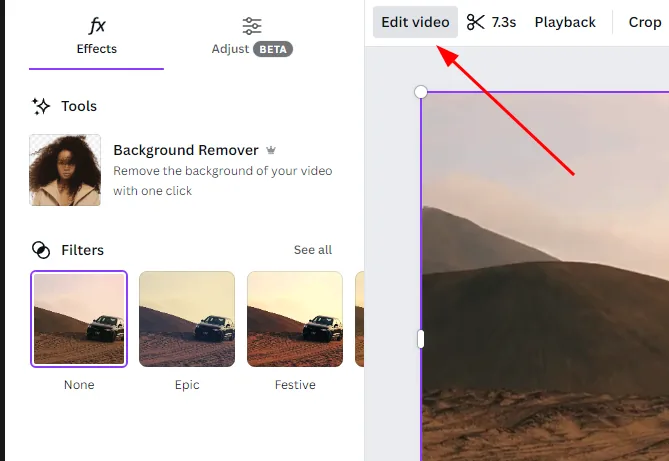
It features a background remover and filters (much like LUTs) under the Effects category. Besides that, Adjust lets you correct color, light, and texture in the output.
The video editing features also include cut, speed change, crop, flip, and more.
Next, we have Animate to apply preset animations at the start, end, or both. You can control the speed of the animation and its direction.
Finally, the last tab at the top, Position, is where you can put multiple videos on top of each other or side by side with a custom background.
What helps the Canva case is the stock asset library, which you can use for overlay elements. And though you couldn’t see a timeline right away, there’s a feature that works in a similar way.
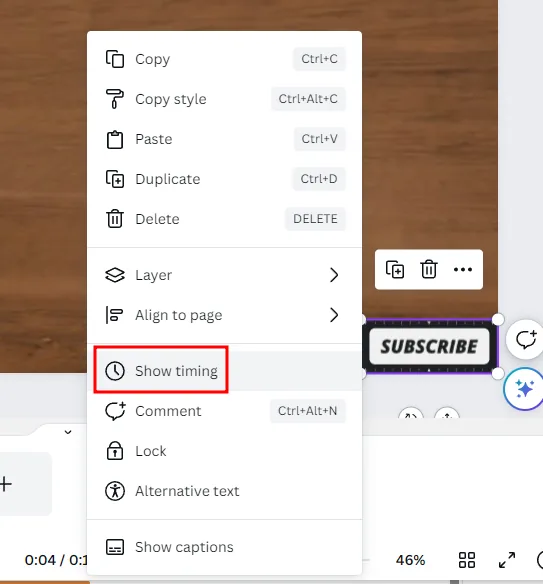
You can right-click the element and click Show timing. This reveals the position of that object relative to the primary video element.
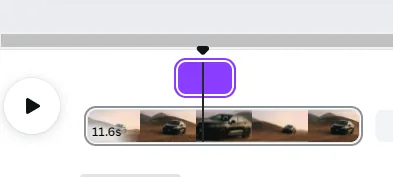
Now you can adjust the position and the duration by dragging it. This is handy for social media people to point out objects, add pop-up buttons like Subscribe or Follow, or give end credits.
It doesn’t feel as workable as a full video editing timeline, but it does the job to an extent. The timing bar shows only the selected element, so you won’t see separate bars for every object.
That’s not true for audio. You can have as many audio tracks as you like, each with its own timeline space where you can apply effects like fade in and out, beat sync (to time video elements to the music), volume, and more.
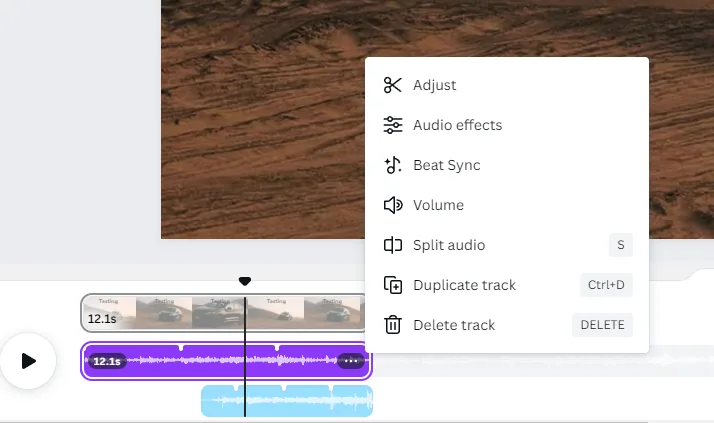
In addition, Canva lets you upload your own audio and video tracks.
That sums up Canva’s video editing capabilities from my side.
Verdict
Movavi and Canva are aiming for different use cases, even as they’ve inched closer. Movavi is best for someone getting into real video editing, now with a stack of one-click AI tools that shave hours off the boring parts and customizable, Block-based templates that make even a first project look professionally edited.
Canva’s video tools have grown, but its real focus is still design and images, the battleground we’re moving on to next.
Canva vs. Movavi for Images
Canva is a renowned force in image editing, and this might be tough for Movavi. Let’s start with Canva this time.
Canva Image Editing
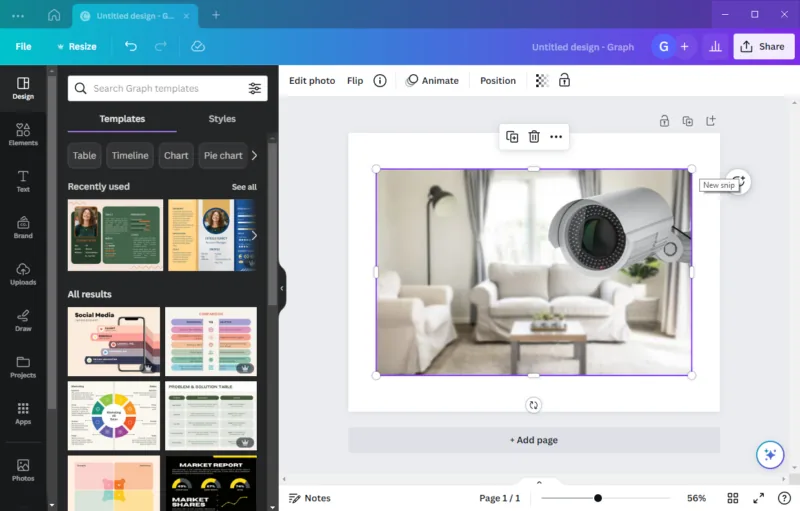
If you’re subscribed to Canva Pro, there’s nowhere else you’ll need to look for media elements and templates. Its ever-expanding stock library rarely disappoints. Plus, the interface is really intuitive, and everything just works.
Coming to the editing part, you have a background remover, the AI-powered Magic Eraser, and Magic Edit. One small restriction is that you can only use Magic Eraser or Magic Edit at a time.
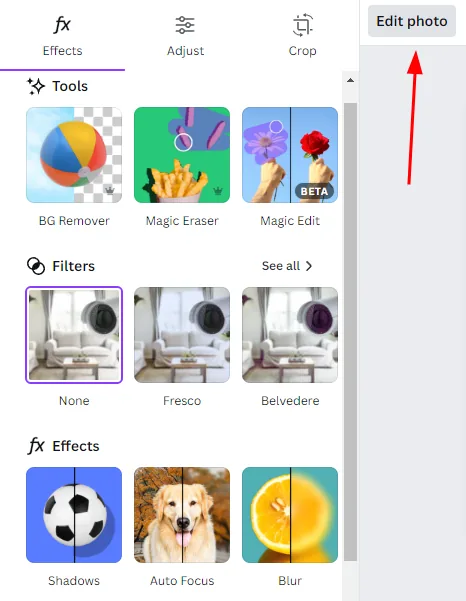
Here I tried to remove the table using its eraser, and in the next one I replaced the camera with a hair dryer.
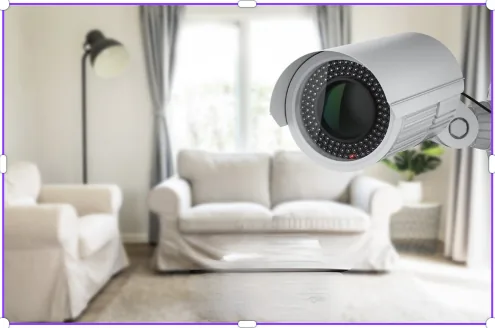
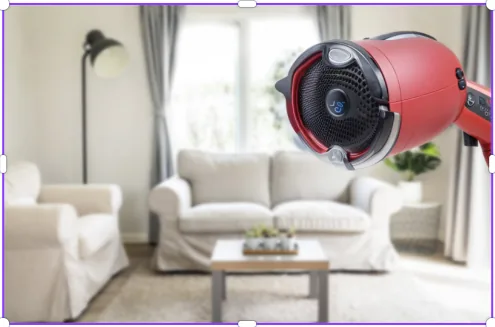
You might see some rough edges in the AI results.
Moving on, Canva has theme filters, shadows, autofocus, and blur. Autofocus worked great to put certain parts in focus while blurring everything else. Similarly, shadows let you adjust their size, length, angle, and more.
Likewise, image editing includes color, temperature, and texture corrections to the background, foreground, or both.
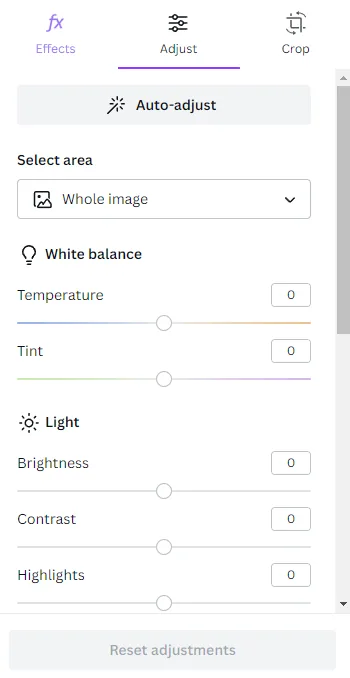
Finally, Canva’s image editing wraps up with animations and positioning multiple images in layers.
Movavi Image Editing
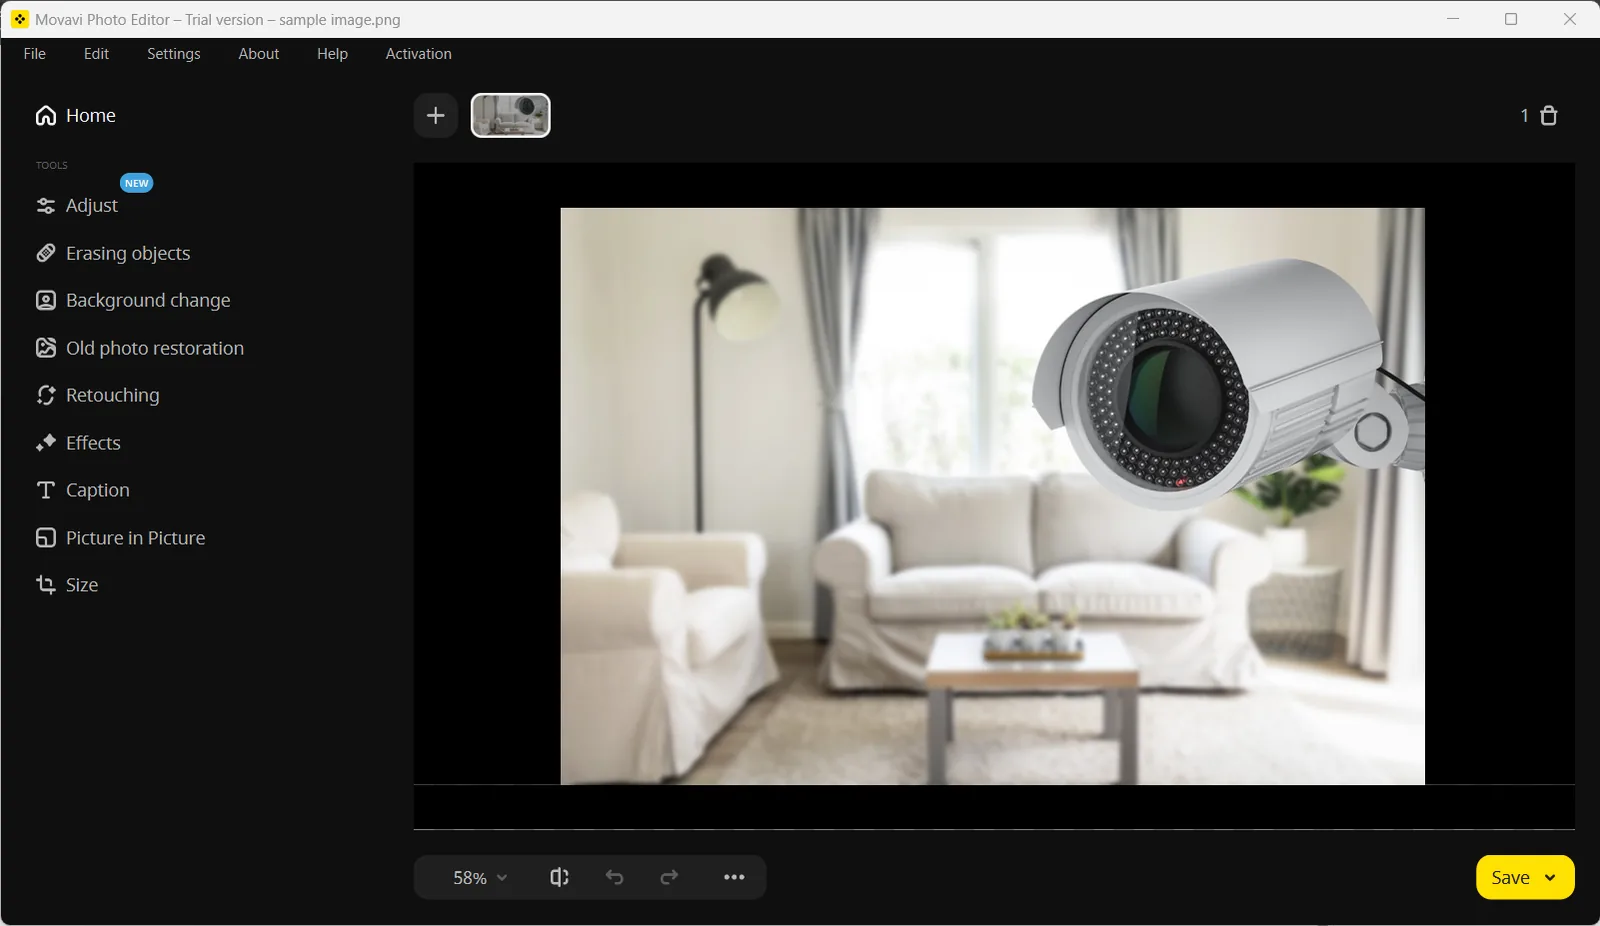
I would easily give Movavi Photo Editor a plus one for its super straightforward interface. There’s no chance of losing sight of any feature.
Everything is nicely stacked in its left pane.
Its first tool, Adjust, gives you auto color correction presets, with an option to do it all manually.
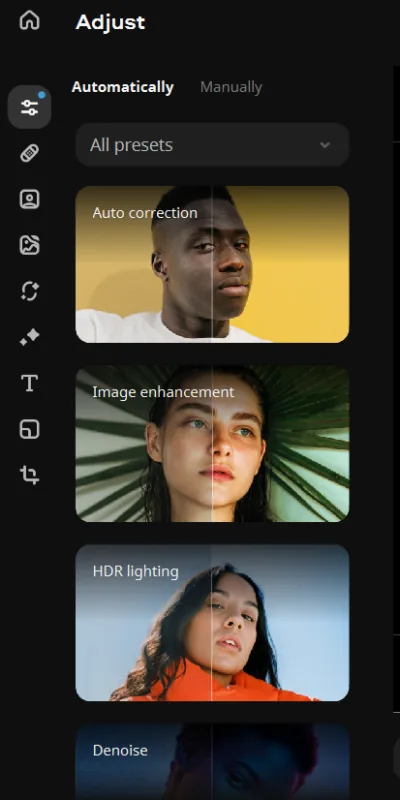
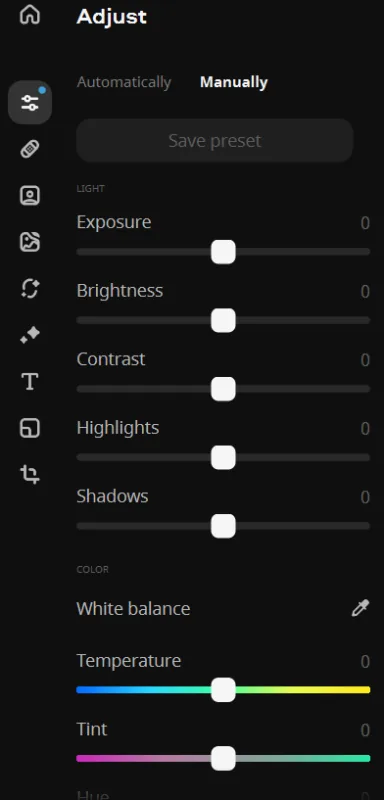
I tried some of the auto corrections, and they worked great.
Next, I tried Erasing Objects. It has both auto and manual modes.
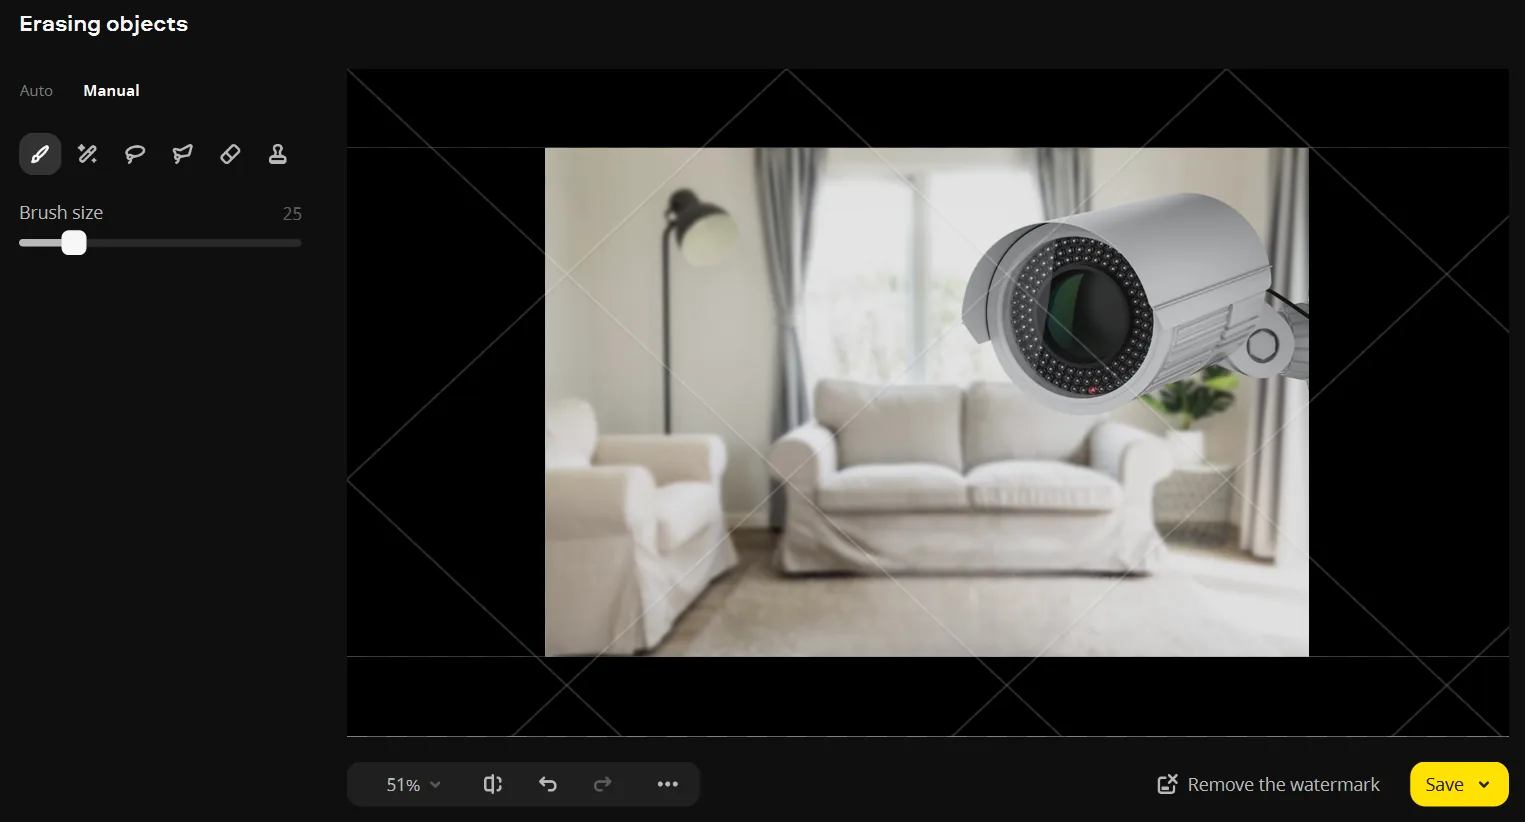
I have to admit this was miles better than what Canva Magic Eraser did on the same object. I tried both AI and manual brushing on the center table, and the final render is pretty convincing.
Its manual eraser also has many options to trace any object accurately for a clean removal. So far, the scale tilts toward Movavi, as its AI performs better and comes with manual editing.
Next on the list is a background remover like Canva’s. Again, there are two modes, AI and manual, for fine-tuning the output.
Old photo restoration is another feature Canva doesn’t have. It’s an AI-powered feature that removes defects and colorizes old photos.
I downloaded one from Unsplash and gave it a go.
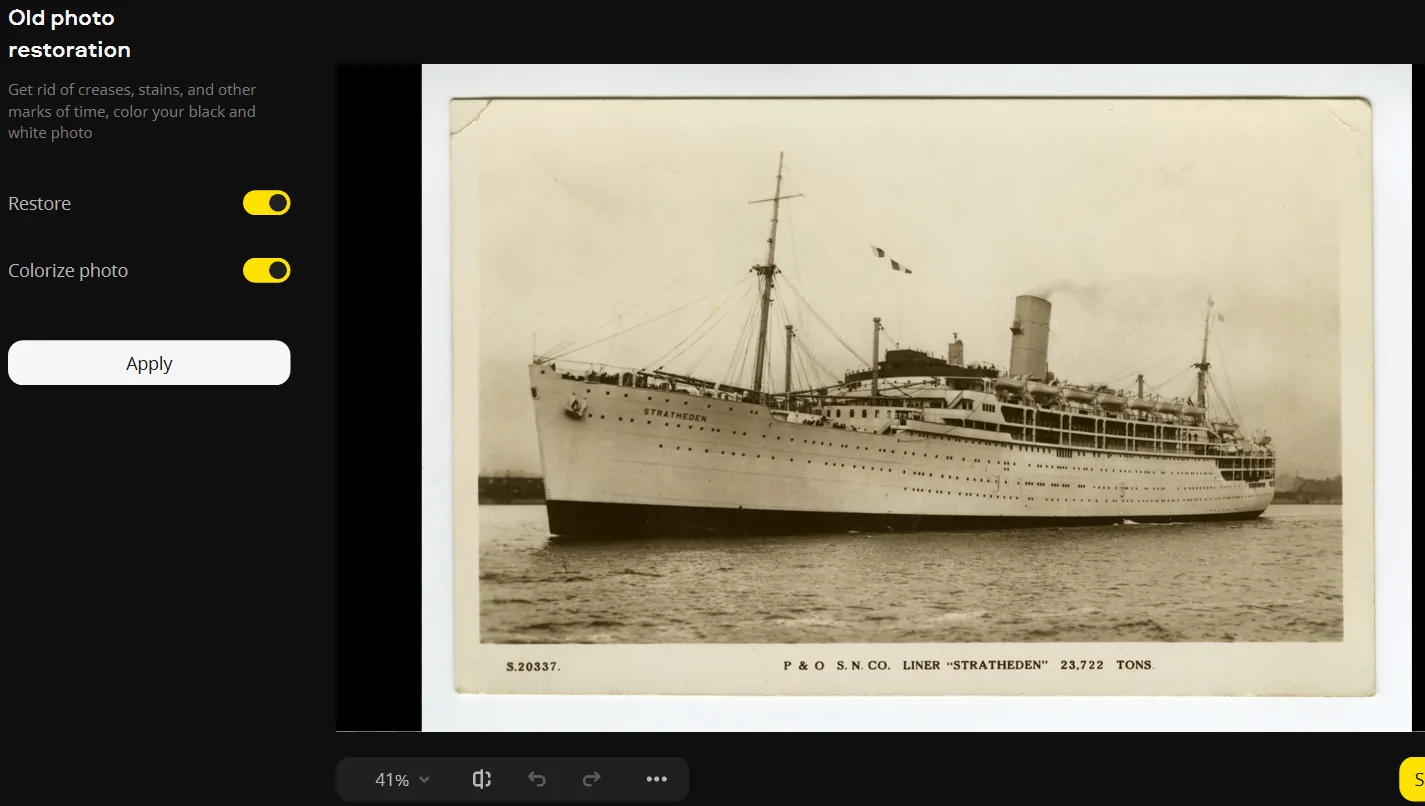
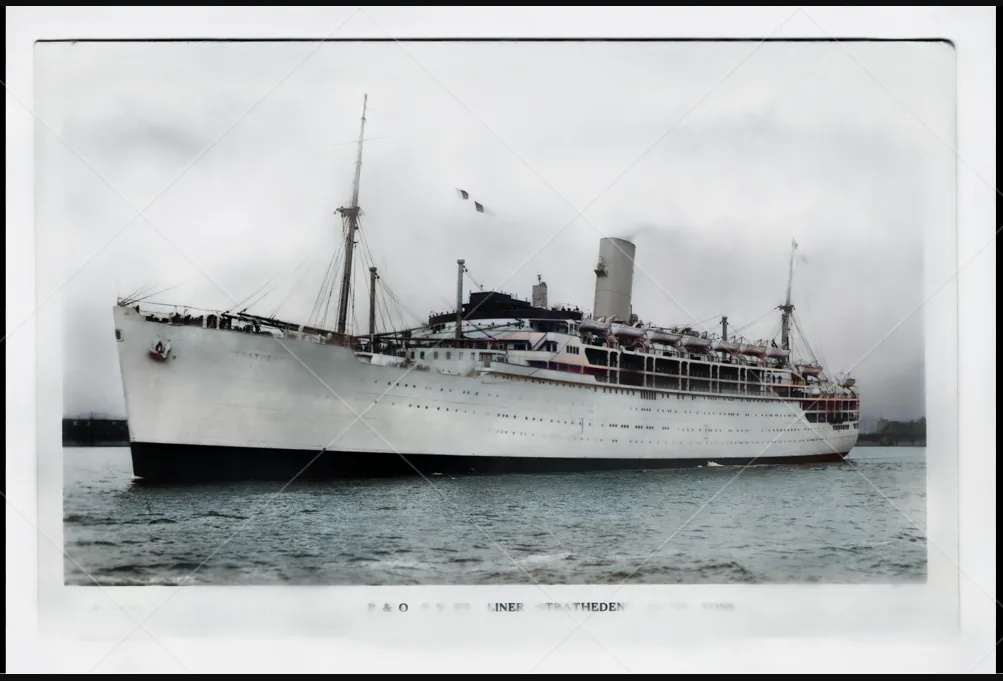
This felt good, but I expected more. So, I tried another one.
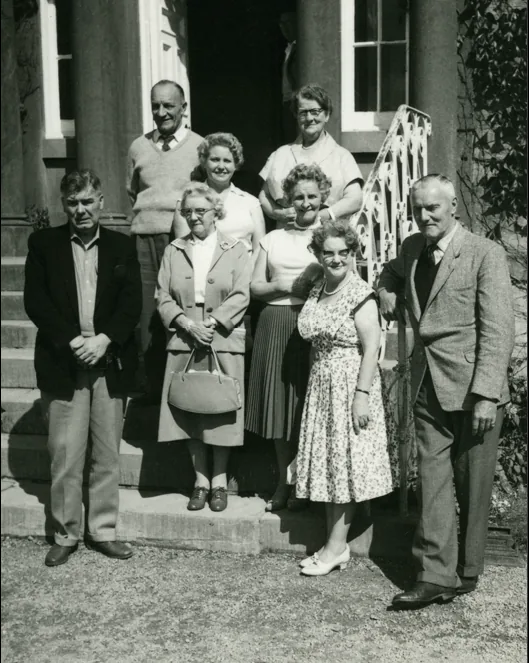
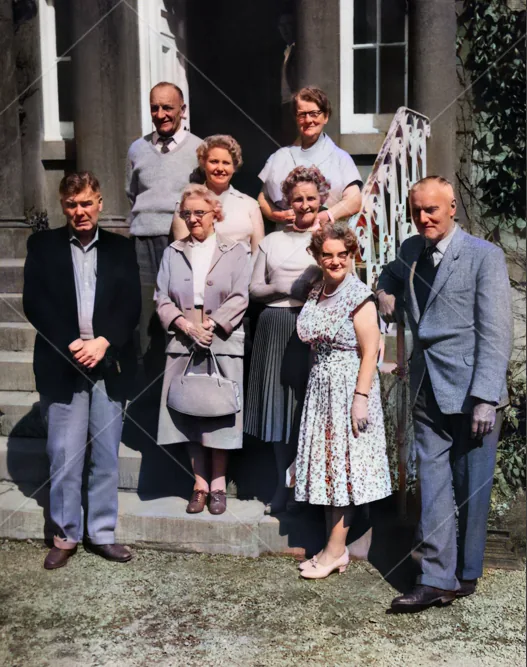
This one cleared any remaining doubts. It isn’t another AI gimmick, and Movavi Photo Editor can produce studio-level results.
Retouching again has AI and manual modes. This time its AI couldn’t make major changes, especially the skin smoothing and wrinkle removal I expected. However, the manual modes worked well on a few things, including eye enlargement and face slimming.


Next are its Filters to theme any image and Captions to add text and stickers.
A few more tools include crop, rotate, resize, and more. That completes my brief run with Movavi Photo Editor.
Verdict
As with video editing, Canva and Movavi are going in different directions.
Canva’s strength is a rich stock media library, lightweight photo editing, and animations that serve day-to-day marketers. Movavi, on the other hand, has a set of AI tools for more serious photo editing.
Final Thoughts
There’s no clear winner because they aren’t really competing. Both are good at what they do and have fans in their own areas. If you’re choosing between them, it comes down to your requirements.
For in-depth photo and video editing, you have Movavi with its video and photo editors, and a free version of Movavi Video Editor with no time limit that lets you test every tool before upgrading.
Canva suits lighter design jobs and is a boon for online publications, e-commerce stores, and social media professionals. It also has a powerful free-forever plan you can try.
If you need purely AI image generator then you can try Sparkian. It is AI workspace which lets you chat and generate image with multiple models.