


Capturing a website screenshot is a common task in web development and automation. Usually developers capture web pages for testing, monitoring, reporting, and many other tasks. A website screenshot in Python is a popular choice because Python works well for automation and integrates easily with applications and scripts.
Geekflare offers a Screenshot API that captures a web page from a URL with a single API request. You can capture full-page or mobile screenshots, choose the output format, and customize the screenshot based on your needs.
In this article, you will learn how to take a website screenshot in Python using Geekflare, customize screenshot settings, and integrate the API into your Python applications.
Prerequisites
Before you begin, make sure you have the following:
- A Geekflare API key. (If you don’t have one, create a Geekflare account to access your API key.)
- Python 3.8 or later installed
- The Geekflare Python SDK
- The Requests library
Install the required libraries:
pip install geekflare-api requestsHow to Take a Website Screenshot in Python
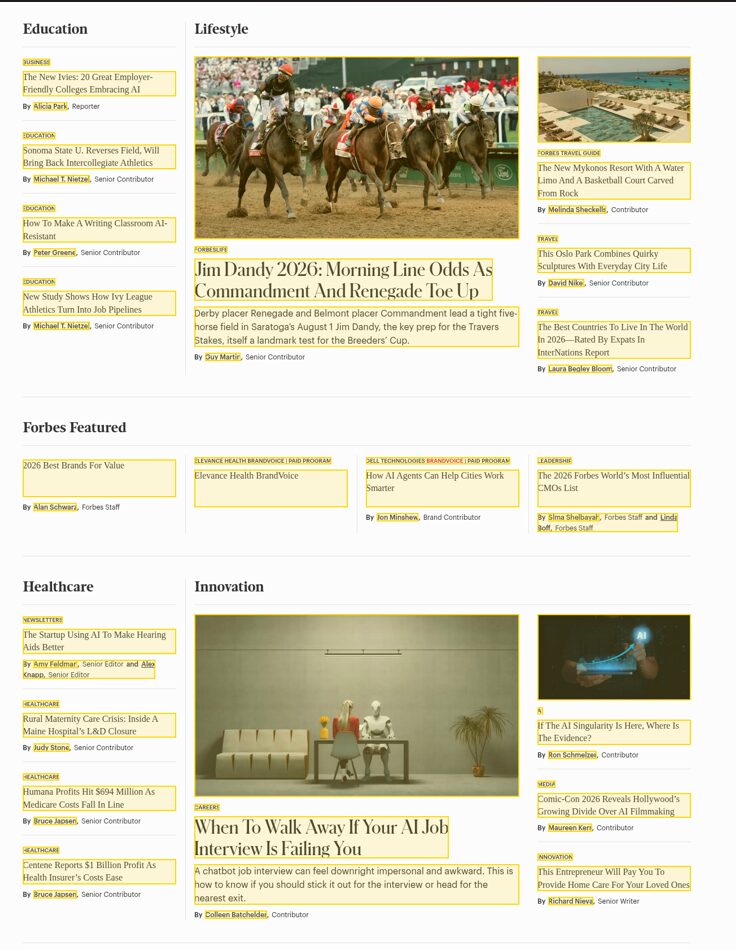
In this example, we’ll capture a full-page screenshot of https://www.forbes.com using the Geekflare Python SDK. This webpage displays ads, cookie banners, and bot protection, so you can see how these options work on a real website.
from geekflare_api.client import GeekflareClient
from geekflare_api.models import ScreenshotDto

with GeekflareClient(api_key="<api-key>") as client:
    result = client.screenshot(
        ScreenshotDto(
            url="https://www.forbes.com",  # Replace this with the URL you want to capture
            device="desktop",
            type="png",
            full_page=True,
            block_ads=True,
            hide_cookie=True,
            skip_captcha=True
        )
    )

    print(result)
The request captures the Forbes homepage as a full page PNG image. The following image shows a portion of the captured screenshot. It also highlights headlines, links, images, and other page elements with yellow outlines for easier identification.
Understand the API Response
The API returns the request status, the screenshot settings, and the URL of the captured screenshot. You can use the screenshot URL to open the image in a browser, download it, or use it in your application.
Example response:
{
  "timestamp": 1785353651274,
  "apiStatus": "success",
  "apiCode": 200,
  "meta": {
    "url": "https://www.forbes.com/",
    "device": "desktop",
    "type": "png",
    "test": {
      "id": "4152de63-ca95-4e67-99c0-95529afef0ab"
    },
    "fullPage": true,
    "blockAds": true,
    "hideCookie": true,
    "skipCaptcha": true,
    "addTimestamp": false,
    "fallbackToFullPage": false,
    "inline": false
  },
  "data": "https://cdn.geekflare.com/tests/screenshot/MVcAkM5rPB7tsaCn"
}
The response contains the following fields:
apiStatusindicates whether the request completed successfully.apiCodereturns the HTTP status code.metacontains the screenshot configuration, including the target URL, device, output format, and enabled options.datacontains the URL of the captured screenshot. Open the URL in your browser, download the image, or use it in your application.
Customize Website Screenshots in Python
The Geekflare Screenshot API provides several options to customize website screenshots. You can change the device type, output format, viewport size, theme, image quality, and other settings to match your requirements.
The following example combines some of the most commonly used customization options.
result = client.screenshot(
    ScreenshotDto(
        url="https://geekflare.com",
        device="mobile",
        full_page=True,
        type="webp",
        block_ads=True,
        hide_cookie=True,
        skip_captcha=True,
        highlight_links=True,
        add_timestamp=True,
        delay=3,
        viewport_width=1440,
        viewport_height=900,
        page_height=2000,
        capture_beyond_viewport=True,
        theme="dark",
        disable_animations=True,
        remove_background=True,
        quality=80,
        scale_factor=2,
        proxy_country="us"
    )
)
The following table explains the purpose of each customization option.
| Parameter | Description |
|---|---|
device | Captures the webpage in desktop or mobile view. |
full_page | Captures the entire webpage instead of only the visible viewport. |
type | Sets the output format to PNG, JPEG, or WebP. |
block_ads | Removes advertisements before capturing the screenshot. |
hide_cookie | Hides cookie consent banners. |
skip_captcha | Bypasses supported CAPTCHA prompts. |
highlight_links | Highlights links and page elements in the screenshot. |
add_timestamp | Adds the capture date and time to the screenshot. |
delay | Waits for the specified number of seconds before taking the screenshot. |
viewport_width | Sets the browser viewport width. |
viewport_height | Sets the browser viewport height. |
page_height | Sets the height of the captured page. |
capture_beyond_viewport | Includes content outside the visible browser viewport. |
theme | Uses the light, dark, or auto theme when capturing the webpage. |
disable_animations | Stops page animations before capturing the screenshot. |
remove_background | Removes the page background where supported. |
quality | Sets the image quality for JPEG and WebP screenshots. |
scale_factor | Captures higher resolution screenshots. |
proxy_country | Captures the webpage using a proxy server in the specified country. |
Try the Geekflare Playground
The Geekflare Screenshot Playground lets you capture website screenshots without writing any code.
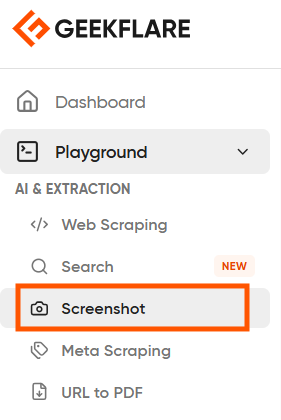
Log in to your Geekflare account and open the Playground. From the available options, select the Screenshot.
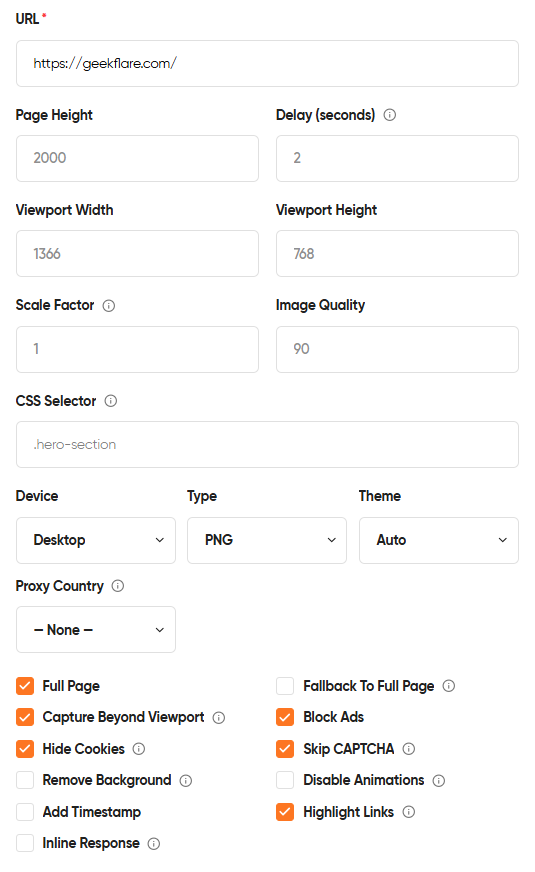
Enter the website URL, configure the screenshot settings, and select the options you need, such as Full Page, Block Ads, Hide Cookies, Skip CAPTCHA, Highlight Links, Viewport Size, Image Quality, Theme, and Proxy Country.
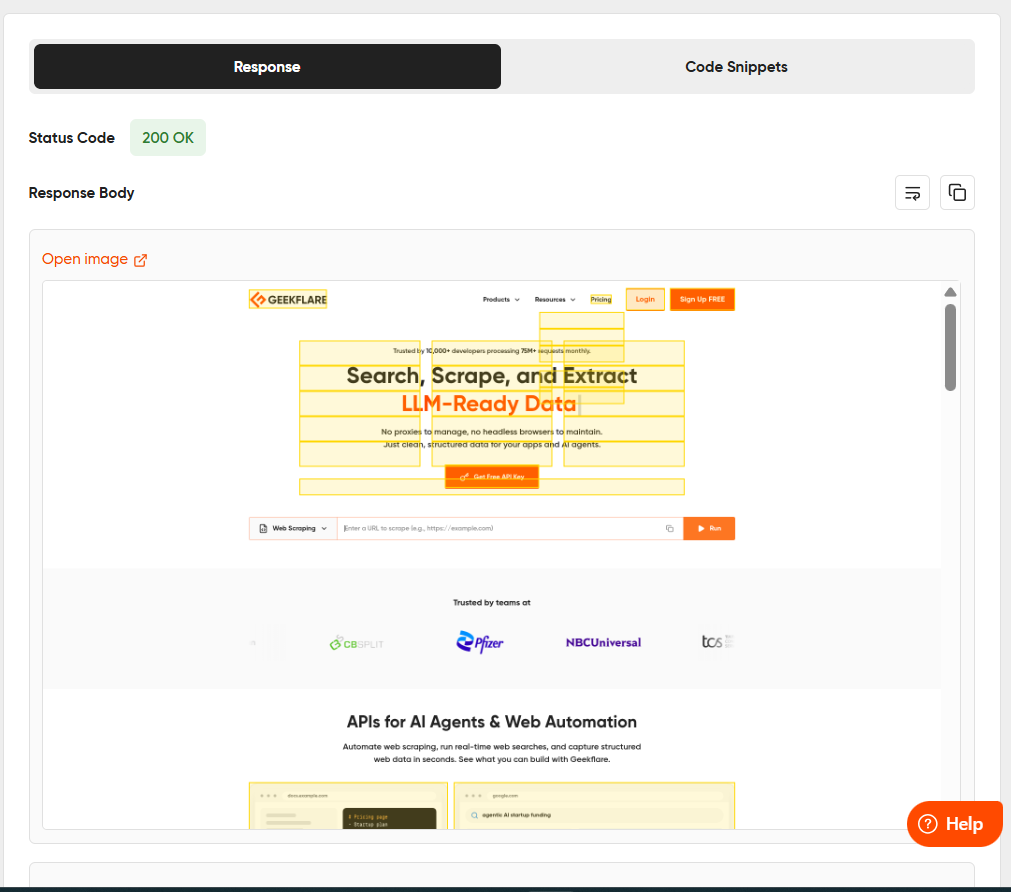
Once you’ve configured the settings, click Send Request to generate the screenshot. You can then copy the generated code snippet in Python, cURL, PHP, or Node.js and use it directly in your application.
What Can You Use the Screenshot API For?
The Geekflare Screenshot API can help with a wide range of automation tasks, including:
- Website Monitoring: Capture website screenshots at regular intervals to track visual changes, detect broken pages, or identify unexpected layout updates.
- UI Testing: Compare screenshots across different versions of your application to find visual changes after new releases.
- Competitor Tracking: Capture screenshots of competitor websites to monitor design updates, product launches, pricing changes, or promotional campaigns.
- AI Applications: Generate webpage screenshots that can be analyzed by AI vision and multimodal models for tasks such as document understanding and UI analysis.
- Compliance and Records: Archive webpage screenshots for auditing, compliance, legal documentation, or future reference.
- Social Media Previews: Create high quality webpage previews for reports, dashboards, newsletters, and social media content.
Conclusion
Taking website screenshots in Python is simple with the Geekflare Screenshot SDK. The SDK lets you capture website screenshots, customize how they are generated, and integrate the feature into your Python applications with minimal code.
The Geekflare Playground helps you test different settings and generate ready-to-use Python, cURL, and Node.js code.